Welcome to the Austin Seven Friends web site and forum
As announced earlier, this forum with it's respective web address will go offline within the next days!
Please follow the link to our new forum
http://www.austinsevenfriends.co.uk/forum
and make sure, you readjust your link button to the new address!
NS Mud Wing patch
Advise please on the best way to make this patch.
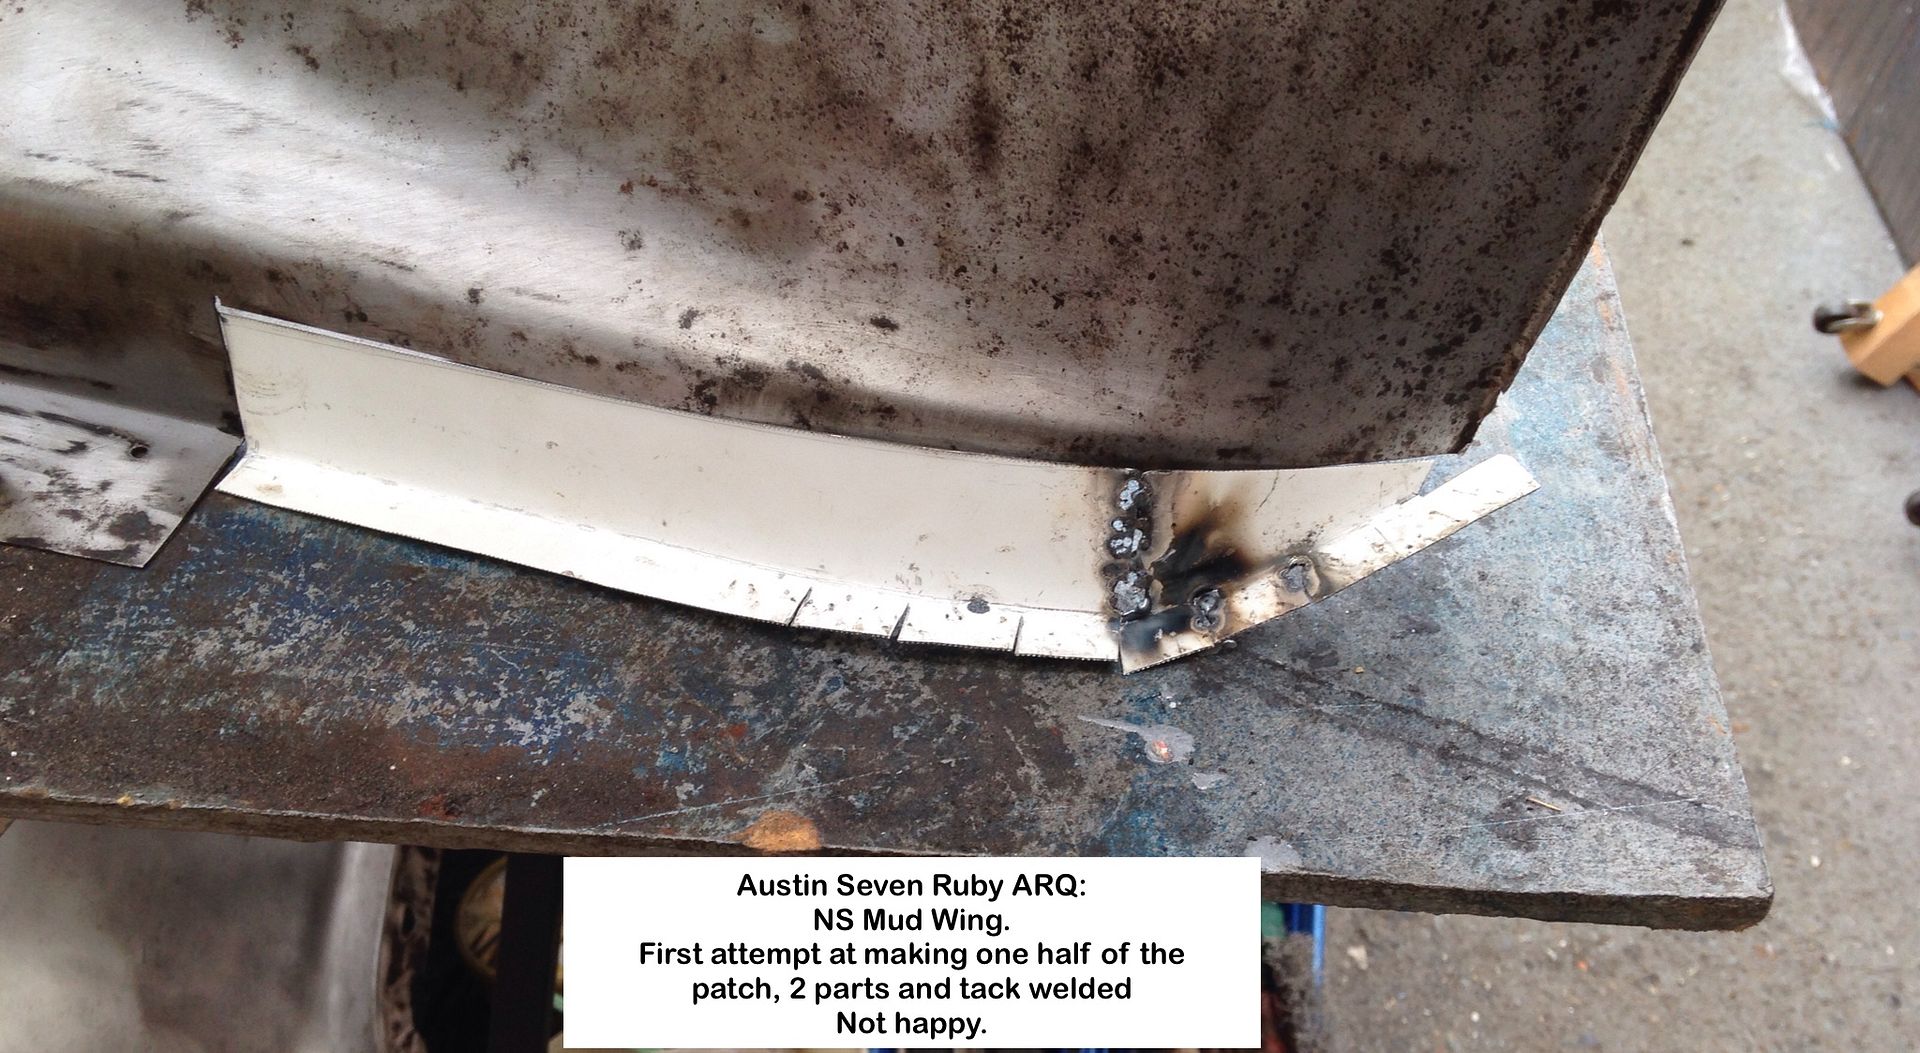
This is my first attempt at bodywork, and I experimented using 0.6mm sheet
Pretty pleased with it, BUT can/must do better.
A former and tin bashing?
Open to any suggestions.
Not sure where to split the part for easy welding.
My bender produces a bent very close to that from the Austin factory so don't need to make a new blade, with a different radius.
I am thinking of making short bends on the top curved section/s, split as per my experiment after a failed attempt to stretch the metal, and then welding the flat flange/s to them, but just had a thought, would 0.6mm sheet (not 1mm as stated) stretch enough?
I did mange to get a gentle curve only, after a few minutes with sharp end of hammer.
David Gardiner in his video Bodywork Restoration Tutorial makes stretching the metal look so frigging easy - Grrrr
Need to have another look at what he does, before I dive in again.
Trust me to start on this as a first attempt at tin bashing.
My late Dad is shaking his head right now, shouting "Get in with it, it's easy!"


Geoff - Spring!?
Location: South Norfolk - Next to Suffolk
Geoff, the David Gardiner video that I have seen is excellent and would be recommended viewing for anyone attempting this sort of repair. My advice for what it is worth; First measure the panel thickness and make your repair sections from exactly the same gauge material, welding them in will be far easier later. Second set yourself up with some practice sections, fold a few angled strips and practice shrinking one edge to make the strip curve, then do the same but stretch an edge to make the strip curve the opposite way. Once you have mastered these two techniques try Scribing an S curve onto a piece of flat plate mark a a second line 3/4" away and trim to that line. Now get a piece of steel bar and cut a slot in the end face 3/4" deep, you can use the bar over your panel to break the edge and bit by bit lift the flange, you will now need to use hammer and dolly to bring the edge up to 90 degrees, shrinking or stretching the edge depending on the radius you are working is internal or external. Far easier to demonstrate than it is to try and explain in words, but once you have mastered these methods making your patch panels will be easy. Watch David Gardner, again and again, then practice, practice, practice and It should fall into place.
Location: NZ
Steve V.
If you do a bit of searching it seems by the 1950's the standard size was 5/32 UNC. You can still buy them off the shelf from landrover and MG specialists. Sadly with a phillips head.
Location: not north wales any more
I'm just a beginner here, I've been repairing the body on my Arrow for the last 6 months and I'm just now getting some of these techniques to work. My tips would be to stretch that flange
Make sure you hammer is shaped to stretch in one dimension only (curved not domed)
Help the stretch along by putting the metal in tension while you hit it
Make sure the hammer is stretching at least half the width of the material in one blow or you will just be denting local areas
work from the outside edge in
Also 0.6 seems very thin to me, Ive been using 1.2 cold rolled. Is your material suitable (Malleable enough) for hand forming?
Good luck 

Location: Fremantle, Australia
Ian, Mark,
Thanks for the suggestions.
Watched the video on shrinking/expanding again last night.
Mud Shields are around 1mm thick as best I can measure, but no idea of original panel thickness before forming.
I only used the 0.6 to experiment with and realised later that it was far too thin to stretch.
I will get some 1mm and slightly thicker to practice on.
Someome has suggested using an air hammer, with blunted chisel, to stretch.
Air hammer I have so worth a try.
Mark,
Could you be more specific re 'curved not domed' please?
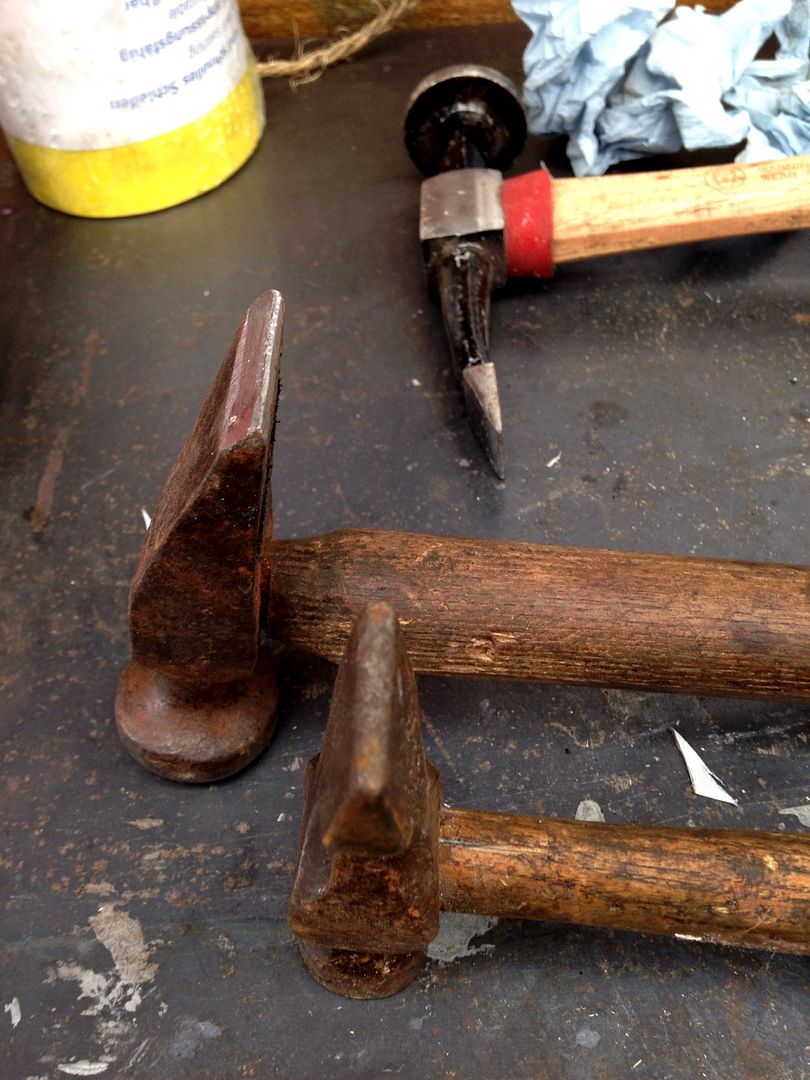
I don't have a proper stretching hammer but have these, having ground the centre one:

Making one of these patch panels is going to teach me a lot for future metal bashing.
Geoff - Talk about jumping in at the deep end!
Location: South Norfolk - Next to Suffolk
Hi Geoff
I did quite a bit of metal bashing, mainly 1.5 mm Aluminium when making my GE Cup Model look-alike. I don't know how many repair sections you need to make, but I would certainly invest in a small shrinker/stretcher machine. They are available on Amazon for about £ 160.00 and certainly make life a lot easier, particularly the shrinker. Stretching metal is fairly easy with a flat hammer, but I couldn't master shrinking with a hammer. Best of luck with the restoration.
Location: At the moment in France but soon to be near Grantham
When hammer shrinking steel a bit of heat can help. First put a series of puckers into the edge you wish to shrink, much like the wavy flange on a metal pie or flan dish, this will cause the panel to curve into the desired shape. Then heat one of the puckers with an oxy torch to dull red and close just the extreme the open end down onto a flat surface. The idea is to trap the excess metal in the pucker, this excess can then be hammered down flat, being now trapped by the closed edge the additional metal has nowhere to go other than flow into the surrounding metal. Heating the bit of metal you wish to move to dull red softens the steel making it flow more easily, you can also shrink steel simply by heating and quenching, although this method is generally more useful when removing stretch and flop in a reasonably flat panel.
Edit: Think of it like this, to stretch an area you will need to make the metal thiner, this can be achieved by striking (squashing) and area between two hard surfaces i.e hammer and dolly, or anvil and roller of an english wheel etc. To shrink and area you need to make the material thicker, so you need gather up the excess material, trap it and then push it back into its self, this is known as hammer off dolly, in other words you support the metal next to the area that you strike with the hammer pushing the metal down to the same level as the dolly. With the material trapped at the edge the metal has to flow into its self and shrink.
Location: NZ
Geoff
You will find it much easier with the some thicker sheet so good luck. The hammers both look quite aggressive for stretching, the one I use that works best has a bigger, round, head (Say 15 - 20mm dia) with a slightly radiused crown. My comment about shape is the the crown should be flat in one dimension and radiused in the other. (like yours, just with a much larger radius).
Buts that's what I found worked, you can probably can get the same result with what you have in the photos, you will just need a lot more hammer blows to end up with a flatish finish. It helps if the wind is blowing from the west as well

Location: Fremantle, Australia
More good advise - cheers.
Been watching the David Gardiner video again on the way he does his work.
Looked at stretcher/shrinker u it's yesterday but had to buy a new welding helmet.
The solar one I have refused to work yesterday afternoon as the ambient light was miserable even in the clear roofed carport.
I do have portable flood lights, but they just get in the way so the new battery one will solve that problem with luck and it has a big 'window'
I will be trying the hammer approach, then air hammer once I get thicker material to practice on.
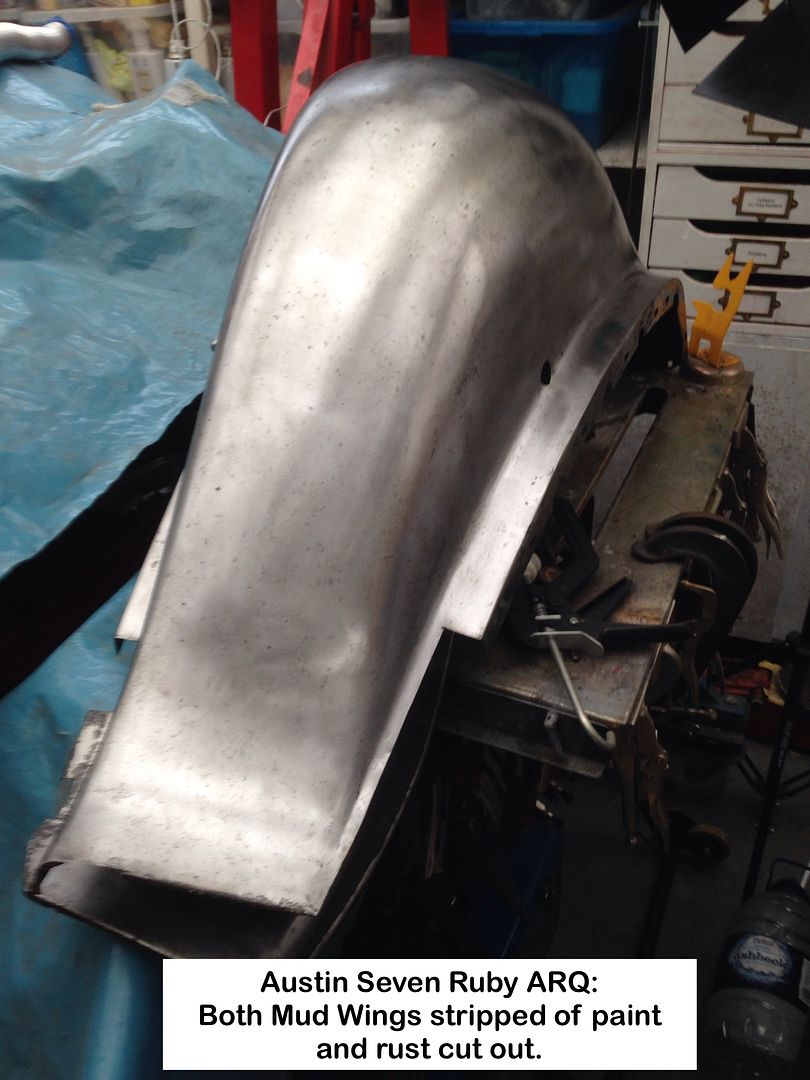
As far as I can tell, these are the only two bits on the car I need to stretch, but time will tell.
Geoff - Off to steel merchant.
Location: South Norfolk - Next to Suffolk
Been using the MIG to weld patches in the front Mud Shields.
Whenever I read about how hard MIG welds where in comparison with OA/TIG, I always thought 'How much harder can they be?'
'Add your favourite AngloSaxon here' HARD that's what!
Couldn't believe it when I tried a file and it just skated over the weld blobs.
Used TIG to fill holes then ground the welds down and the difference in the quantity and type of sparks produced was eye opening, with MIG winning hands down.
Photos to follow when done
Geoff - TIG from now on especially for panel work.
Location: South Nordolk - Next to Suffolk
Out of sequence, as I've repaired the front Mud Shields, modified the Running Boards and given them and other smaller parts a coat of 2k zinc primer.
This is 4 months later than I had hoped for, so nothing unusual then.
My DIY Car Trolleys made the move out and now back in a doddle.
Ruby body into Carport
Tried to embed this video using the BB Code, but no luck, so what am I doing wrong?
Geoff - Bodywork at last.
Location: South Nordolk - Next to Suffolk
Update on my post 3rd March at last!
For some unknown reason I just could not get the video below to upload to either YouTube or Facebook and gave up after 5 attempts even using a different computer.
After the success with the body rolling into the Carport one, had another go last night and this morning found it was sipuccessful.
AustinSevenCylinderBlockWhatsit in all its glory.
Geoff - Work started on the B-post.
PS
Just noticed that some of the photos in a couple of posts are either incorrect or missing for some reason.
Haven't changed anything in Photobucket either.
Location: South Nordolk - Next to Suffolk
Where the heck is South Nordolk I wonder.
Geoff - Body ready for tilting.
Location: South Norfolk - Next to Suffolk
Geoff have you paid the extortioners in order to keep the historical part of this thread alive or have you discovered another solution.
Location: NZ
Thought the same but hesitated to comment lest it alerted the robber band 
Location: Melbourne, Victoria, Australia.
Ian, Tony,
There is no way I will pay their greed induced ransom.
I do, however, pay for extra storage and read somewhere that doing so will keep links working till next year sometime, when they will kill 3rd party links as well, so they are now only used as a photo backup, amongst others.
Have now switched to using Postimage for now, till I sort out something I control.
Geoff - Norhing done the last two days 
Location: South Norfolk - Next to Suffolk


