Welcome to the Austin Seven Friends web site and forum
As announced earlier, this forum with it's respective web address will go offline within the next days!
Please follow the link to our new forum
http://www.austinsevenfriends.co.uk/forum
and make sure, you readjust your link button to the new address!
When I have 'engine turned' aluminium for dashboards, I have used a cup shaped wire brush that had been used a fair bit decarbonising combustion chambers. I marked a grid on the ali with soft pencil in a hexagonal pattern. I practiced on a scrap bit of ali to get it right, with my wire brush the lines were about 3/4" apart. First I drew horizontal lines 3/4" apart, then drew two lines at 60 degrees to horizontal and made lines parallel to these 3/4" apart, ending up with a hexagonal grid like a honeycomb. I worked along each horizontal line keeping even pressure on the wire brush for about 10 seconds. The result was very pleasing. I applied the finish after the holes for the instruments had been cut, which cleaned up any scratches and minor blemishes.
Hi Rob, love your work and have been following your "making a body" thread with great interest, always liked the flared hole aircraft look.
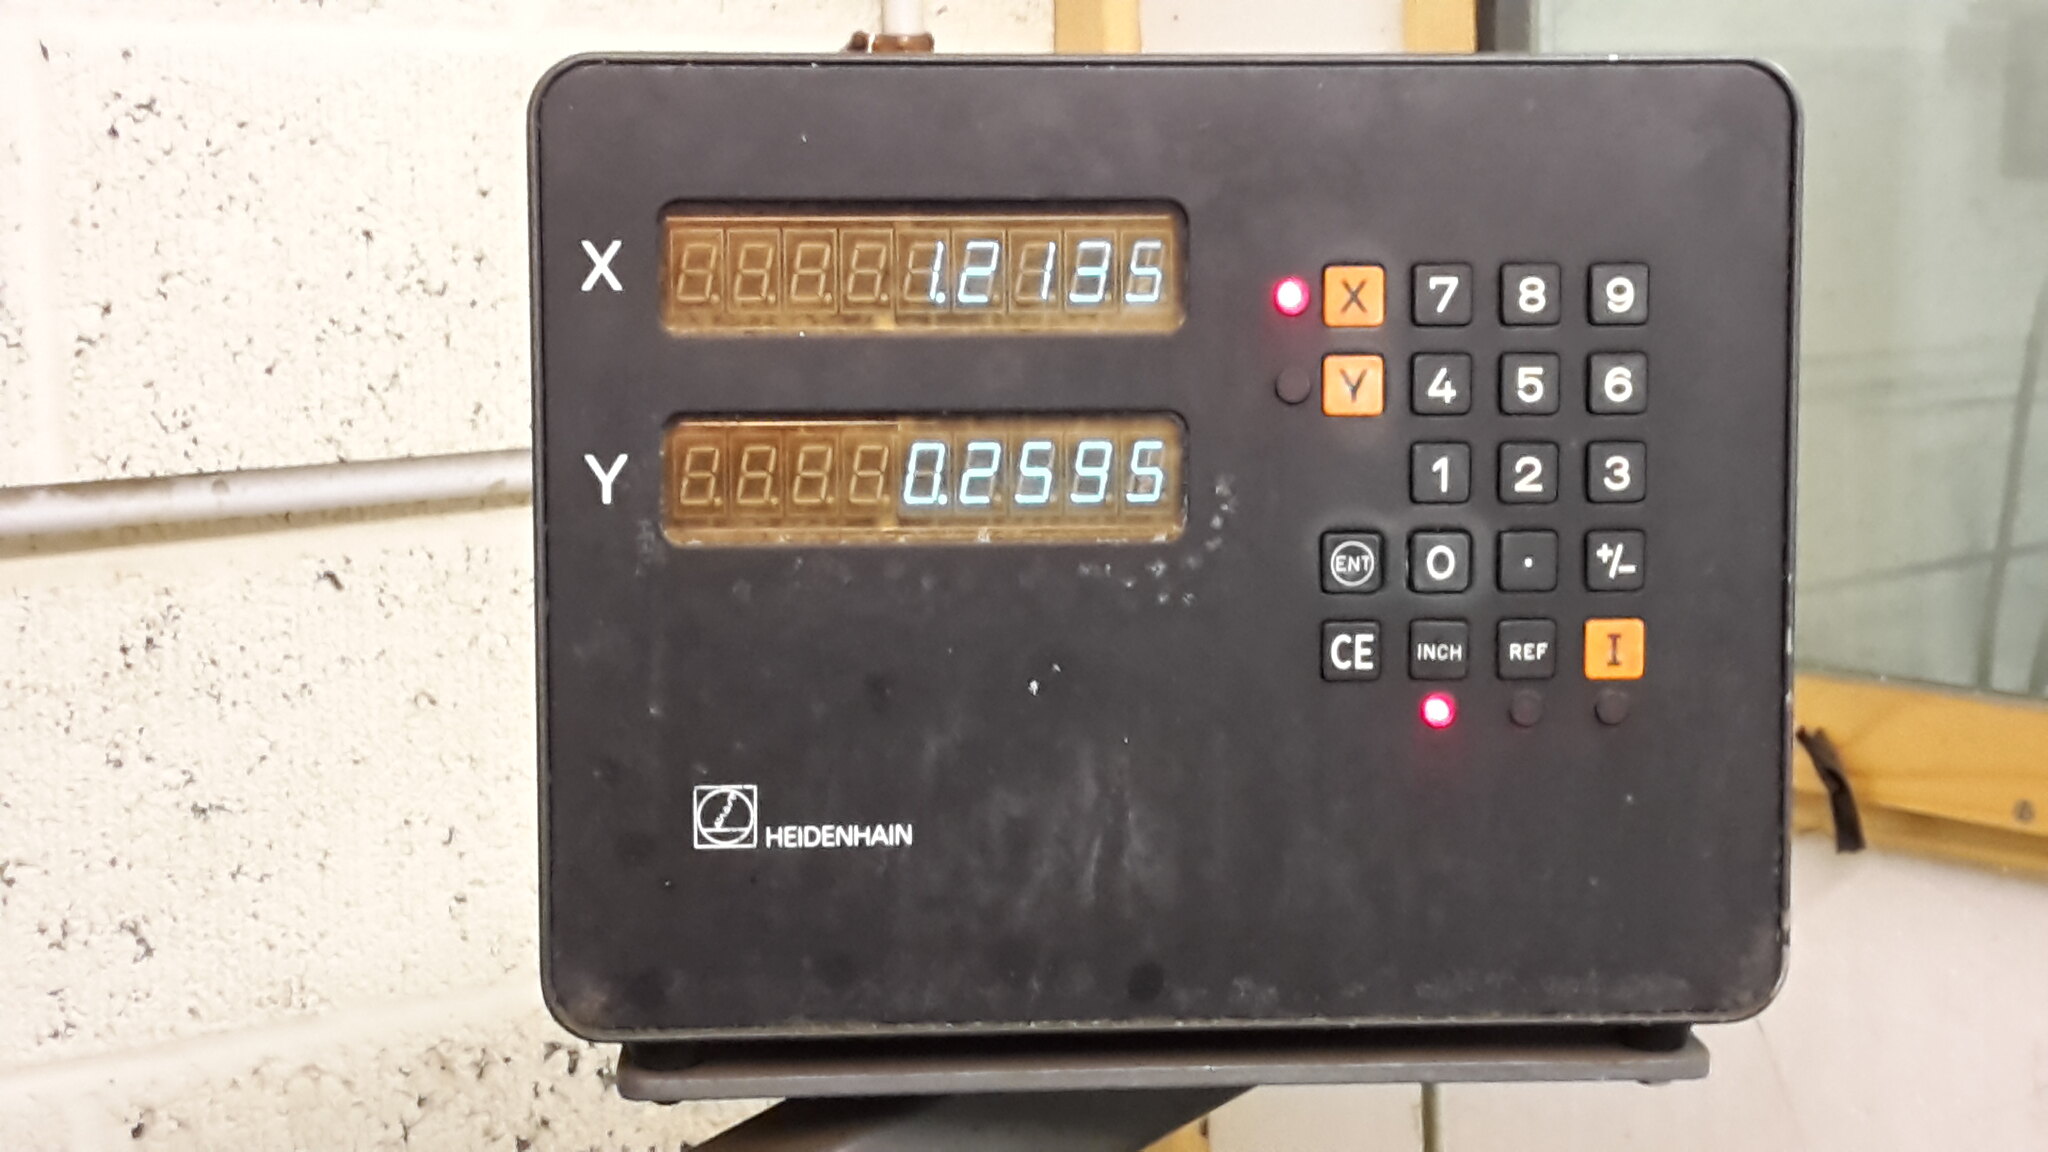
swirl spacing is made easy with a digital read out (previous post should have read d.r.o.) Accurate to half a tho.
All the holes were deburred to reduce the chance of the leather catching, on areas where I was half on I didn't really worry, less than half I noted the coordinates and went back to them (just in case) and applied less pressure for a bit longer.
Tom
Location: Eye on the Norfolk / Suffolk border
Hi Malcolm, never thought of using a cup brush, any chance of a pic? The other way I had heard of was using a piece of dowel with some emery paper stuck to the end, but I wondered how you would maintain an even pattern.
Supposedly dash boards were engine turned to reduce glare, preferable to a mirror finish, I have tried it in direct sun and it does seem more bearable to look at.
Tom
Location: Eye on the Norfolk / Suffolk border
It may be cheating but I bought a sheet of "engine turned" alloy from europa at burton on trent.
Location: down by the trent.
Page 126 in the europa online catalogue,Dash/trim/finish,sheet 2mm thick,1220x300,£38,sheet 2mm thick, 1220x610 £65.
Location: down by the trent.
Tried to upload pics of the dash I made with the "europa" alloy but failed,no good with these computer things,much better with a hammer!.
Hi Tom
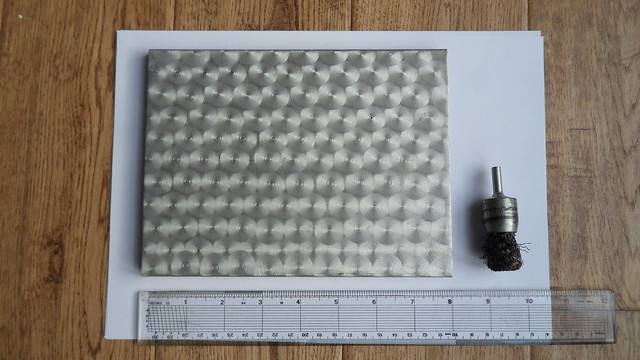
My car with the engine turned dash is cocooned away in hibernation but I have the inspection panel off the Pytchley transmission tunnel handy. This I have photographed together with the wire brush I used and a ruler to give everything scale. Once the metal is marked out with pencil the turning is quite rapid, it only took about ten minutes to do this example.
I will get my pal Steve to post the photo as it is beyond my computer skills!
Hi Malcolm. Great work and very effective, sounds like it’s much quicker than the method I used, will have to remember that one.
Thanks Steve for posting the picture, the more ideas the better.
Phil, I sent you an email but it may have got lost in the ether, if you can email me a picture of your dash I’ll happily post it for you.
Tom
Location: Eye on the Norfolk / Suffolk border
Sorry tom,clicked on the email tag and it gave me a message about "email server not properly installed" I really think the internet has got it in for me!. Cannot find your email either because I don`t know how to find it! ,It`s alright for you,you can use the internet and weld alloy!.
Location: by the trent
Hi Phil, my email should be in your bt internet account, although it might have gone in your spam/junk folder.
Tom
Location: Eye on the Norfolk / Suffolk border
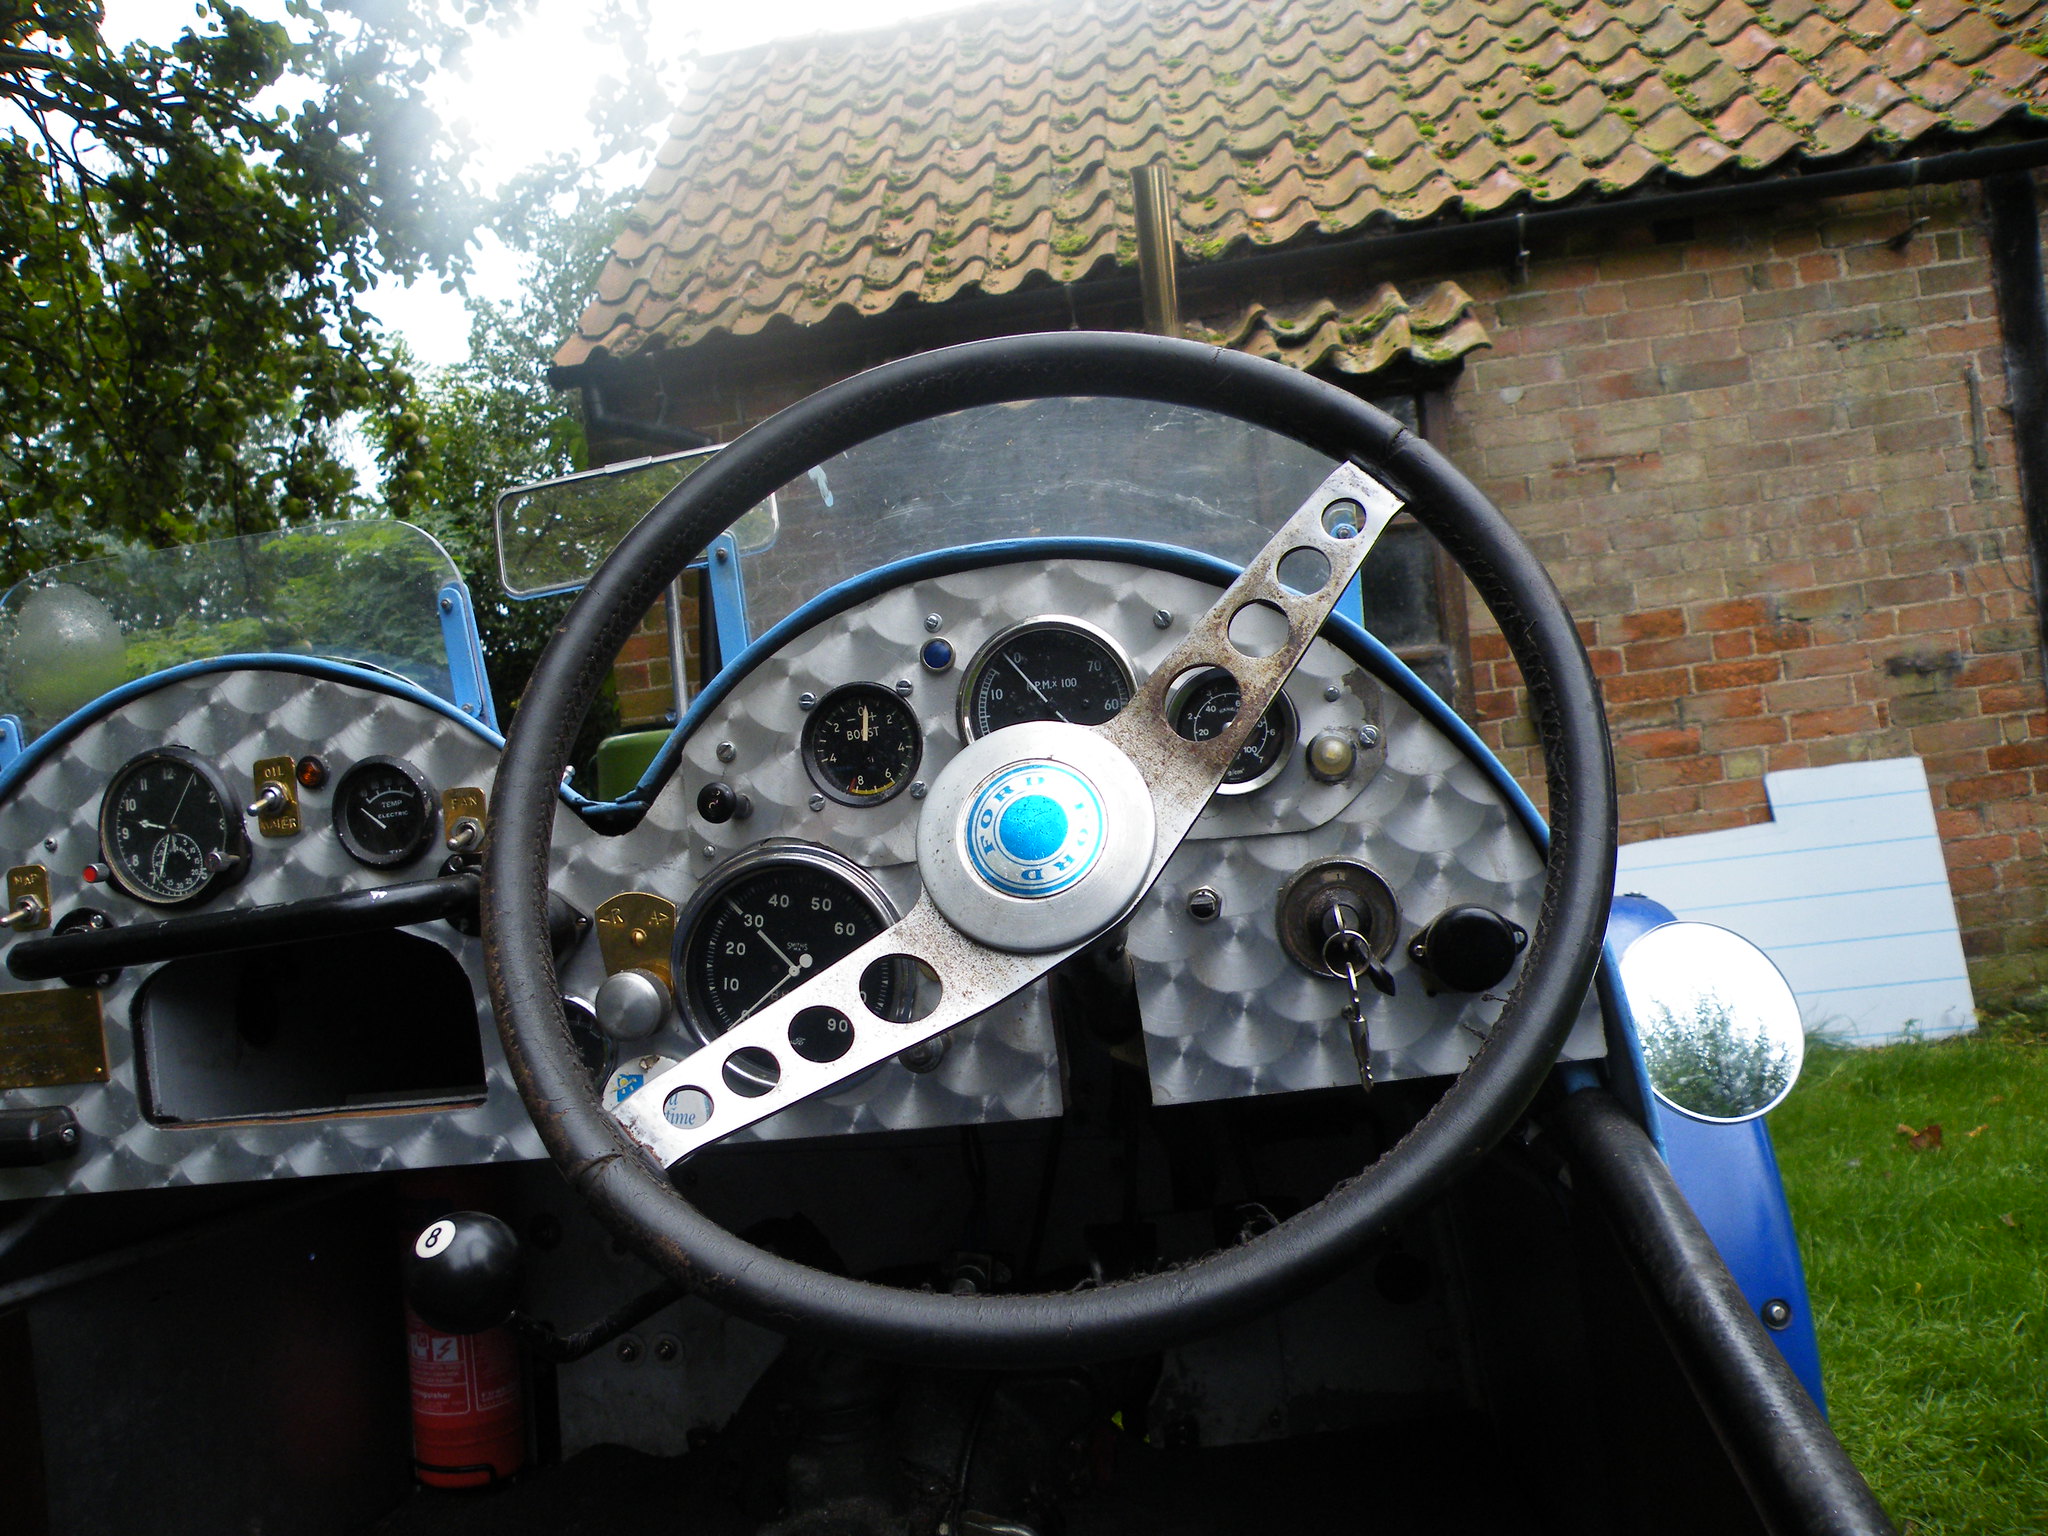
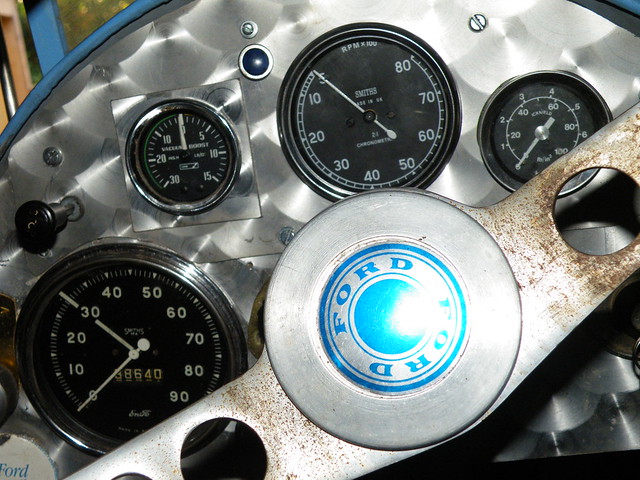
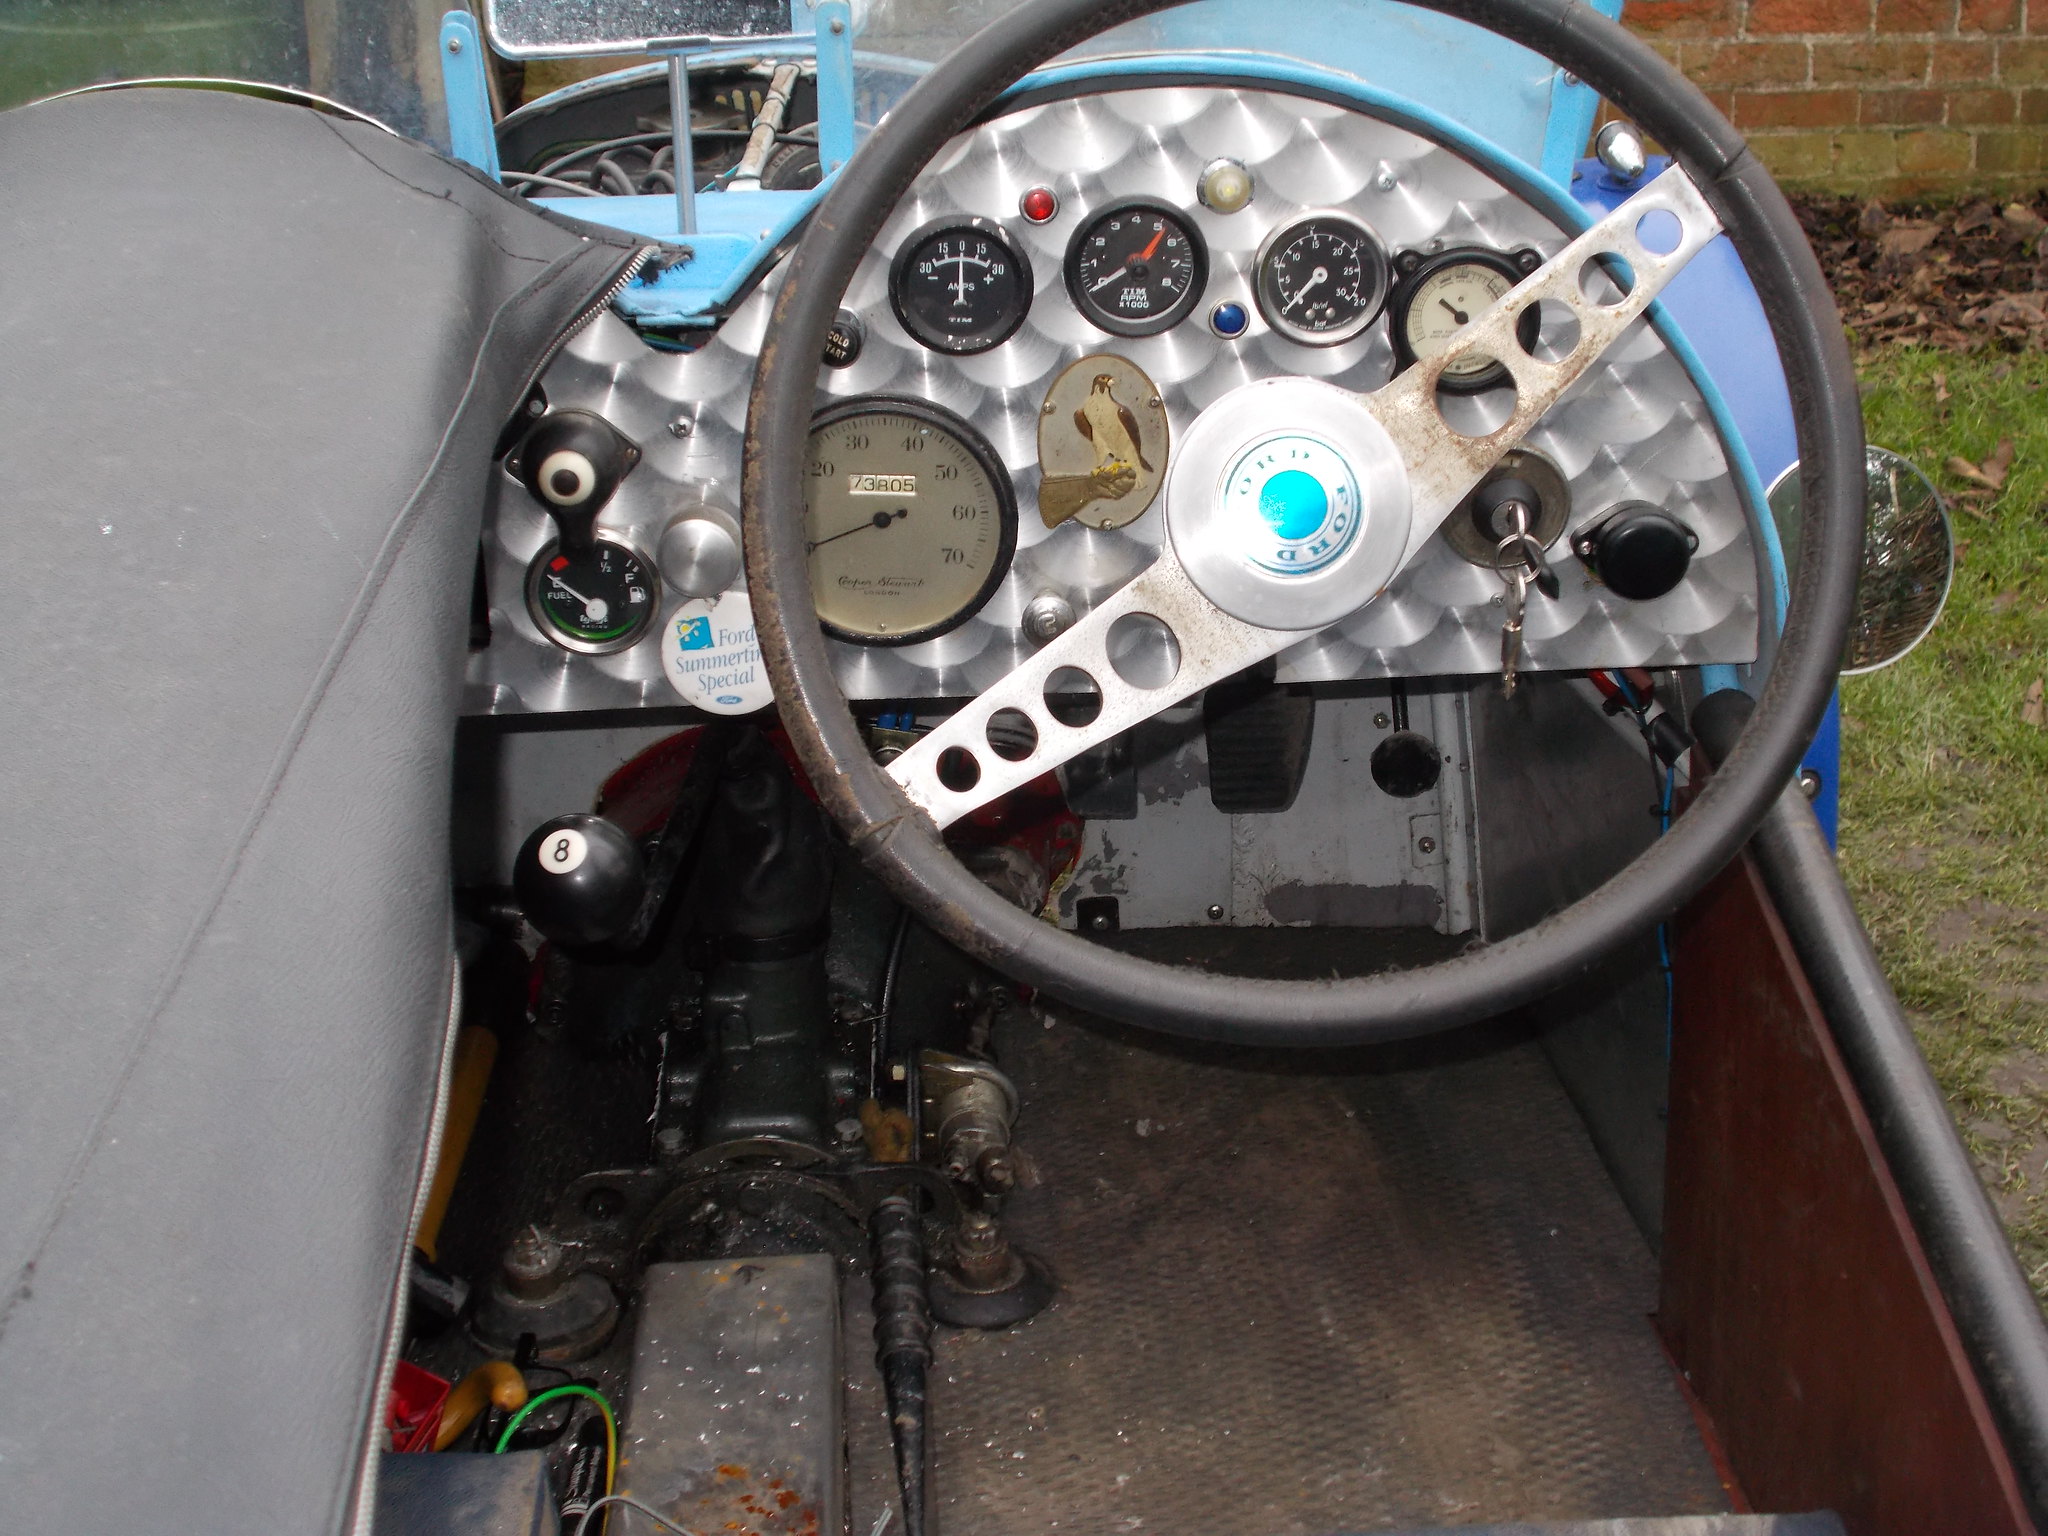
Here are Phil’s dash board pictures, great piece of work, love the 8 ball!
Location: Eye on the Norfolk / Suffolk border
Thanks for sticking my pics on Tom,This is on a ford SV Special,I engine turned the alloy for the dash on my A7 special myself using a bit of dowel with felt stuck to it in my pedestal drill but it did not look as good as yours and I had to move my drill as it was too close to the wall!.There are some clever folks on this site!.Keep up the good work,phil.
Location: by the trent
Hello all,
It’s been a while since the last update of the Boot’s progress, things have been very busy at work and not leaving a lot of time to tinker with cars. However I spent most of the winter months cleaning down the chassis, the most soul destroying part of the rebuild so far. The previous owner used the old oil from oil changes to paint the chassis, it has protected the chassis very well but the successive layers of oil and dirt then more oil etc. proved very hard to shift. What I should of done is try to take the body off but it’s constructed like a layer cake and wasn’t 100% that it would come off in one piece so I ended up cleaning it by hand.
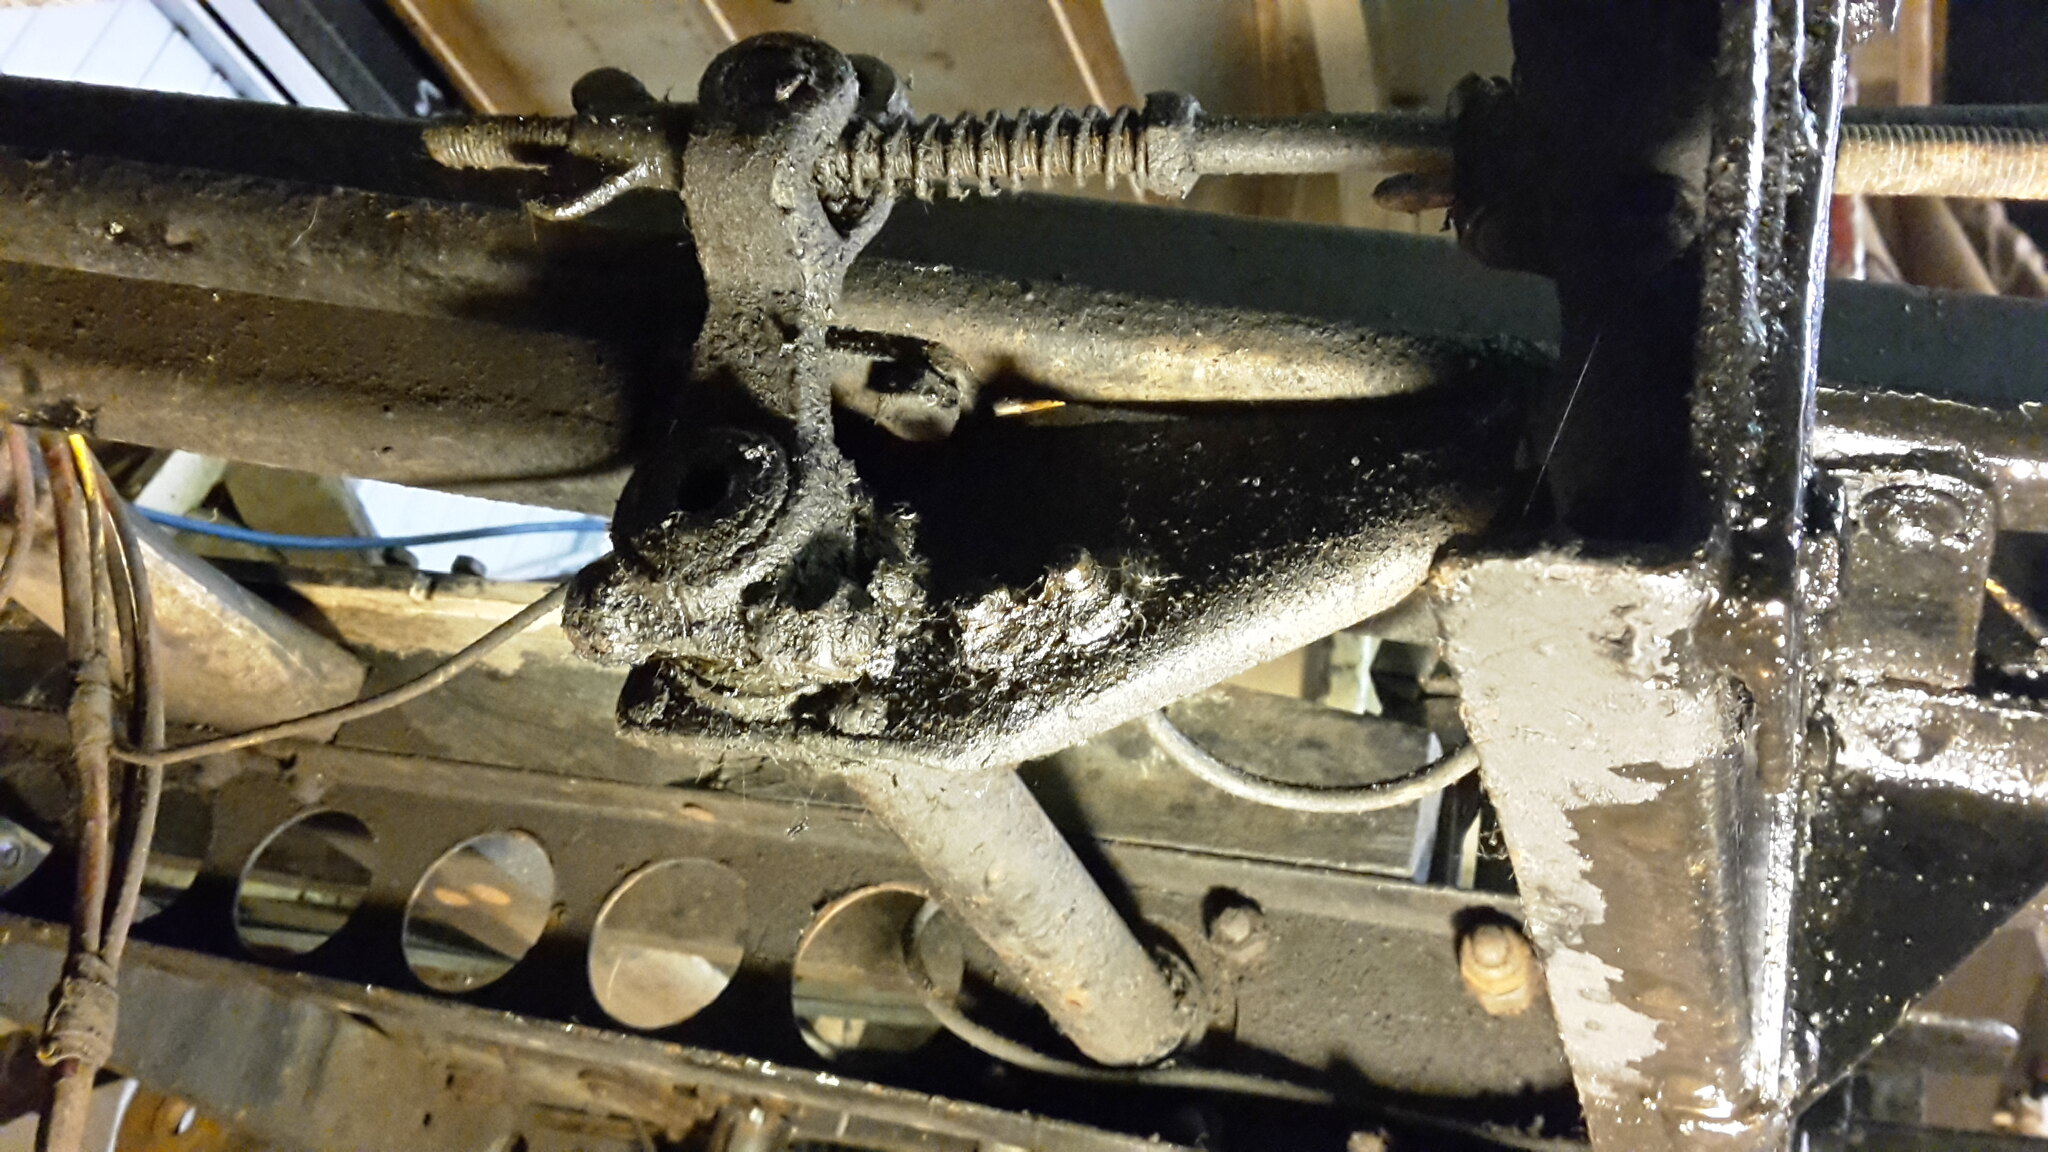
To give some idea of the build up of crud, this is the RHS of the brake cross shaft.
I started by soaking everything in paraffin and then attacking it with a paint scraper, the cardboard underneath had already been renewed once (due to the quantity of muck) when I took this picture.
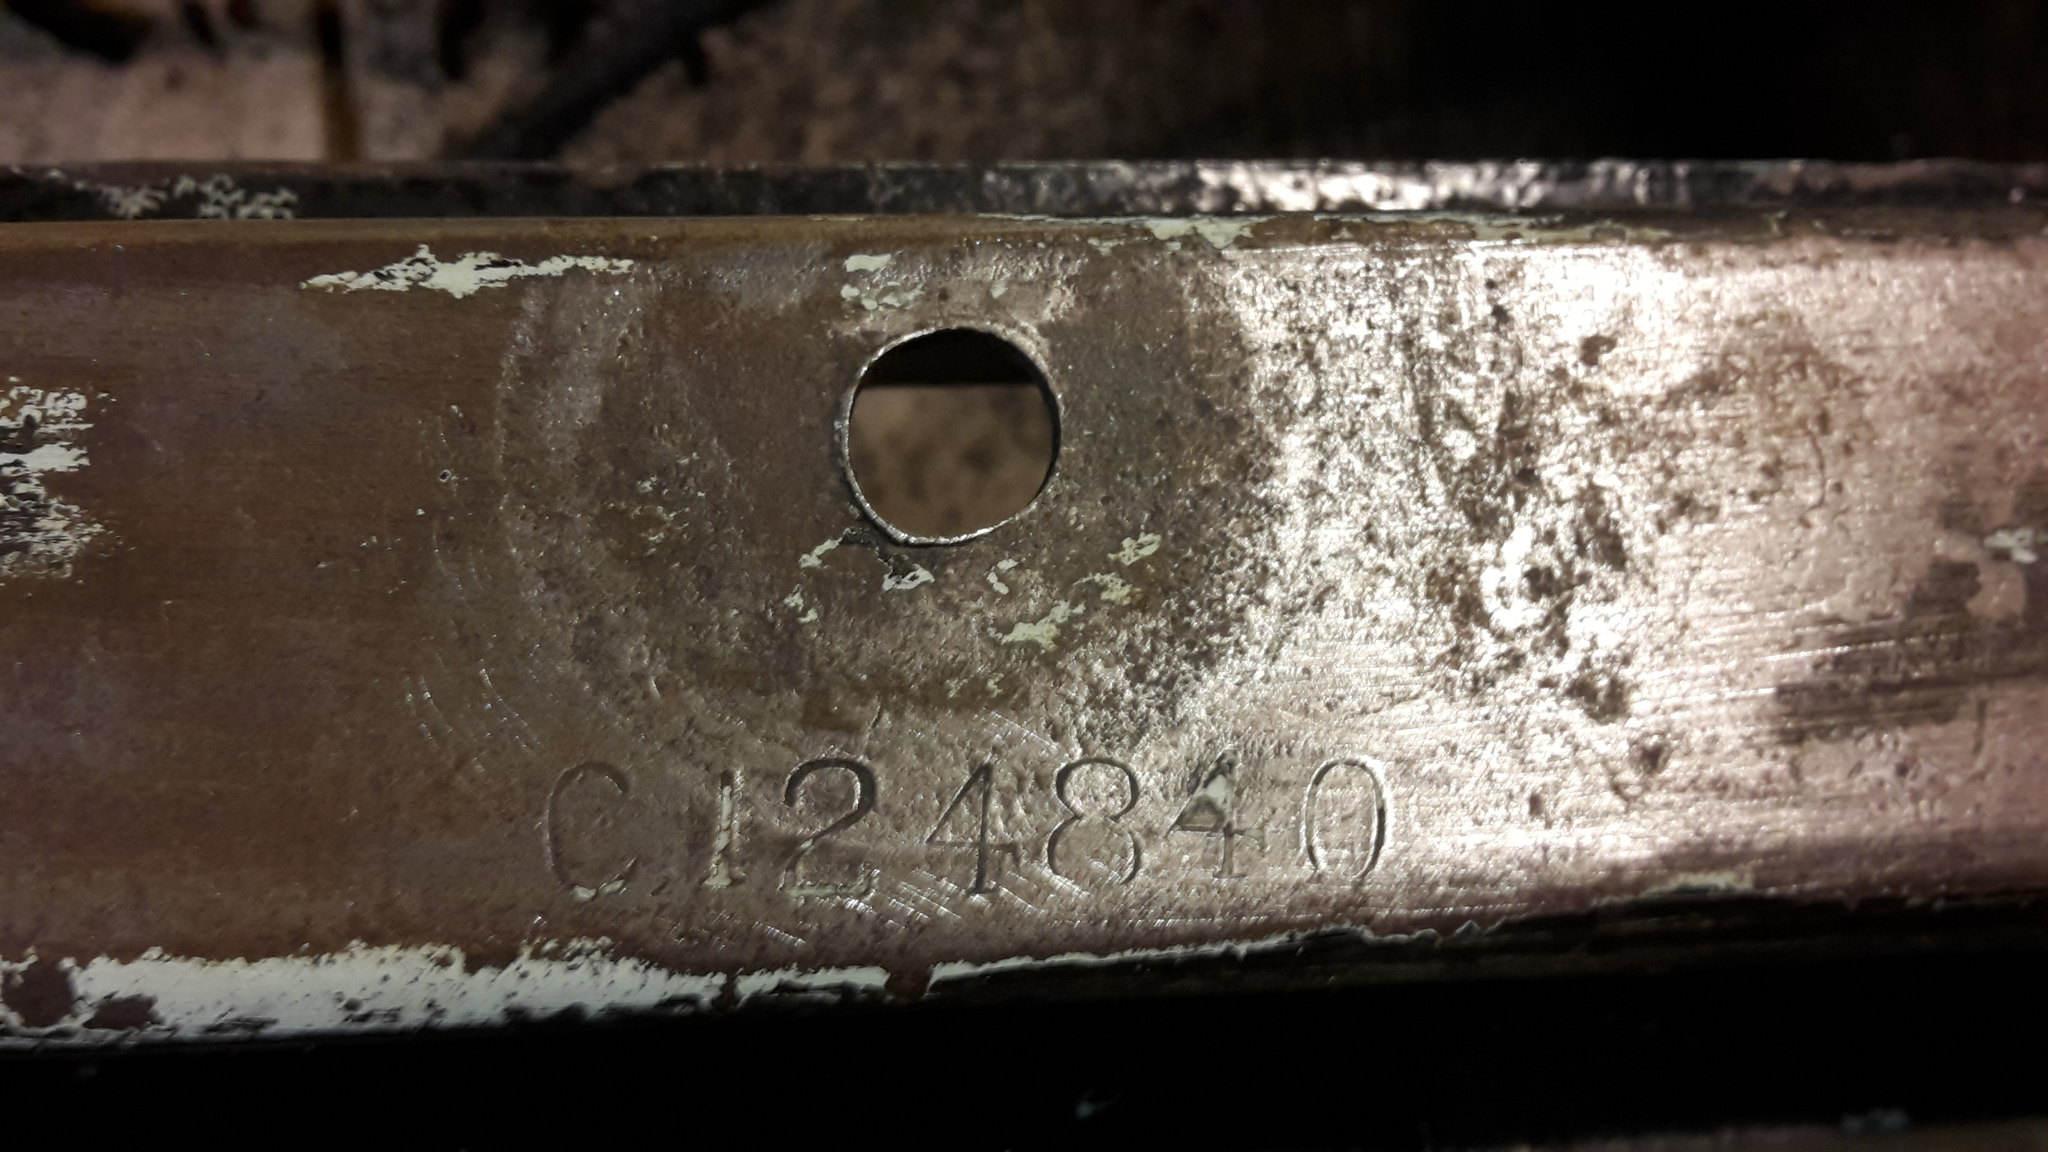
Chassis is still in great condition with a very clear chassis number.
Usual chassis repairs required, this was stick welded back together using a 2.5mm rod at 65 amps.

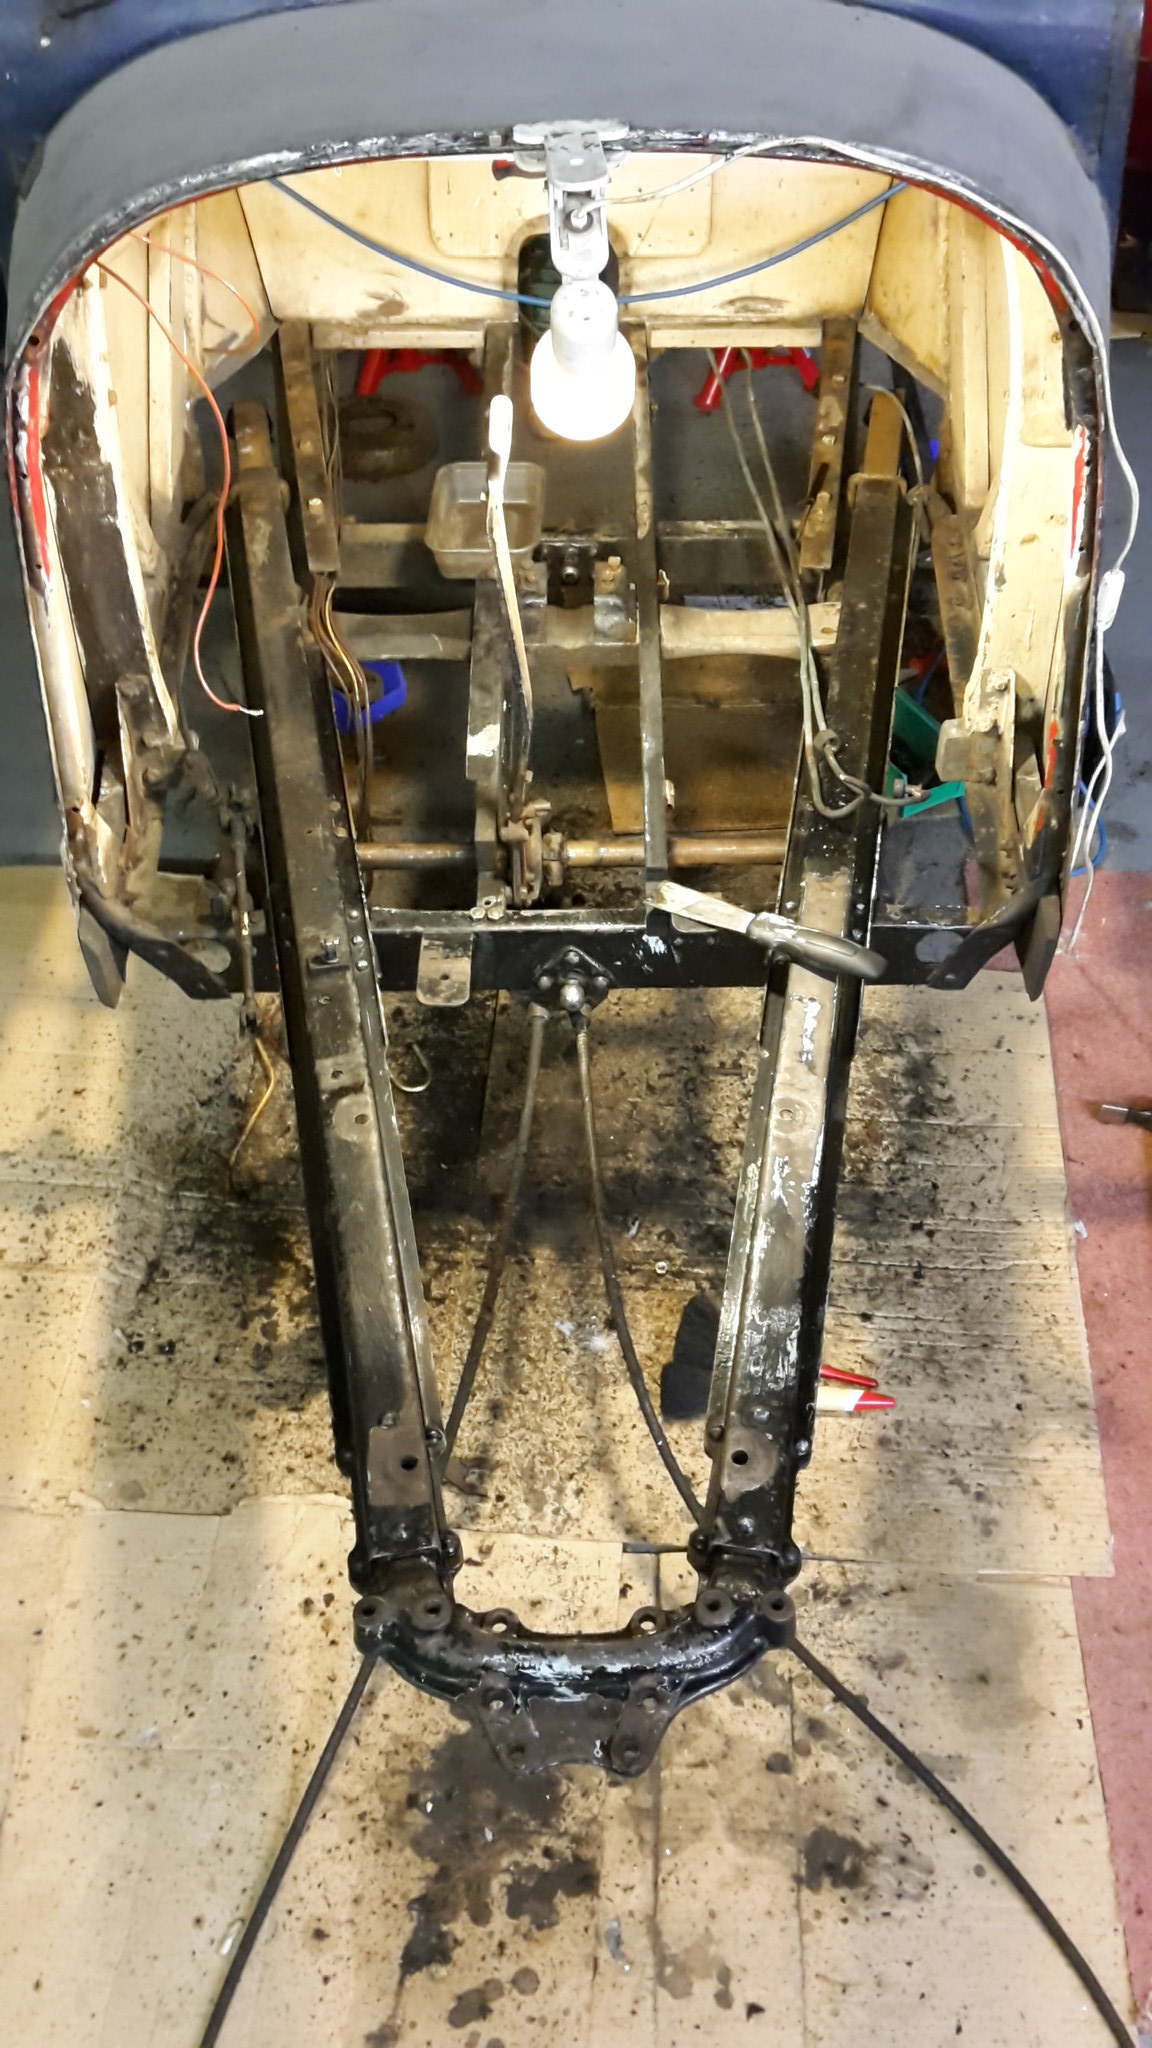
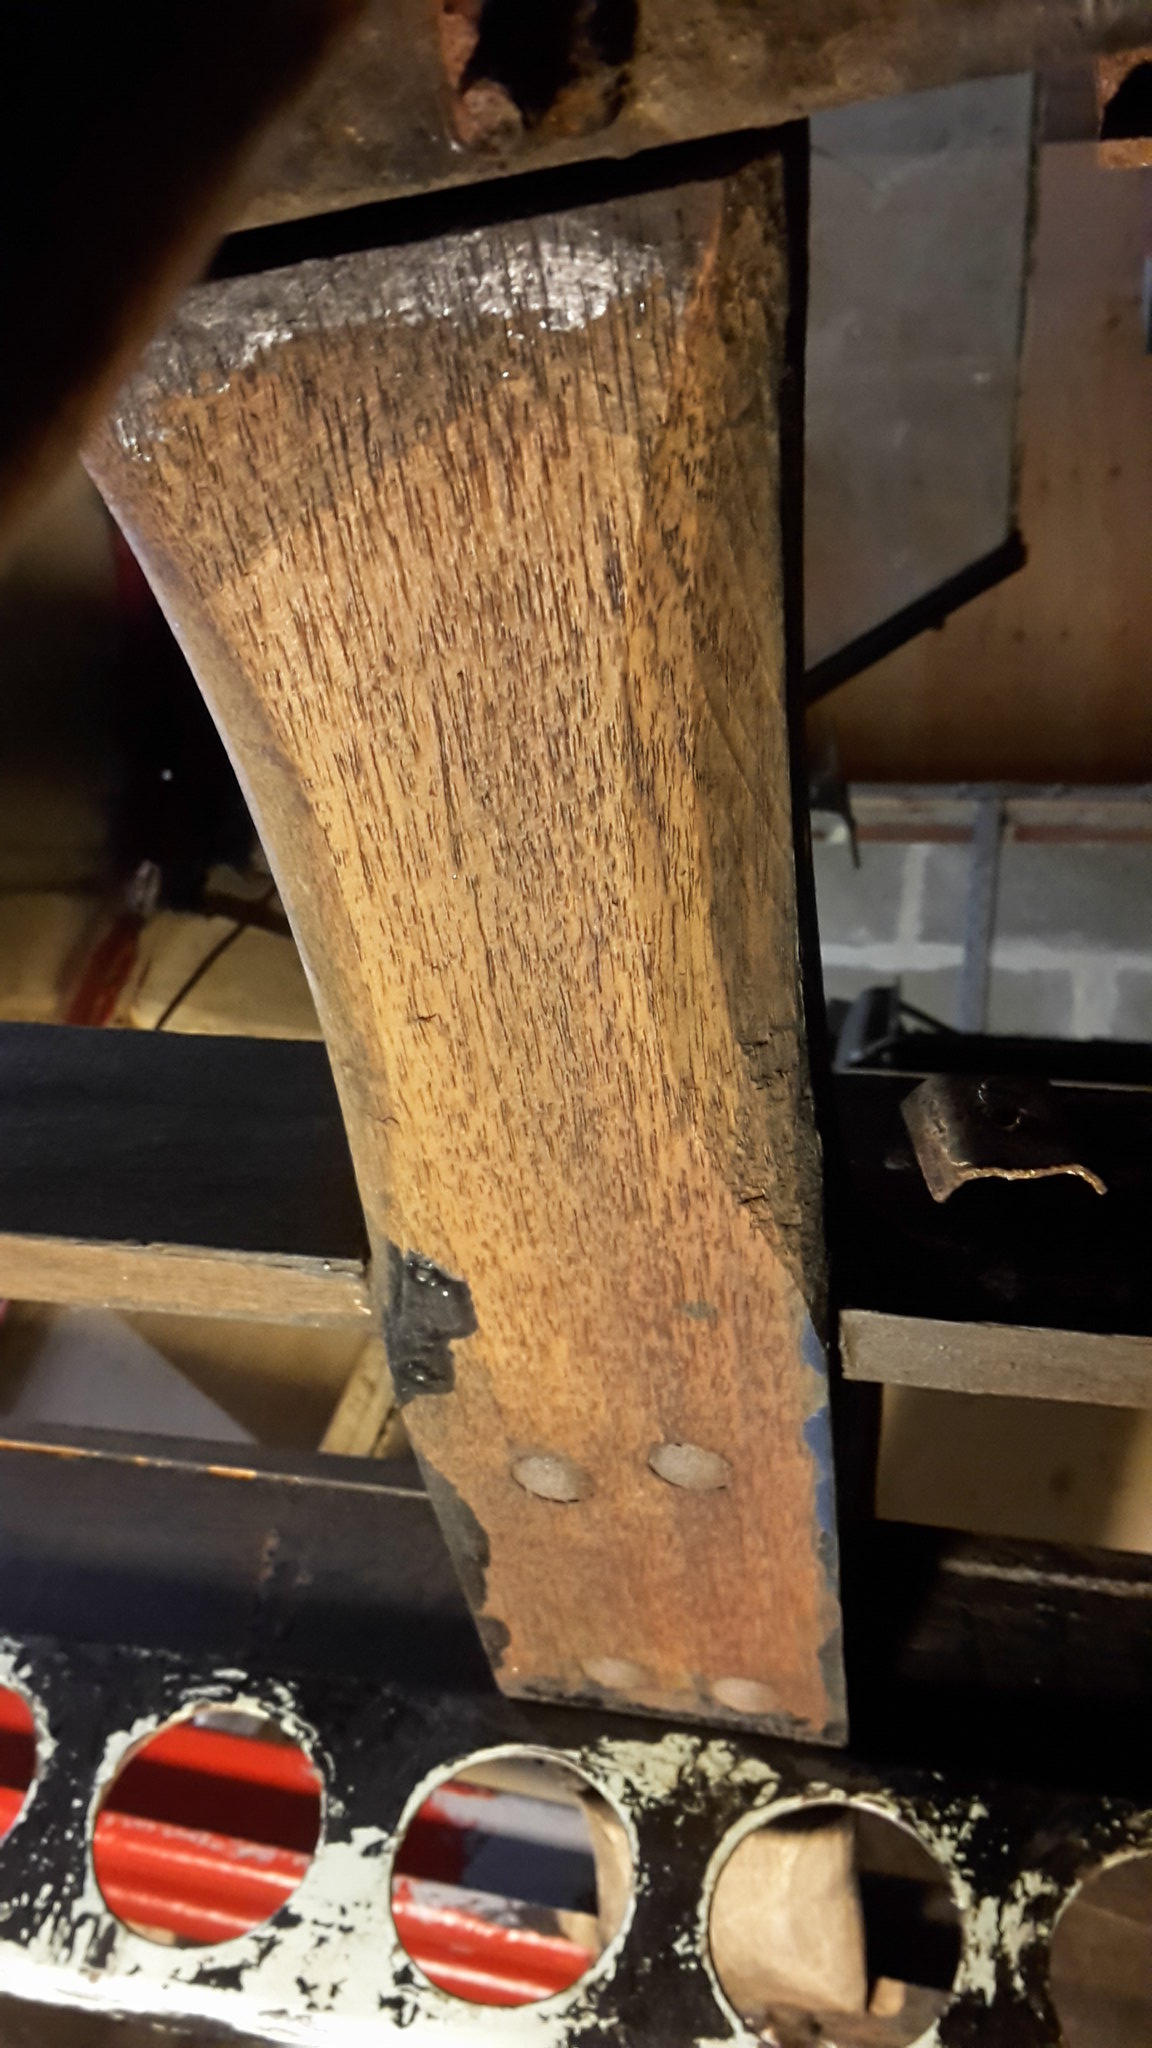
Once all the gunk was removed I found this, the wooded centre cross member had never seen a coat of paint and still as sound as the day it was spoke shaved.
Nearly forgot to take a pic in primer. I applied two coats of Bonda rust primer.
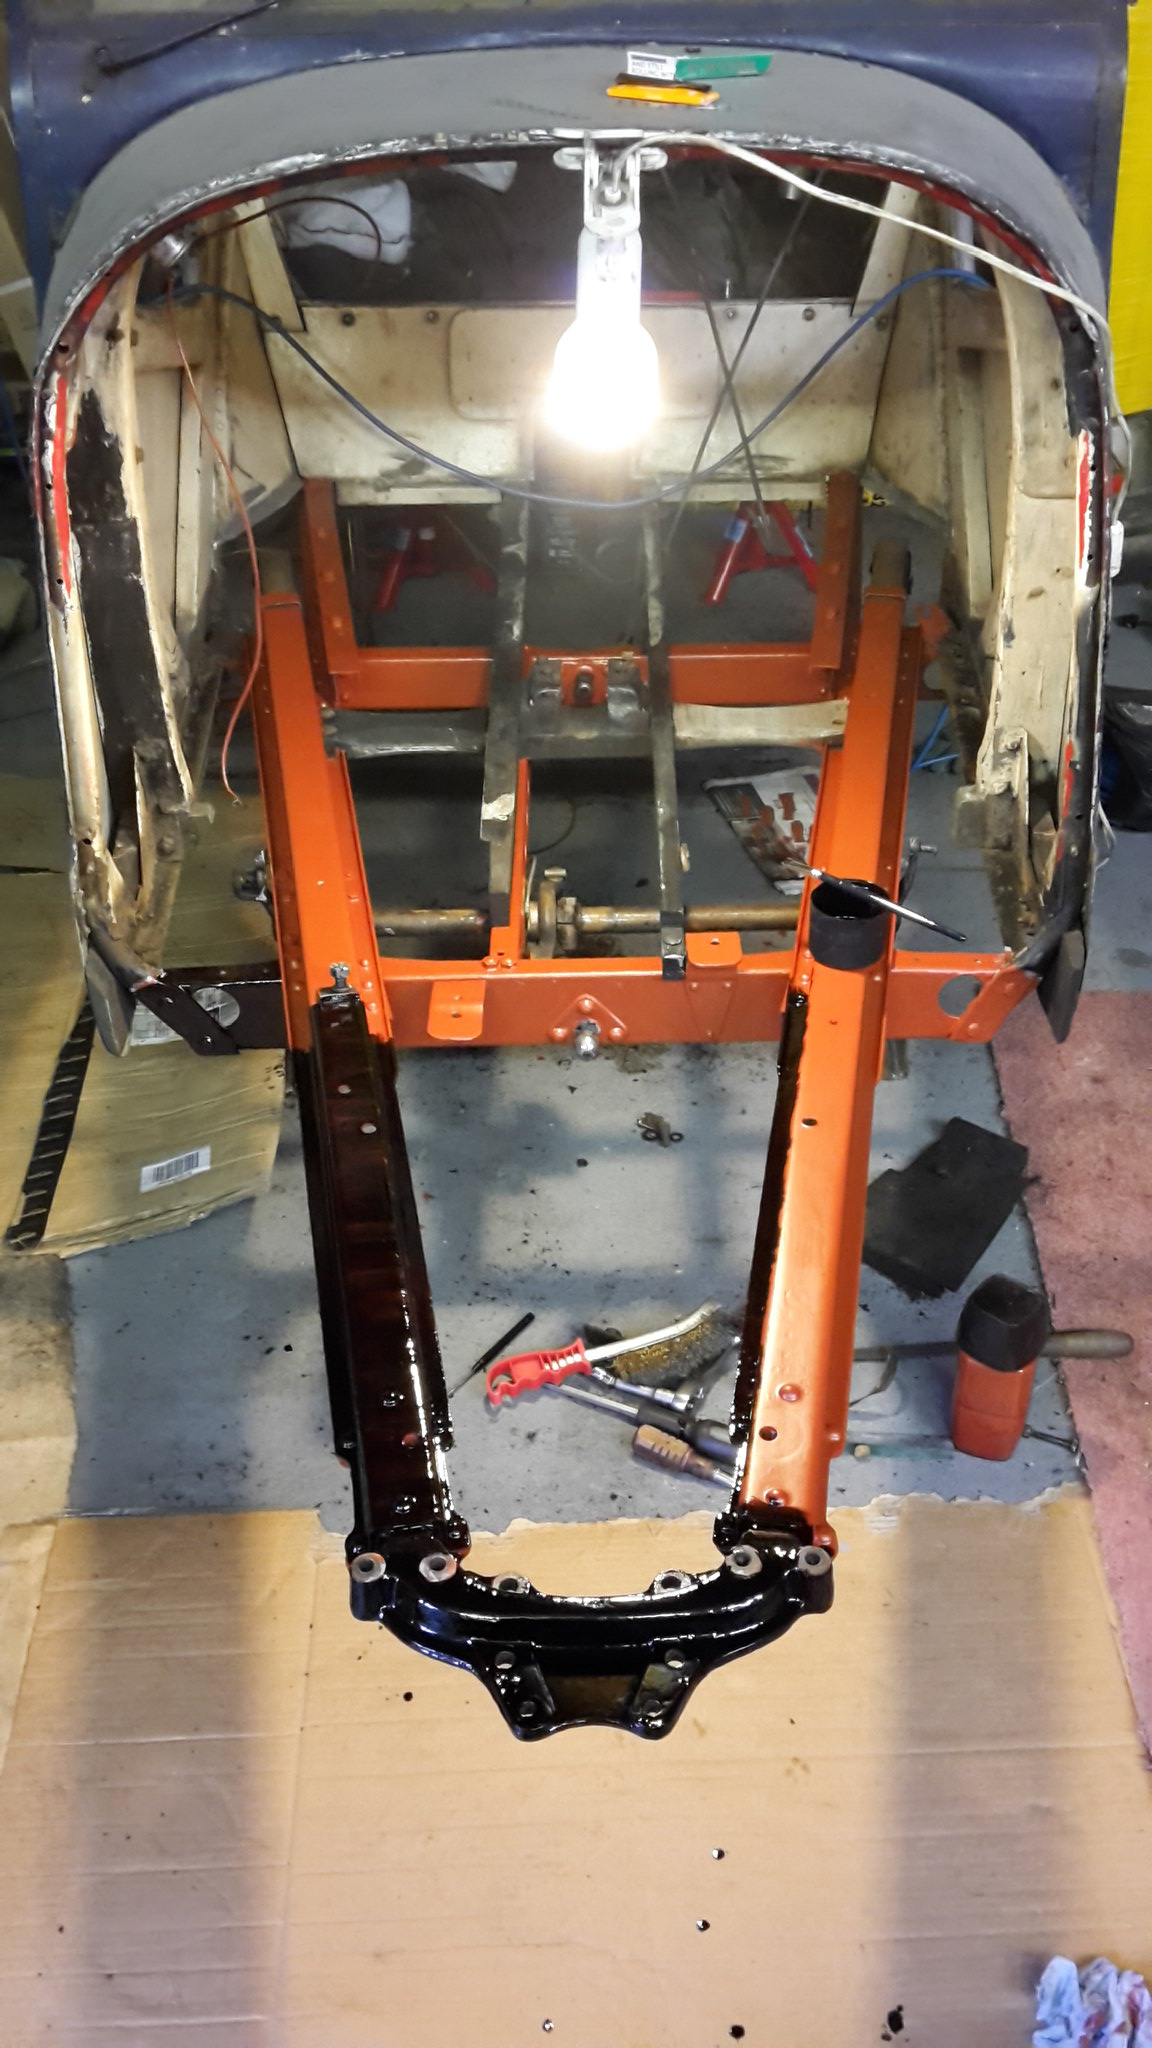
Finally painted with three coats of 2k black, all paint applied by brush and has taught me how bad I am painting left handed as there were areas I couldn’t reach with my right hand. Front axle now fitted, the first major rebuilt part to be refitted to the car!
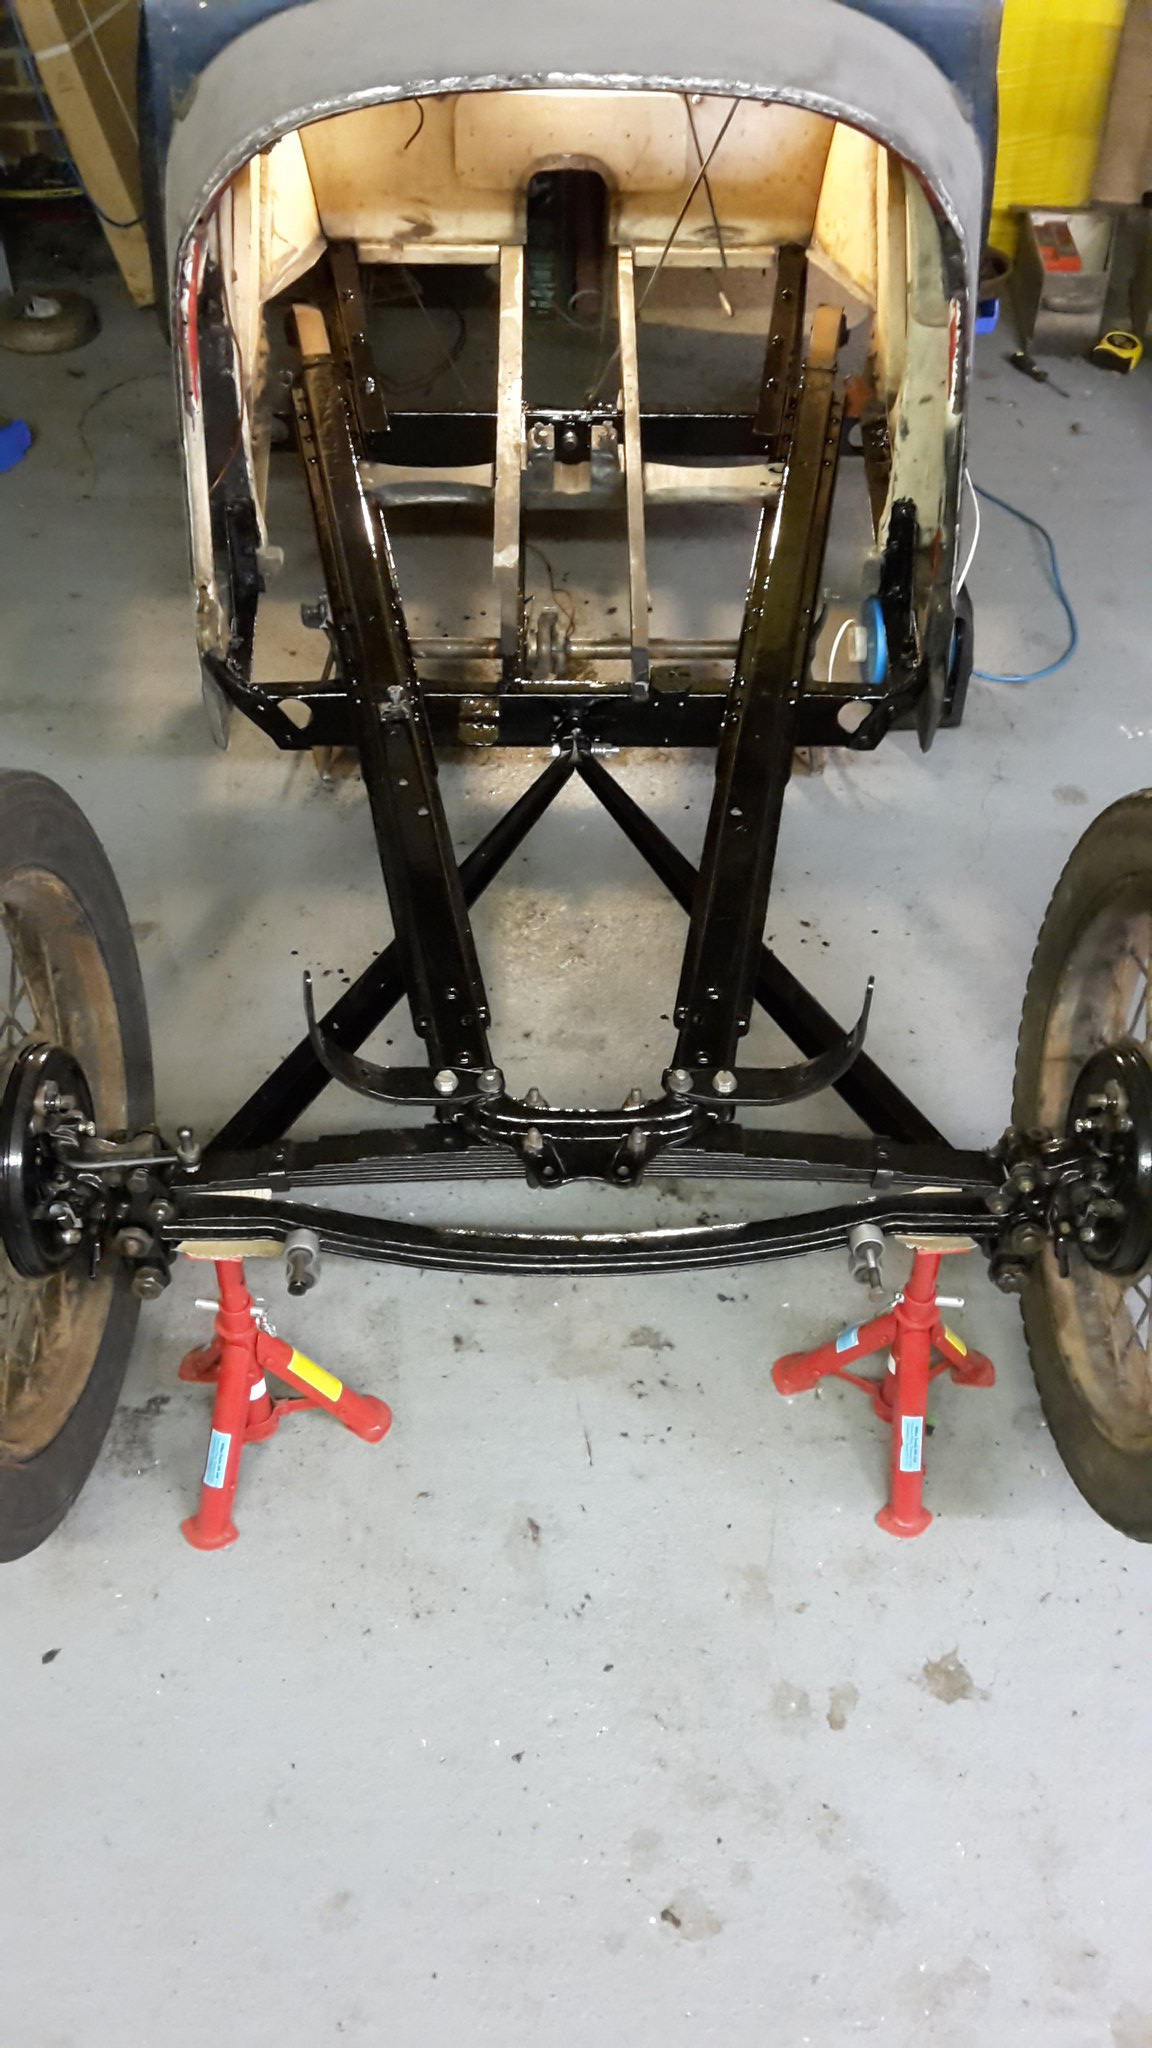
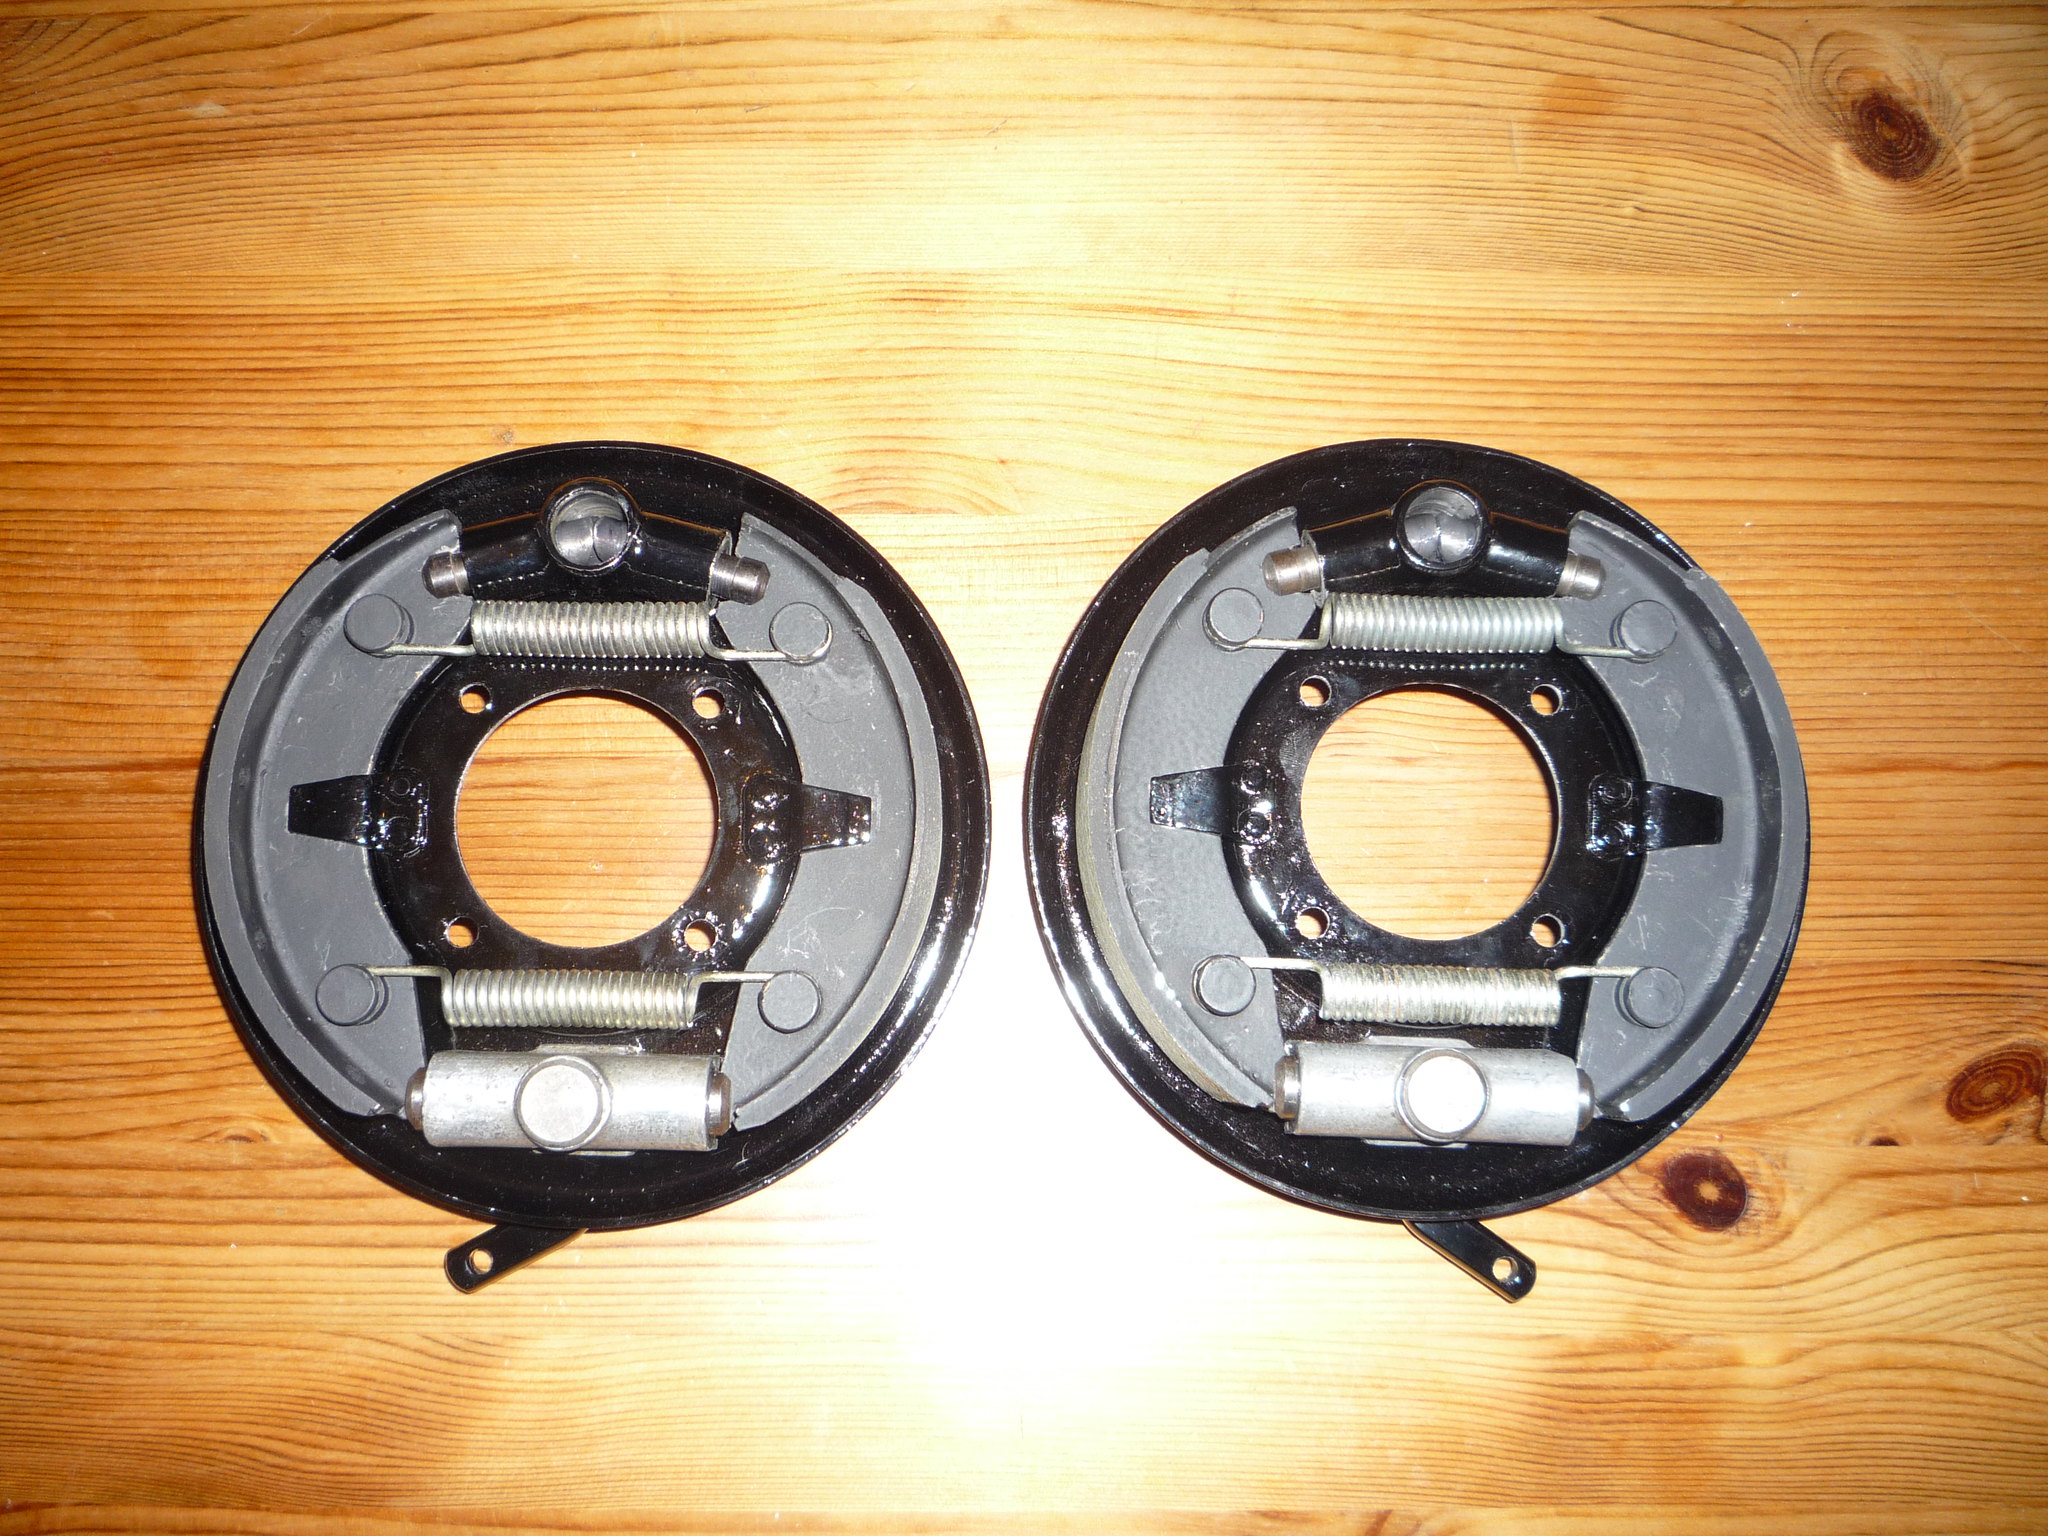
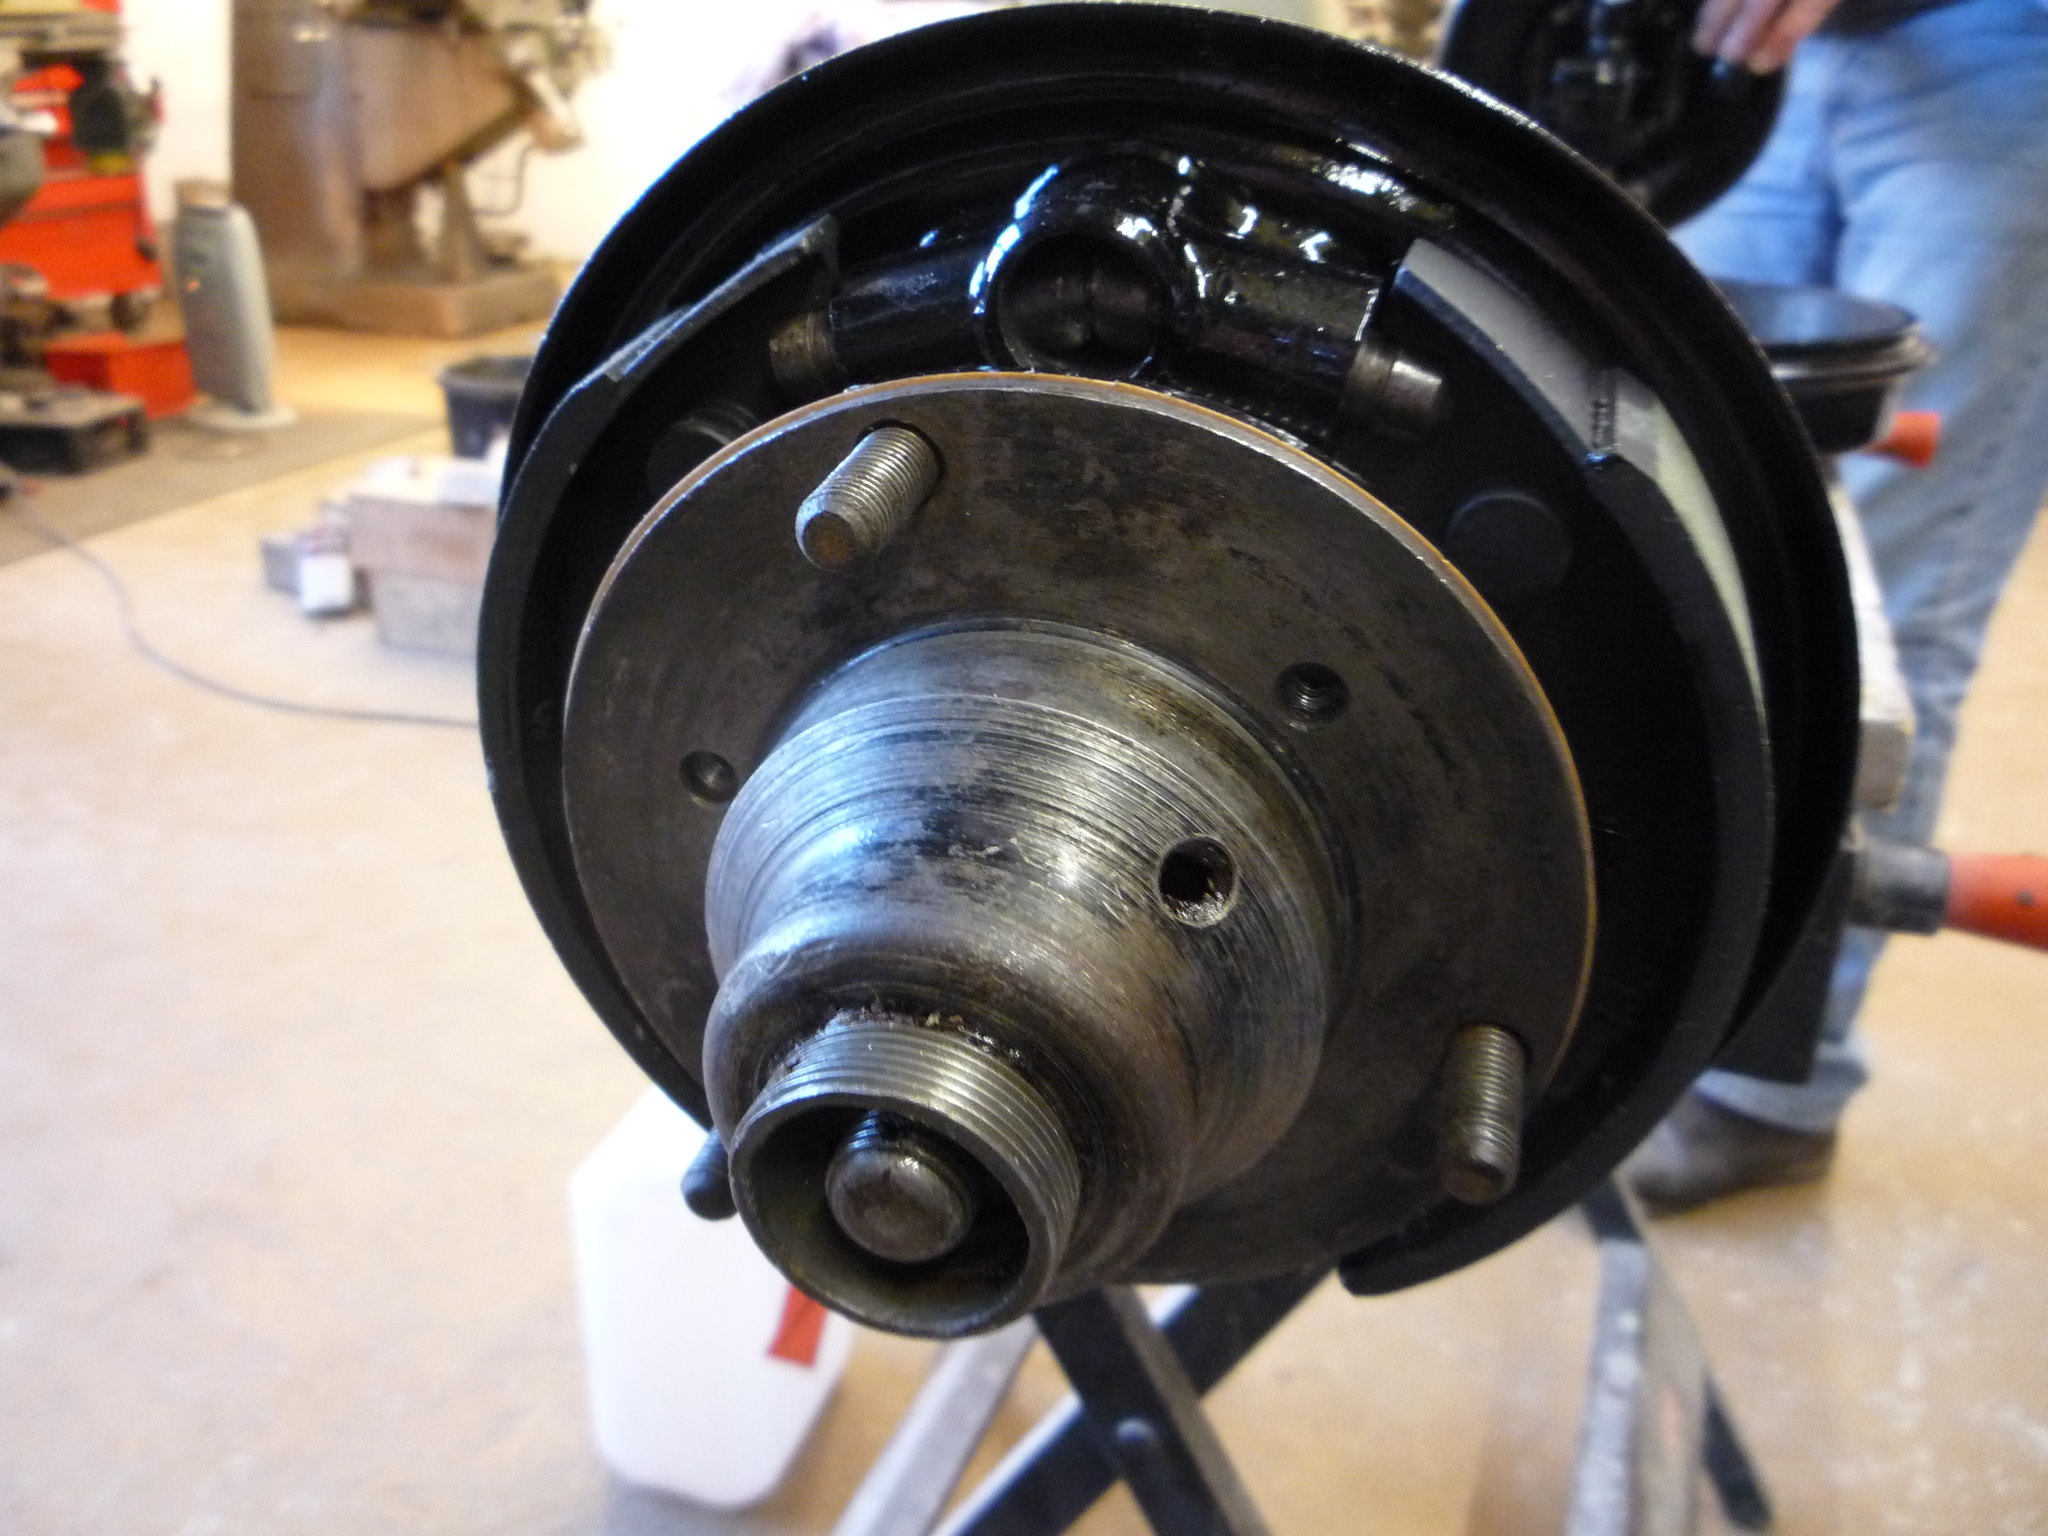
Unfortunately I lost most of the pics of the front axle rebuild due to a hard drive failure, these are the only ones that survived because I'd taken them on my phone. As a side note, at the time I couldn’t get new brake shoe springs for this type of shoe, Citroen DS springs are a straight swap!

Tom,
Location: Eye on the Norfolk / Suffolk border