Welcome to the Austin Seven Friends web site and forum
As announced earlier, this forum with it's respective web address will go offline within the next days!
Please follow the link to our new forum
http://www.austinsevenfriends.co.uk/forum
and make sure, you readjust your link button to the new address!

Thought the same but hesitated to comment lest it alerted the robber band 
Location: Melbourne, Victoria, Australia.
Nick,
Had another look at the ply, and it's just the edges that break away so I may be lucky, but only time will tell.
Will take lots of photos and measurements just in case it behaves like an Egyptian mummy.
Bryan,
Springs look fine, but haven't tried removing that Coir yet. Talk about dust, so that must be original.
The string was looped through holes in the Rexine below the leather, thus holding everything in place.
The filling for the seat cushion comprises of a fat piece of foam
Simon,
Your mention of that ply reminded me that I stocked it in my hobby shop, for model aircraft use.
Will keep it in mind if needed.
Thanks.
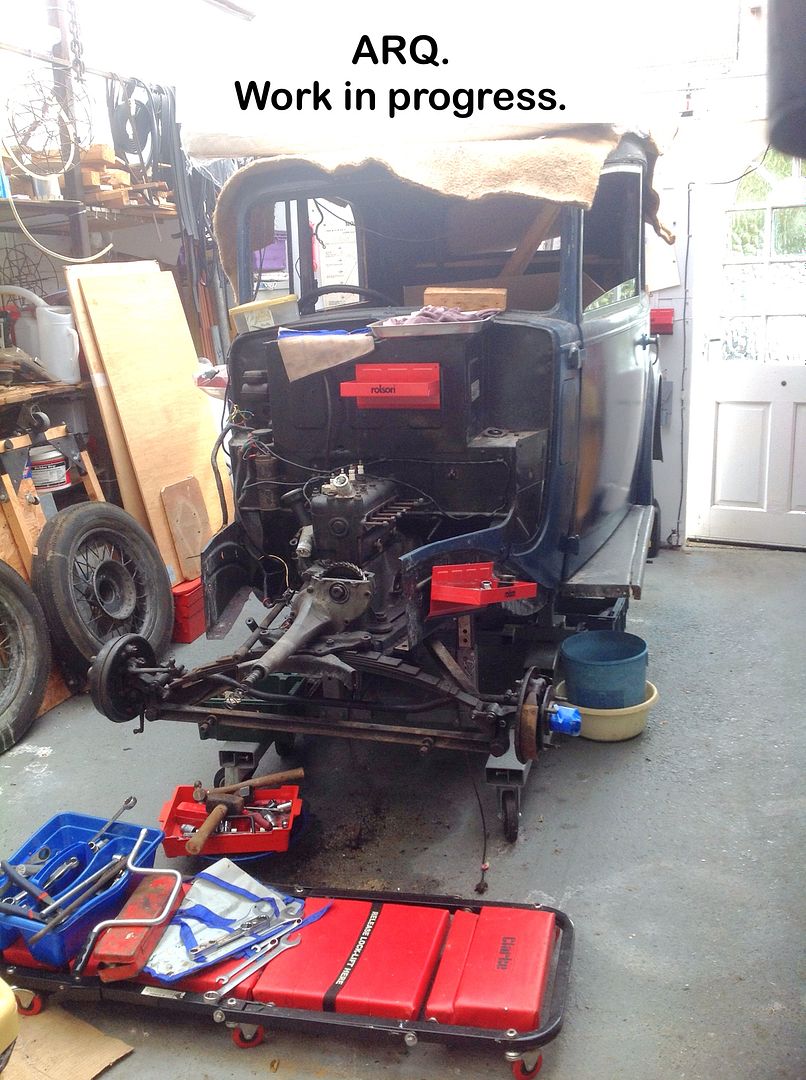
Geoff - Champing at the bit to get the body off now.
Location: South Norfolk - Next to Suffolk
Back on the job after far too long an absence sorting out an issue with the lathe, then replacing Summerhouse felt amongst other things.
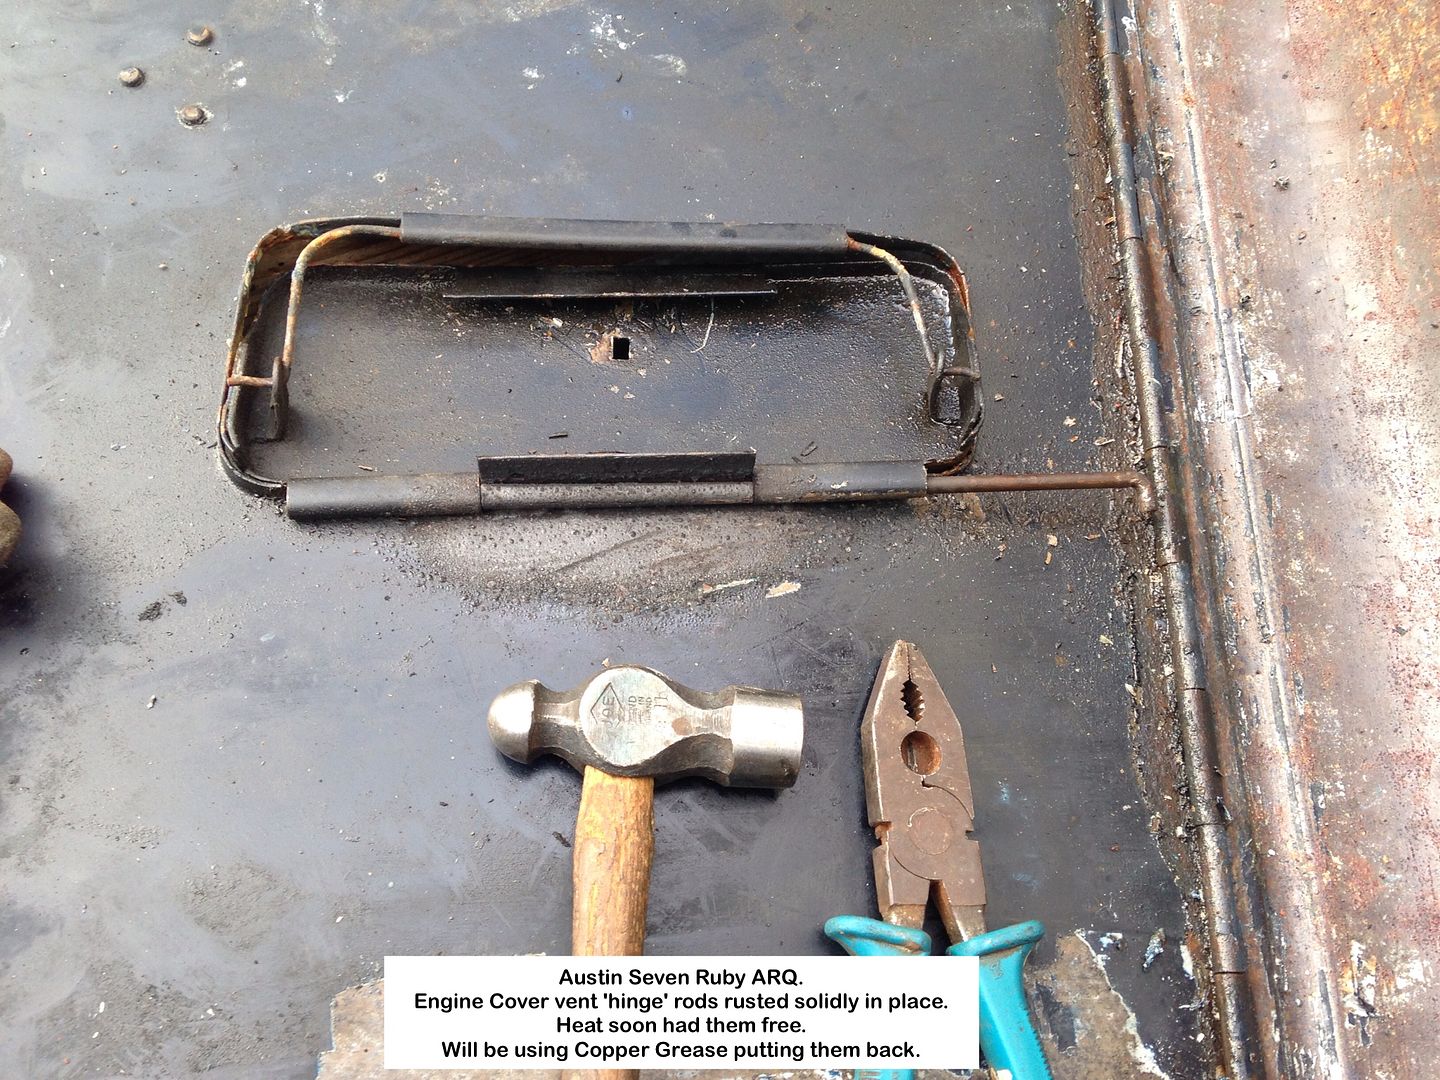
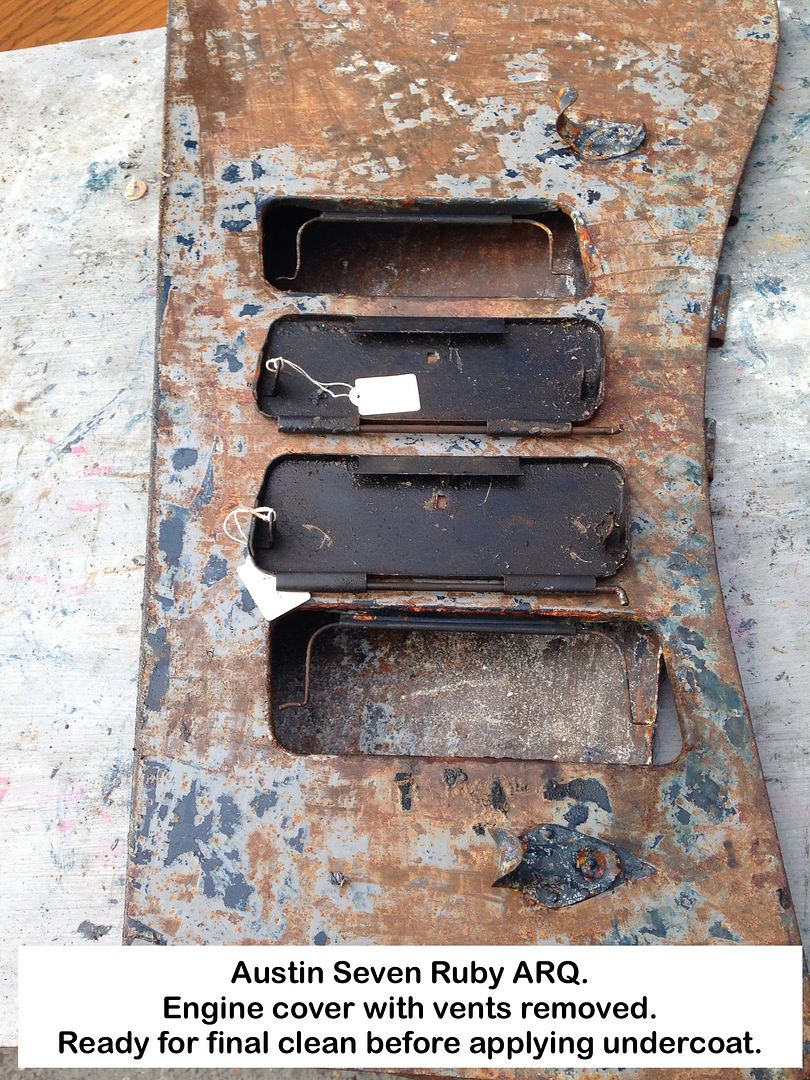
Engine cover vents.
Could only remove one of the 'hinge' rods as ALL the others had rusted in place and just would not budge even with the help of THE usual persuader, so resorted to using the ULTIMATE solution - FIRE🔥
From the end of a Blowlamp of course.
Hinge rod rusted in place, so heat applied after overnight dose of penetrating fluid.
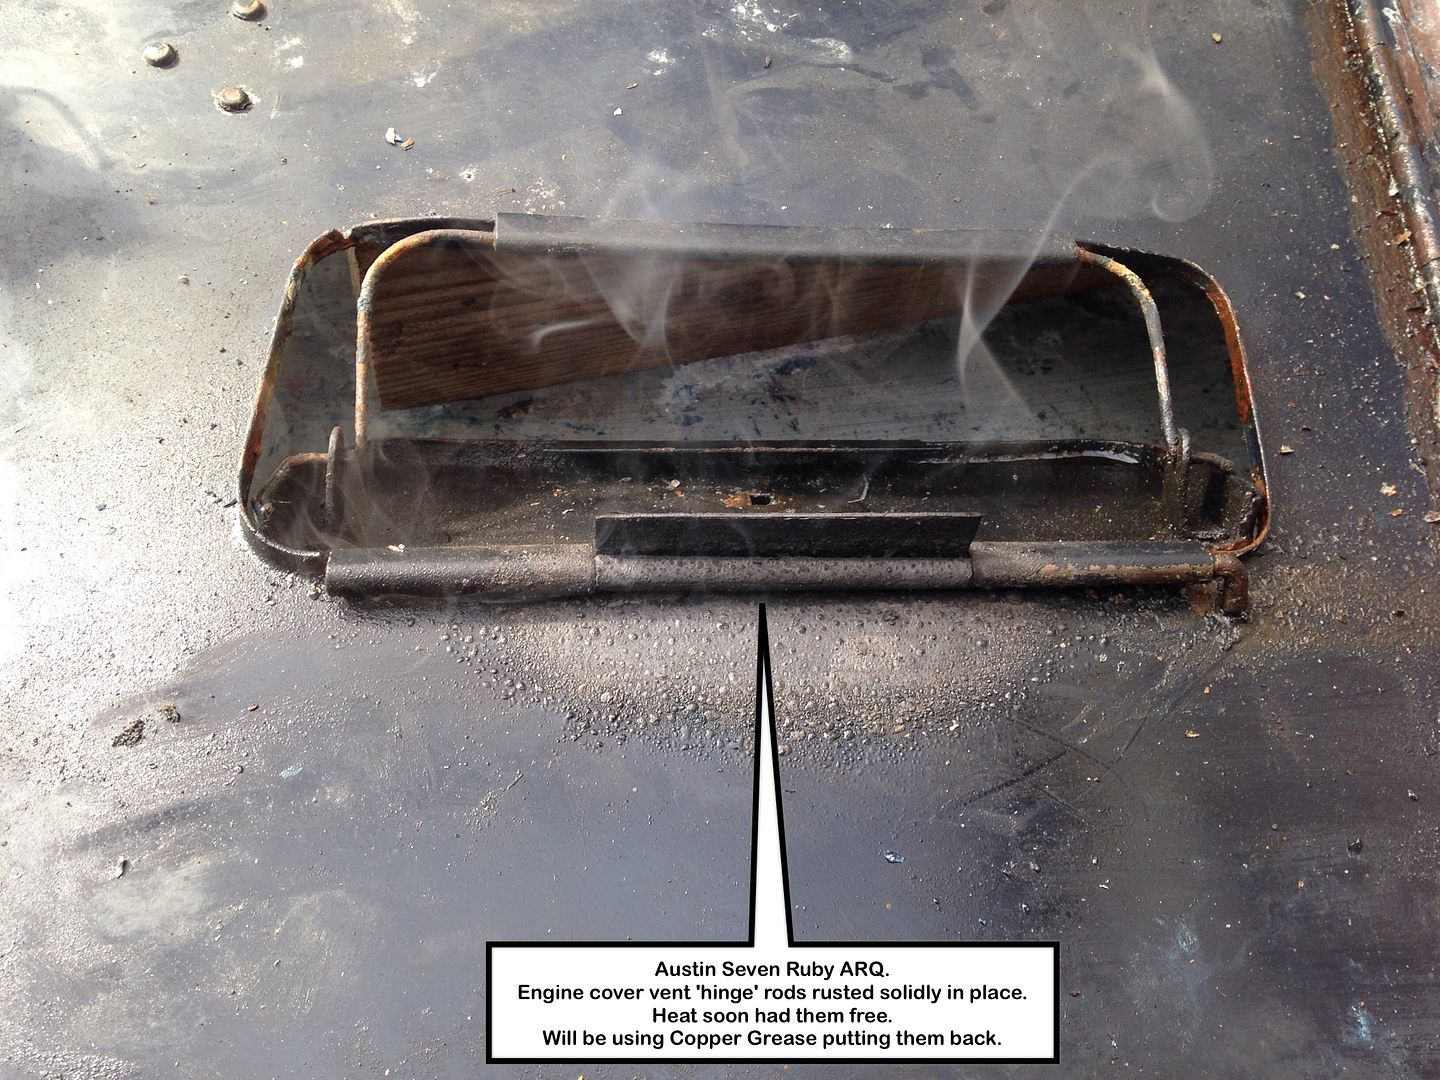
Heat and penetrating fluid did the job.
Interior ready for final clean and DTM undercoat.
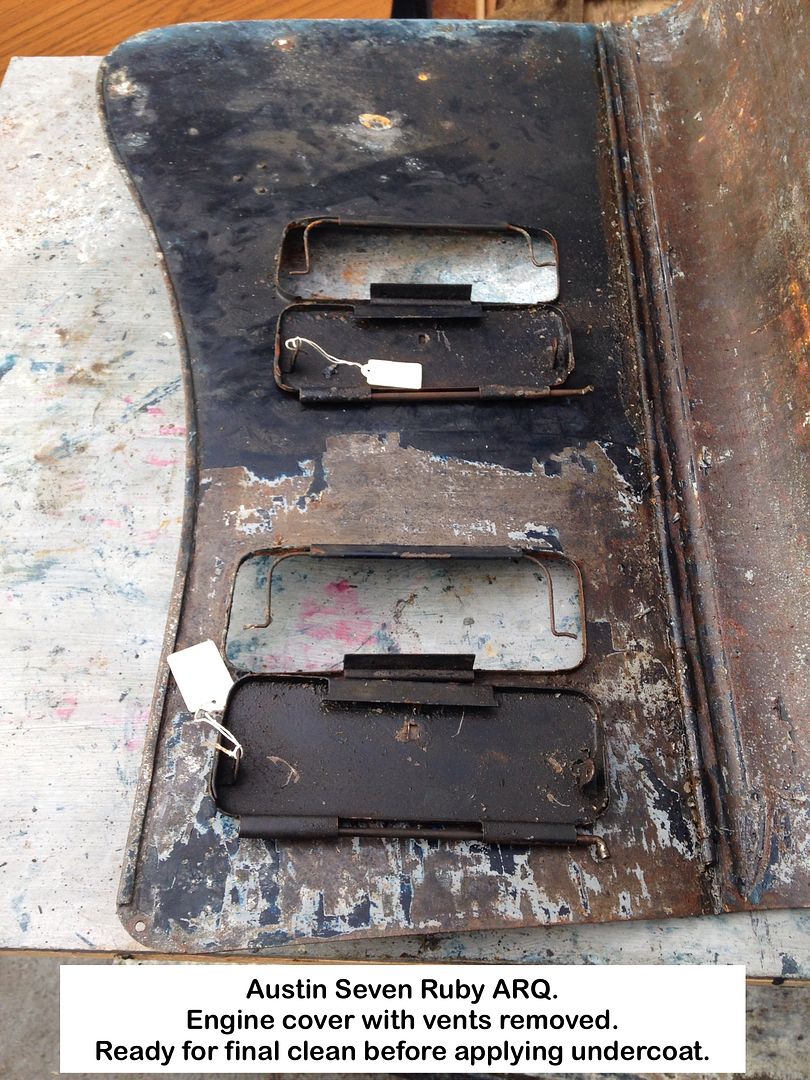
Exterior ready for final clean and DTM undercoat.
One more rear Mud Shield to do and strip the doors of glass, mechanism, strip the paint from the OS door, then apply DTM undercoat to all the loose body parts.
I can then get the body back into the Carport for repairs, especially making good the horrible mess done to the NS door lower hinge area, ditto the NS B-pillar bottom section, final stripping of paint, then application of DTM undercoat, then decide how to proceed.
May apply the top coat/s to the body with the doors attached, but not sure.
Advice please from anyone who has done a bare metal repaint, especially on sequence used.
Geoff - Progress at last.
Location: South Norfolk - Next to Suffolk
Back on track at last!
At last I'm making progress as weather is far more conducive.
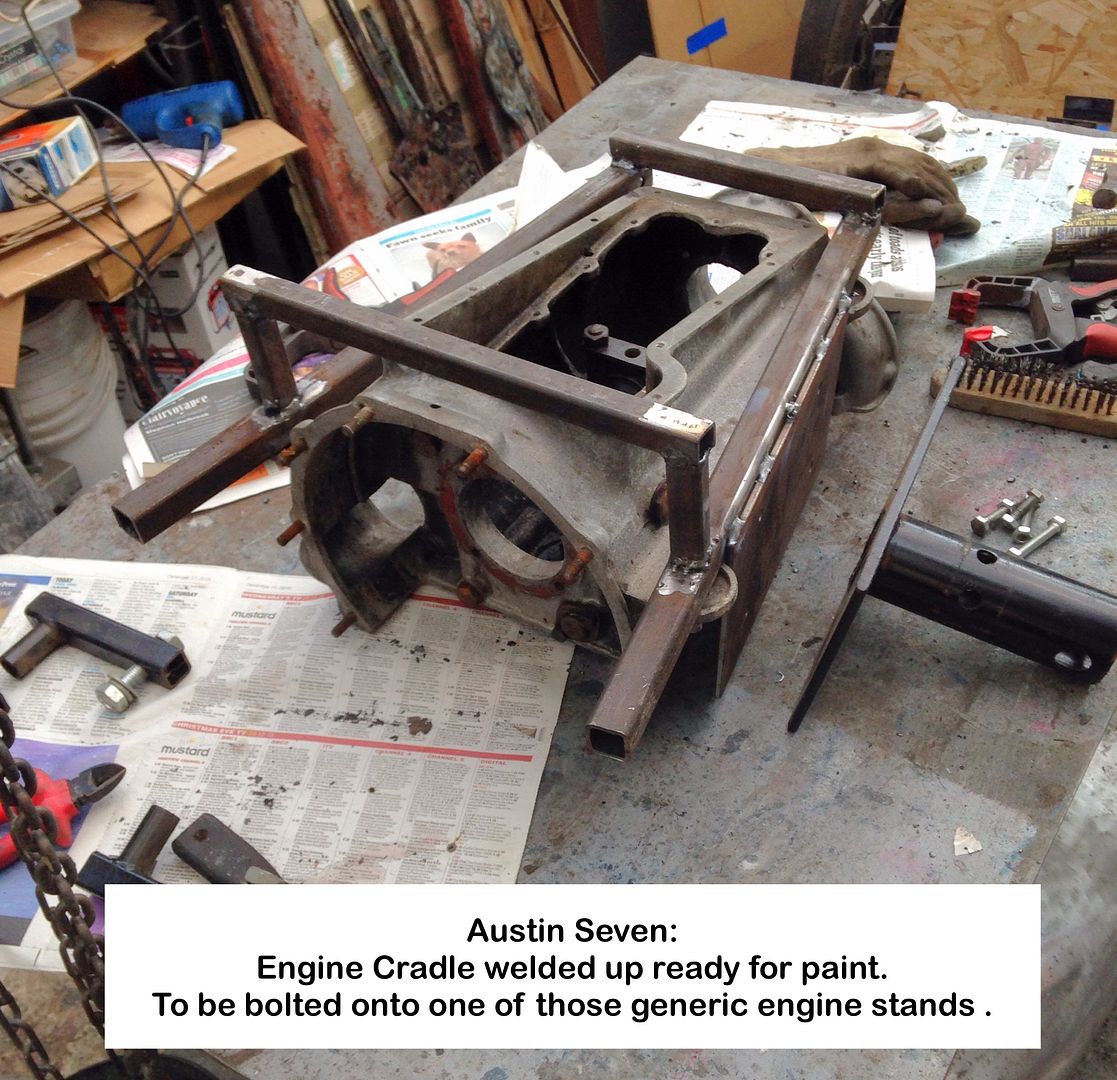
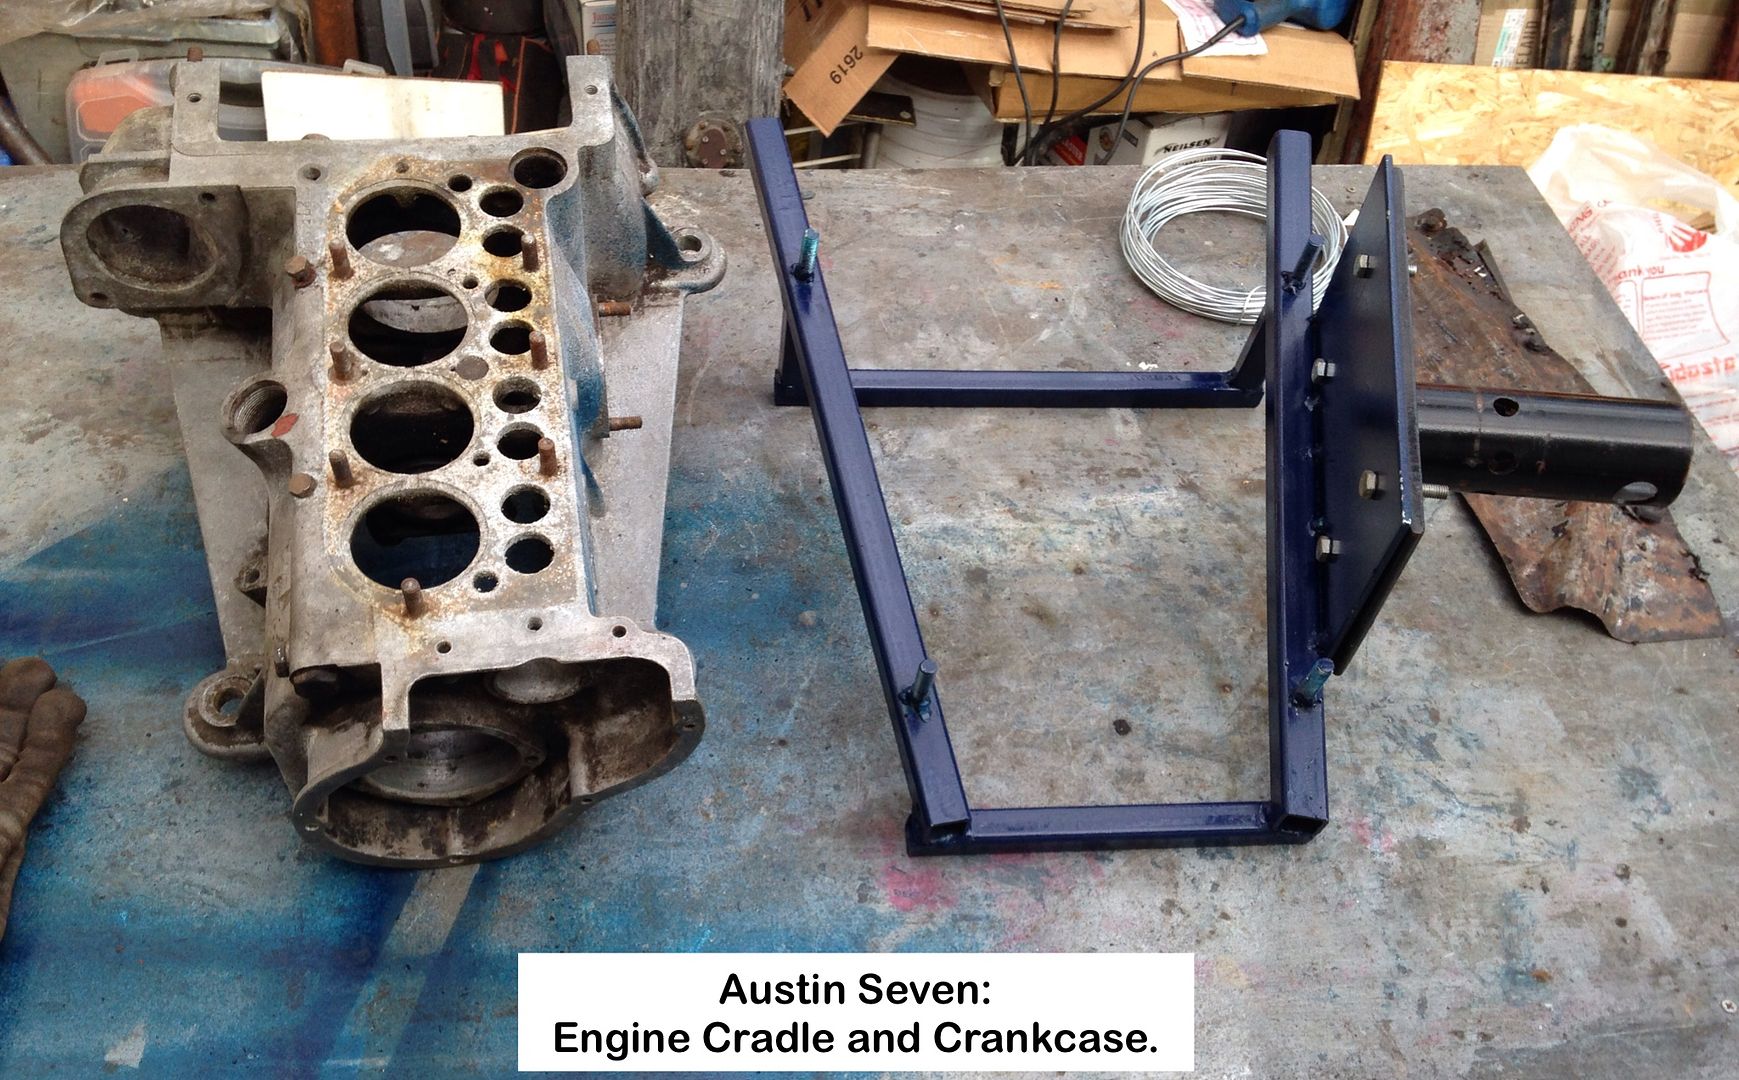
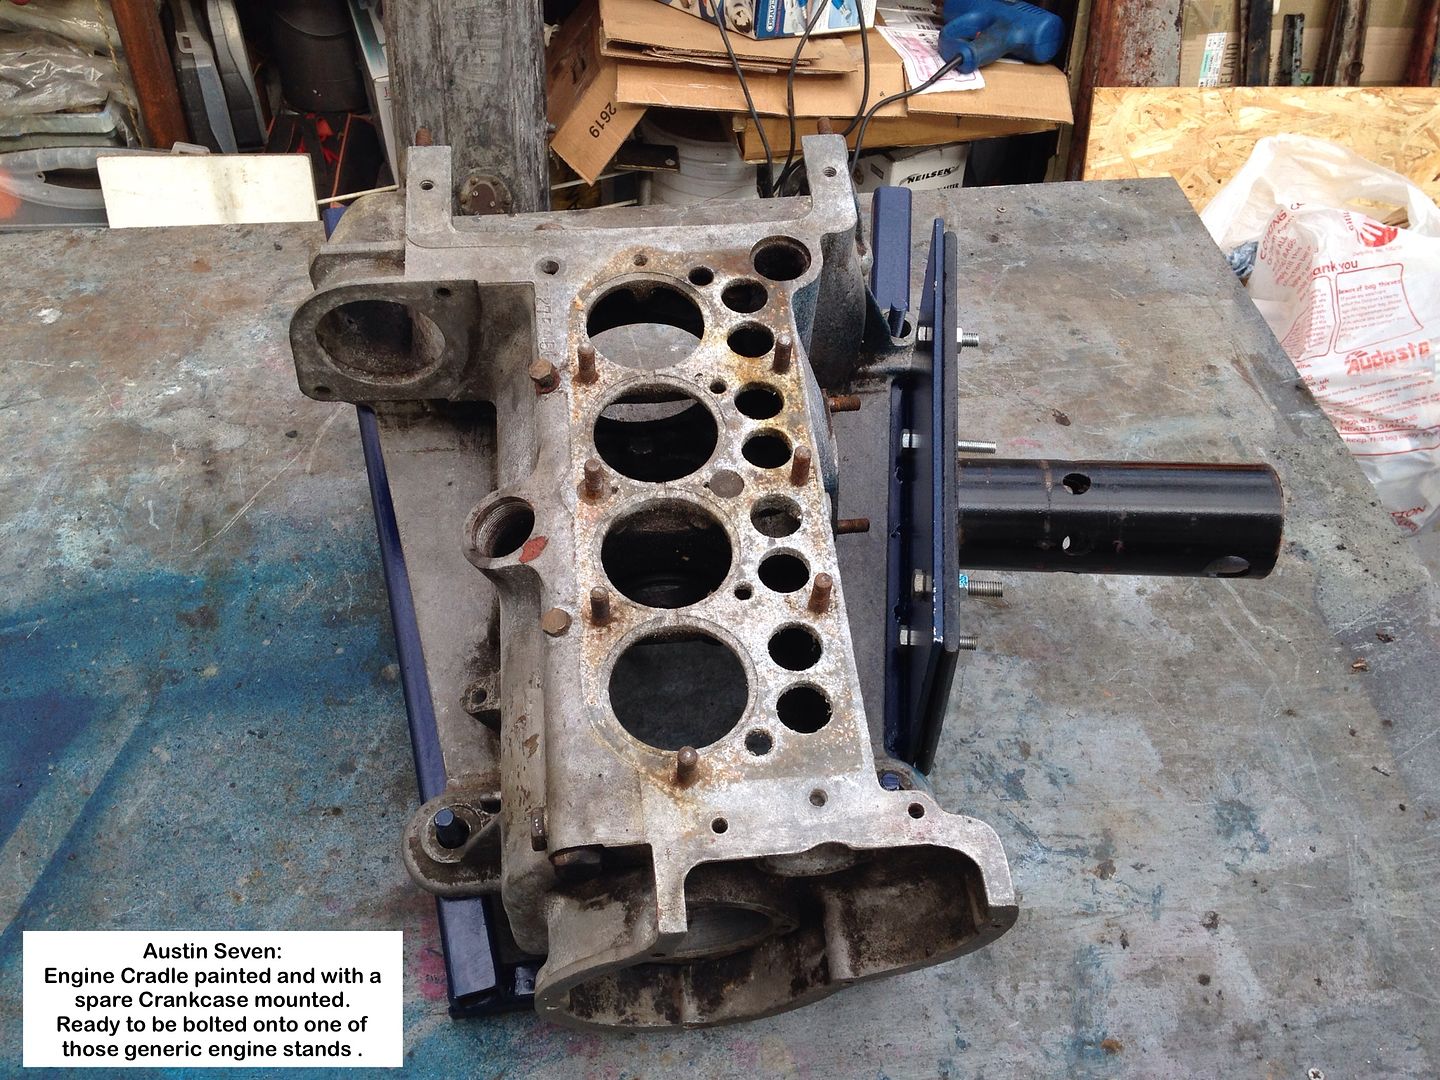
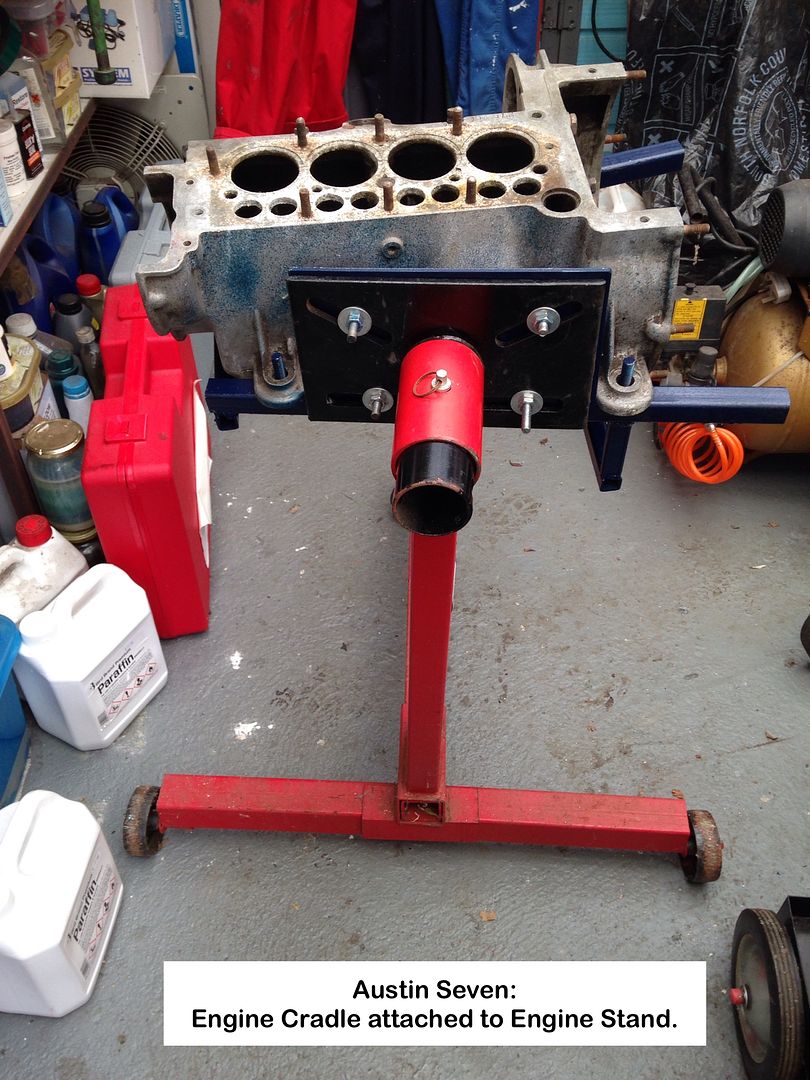
Engine Cradle.
Now that I have sorted the lathe out, it was time to think about some way of getting the engine and gearbox attached to my generic engine stand, and then into the Workshop so that I can work on it at night in comfort.
I did the usual internet search, for a suitable design, but only found one that looked as if it would hold an engine weighing a ton.
Having a spare crankcase to hand, it was easy to use it as a template.
It took just a few days to come up with a suitable design that was simple, light plus quick and easy to make.


Video of the assembly being used.
Geoff - Now to carry out repairs to the parts taken off of the car.
Location: South Norfolk - Next to Suffolk
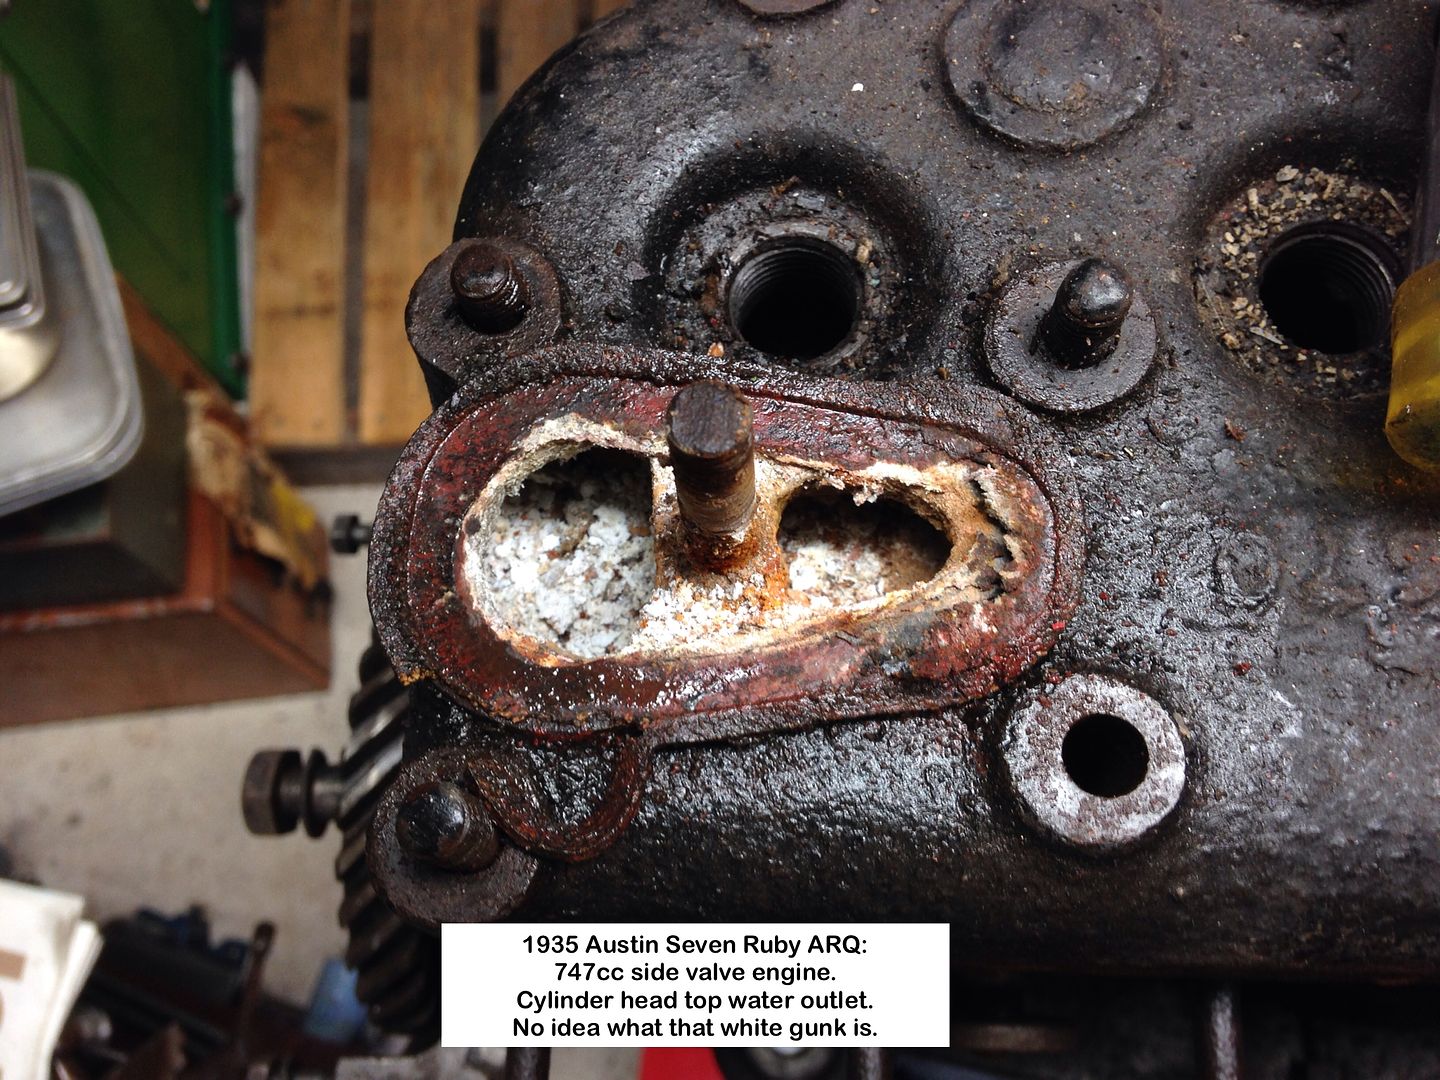
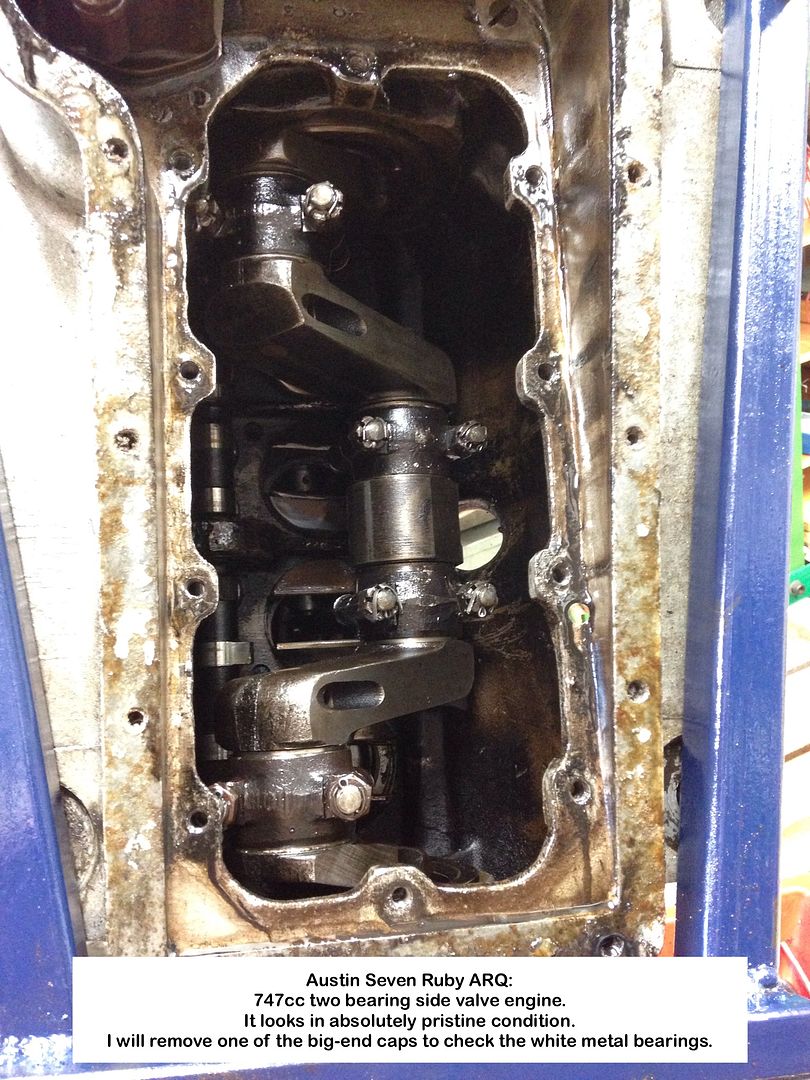
Been checking the engine and it appears to be totally unmolested.
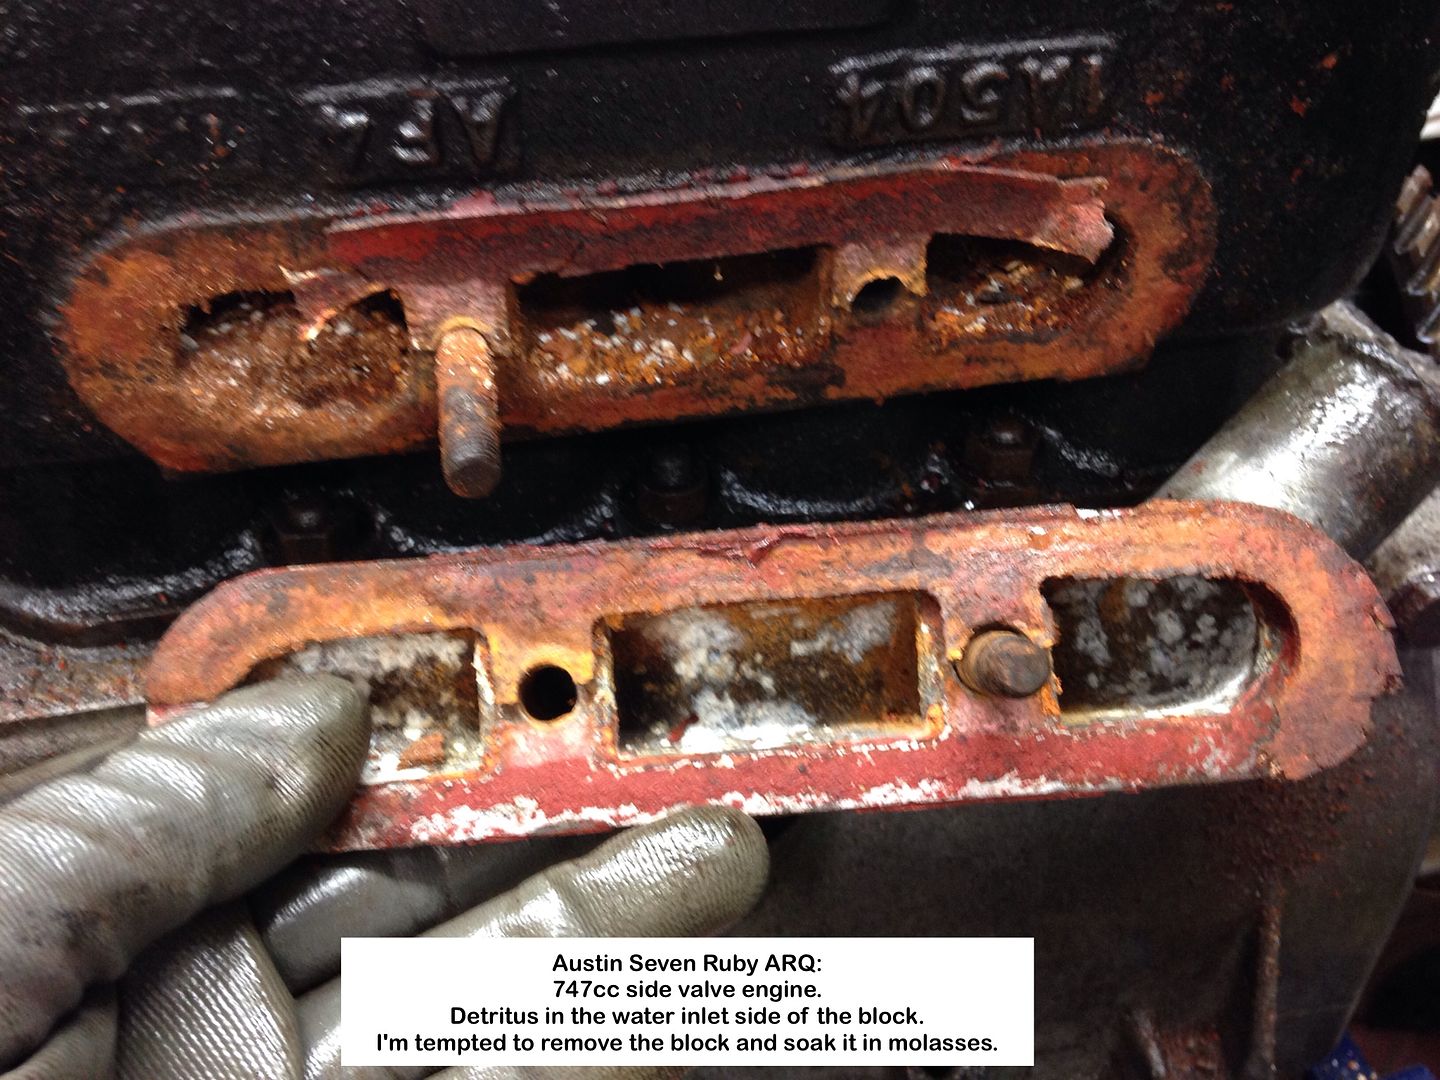
With all that white gunk in the top water outlet, and the detritus in the inlet aside of the block, I think it best to remove it and soak it in molasses, as I will be doing with the head, after removing all Welsh plugs.
There is absolutely no wear in the bores, much to my surprise, but haven't cleaned top of pistons yet to see if there is any oversize stamped on them.
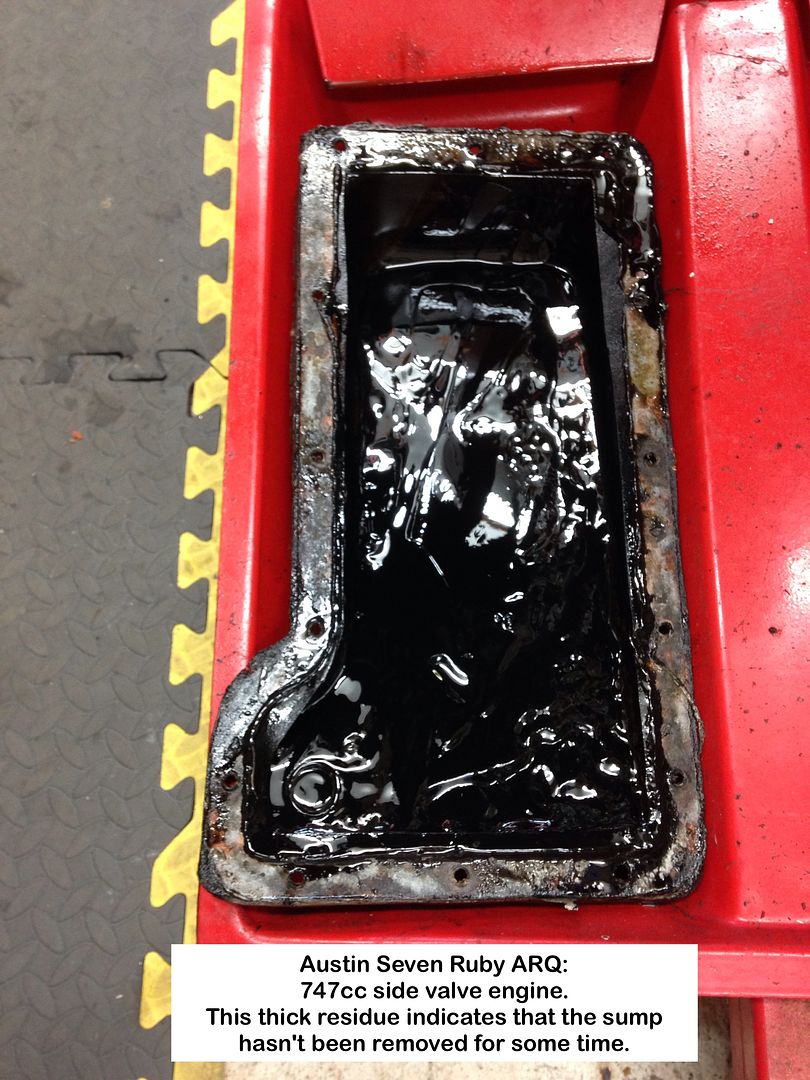
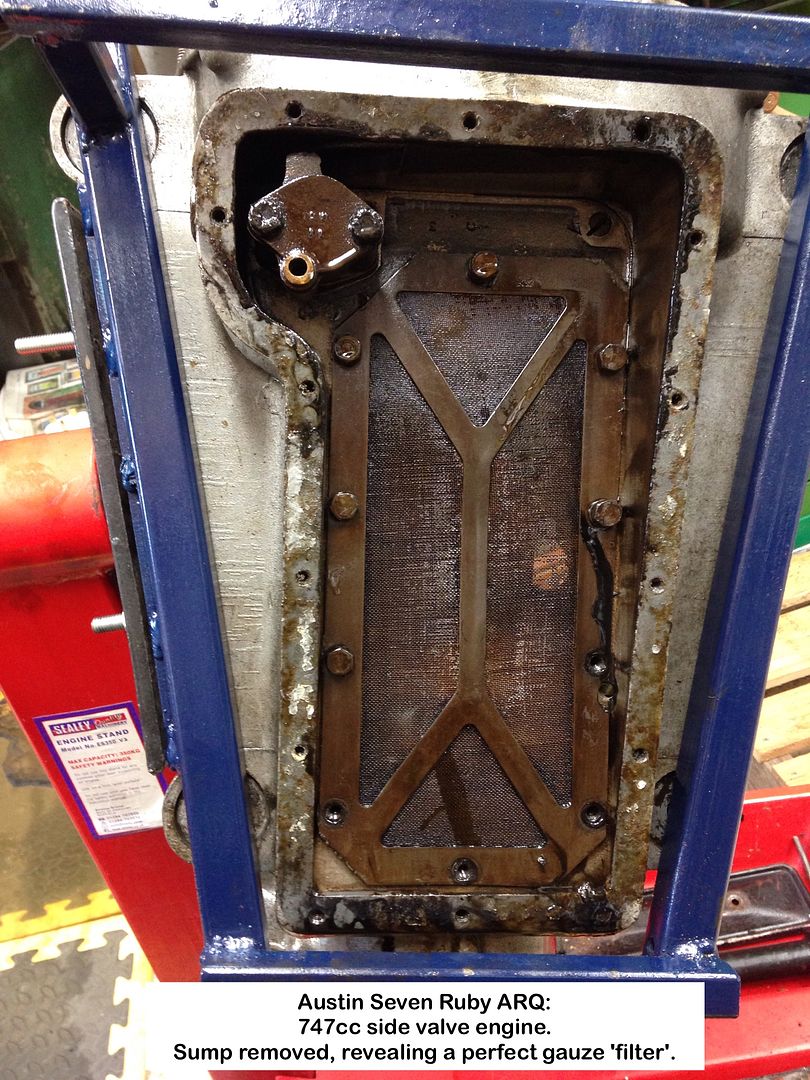
That thick sediment in the Crankcase Bottom Cover, indicates that it hasn't been off for ages, if ever.
I shall be removing the crank and rods to check for cracks, seeing that the engine is out.
Geoff - Busy stripping the loose body parts.
Location: South Norfolk - Next to Suffolk

Thanks for putting me right Ruairidh, and compliment.
Do I bolt the box back on top of the black paint, or scrape it away, down to the DTM coat?
Geoff - Surprised at the impression made though.
Location: South Norfolk - Next to Suffolk
Thanks - 👍
Geoff - One item not to worry about then 👏
Location: South Norfolk - Next to Suffolk
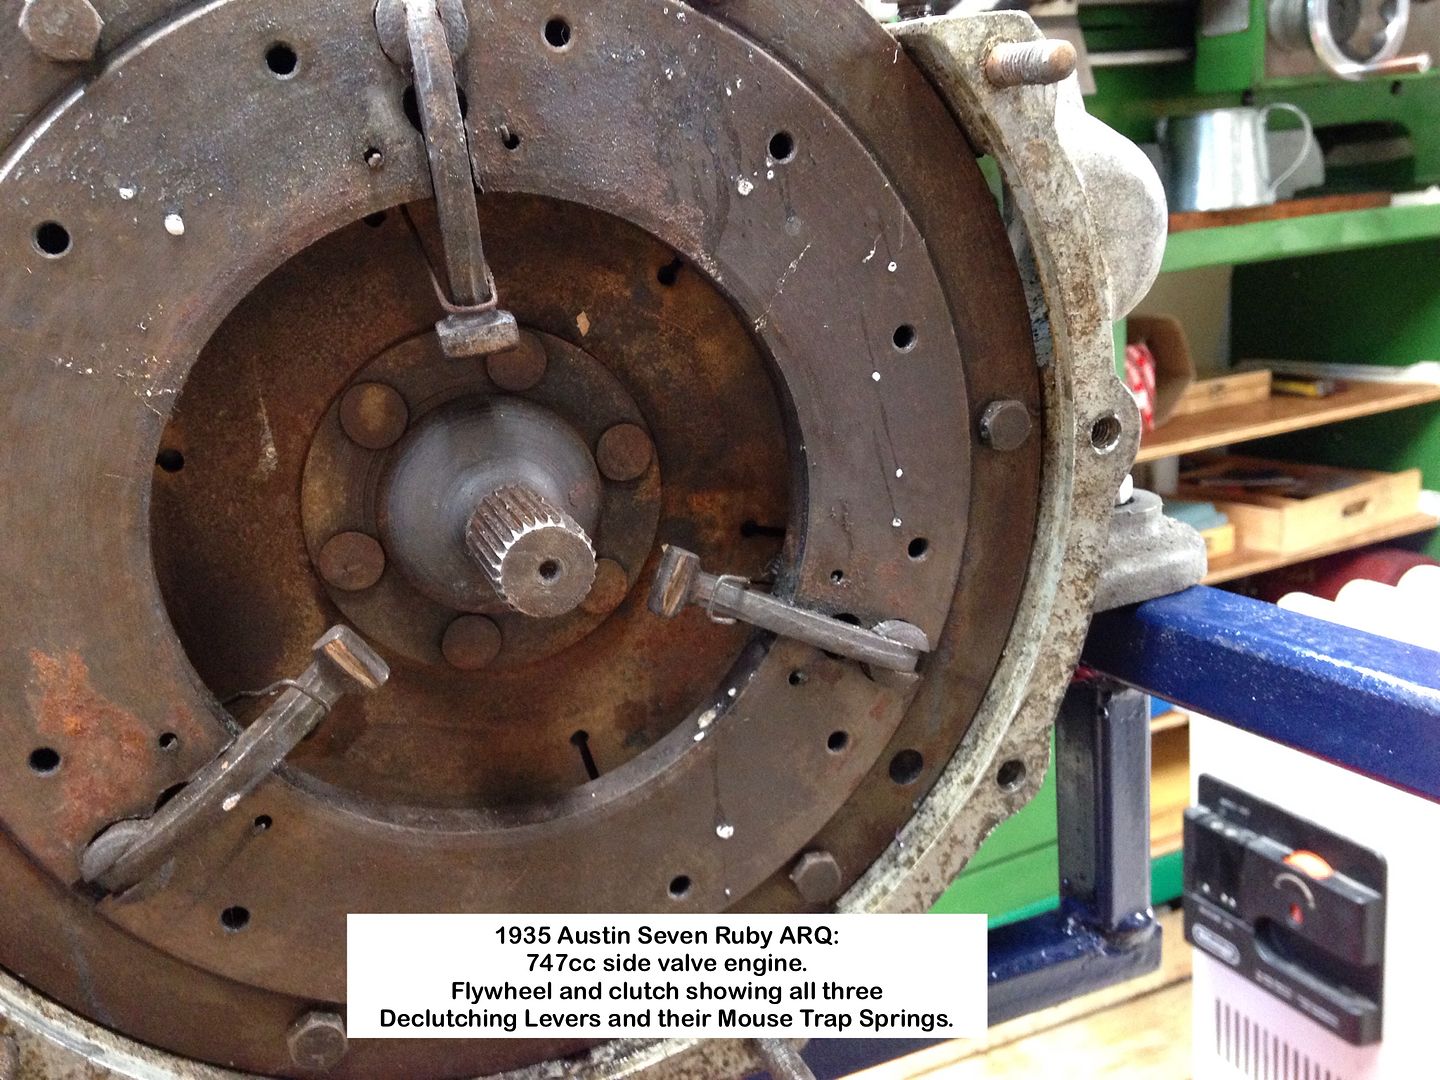
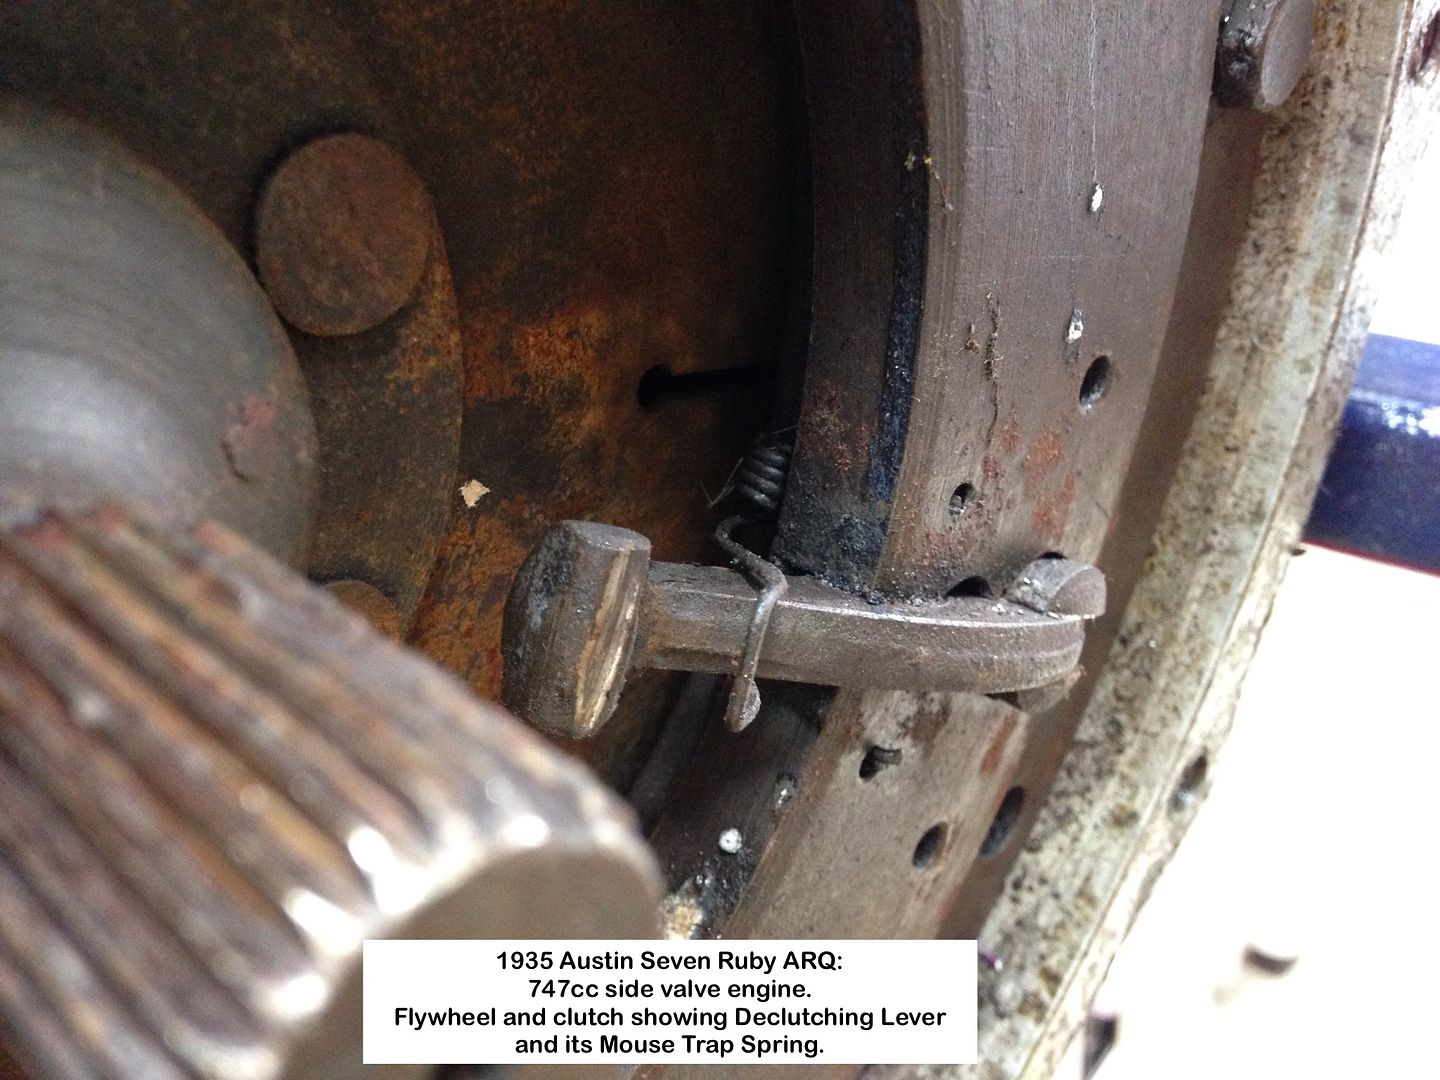
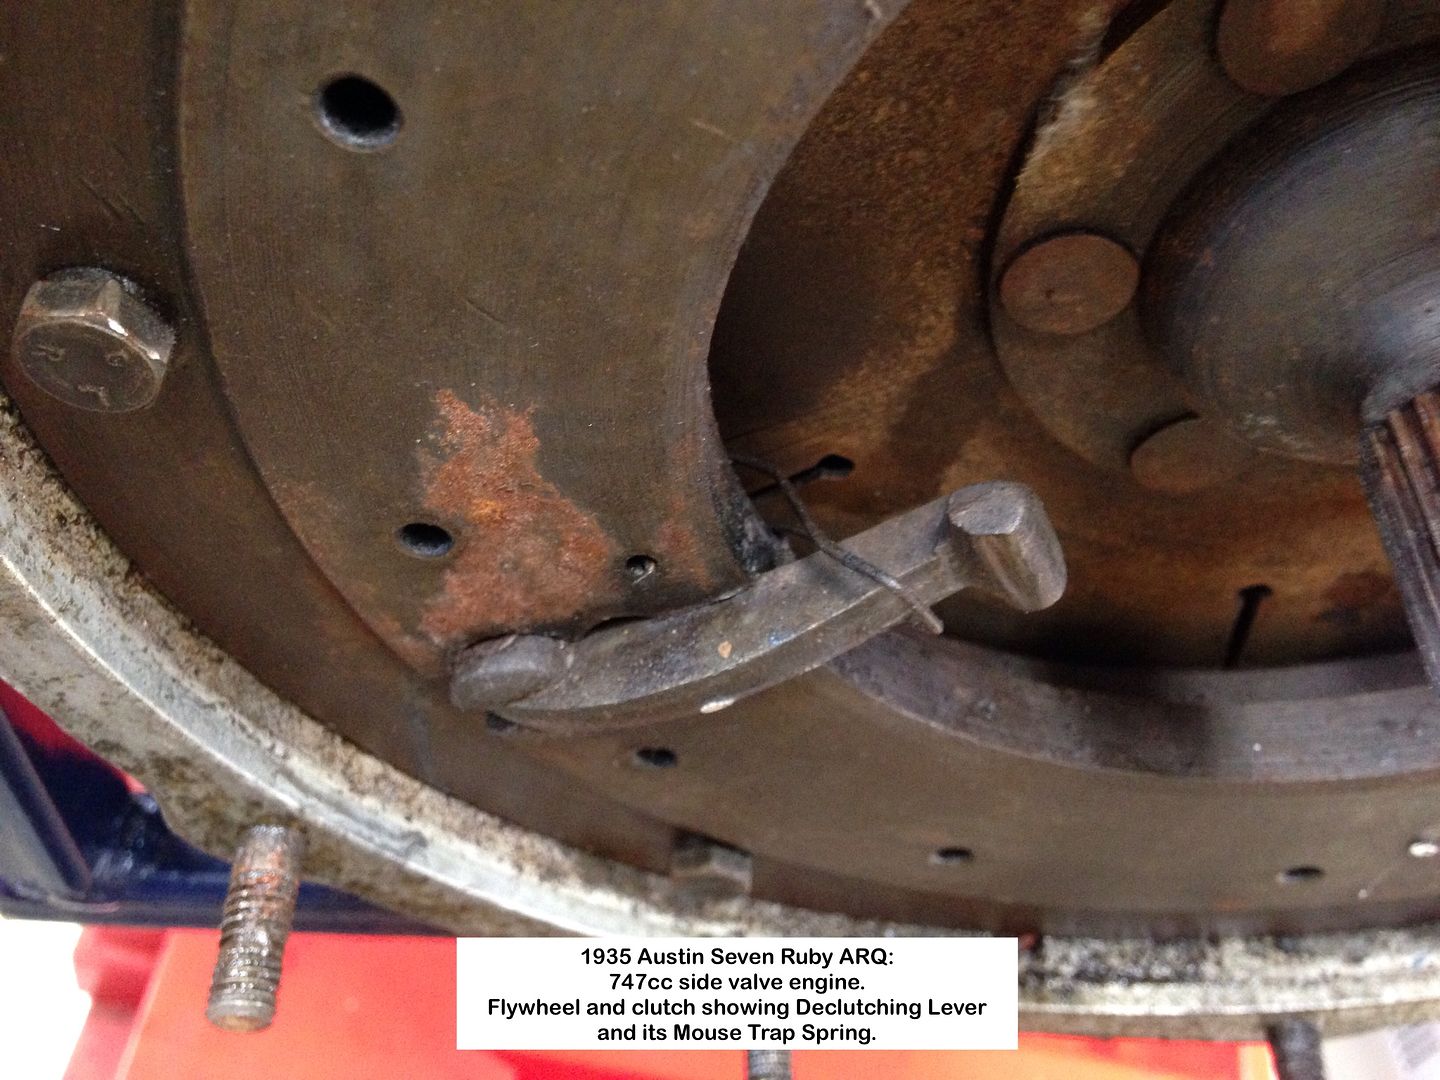
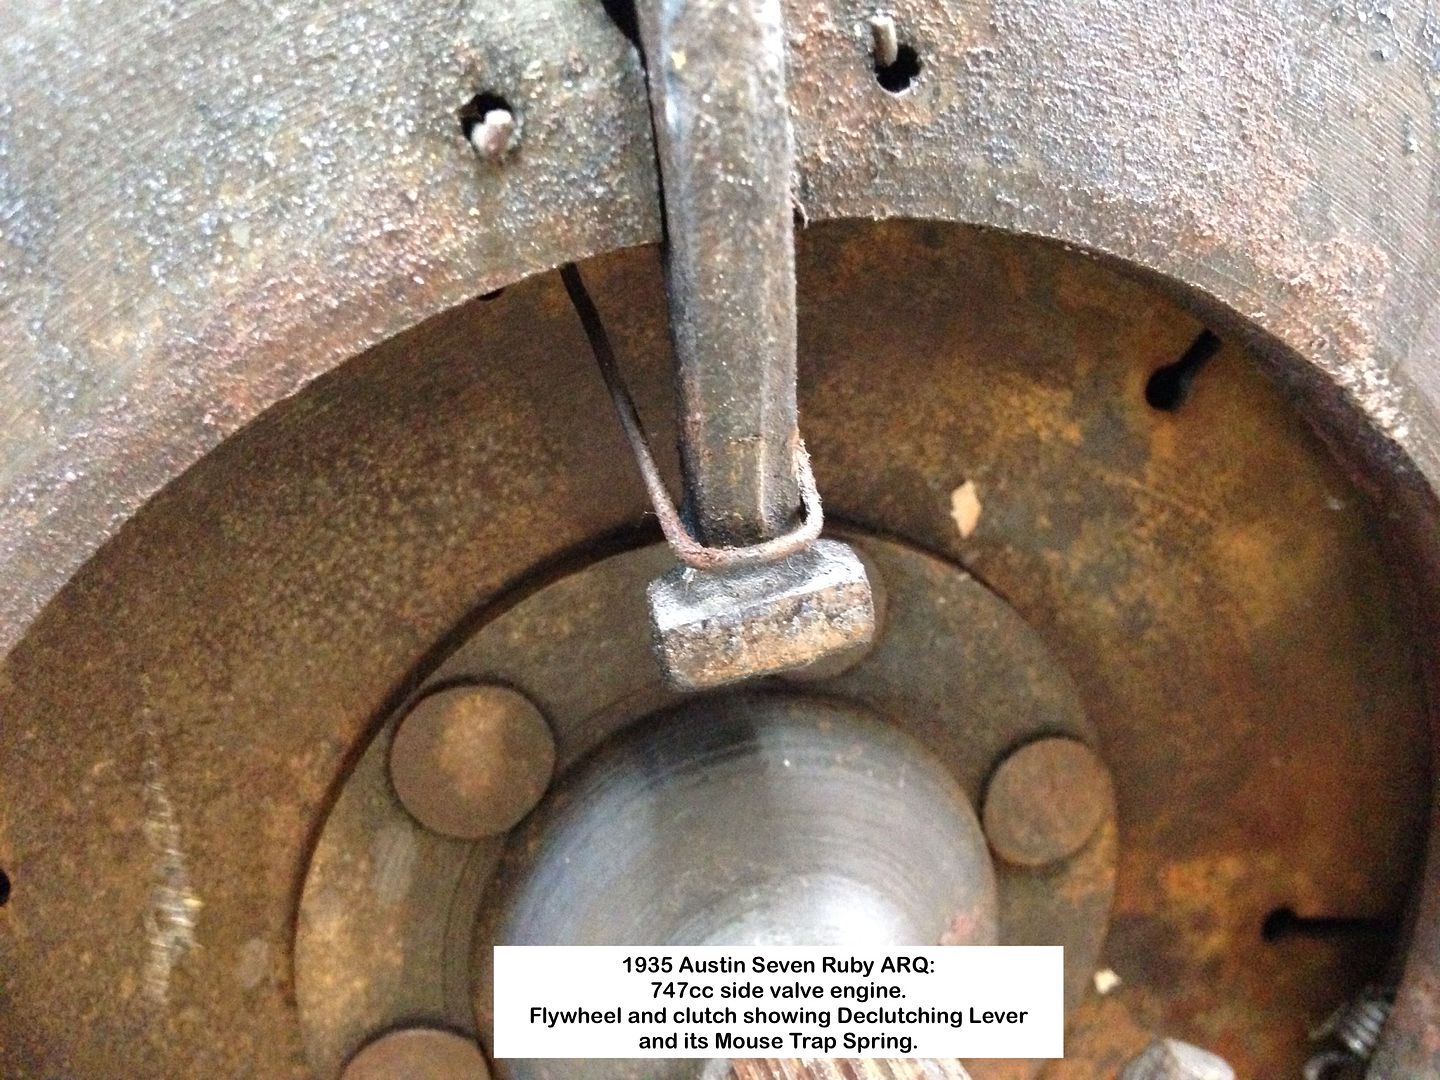
Clutch Mouse springs.
Not sure how these should appear once fitted.
Should they be loose as two are, or resting up against the Declutching levers.
Geoff - More stripping today.
Location: South Norfolk - Next to Suffolk
Quick sideline, as I will be using the machine to do upholstery.
Singer 660 A1 sewing machine:
Have at last got the beast to operate as if it has a servo motor fitted.
Now nice and slow
Proof:
Singer operating
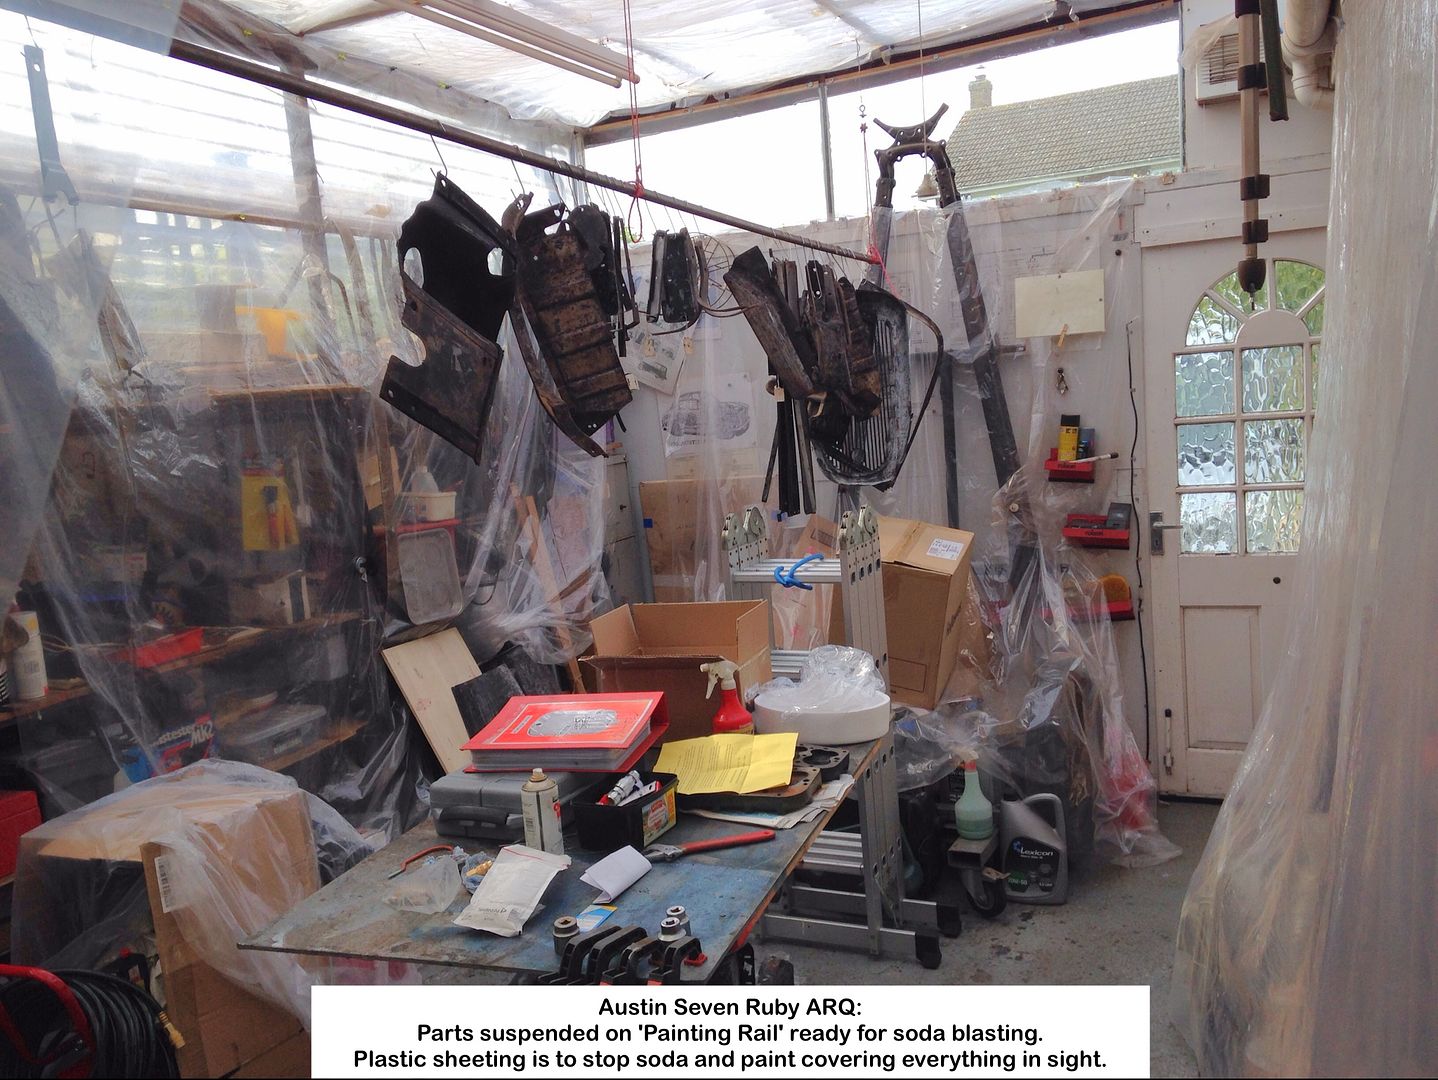
Ruby Painting:
Thinking about how to proceed with painting the loose body parts, once stripped of paint, I came up with the 'brilliant' idea of hooking them onto a rail suspended from the Carport roof beams:
New toy:
The old compressor proved useless at doing much more than operating an air gun, airbrush or inflating tyres, but it then started tripping the ELCB before the pressure switch died, after spewing a fat spark.
I had bought a Miller Soda Blaster (MSB) years ago, so what better time to actually start using it, but a more manly compressor was needed.
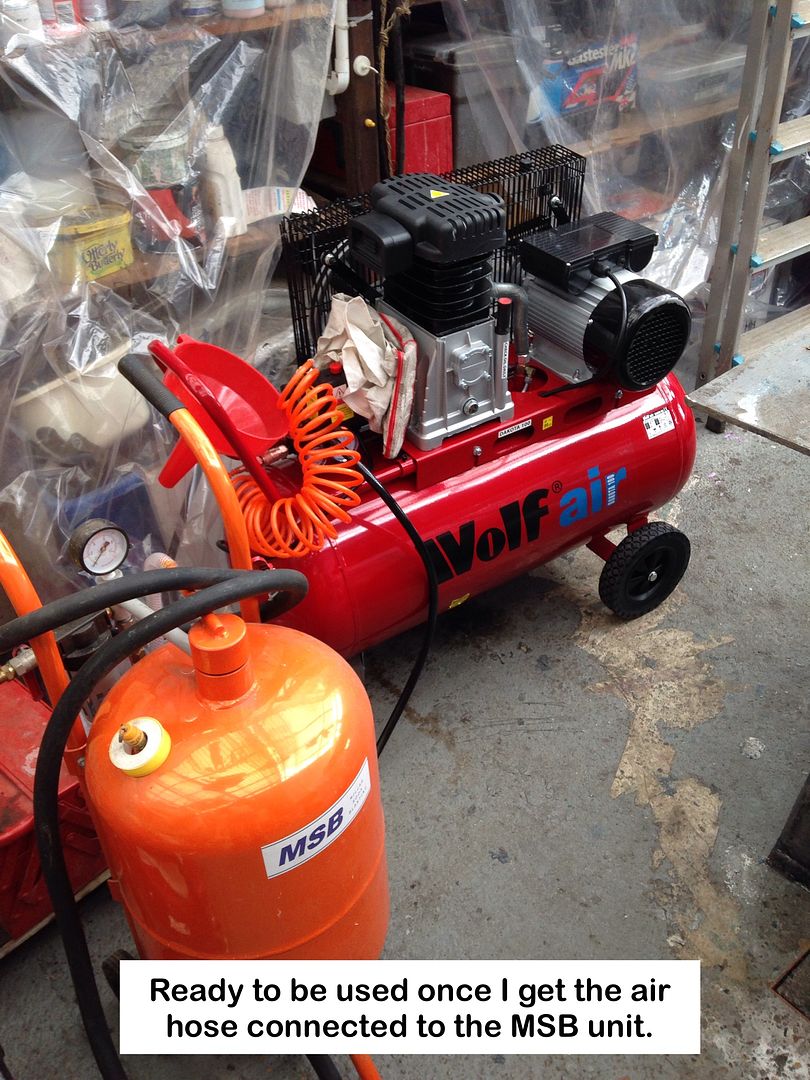
Wolf Air Dakota 100 the new toy the result:

Assembled and next to the MSB unit:
Photos of the method I used to fit the wheels:
http://s1104.photobucket.com/user/Geoff_Halstead/Wolf%20Dakota%20100%20compressor/story
Engine:
Whilst waiting for an adaptor to connect compressor to the MSB unit, decided it was the perfect opportunity to strip the engine.
Removing the Flywheel
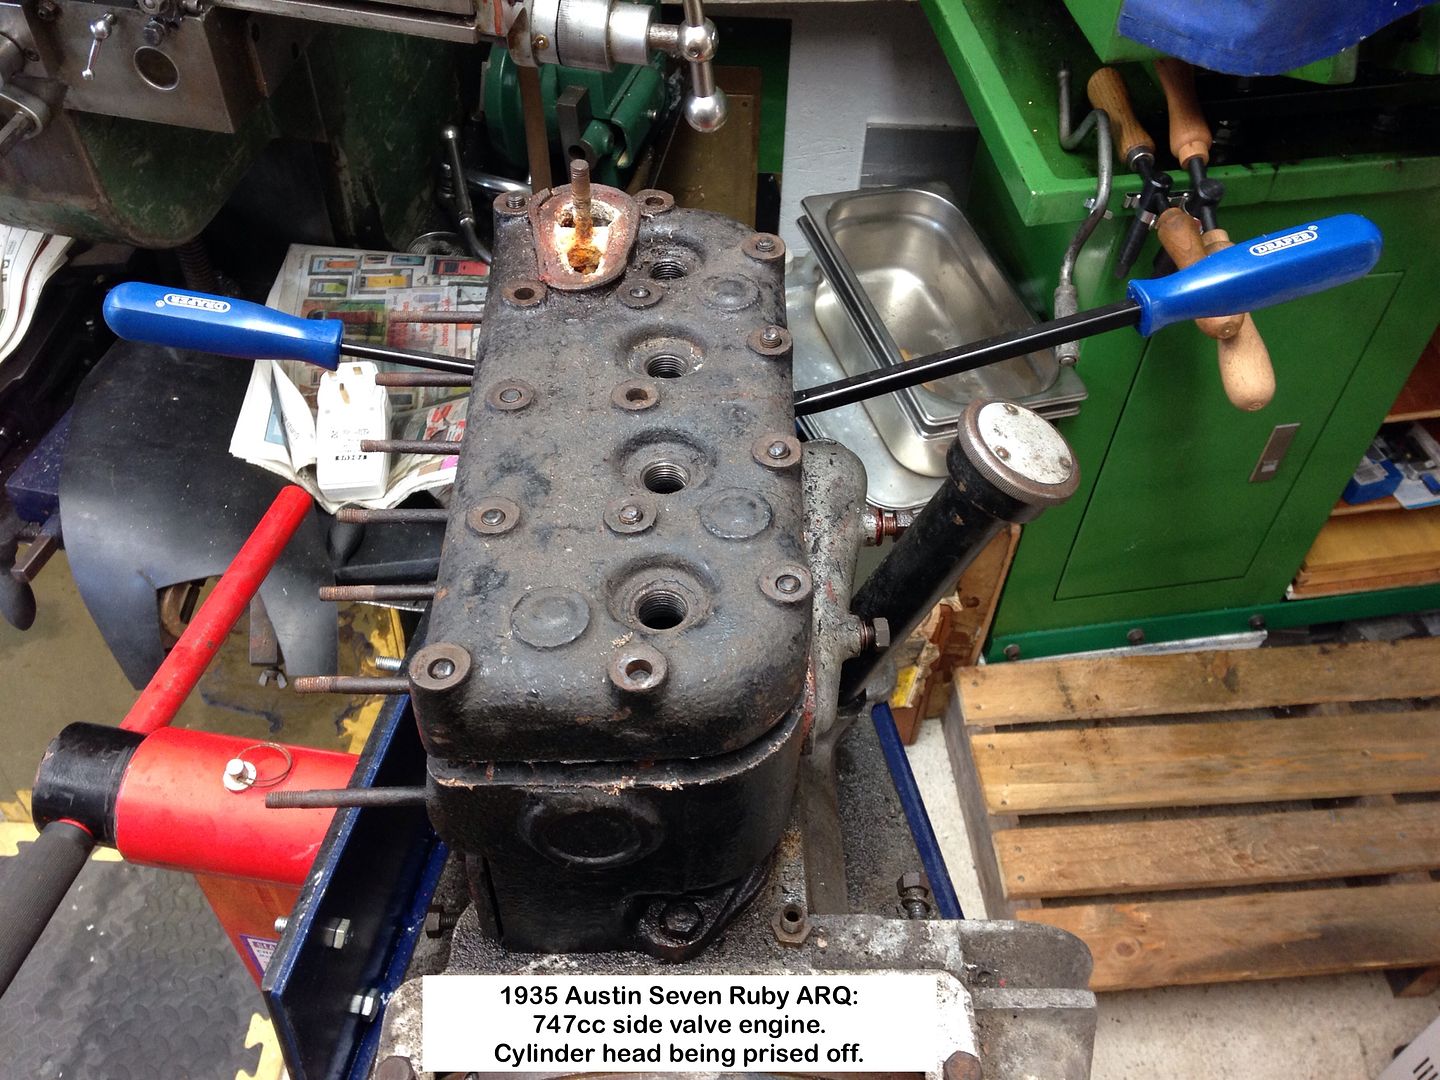
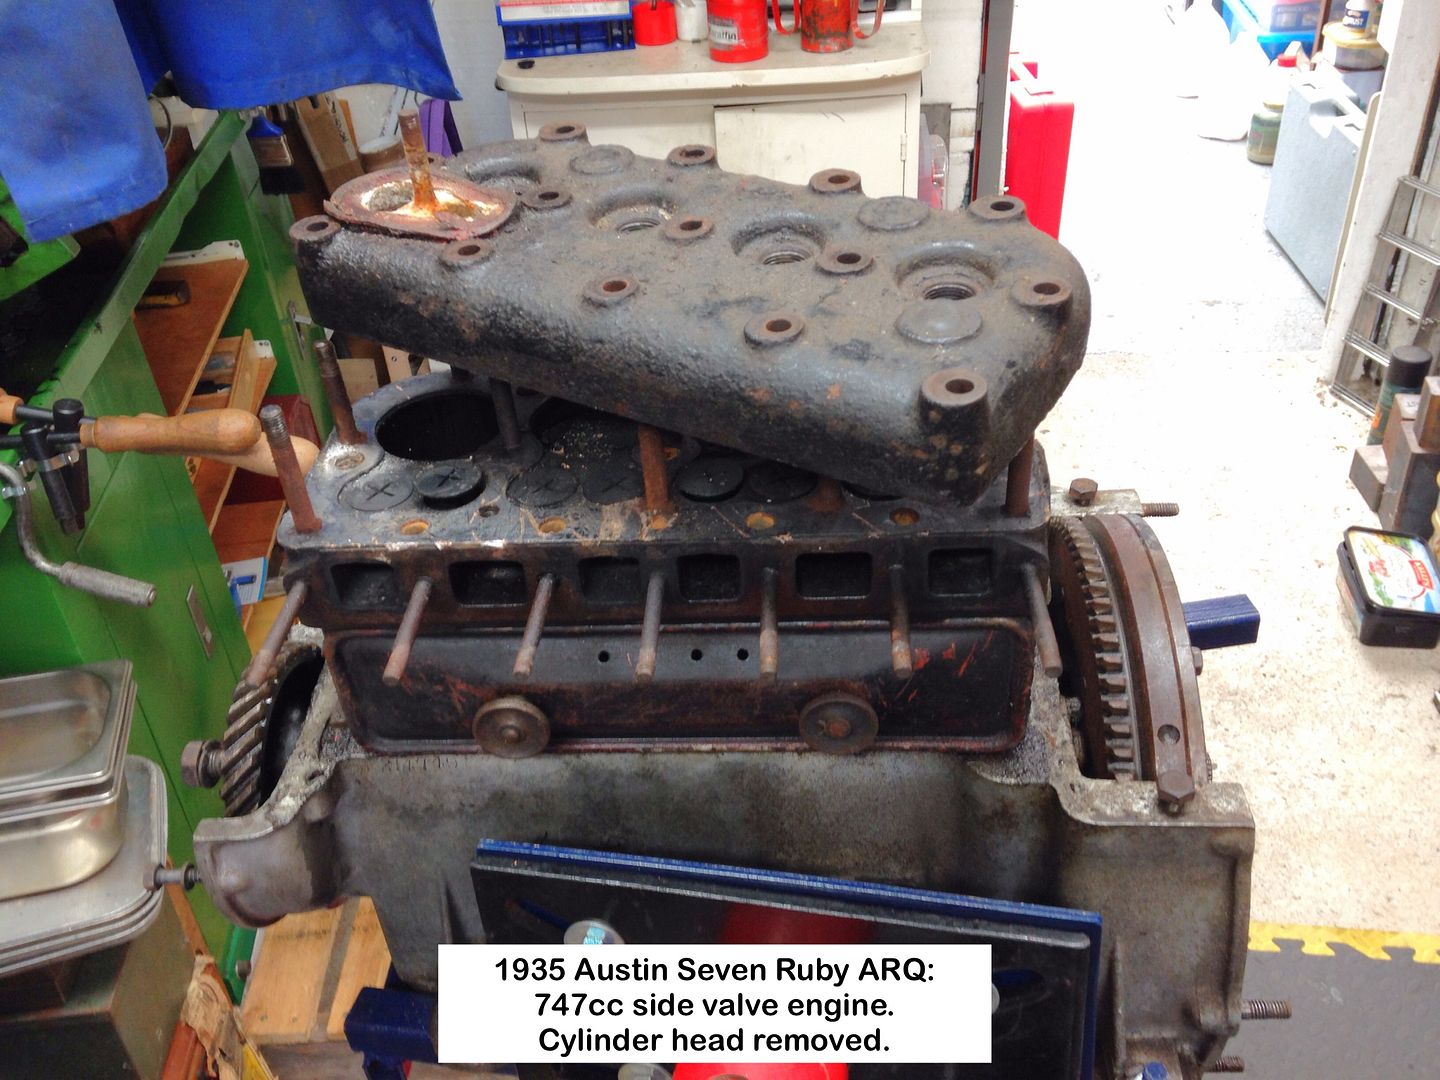
Removing the Cylinder Block
Cam followers and valve springs removal
RubyEnginePartsOganiser
REPO
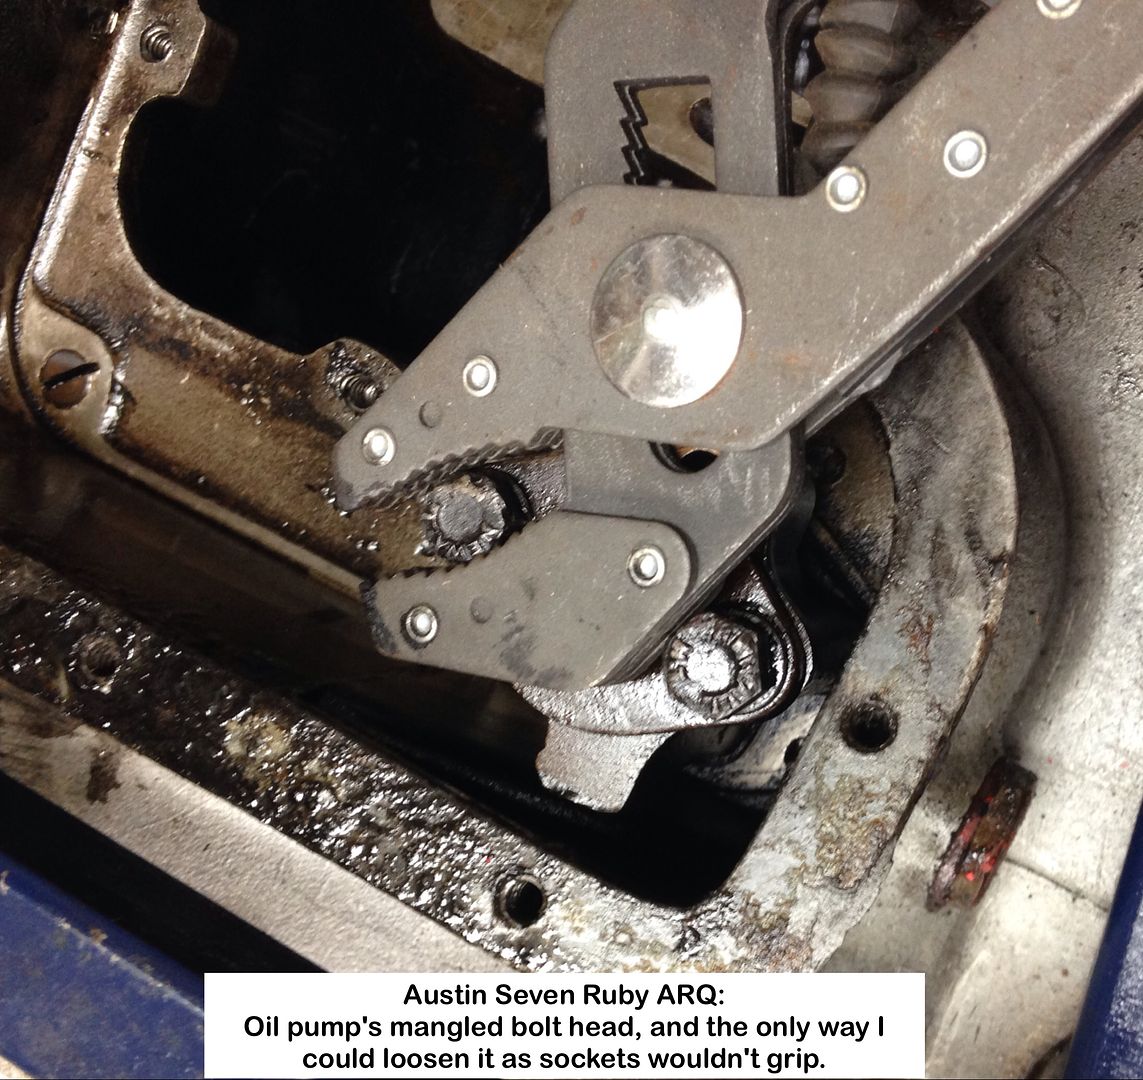
Mangled bolt head on the oil pump:
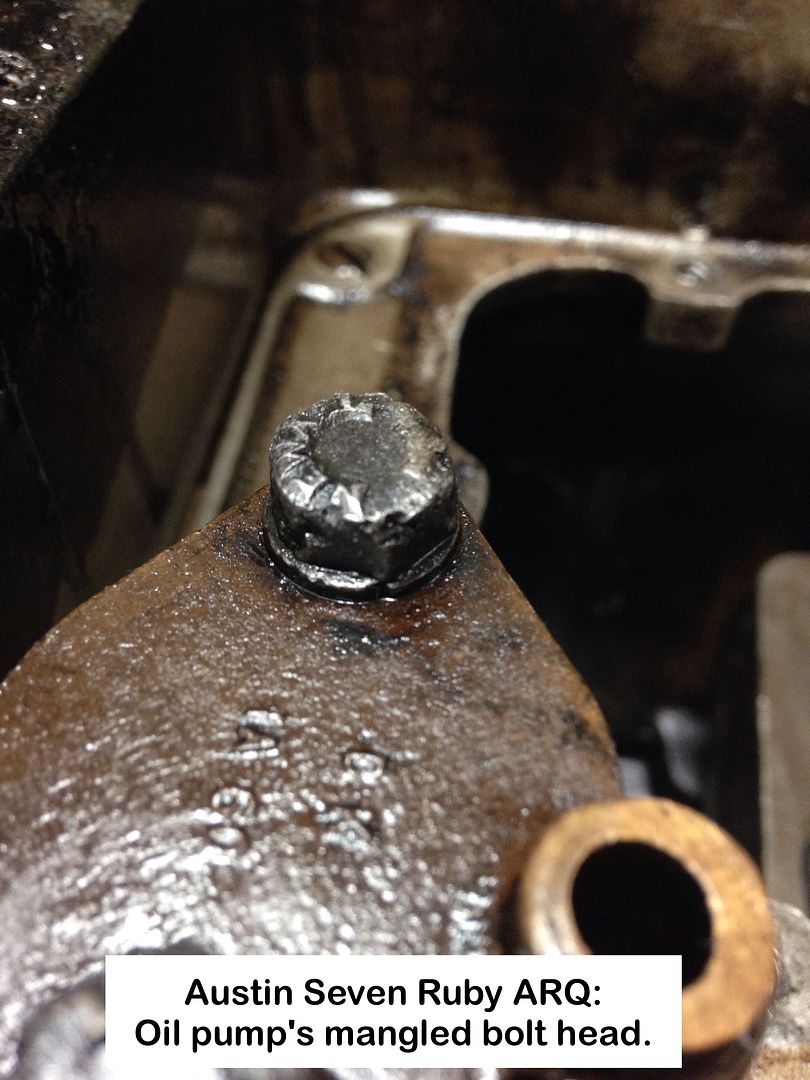
The only tool that would loosen it:
Geoff - Approaching 30° in the Carport 😓
Location: South Norfolk - Next to Suffolk
The Singer sewing machine is now behaving impeccably.
Foot pedal to clutch lever tidied up
Perfect control now
Geoff - Busy editing the video showing the crankcase bearings being removed.
Location: South Norfolk - Next to Suffolk
Sorry about duplicating the Singer details.
Up and down a ladder about 10 times on Wednesday, first to stop the TV aerial wobbling when doves landed and took off, and second to do repairs to the Carport roofing.
Aerial no longer wobbling, BUT my pins are now wobbly.
Why up and down so many times you may ask?
Easy!
I kept forgetting things to take up with me.
Geoff - It's been one of those weeks.
Location: South Norfolk - Next to Suffolk
Hi Geoff,
I have just watched your a couple of your videos, first well done for putting all this information up, I am sure it is a useful source of reference for many.
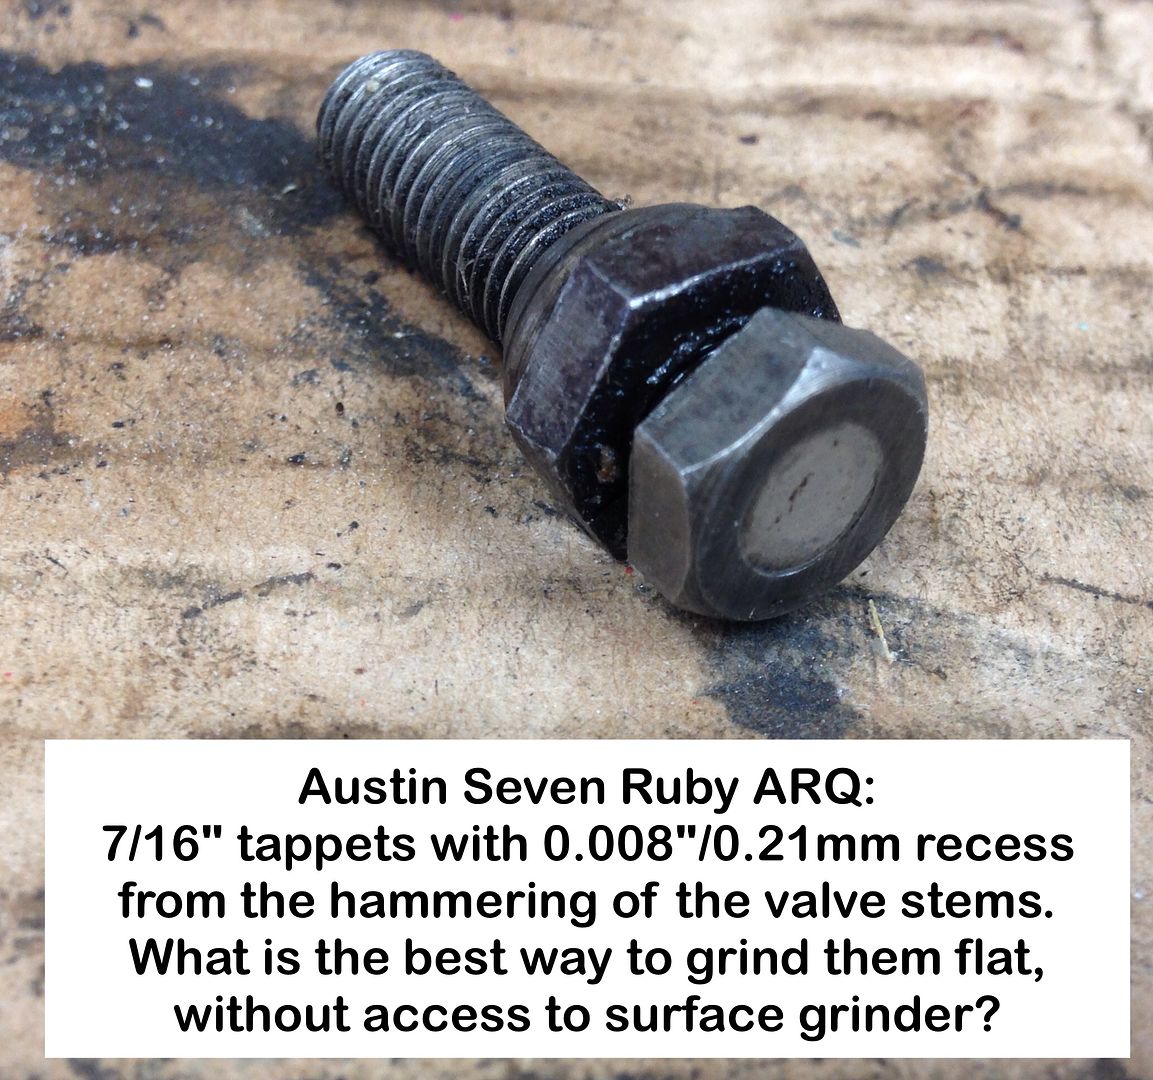
I did note your comment about the dimples on tappet adjusters; They are wear marks caused by the constant hammering on the base of the valve stem, they should be reground flat.
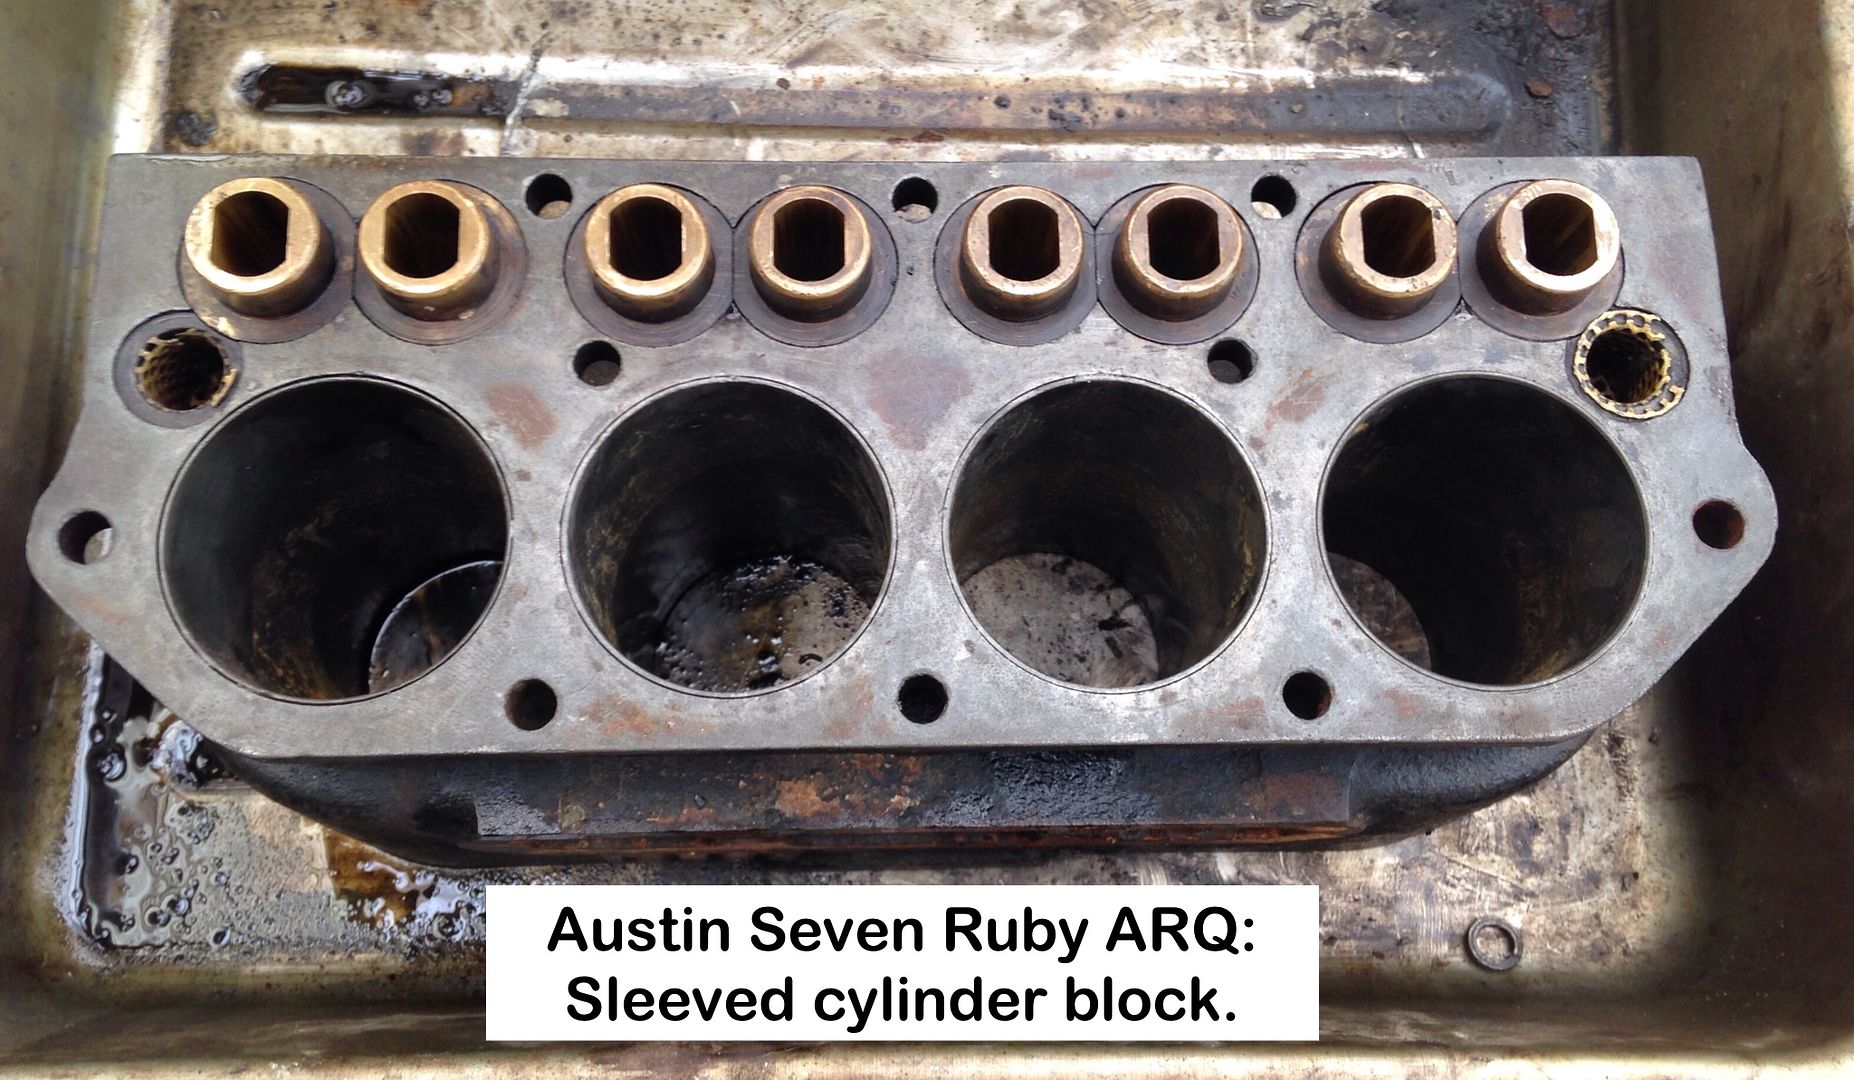
I also noted your cylinder block comment: I find Molasses to be an excellent but slow way of cleaning rusted steel parts, but I have encountered erosion issues with cast components, particularly when left for long periods. I don't know all of the technical details as to why this should be, but the chemical reaction that takes place eats away the surface of cast items.
Location: Auckland NZ
Great video Geoff ,much better than watching programs about the bloody referendum .
Ian/Nigel,
Thanks for comments.
Shows just how long it's been since I worked on a side-valve, thinking that the tappet heads are actuated by the cam lobes.
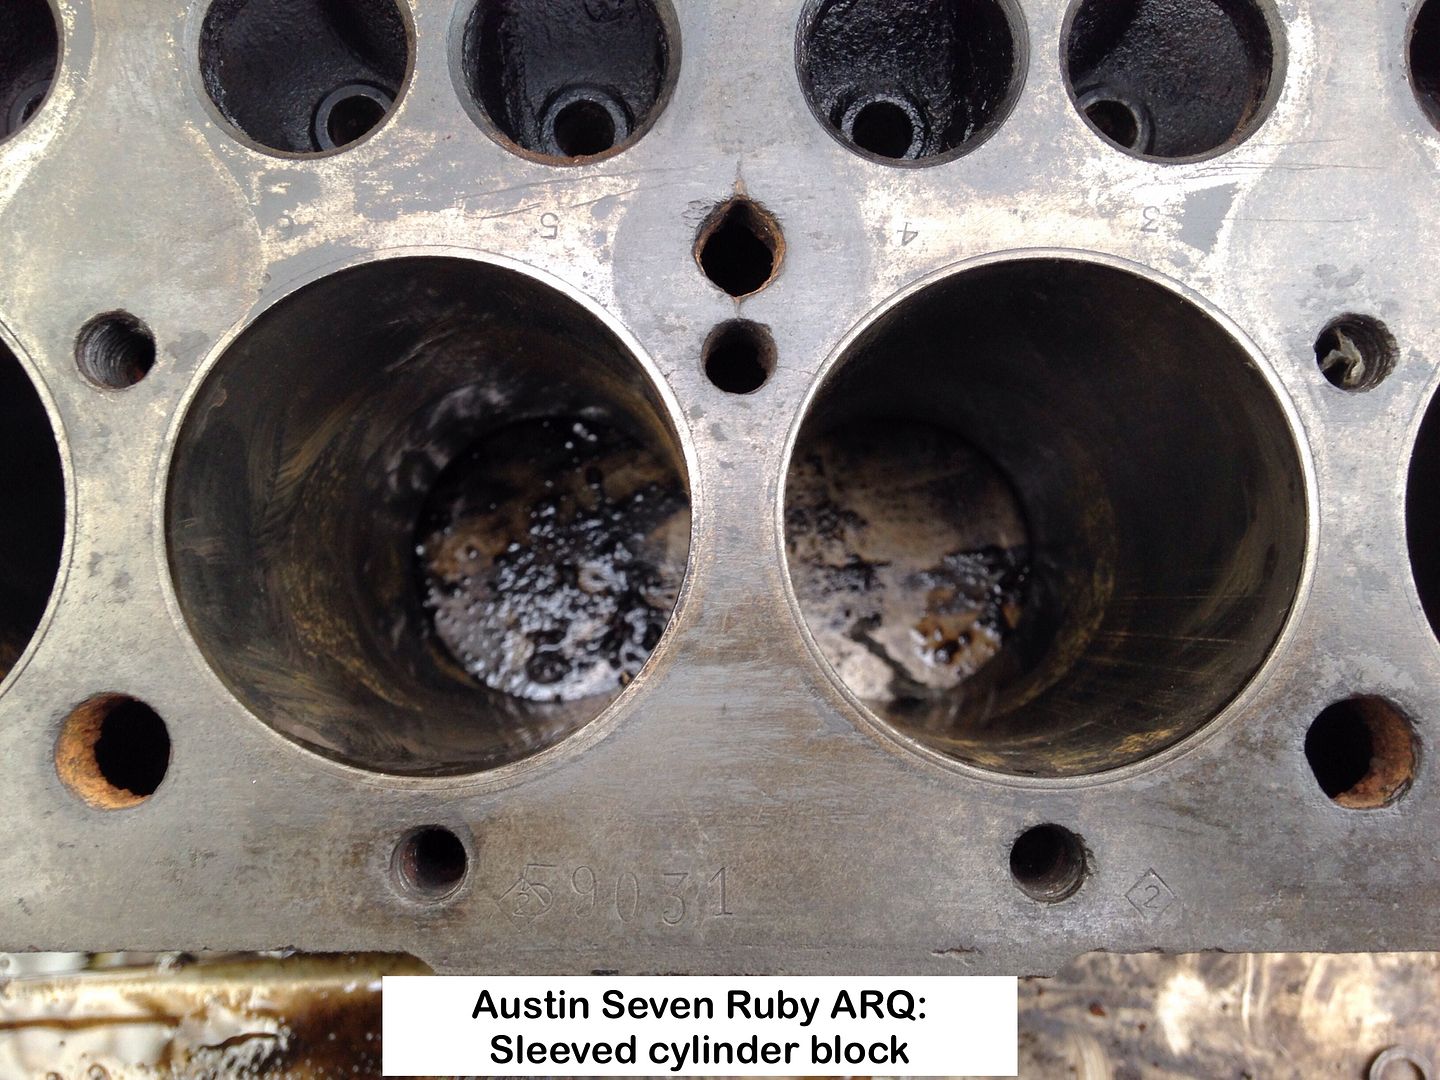
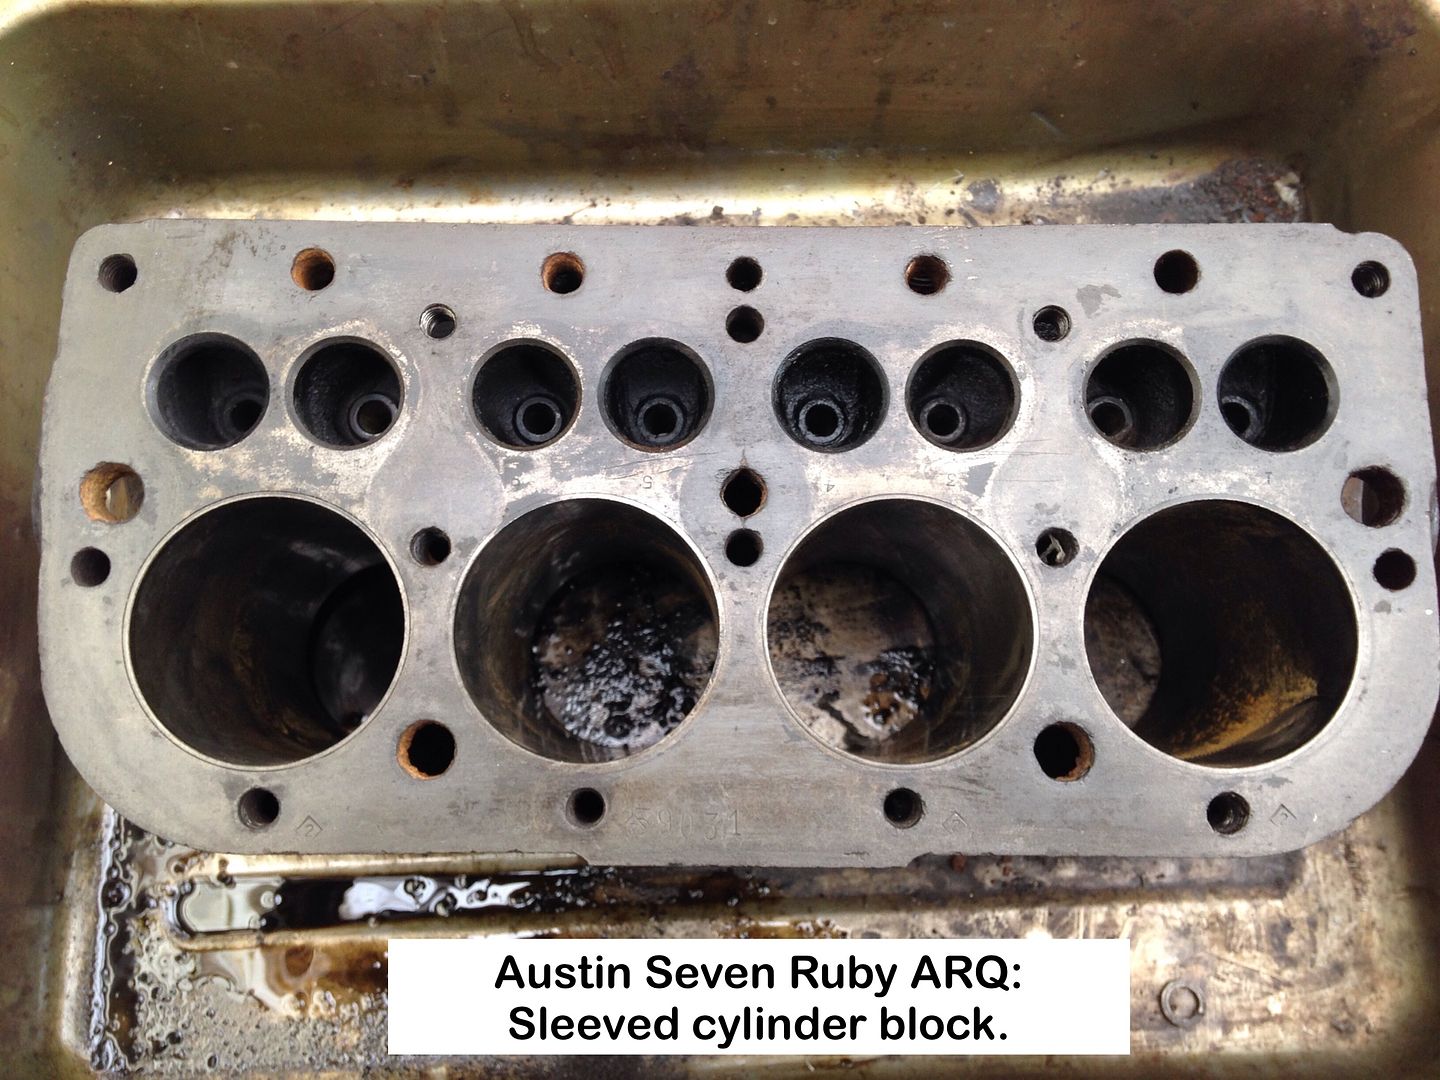
Engine block has cleaned up well, but I may run some descaler through the waterways.
Most definitely sleeved:
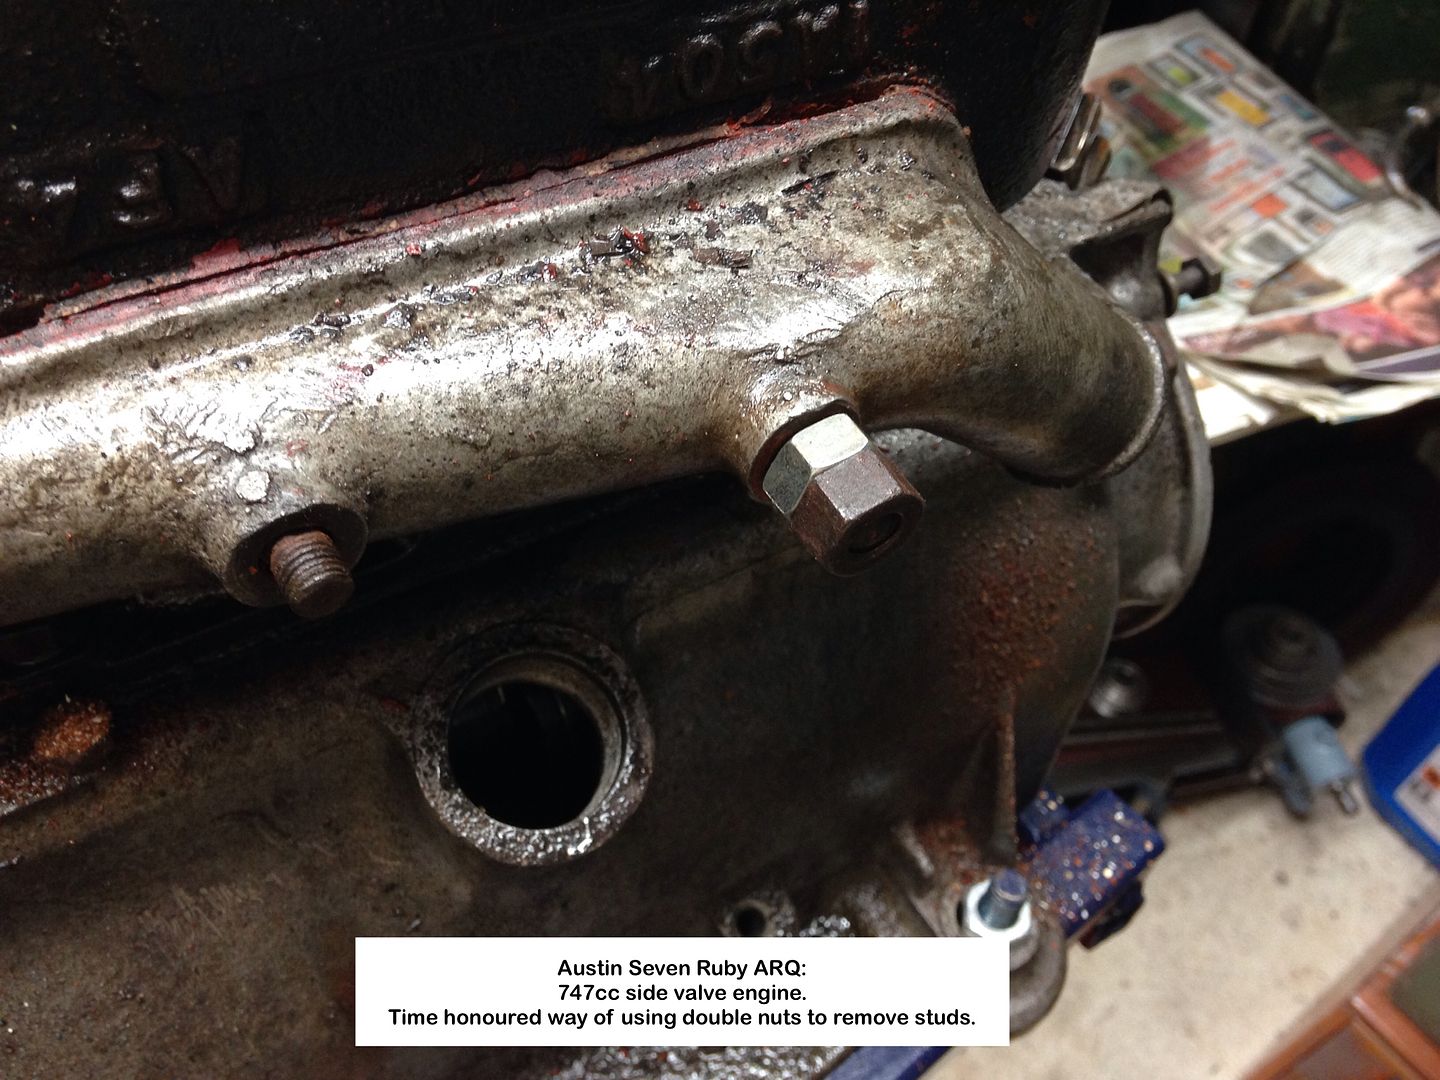
The manifold studs, only one being stepped, came out eventually after having to hammer the sides, thus bending them slightly, but they need replacing anyway, as I will do with the head studs.
Second attempt at removing the oil pump as the first was abysmal.
Geoff - My Facebook page shows both.
Location: South Norfolk - Next to Suffolk
Last week used the MSB unit for the first time, and man is it dusty.
Didn't seal up one section of the plastic sheeting properly that was isolating one half of the Carport, so some dust got through.
I will fix this before doing any more blasting or spray painting.


This method does, however, remove paint from areas nothing else can get into.
Attacked a lilac tree using chainsaw, then had to do some wood and felt replacement on Shed roof.
Geoff - Brain says "Can do" but body replies "No bl@@dy way"!
Location: South Norfolk - Next to Suffolk
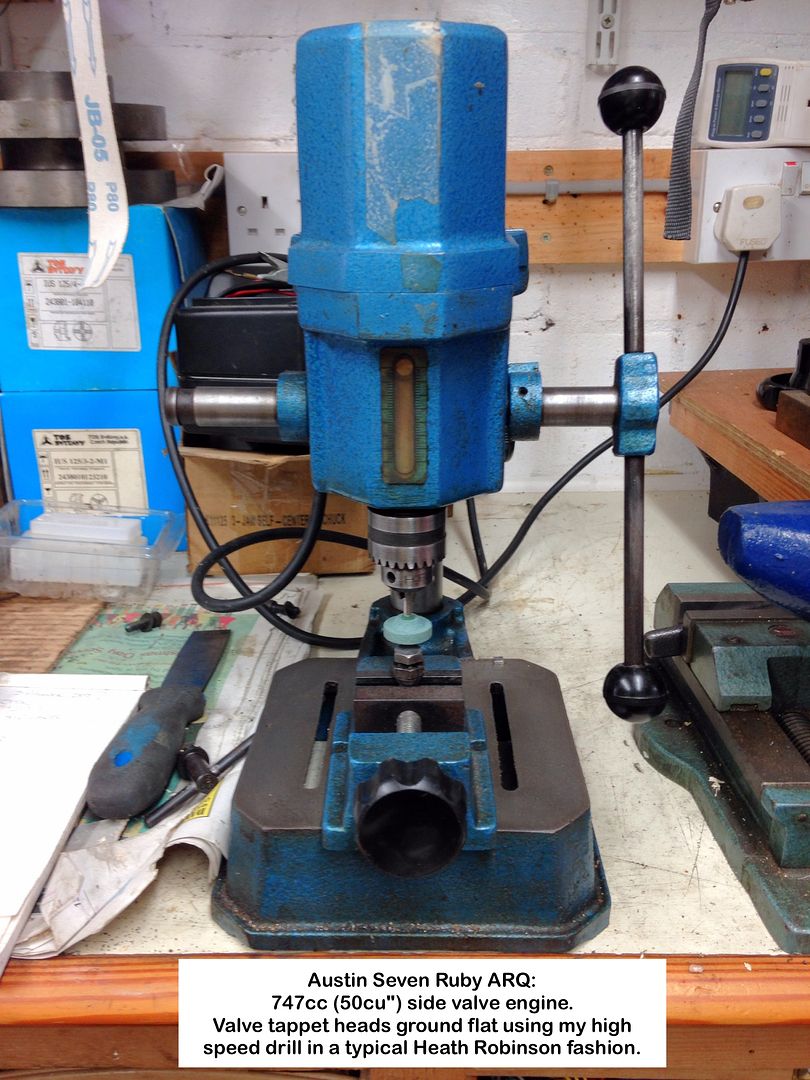
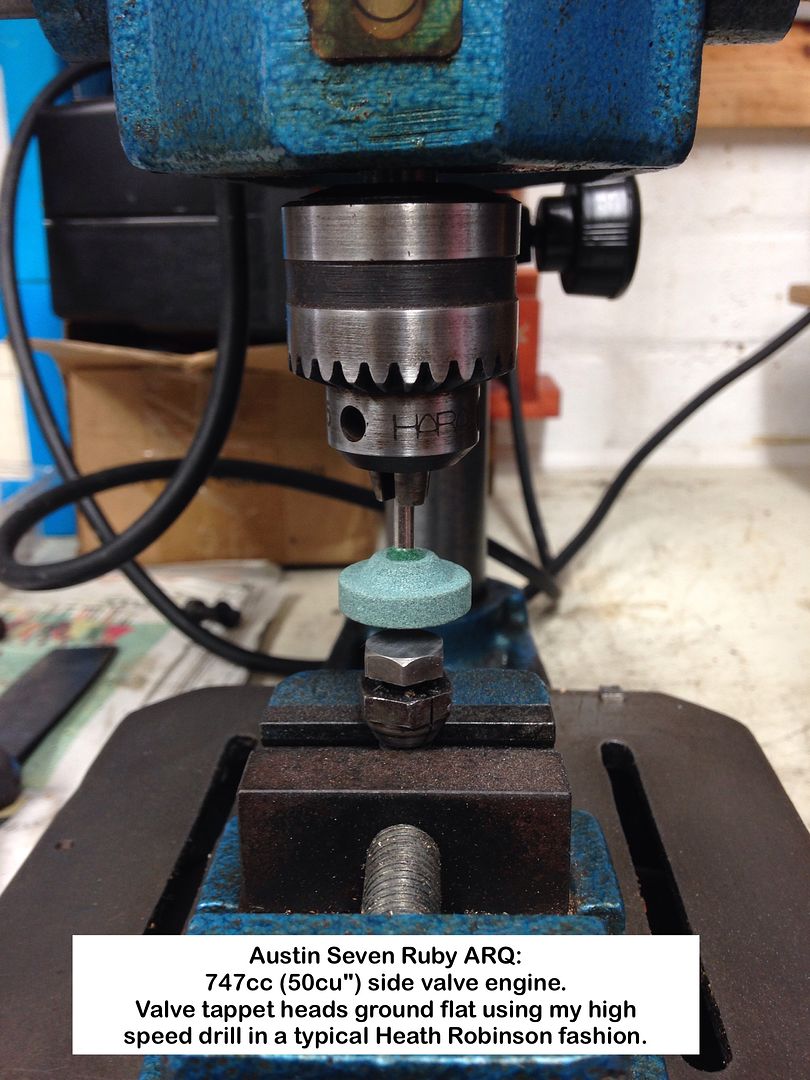
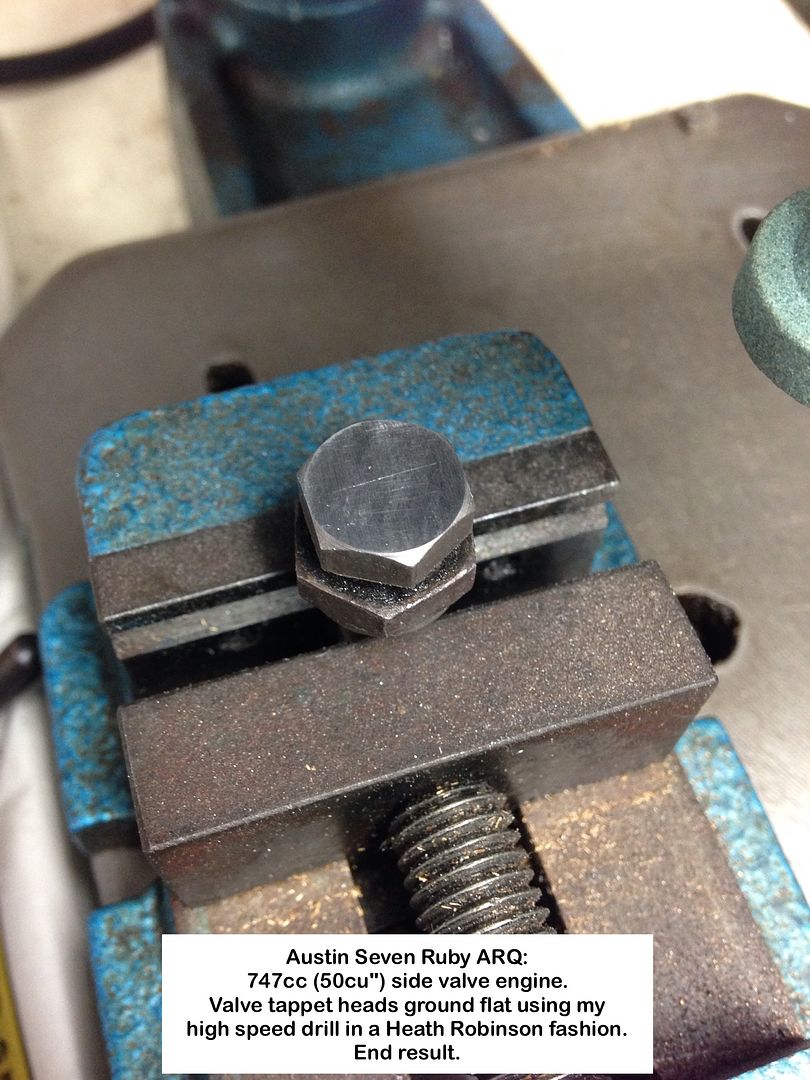
Grinding tappet heads courtesy of Heath Robinson thinking.
My Heath Robinson set-up of grinding them flat, in lieu of a surface grinder.
High speed bench drilling machine fitted with a grinding disc then diamond cards for final finishing.
Tappet heads - Before:
Grinding by sliding the tappet under the grind stone, but by not more than just over 1/2 Ø:
End result:
Good contact with valve stems after a rub on the diamond card:
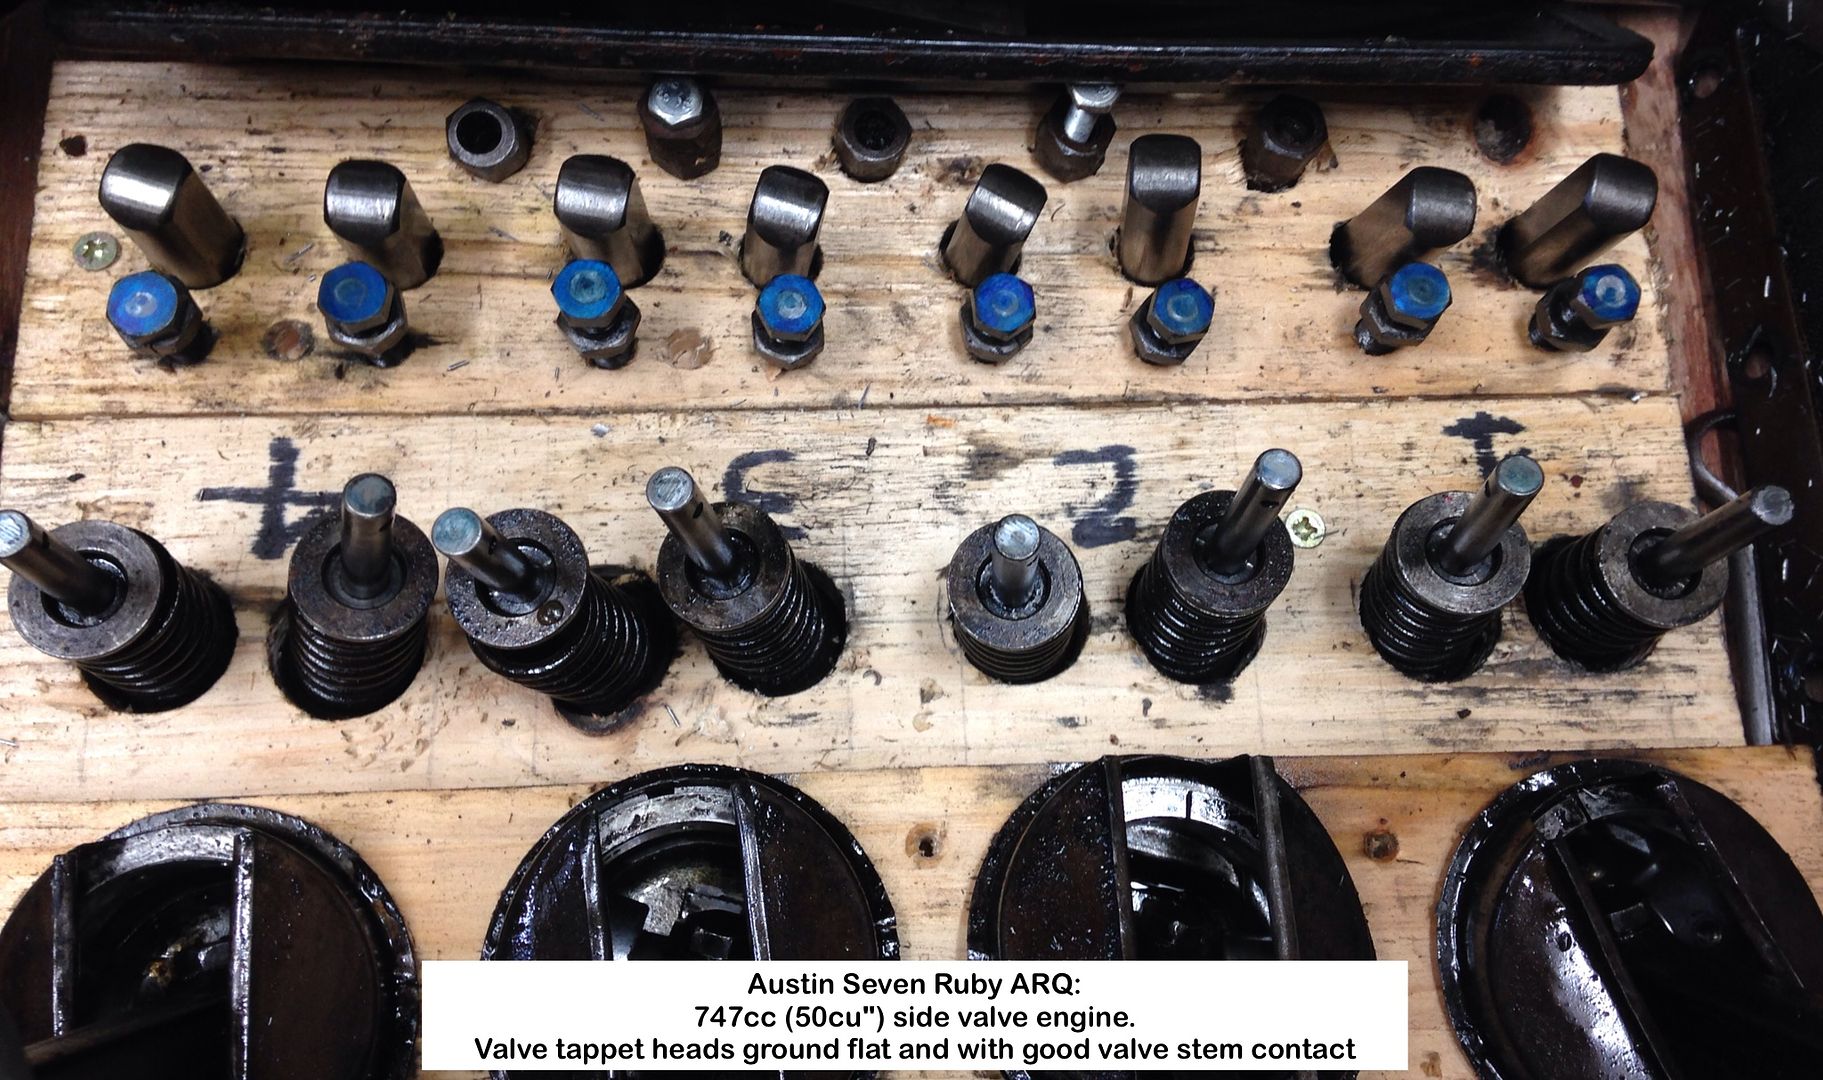

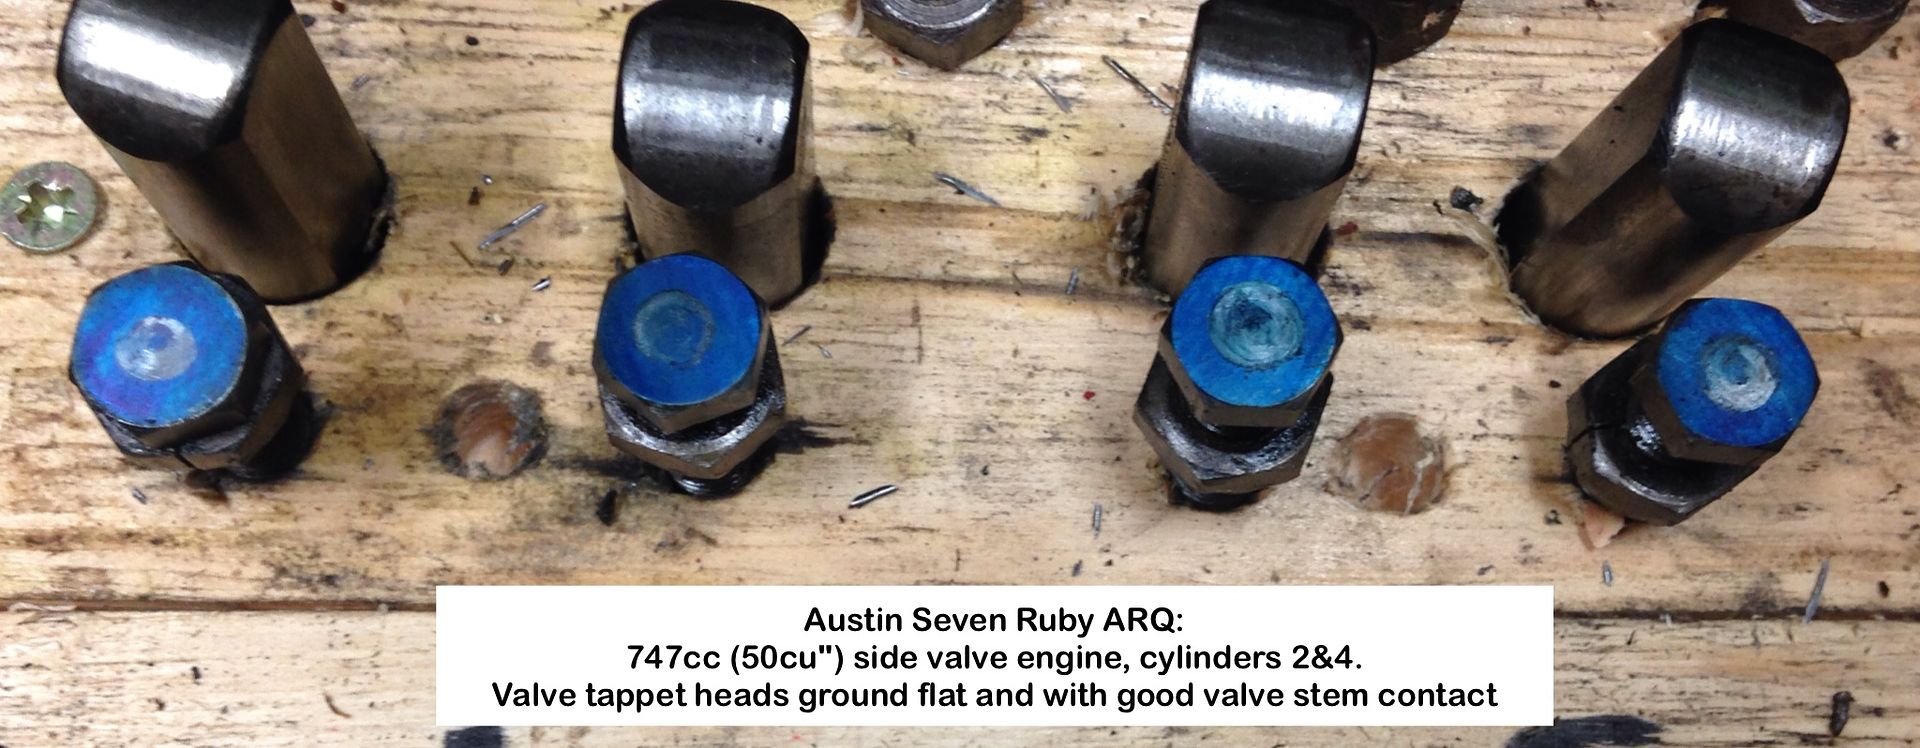
Cam followers look fine but will use marker pen to check contact areas during trial assembly of engine.
Time to use the TIG welder to repair body parts.
Geoff - If only I could do the same with my body parts!
Location: South Norfolk - Next to Suffolk
As far as I can tell from the photos Geoff, the block looks cracked to me? There appears to be a crack from centre stud to pots 2 and 3 and to the waterway.
Great pics and videos
Location: Farnham
Tappet screws have often been refaced many times. Worth checking with the edge of a file that still hard. Various simple ways of flattening; precision unnecessary.
Location: Auckland, NZ
Updates soon as I've just got the MIG machine I bought years ago up and running.
Had to remove the cover and re-seat all the spade connectors as the wire feed motor was dead.
Beginning to see why MIG is so popular.
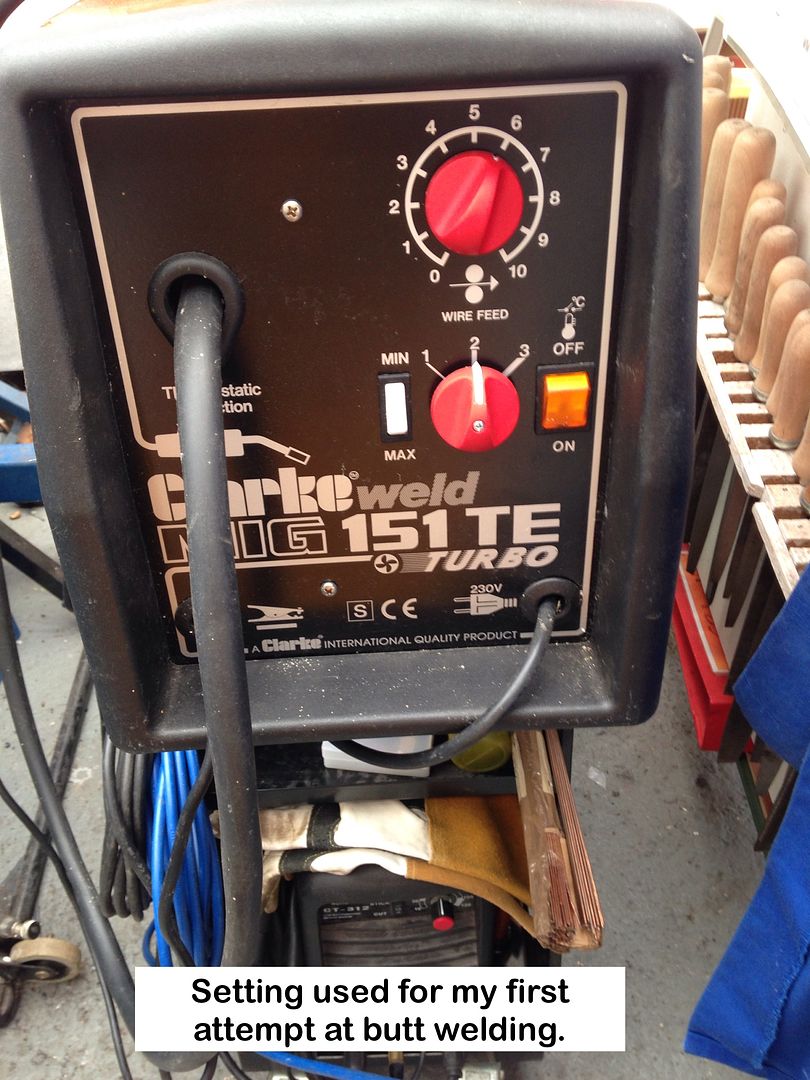
Geoff - MIG practice day.
Location: South Norfolk - Next to Suffolk
Time to let everyone know what's been happening,.
S*d all on the Ruby unfortunately.
The heat and humidity has made the Carport nigh on impossible to work in, especially welding.
I did do quite a few practice beads using the MIG before the heat 'stopped play' though.
Plenty to do in the Workshop to keep me occupied though.
Machined backplates for smaller lathe chucks, made a rear tool post and now busy with backplates to mount chucks on the dividing head.
Other half dumped a DOA Dyson Telescope in my lap, having procured it for a fiver at local car boot, with the words "You are a man, you should be able to fix it"
My response was "I have the three parts that confirms my gender, albeit the middle one not as vigorous as before", receiving that look only a female can give.
She then bu**ered of on her yearly 3-week jolly visiting family.
Took a while sorting out how to strip the machine, but eventually had it in parts only to find one carbon brush wasn't making contact with the commutator and that meant bending three tabs back in order to get the brush housing out.
As I pulled the brush clear of its tube it promptly broke in half with that loose bit crumbling in my fingers.
Never experienced this before.
Found a suitable replacement in my electric spares box and used the RSU to solder the lead on and then reinstall and power leads back.
Quick check with motor free and good as new.
Not bad for a fiver and a few hours work.
A well thought out design to make it easy to assemble in the factory, BUT not for carbon brush replacement, so bin and buy a new Dyson.
Was hoping for cooler weather, but 80% humidity in the Carport and not much less this last month is not comfortable.
Geoff - Workshop only slightly less humid
Location: South Norfolk - Next to Suffolk
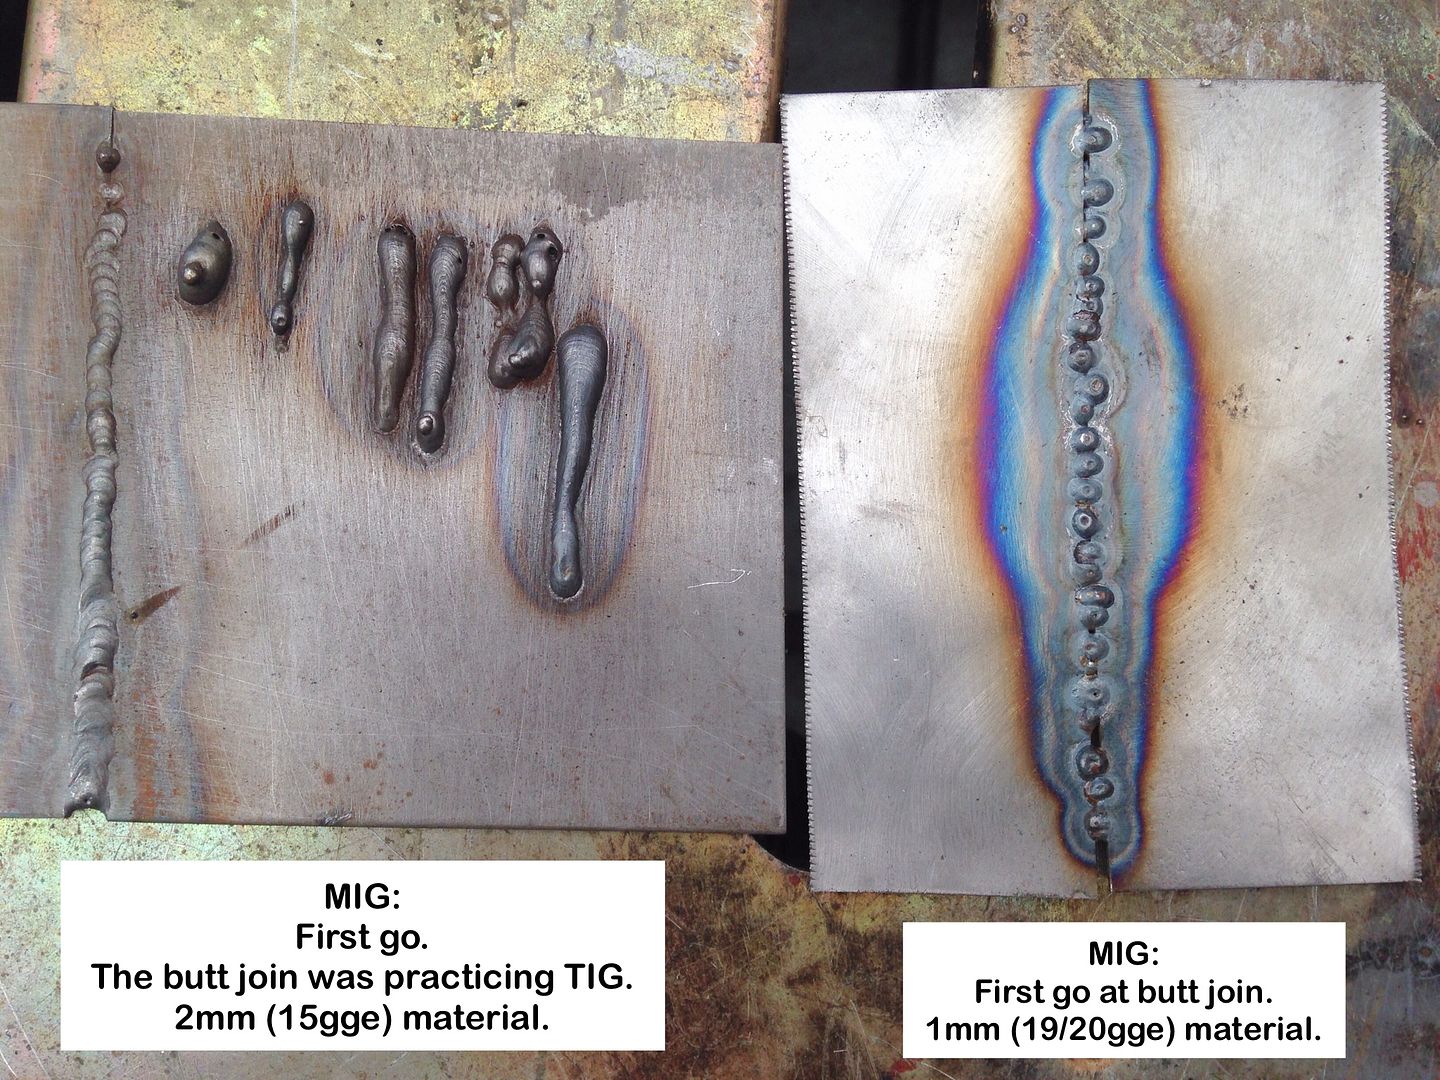
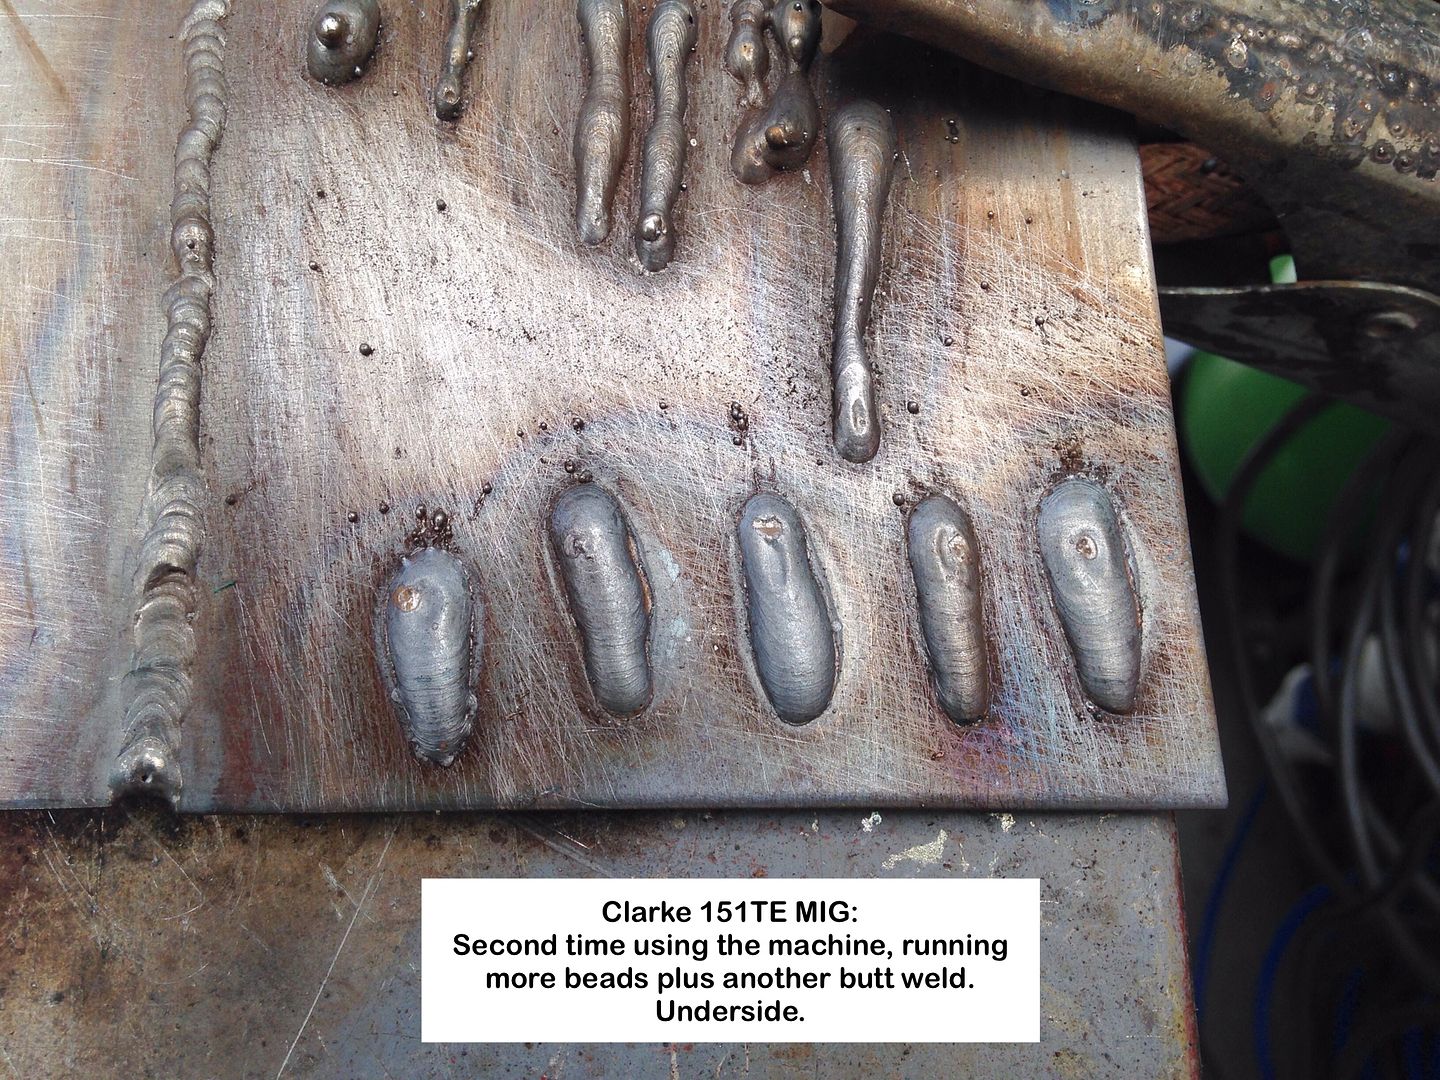
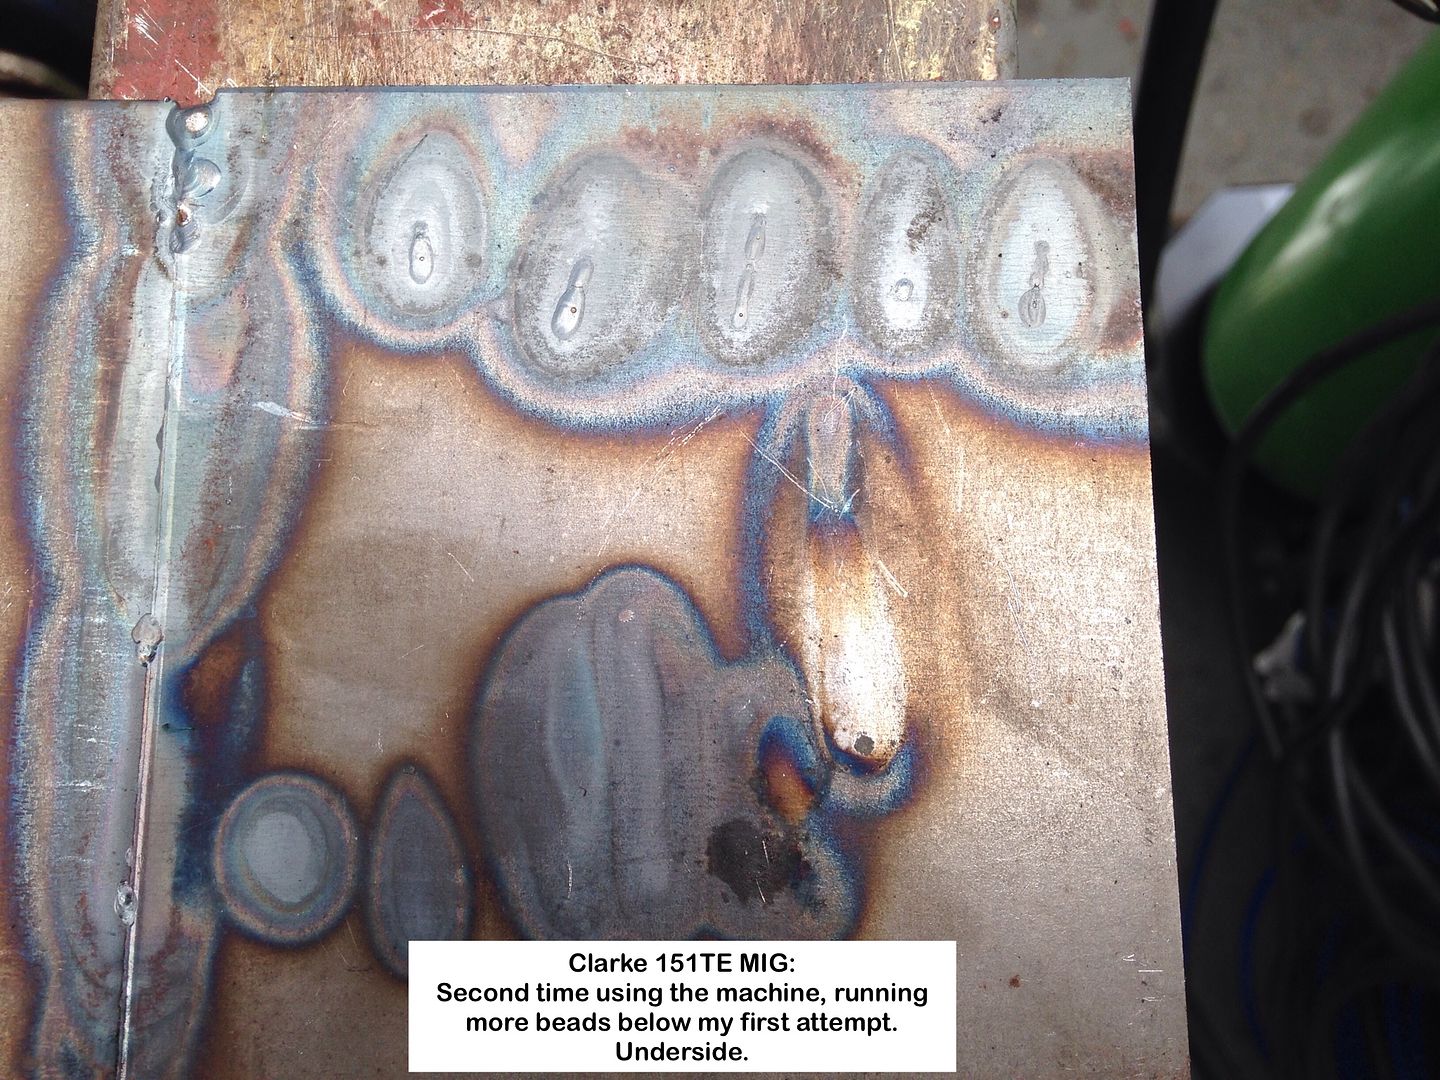
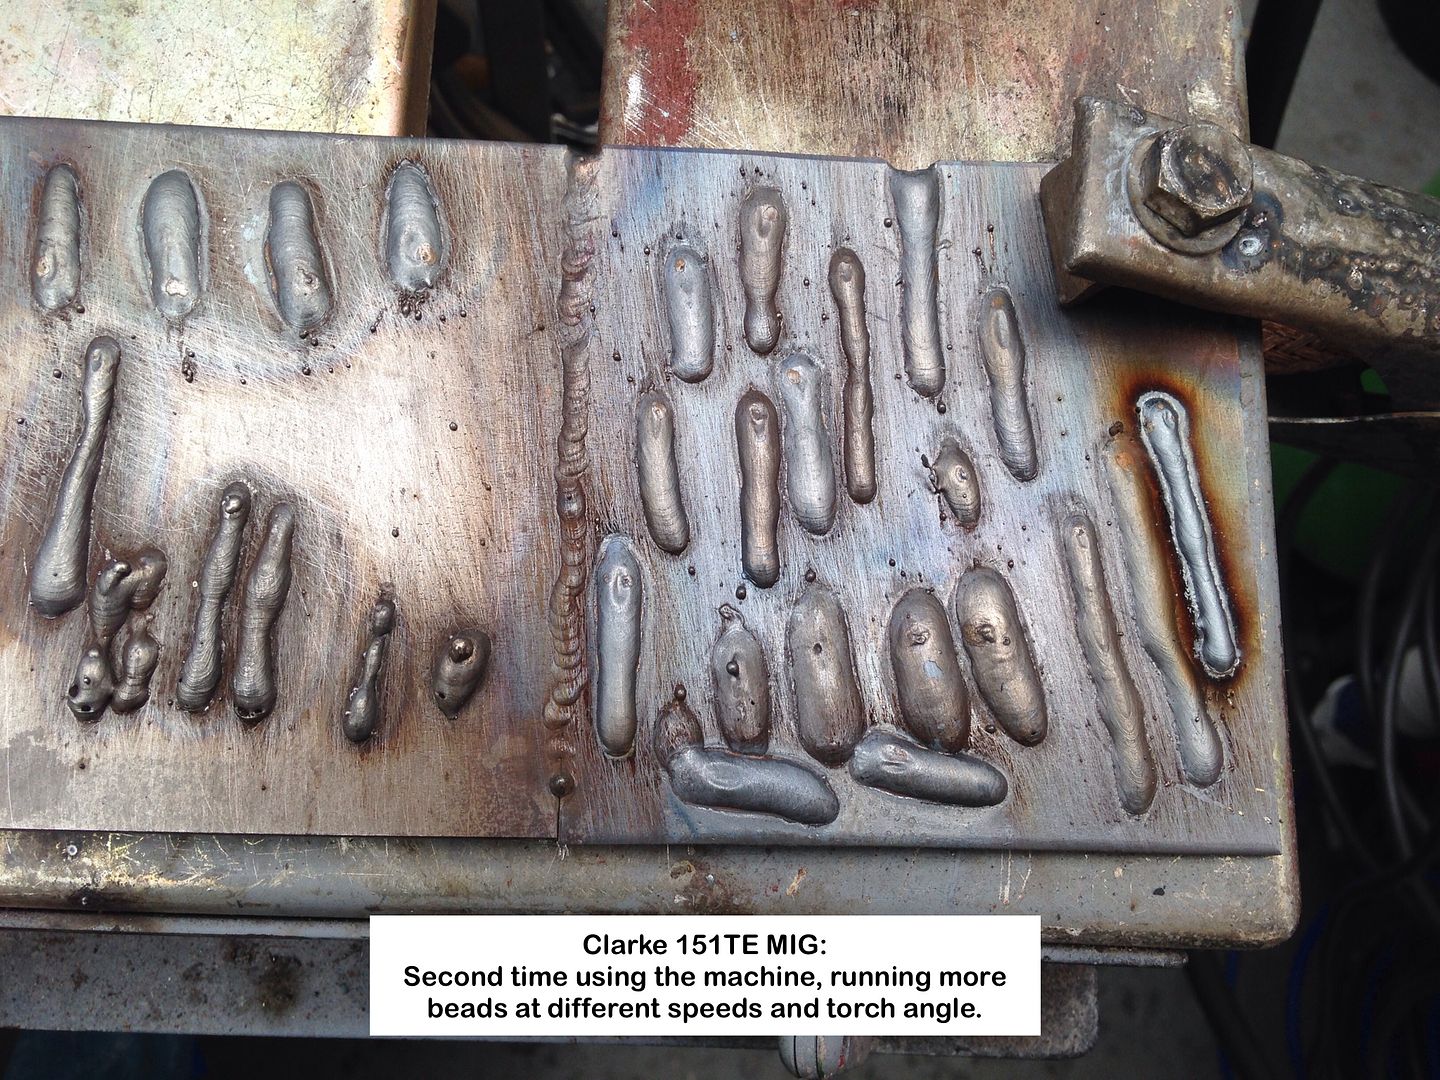
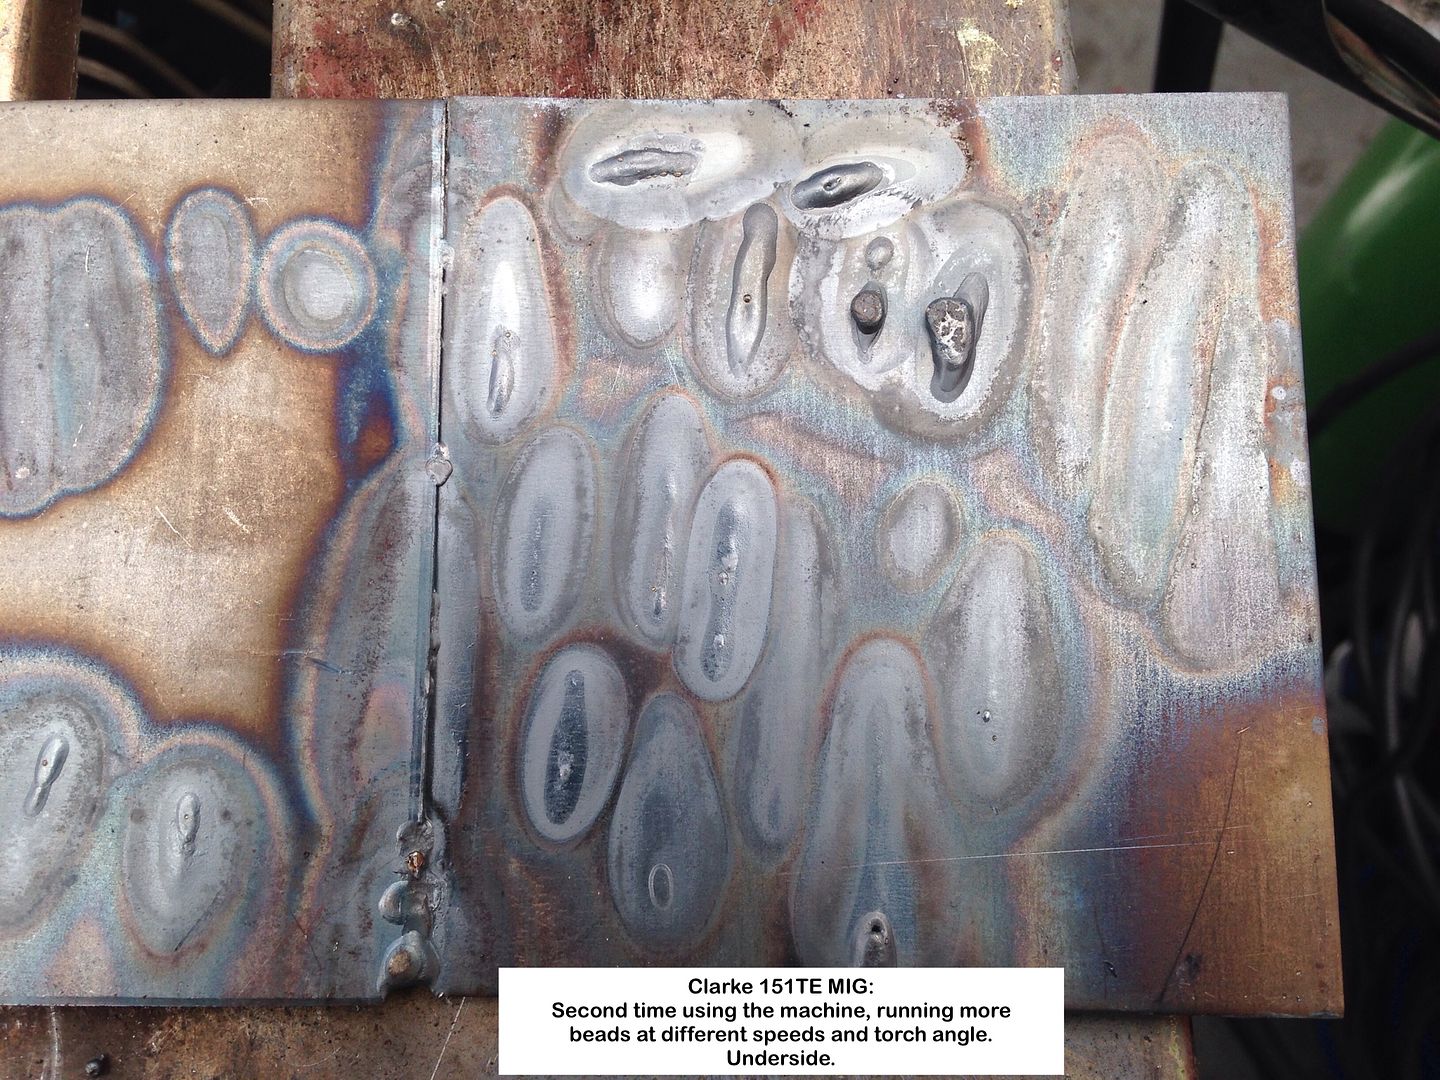
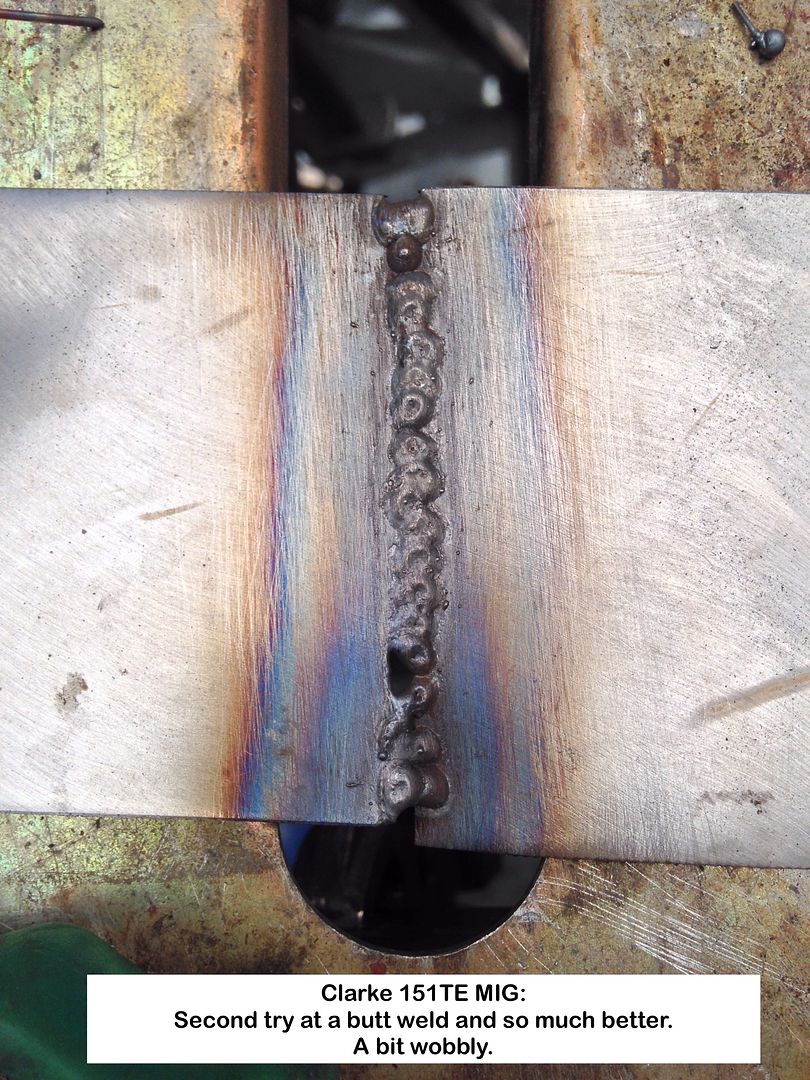
Update with photos of my first attempts with the MIG and progress on the Ruby.
Hope the photos show this.
As mentioned previously I can now see why MIG has become the de facto method to use.
Quick and fairly easy, but need more practice though.
I think that minute tube from the gas bottle to the nozzle is restricting gas flow as I can only get 5lt/min, so may need to do some surgery to not only fit a larger dia one but also longer power cable as both are far too short for easy working on car bodies, or much else in fact.
The earth clamp was replaced PDQ.
MIG:

Been busy on the lathe machining backplates for and fitting the smaller chucks I bought 7 odd years ago, plus ditto for two chucks for the dividing head.
Had to do some screwcutting in the lathe for the first time, external to make a thread gauge to do the internal on the plates, and surprised myself no end in not making a dogs breakfast of it.
Did have a brain fade with the change gears on the lathe though, finding I could only get 11.5tpi instead of the 12tpi I needed to thread the backplates for the dividing head, so gave up, had lunch and the minute I looked at the lathe on returning saw I had to replace one of the two change gears with a similar 40tpi, then proceeded, sighing with relief.
I had looked at the information on the lathe detailing what gears to use for what thread umpteen times, but on occasion wood gets in the way of trees, as happened on this occasion
Ruby:
Started cleaning some of the loose body parts prior to applying epoxy primer, and suffered no end with the heat and humidity in the Carport.
September was just too hot and humid to do any work in the Carport so spent the time in the Workshop.
Ground the valves in, machined the flat surfaces for the water outlet and inlet/exhaust manifolds, then draw filed the head and block and they are as flat as I expected.
I need to edit the videos I took and clean up the photos, but the heat and humidity has effected me far more than I ever expected and only now starting to get back into the swing.
Geoff - Never ever thought I would look forward to cooler weather![/quote]
Location: South Norfolk - Next to Suffolk
I would try turning the wire speed back some what, that will remove the garden slug looking weld. the spots you have done is the right way just over lap them more.
good luck. and keep the posts coming I have learnt alot.
Location: Switzerland
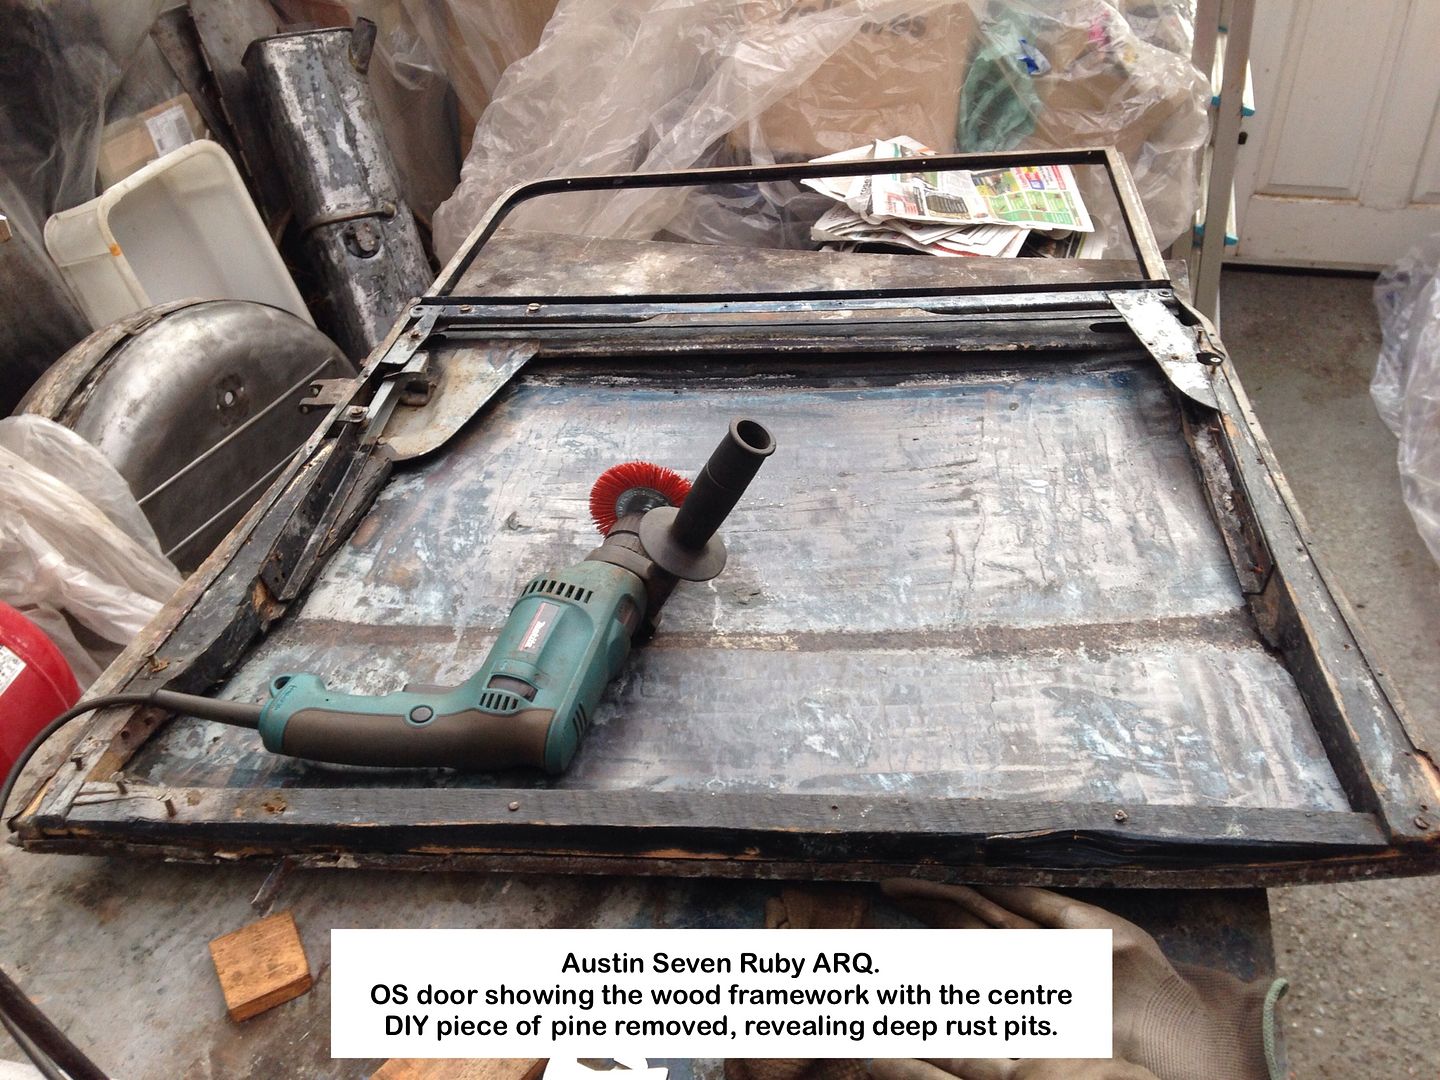
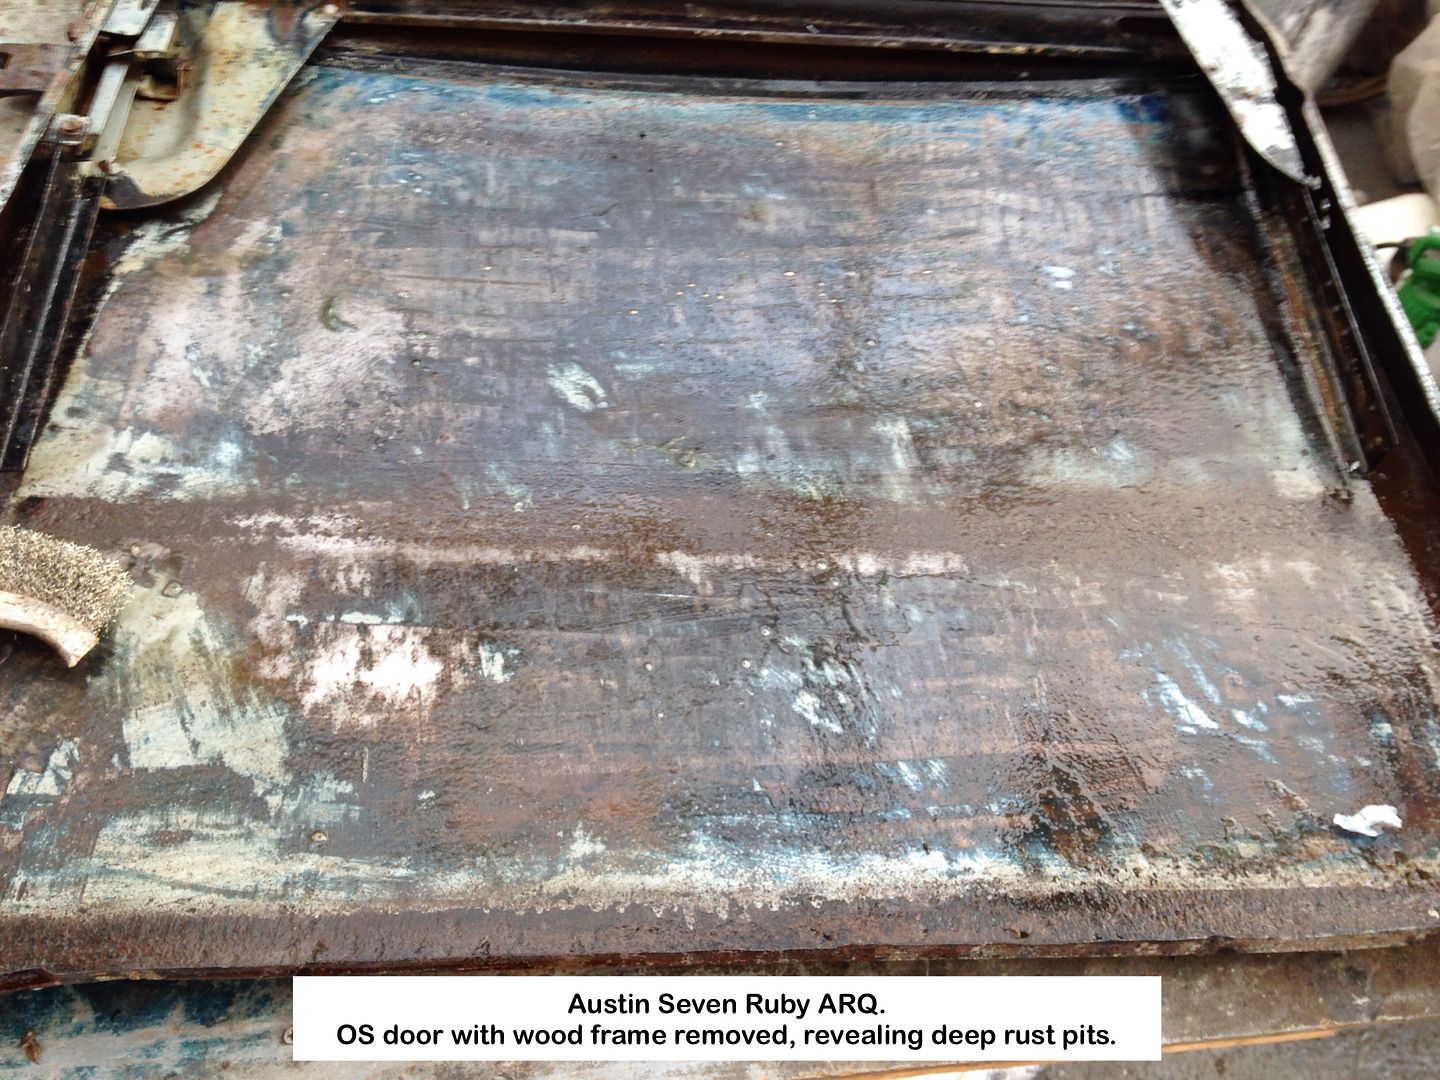
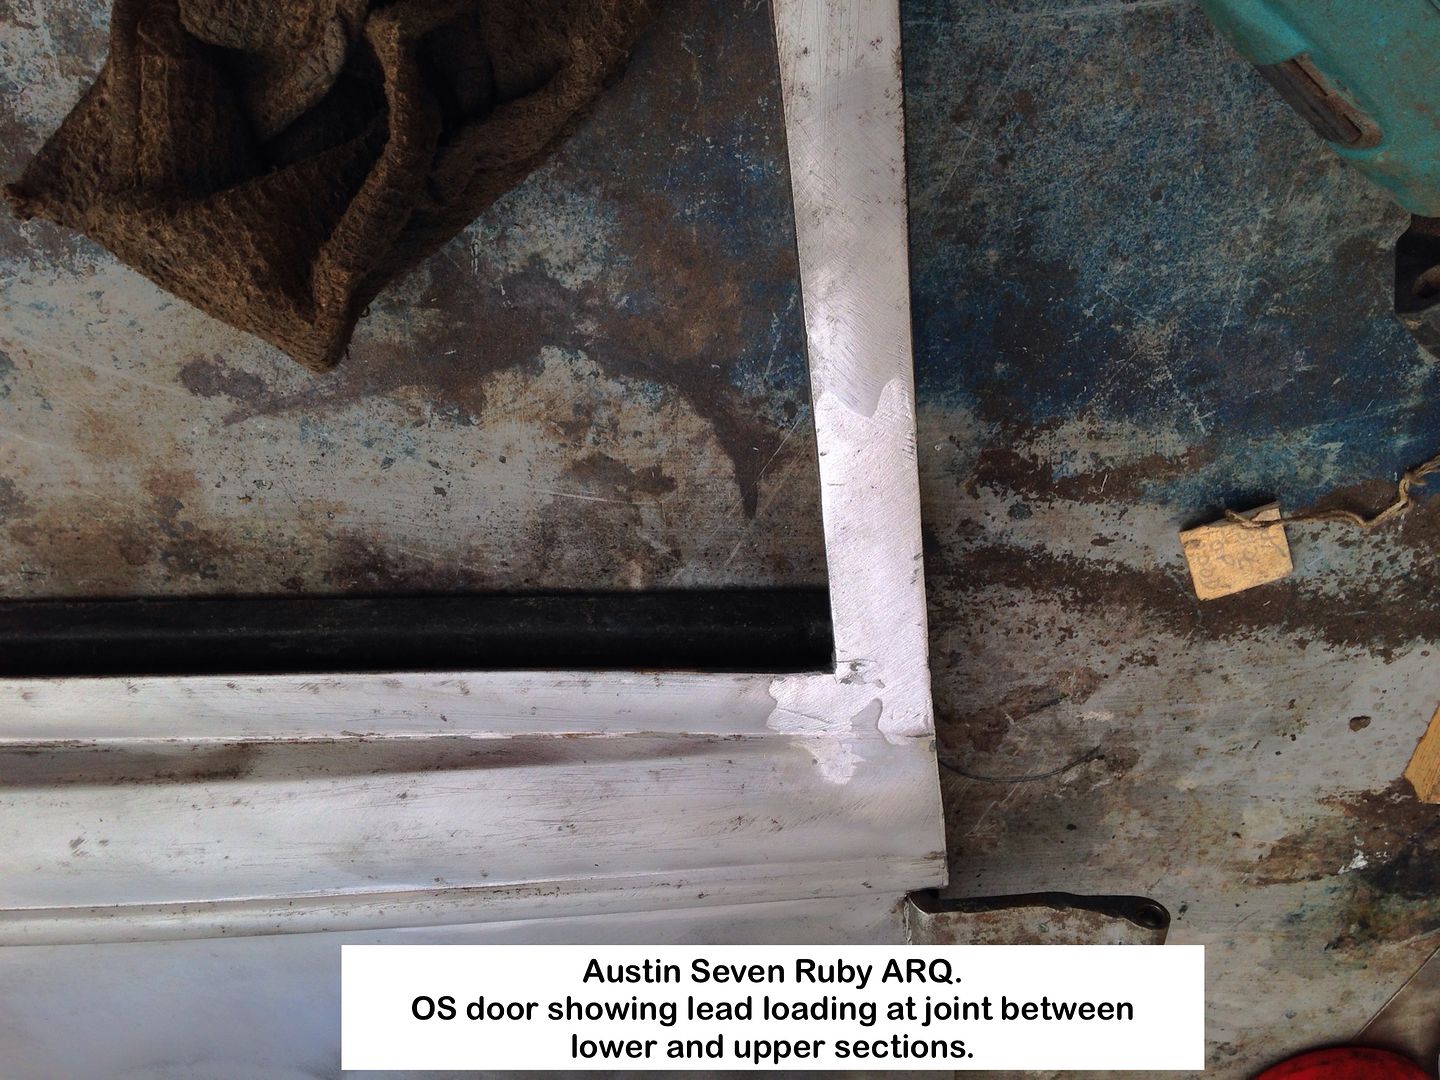
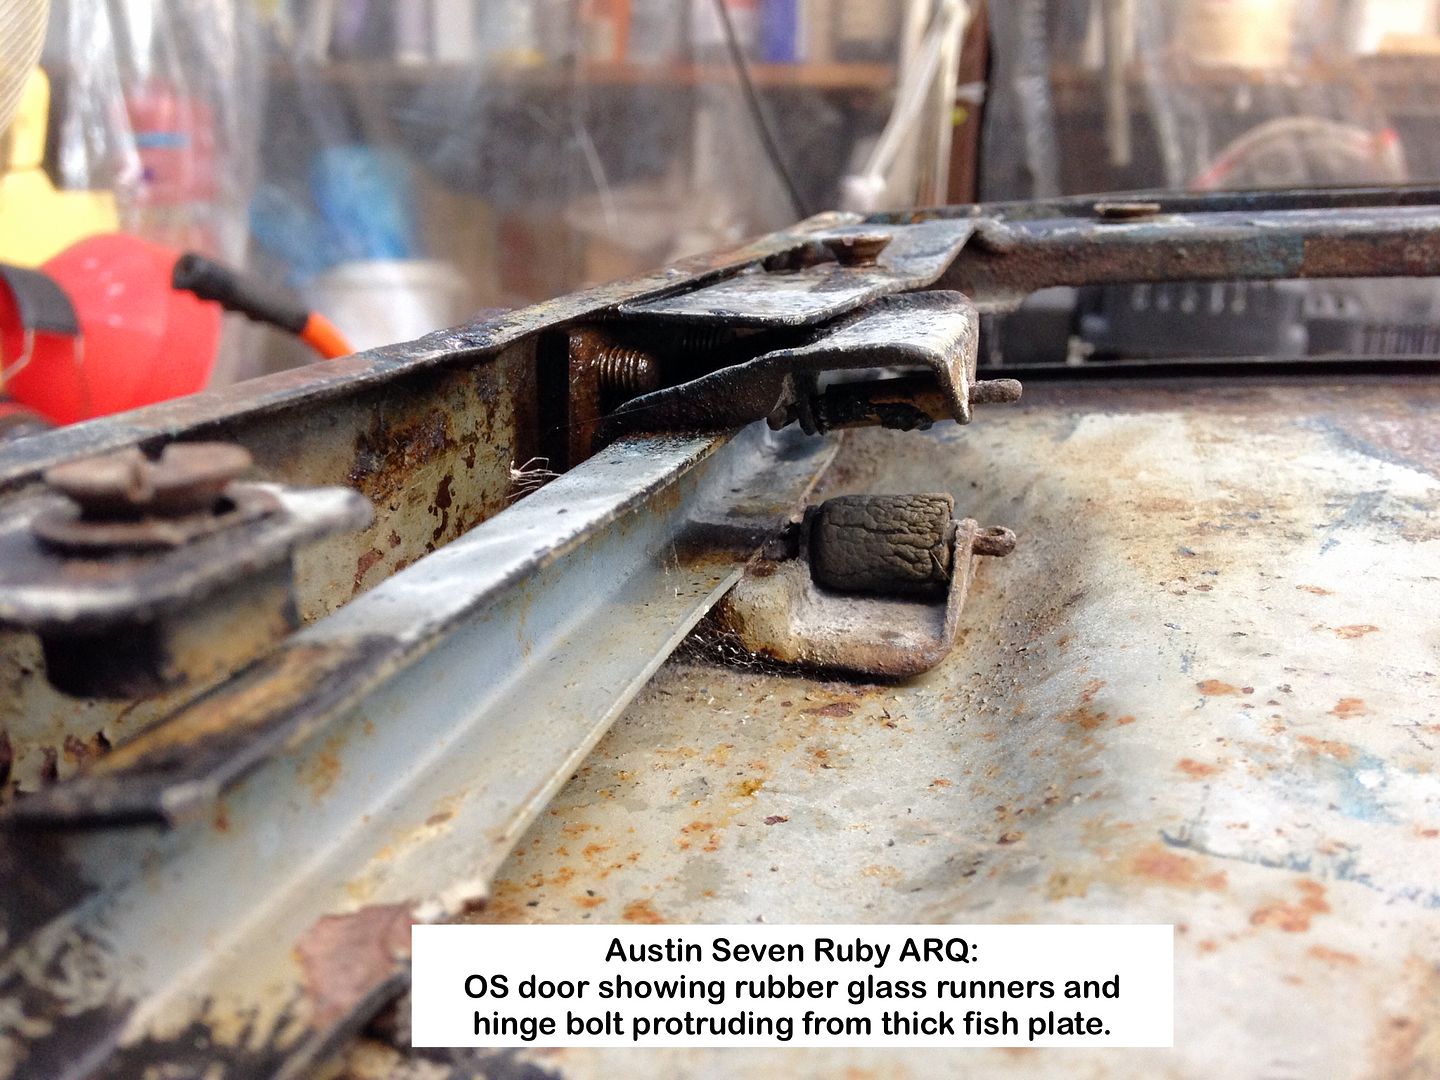
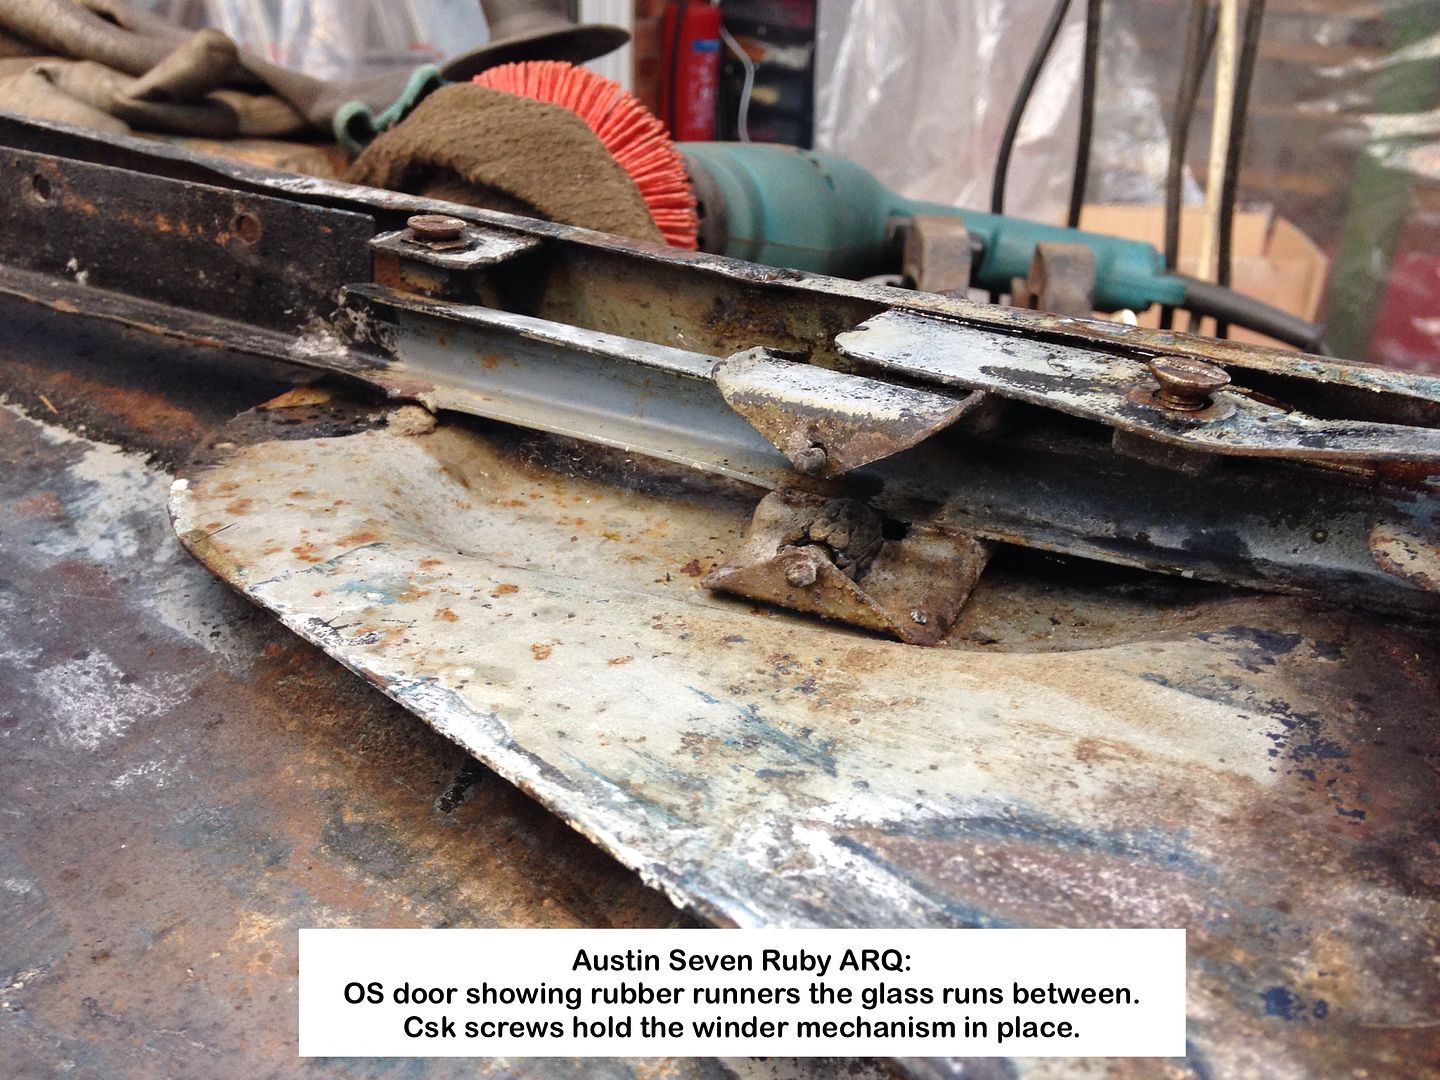
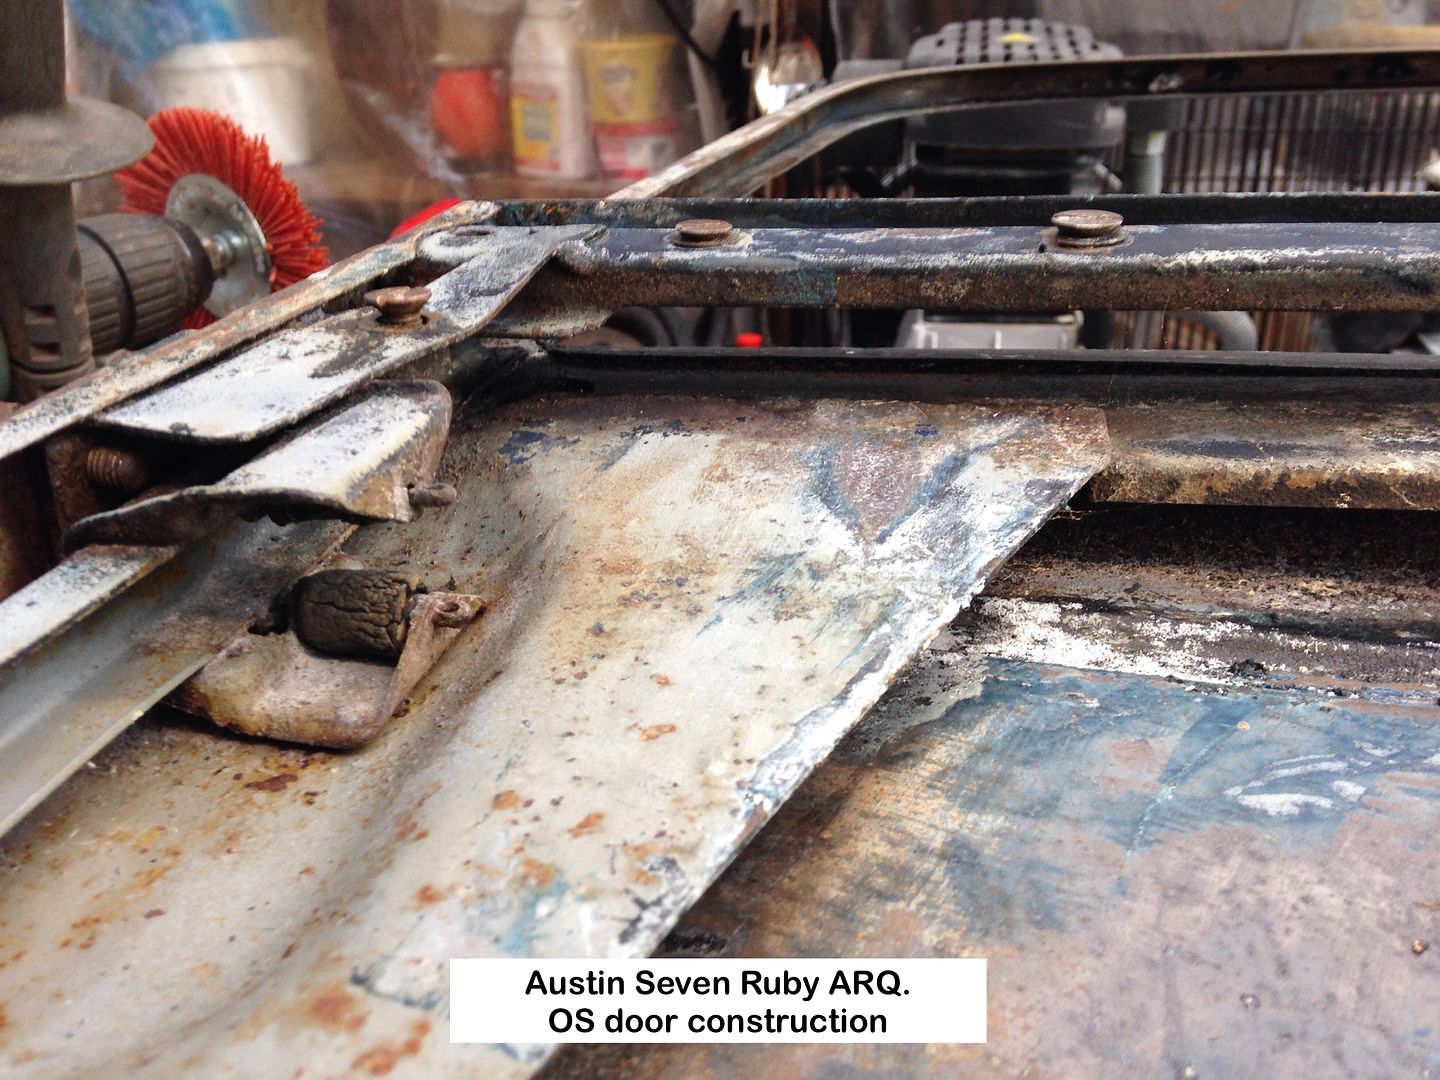
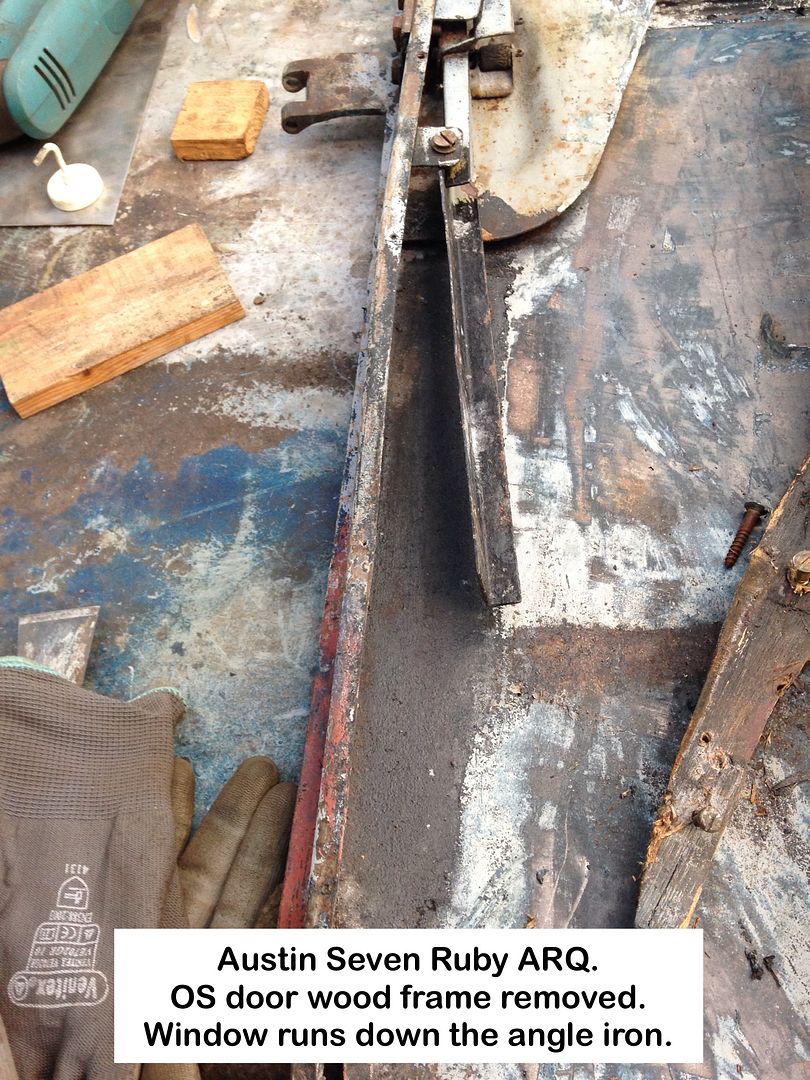
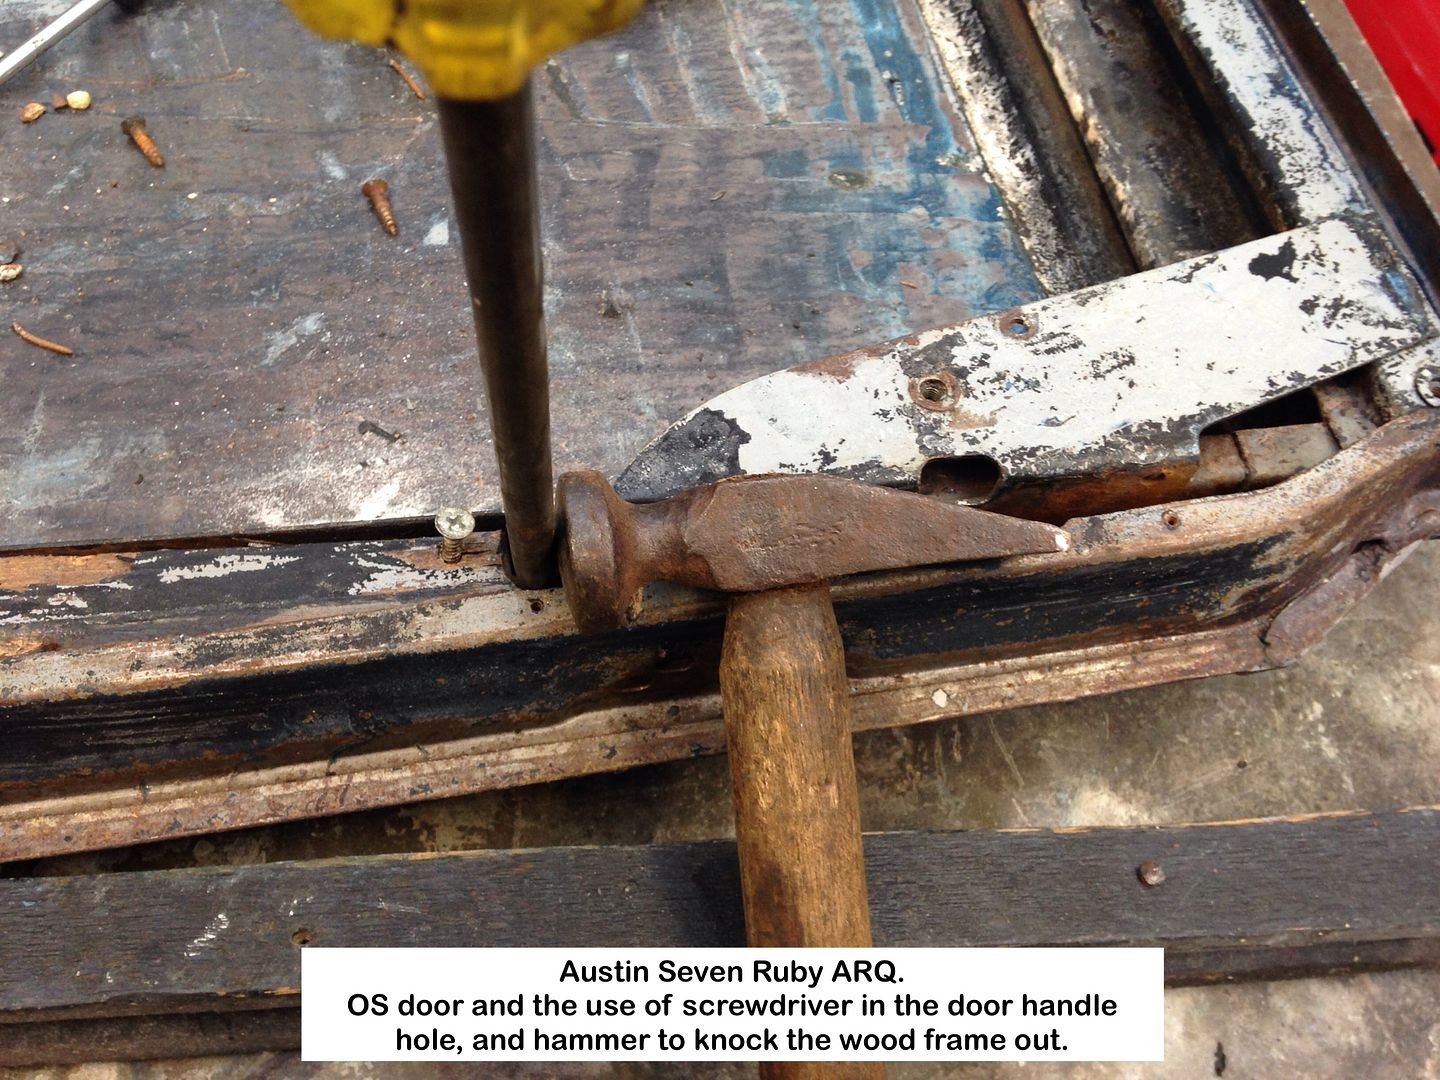
Offside door:
I've recovered from the marathon of getting all the links for the NS door into the last post.
The OS door isn't in as bad a state meaning nowhere near as much work needed on it.
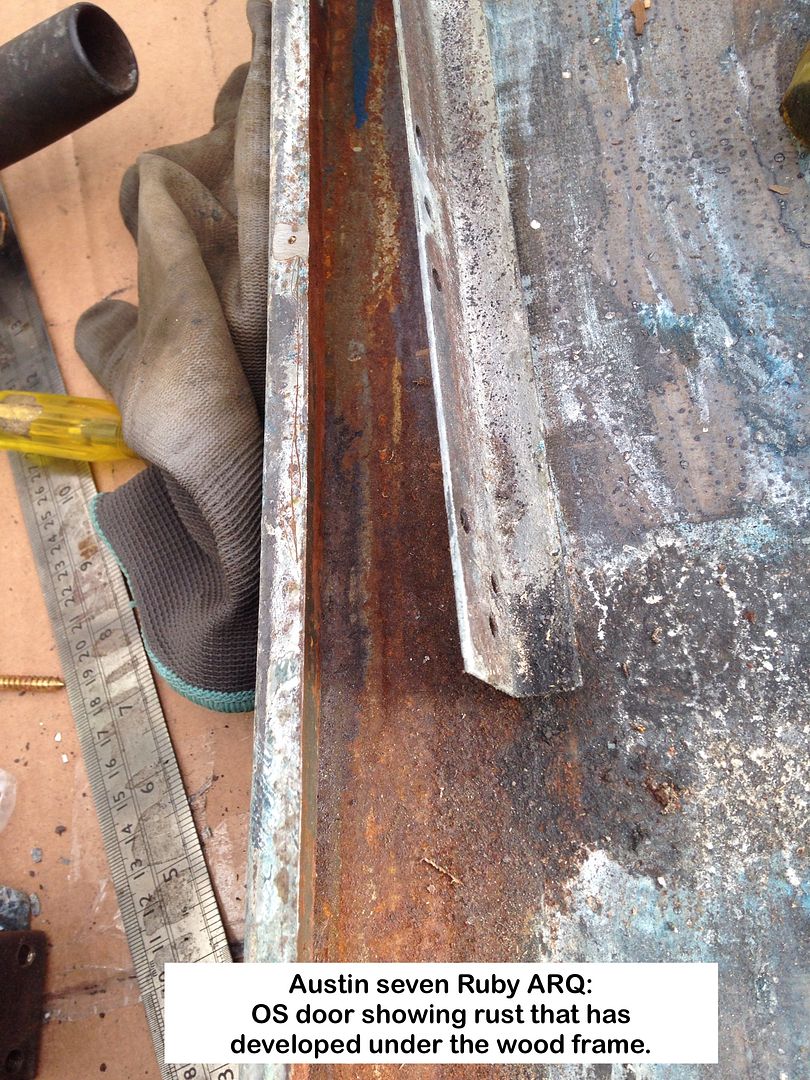
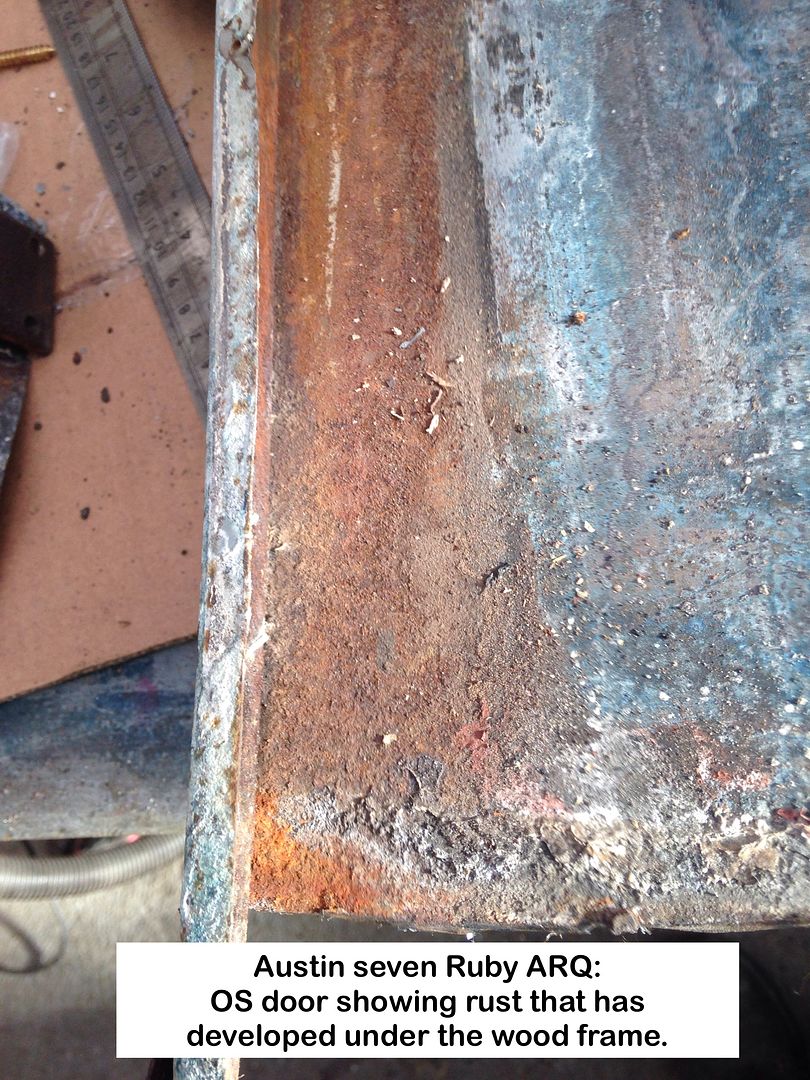
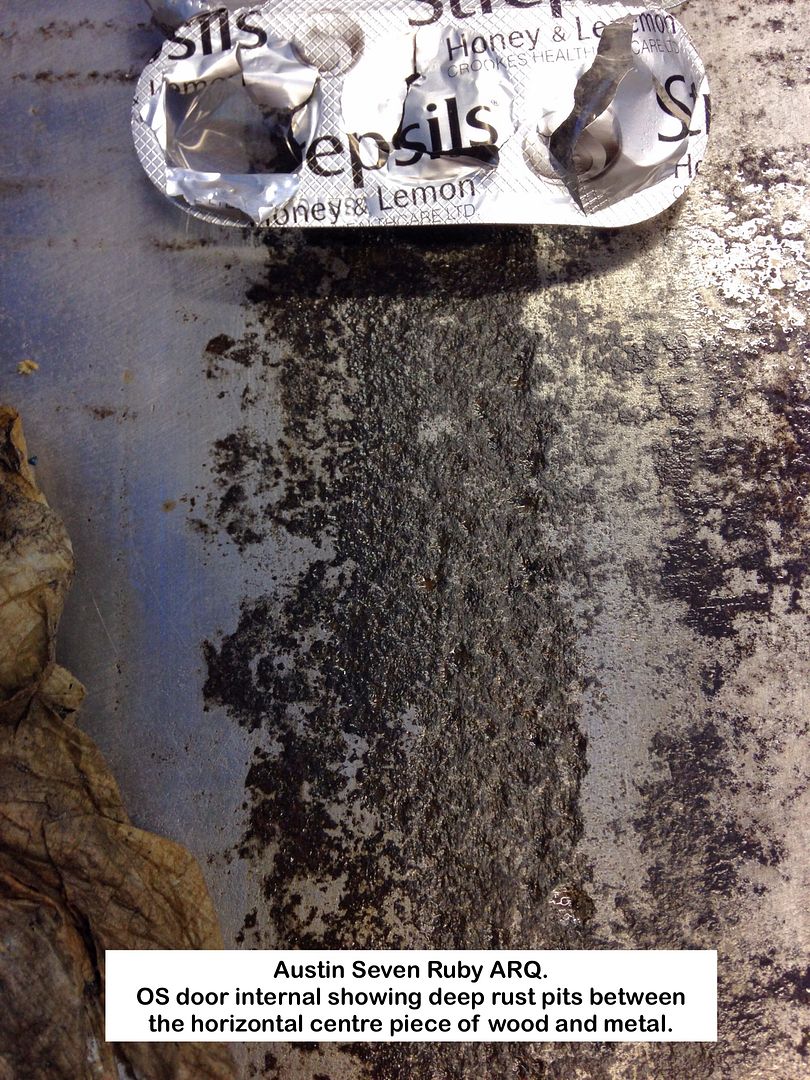
There where varying degrees of rust between the wood frame and steel panel ranging from minor to quite severe rust pitting under the horizontal centre piece.
The bottom lip is very much 50/50 whether it's worth keeping or replace either some or all of it.
Will need to come up with a solution to replace the perished rubber rollers that the glass runs between, but will add a photo once I have removed the 4 tubes that the rubber is mounted on.
Will get a cost for blasting before trying myself.
Cannot be more messy compared with soda blasting can it!?
1)
2)
3)

4)
5)
6)
7)

8)
9)
10)
11)

12)
13)
14)
Geoff - Next lot will be of the finish painted small parts.
Location: South Norfolk - Next to Suffolk
Hi Geoff,
There is a very good blaster just down the road who does wet blasting and dipping, would you like his number?
Keep up the good work,
Tom
Location: Eye on the Norfolk / Suffolk border
Yes please Tom
Fersfield by any chance?
Do you per chance have access to sheet metal rollers?
Geoff - 5year old's school Christmas Party at 1330h, so girding my loins.
Location: South Norfolk - Next to Suffolk

Much appreciated Duncan.
I used to do Bradford - Diss - Bradford regularly when I was Enginering Manager at Klockner Moeller, so yes a tad too far 
Geoff - School party went well, if somewhat noisy.
Location: South Norfolk - Next to Suffolk
Hi Geoff, the Fersfield company only do coarse grit dry blasting, I was thinking about a company near Stanton on the Bury road. I can’t find there contact details at the moment but I will email you.
Yes I’ve got some sheet metal rollers and you’re more than welcome to use them or give me a ********** sketch and I’ll roll them for you. If you haven’t got the material yet let me know and I can get it pre-cut for you.
Tom
Location: Eye on the Norfolk / Suffolk border
Thanks Tom, much appreciated.
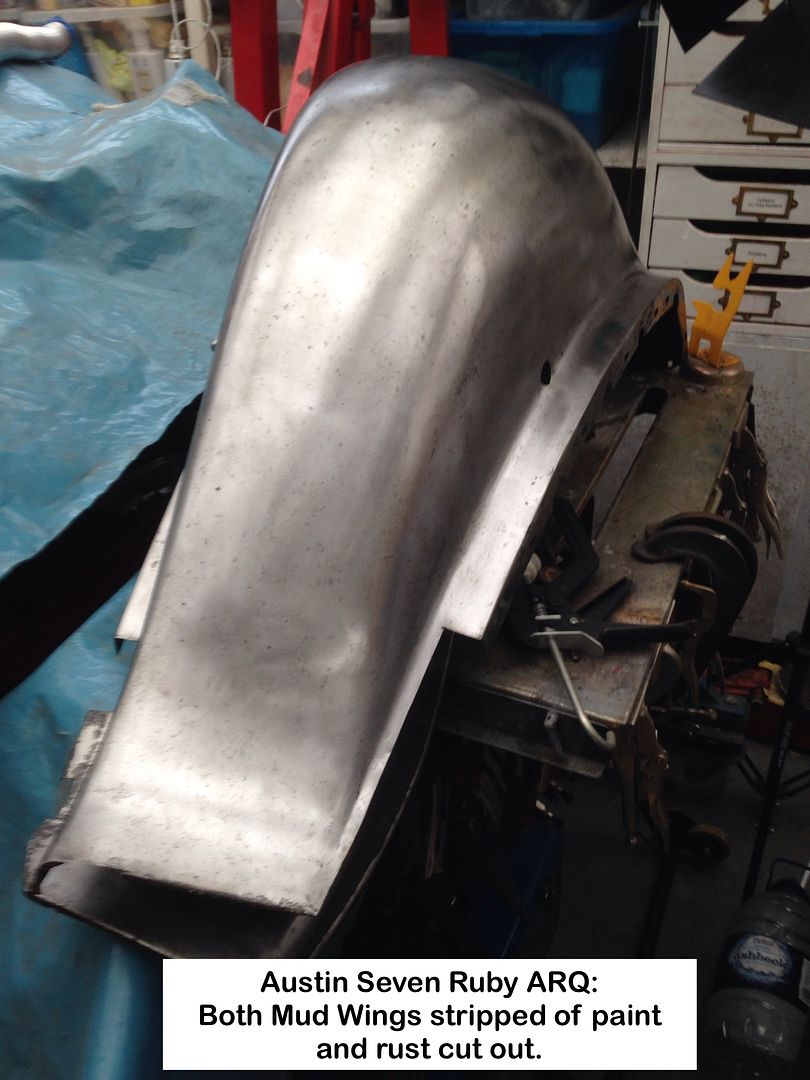
I will need to pop round with the rear Mud Shields as they both need the area that fits flush up against the inner arches replaced, as do the corresponding sections of the inner arches, that said Mud Shields bolt up against.
They have what I can only describe as being well and truly done over, as with the NS door.
Do you have suitable sheet I could purchase?
If not will get some cut at Roy Allen.
Hope the above is as clear as mud
Some time next month with any luck, as I'll have the body back in the Carport then.
Geoff - Inside today catching up on other things as Carport too 'bleep' cold 
PS:
The school party went well 
Location: South Norfolk - Next to Suffolk
Ian, Mark,
Thanks for the suggestions.
Watched the video on shrinking/expanding again last night.
Mud Shields are around 1mm thick as best I can measure, but no idea of original panel thickness before forming.
I only used the 0.6 to experiment with and realised later that it was far too thin to stretch.
I will get some 1mm and slightly thicker to practice on.
Someome has suggested using an air hammer, with blunted chisel, to stretch.
Air hammer I have so worth a try.
Mark,
Could you be more specific re 'curved not domed' please?
I don't have a proper stretching hammer but have these, having ground the centre one:
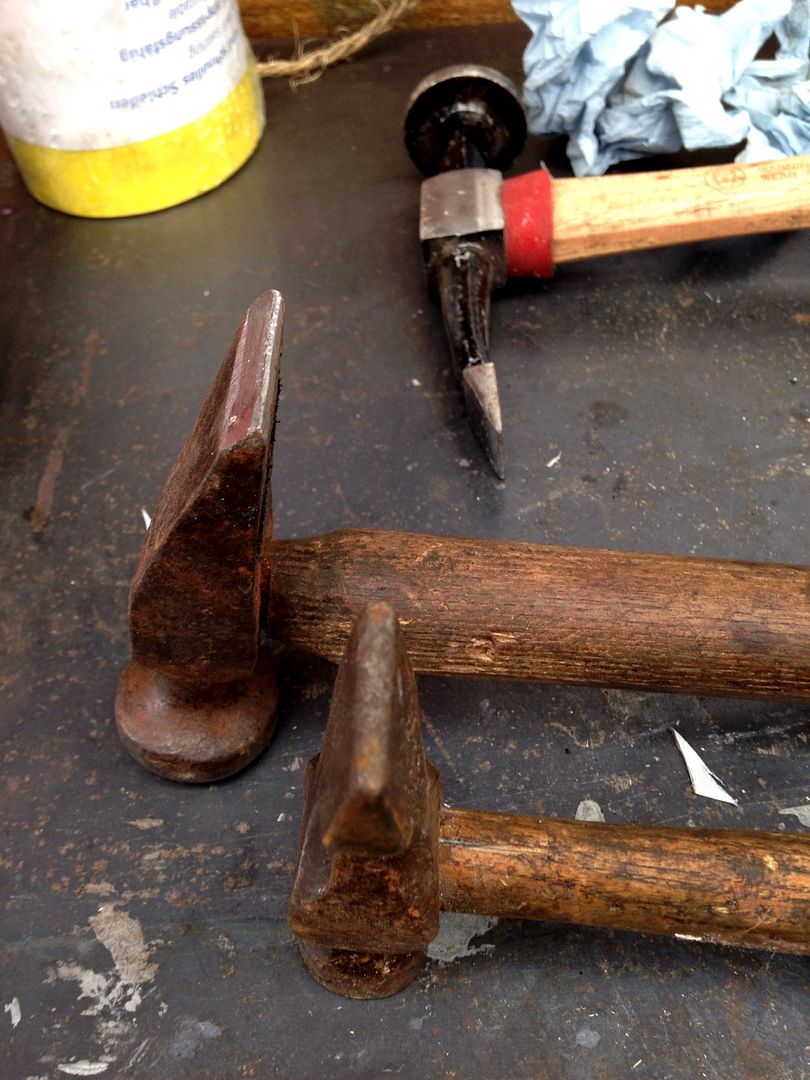
Making one of these patch panels is going to teach me a lot for future metal bashing.
Geoff - Talk about jumping in at the deep end!
Location: South Norfolk - Next to Suffolk
Hi Geoff
I did quite a bit of metal bashing, mainly 1.5 mm Aluminium when making my GE Cup Model look-alike. I don't know how many repair sections you need to make, but I would certainly invest in a small shrinker/stretcher machine. They are available on Amazon for about £ 160.00 and certainly make life a lot easier, particularly the shrinker. Stretching metal is fairly easy with a flat hammer, but I couldn't master shrinking with a hammer. Best of luck with the restoration.
Location: At the moment in France but soon to be near Grantham
When hammer shrinking steel a bit of heat can help. First put a series of puckers into the edge you wish to shrink, much like the wavy flange on a metal pie or flan dish, this will cause the panel to curve into the desired shape. Then heat one of the puckers with an oxy torch to dull red and close just the extreme the open end down onto a flat surface. The idea is to trap the excess metal in the pucker, this excess can then be hammered down flat, being now trapped by the closed edge the additional metal has nowhere to go other than flow into the surrounding metal. Heating the bit of metal you wish to move to dull red softens the steel making it flow more easily, you can also shrink steel simply by heating and quenching, although this method is generally more useful when removing stretch and flop in a reasonably flat panel.
Edit: Think of it like this, to stretch an area you will need to make the metal thiner, this can be achieved by striking (squashing) and area between two hard surfaces i.e hammer and dolly, or anvil and roller of an english wheel etc. To shrink and area you need to make the material thicker, so you need gather up the excess material, trap it and then push it back into its self, this is known as hammer off dolly, in other words you support the metal next to the area that you strike with the hammer pushing the metal down to the same level as the dolly. With the material trapped at the edge the metal has to flow into its self and shrink.
Location: NZ
Geoff
You will find it much easier with the some thicker sheet so good luck. The hammers both look quite aggressive for stretching, the one I use that works best has a bigger, round, head (Say 15 - 20mm dia) with a slightly radiused crown. My comment about shape is the the crown should be flat in one dimension and radiused in the other. (like yours, just with a much larger radius).
Buts that's what I found worked, you can probably can get the same result with what you have in the photos, you will just need a lot more hammer blows to end up with a flatish finish. It helps if the wind is blowing from the west as well
Location: Fremantle, Australia
More good advise - cheers.
Been watching the David Gardiner video again on the way he does his work.
Looked at stretcher/shrinker u it's yesterday but had to buy a new welding helmet.
The solar one I have refused to work yesterday afternoon as the ambient light was miserable even in the clear roofed carport.
I do have portable flood lights, but they just get in the way so the new battery one will solve that problem with luck and it has a big 'window'
I will be trying the hammer approach, then air hammer once I get thicker material to practice on.
As far as I can tell, these are the only two bits on the car I need to stretch, but time will tell.
Geoff - Off to steel merchant.
Location: South Norfolk - Next to Suffolk
Been using the MIG to weld patches in the front Mud Shields.
Whenever I read about how hard MIG welds where in comparison with OA/TIG, I always thought 'How much harder can they be?'
'Add your favourite AngloSaxon here' HARD that's what!
Couldn't believe it when I tried a file and it just skated over the weld blobs.
Used TIG to fill holes then ground the welds down and the difference in the quantity and type of sparks produced was eye opening, with MIG winning hands down.
Photos to follow when done
Geoff - TIG from now on especially for panel work.
Location: South Nordolk - Next to Suffolk
Out of sequence, as I've repaired the front Mud Shields, modified the Running Boards and given them and other smaller parts a coat of 2k zinc primer.
This is 4 months later than I had hoped for, so nothing unusual then.
My DIY Car Trolleys made the move out and now back in a doddle.
Ruby body into Carport
Tried to embed this video using the BB Code, but no luck, so what am I doing wrong?
Geoff - Bodywork at last.
Location: South Nordolk - Next to Suffolk

Ian, Tony,
There is no way I will pay their greed induced ransom.
I do, however, pay for extra storage and read somewhere that doing so will keep links working till next year sometime, when they will kill 3rd party links as well, so they are now only used as a photo backup, amongst others.
Have now switched to using Postimage for now, till I sort out something I control.
Geoff - Norhing done the last two days 
Location: South Norfolk - Next to Suffolk