Welcome to the Austin Seven Friends web site and forum
As announced earlier, this forum with it's respective web address will go offline within the next days!
Please follow the link to our new forum
http://www.austinsevenfriends.co.uk/forum
and make sure, you readjust your link button to the new address!
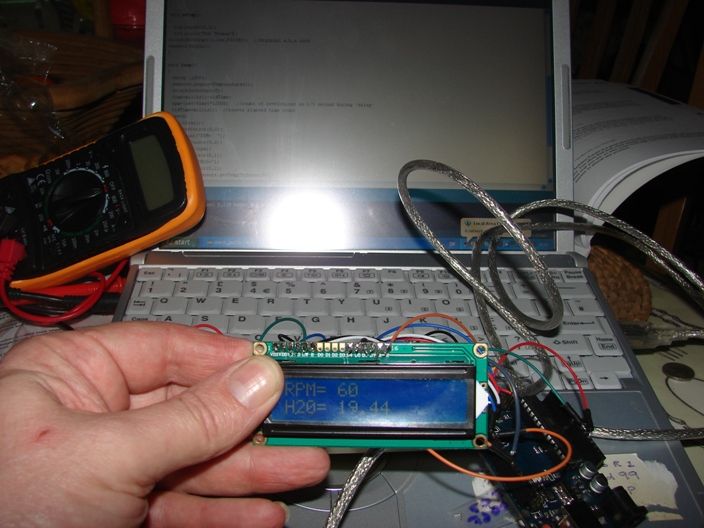
Hi Rob. My Austin is fitted with electronic flashers, assisted contact ignition and a tachometer all to my own designs. I used discrete parts for these, but am also a fan of Arduino which I am using for a different car related project.
One of the potential snags with A7s is the tremendous level of electrical noise, both conducted round the wiring and radiated from the copper plug leads. Using an independent battery DC supply helps, but I also found it beneficial to use suppressor resistors at the plugs to avoid spurious glitches. I "hid" 4.7K 2 watt wire-ended resistors inside heatshrink sleeves at the plug ends. To achieve a smooth cylindrical shape before the heatshrink went on, I filled the gaps by winding with plumbers PTFE tape. You could always use proprietary suppressed caps of course. Hope this might save you from the Gremlins !
Location: New Forest
Thanks John. Good advice.
If I can get 'Plan A' working then the next logical step is to avoid the distributor completely and use the same hall-effect trigger and a map to create a computer controlled advance curve. I have the same thing on my aeroplane engine and it fires 40,000 volts at all rpms, never runs out of sparks at high rpms, never loses timing, never shows any spark scatter, etc, etc. At 40,000 volts I can use suppressed caps (or carbon leads..Yuk) and open the sparkplug gaps to 35 thou.
New water temp probe and wiring loom arrived in the post from Shanghai yesterday. 99p, including the postage via airmail. 
Easier starting with electronic ignition...
https://www.youtube.com/watch?v=xqw8ZcI0eEw&list=PLBnaW8WNlTyHZ09I5KMF2ml1CxuD-9_XJ&index=7
Location: Cardiff, like, isn't it.
Have a look at the rusefi project on the web.
Crazy Russian guy making up diy engine control systems.
Think I might have seen a reference to arduino on there?
Steve
Location: South East Cornwall
Revcounter software all finished, speedometer software under development, oil pressure monitoring/warning system still under investigation to find best transducers and finally yhte water temp system with "about to boil" warning lights" is complete. All this stuff can be removed from the car in minutes and only costs about £50 for everything so is cheaper than buying a used Ruby speedo from Ebay.
The speedo kit will be instantly calibrateable with a laptop plugged into the main board. All I need to do is work out exactly how many wheel revolutions are required for 1 mile, done with a tapemeasure and a piece of chalk.
Location: Cardiff
Thanks, Steve.
That website is a bit above my level at the moment. I only started reading about these Arduino things from a book I received for Christmas. His piece of kit will run fuel injection as well, so my version only needs to cope with perhaps 1% of all of the stuff his does.
I want mine to be portable so I'm planning to borrow an ideas from someone else and fit it all inside a 4" Smiths speedo from a Mini or similar.
First running prototype on a small LCD screen...
Location: Cardiff
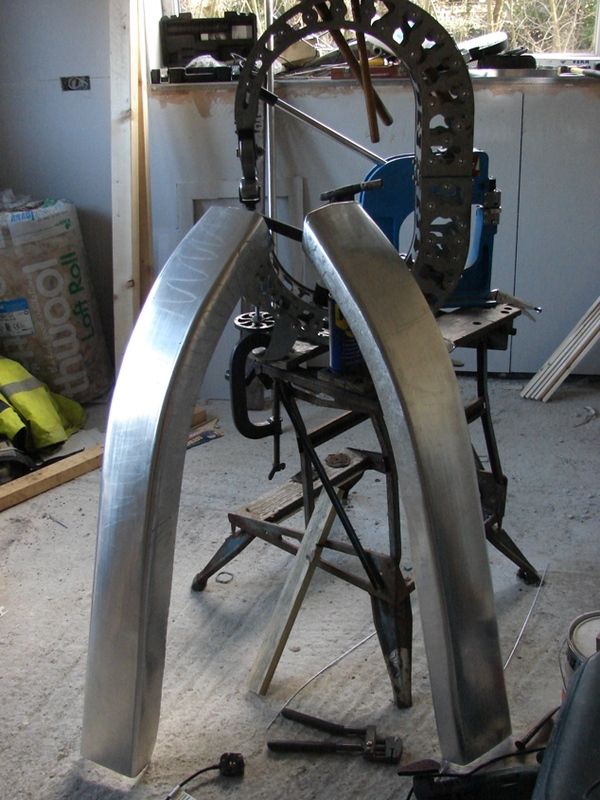
Front wings under construction. I think I'll probably form some panels to weld on that bridge the gap between the wing and the bodywork, a-la MG P-type.
Not sure how to shape the leading edges of the wings.
Location: cardiff
Looking good.
Might I suggest that you mount your English wheel on something more substantial than a B&D workmate? It will make using it much more pleasurable and less irritating. The first one I had was bolted to the floor and back-mounted to the wall.
I use a wheel regularly and have found that I wish mine was bolted down rather than on a fabricated stand. To take advantage of the wheel's ability to "move a wave" it really does need to be set up on something relatively rigid.
Crack on!
Location: Ripon N. Yorks
I can't get in my workshop right now because we're in the middle of having our house rebuilt (hence the building materials in the background.) The Wheel usually gets held in a chuffing great big bench vice but there is a ton of stuff clogging the workshop up. In another month I should be able to start getting the workshop cleared out....hopefully.
Front wings all 'wired' up round the edges. What an awfully complicated job to do! You need several sets of flexible wrists and at least another few fingers to get the little anvils in the right place to bend the edges over. Still, from a distance it all looks quite reasonable.
Next job is to fabricate the stays between the rad shell and the wings. The engine has decided to take a break from running and stoutly refuses to fire up. It might be a blocked jet but the previous owner of the carb had graunched the jet hole from a nice square to a near perfect circle. That jet won't be coming out without a fight.
Location: Cardiff
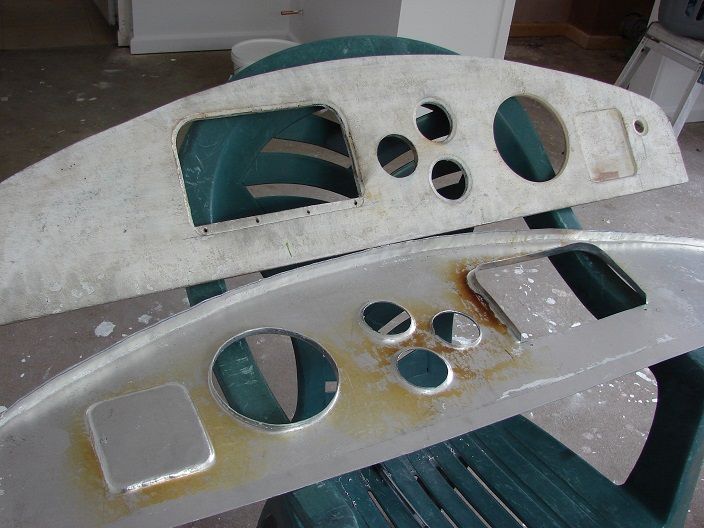
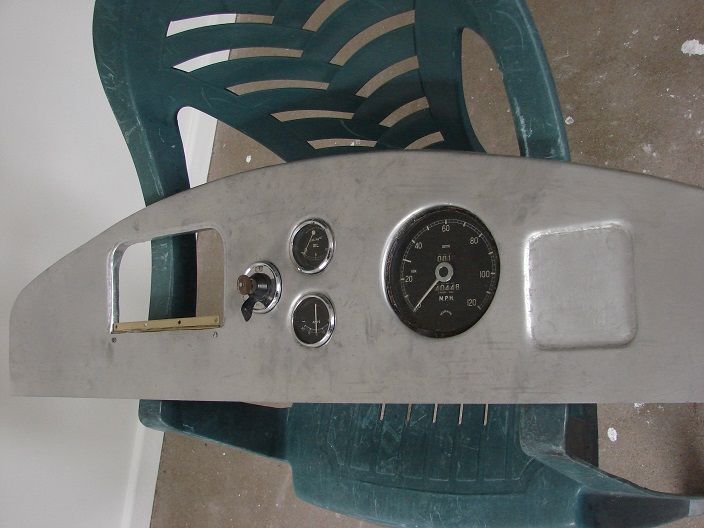
Dashboard version 2 under construction. Plywood former with holes cut out with a jigsaw, routered edges, 1050 grade cheapo aluminium skin annealed and battered round into shape. I'm not sure where the smaller dials came from but the speedo seems to be an early Jaguar one (1080 tpm). Slightly optimistic on the top speed, I think.
I've got to make the cubby-hole lid so that it folds out horizontal to hold a coffee cup and close so that it is flush, hence the recessed lip round the top and the sunken hinge. The bit at the far right is to hold the LED readout of rpm, water temp and warning lights. I've got some switches from a Bristol Blenheim (aircraft, not car) to go in.
Location: Cardiff
Whilst convalescing from that back surgery I have been working on a new dashboard. Using a Arduino (credit card sized computer board, circa £8) I have been working on a revcounter with warning lights that come on at certain rpms (2200-2400), a water temp gauge, oil pressure gauge and speedometer. All are displayed on a small LCD screen. Obviously not standard fit in the 1930s but it is all removable and can fit inside a standard BMC speedo casing.
Total cost for parts, including sensors, will be under £60. Power is 6V or a 9V PP3 battery.
Not a single component made by Smiths, other than the casing!
Hi Rob,
I've been considering using a VW Passat dash - not my pic. You'd need to add CAN to your arduino, but I think the dash has been sufficiently hacked to allow you to drive it (the gamers are using them). It'd need new clock faces printed to age it, and parts of it hidden, but all the clocks are of the servo type, so you can use them for anything.
Andy
Location: Oxfordshire
One of the many features I like on this car is the fuel gauge - a basic multimeter with some numbers scribbled on with a sharpie. Its not the right look here but it might be some inspiration. Perhaps convert a period voltmeter to read whatever it is you want to know.
https://www.youtube.com/watch?v=ZcjpXbMiCtg
PS - nice work on the dash - an inspiration.
Also...out of interest...how much of a radius did you put on the ply? How thick was the ply? Just sits flat on the bench? Did you need to clamp the ali or sandwich it between ply sheets?
It took me a while to work out you had it one way up for the holes and flipped the former for the raised section.
Thanks, David.
It is about 8mm ply with holes cut with a jigsaw and the edges either carved with a knife and file or with the aid of a router that has a bit that comprises a cutter with a small bearing below it that permits you to follow a curved edge. This allows the ali sheet (1050 grade, 1.2mm, £5 per m2) to be 'recessed'. I glued the sheet onto the ply first so that I could start the bashing with 2 pieces of 4x2 and a bench vice keeping it fairly flat. Once part-formed I annealed the sheet again for the finishing touches which also cooked the glue to death.
Making sure it was going to be possible to separate the pieces was always hard. Once the hinge is finally screwed in I'll be able to glue the ali permanently into place.
I'm tempted to 'crackle black' the dashboard. Good idea?
Location: Cardiff
Where do you get 1.2 1050 at £5.00 per squ. metre? My last lot was almost twice that per full sheet, delivered by ASD metal services.
Location: Ripon N. Yorks
Is the router bit to "round over" the edges or a way to cut a clean edge to a template?
Gluing the ali to the ply before forming is a neat idea.
Do I understand correctly that the ply is going to be glued back on again for the finished dash? If it was me I'd resent the weight. If you need it to mount the hinge and dials how about cutting out the bits you don't need to leave just a skeletal frame?
To anneal do you do the "coat in soot then burn it off" trick or do you have another method?
Keep at it!!! MUCH enjoyed.
David
Classic method of annealing aluminium is to rub soap or paint soap solution on it. Then heat until the soap turns dark brown but stop before it goes black.
Location: Ripon N. Yorks
Hi,
Just what I do. Use "savon noir" here which is plain liquid soap. Works a treat.
Renaud
Location: Brittany
Duncan. I get it locally and buy the scratched sheets and the ones with knackered ends on them, hence the price. They ofetn have stuff that nobody else wants, even letting me rummage through the scrap bins!
David. Yes, I have one router bit that sticks a bit of a flat on the edge for the small dials to sit flat whilst still being slightly recessed. I only did this to get away from a more boring look of a flat panel. The speedo hole was merely slashed away with a Stanley knife and a small metal file, just enoguh to make a gentle curve. I planned to do almost exactly as suggested by removing some wood areas with a hole cutter and then glue it all together. I still need to decide what to put in the square hole on the right and have a selection of 1940s switches and lights.
As for the annealing, I use either a bar of soap or one of those Sharpie pens that seems to burn off at a temperature just below that of the soap going brown. I sure does make the panel squirm as you heat it all up and it stretches in strange ways!
Rob
(In the Sim at Gatwick)
Location: Normally Cardiff but in a 737-800 sim today
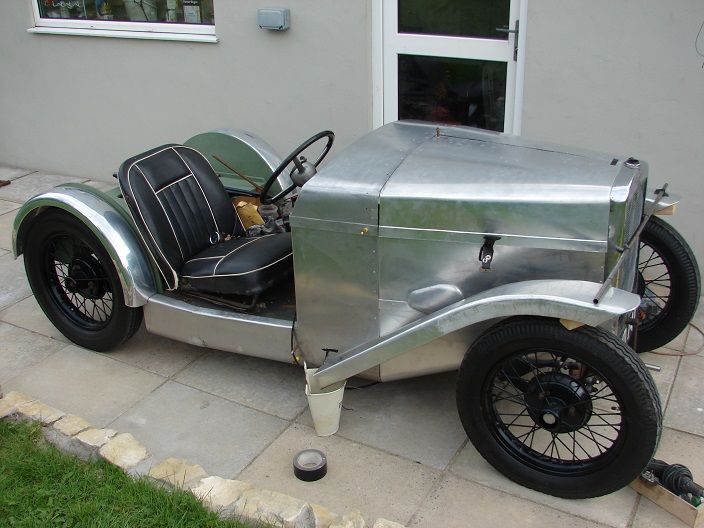
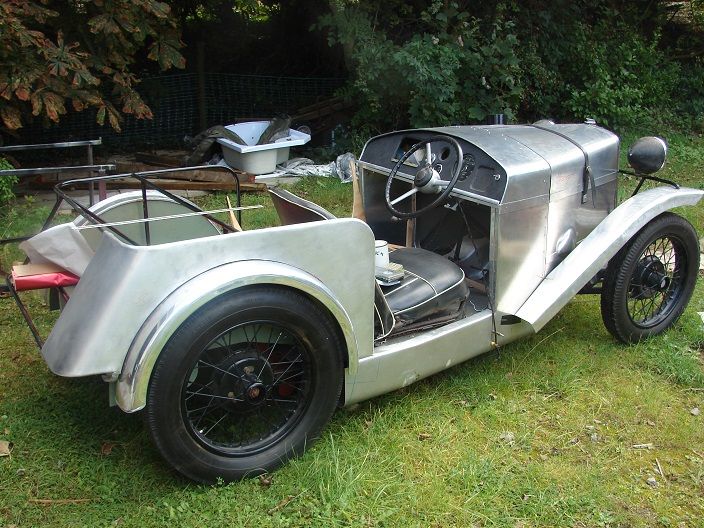
Latest update...
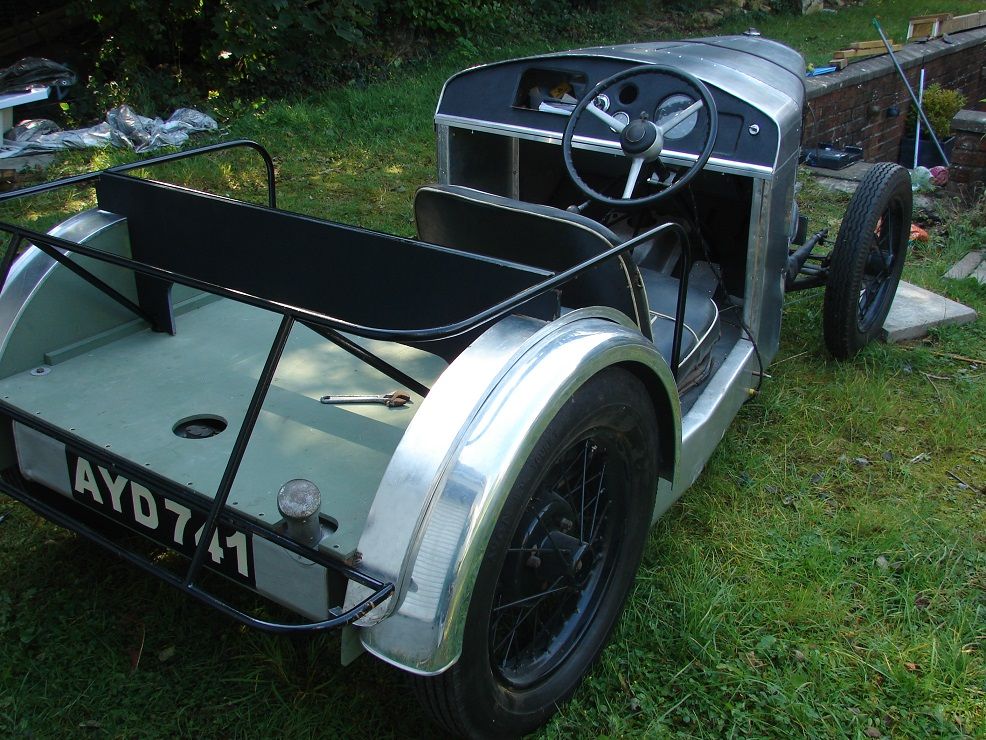
Steel tubular frame made to carry the alloy skin. Some strip ali with folded edges to make a lip for the bottom edges of the side sheets and a wooden bulkhead with a hole to allow the spare wheel to fit in. Next step is to form the steel frames for the suicide doors.
Location: Cardiff
Rob, why not turn an edge over around the wheel arch rather than attach a separate " lip", it would be much neater than a row of rivets.
Location: NZ
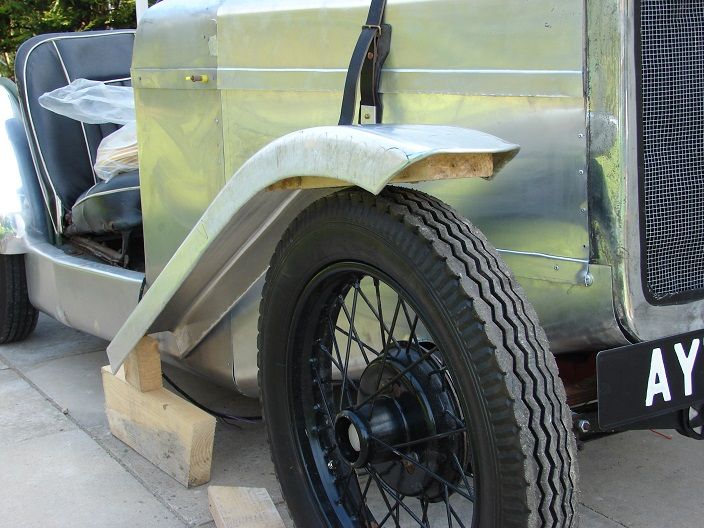
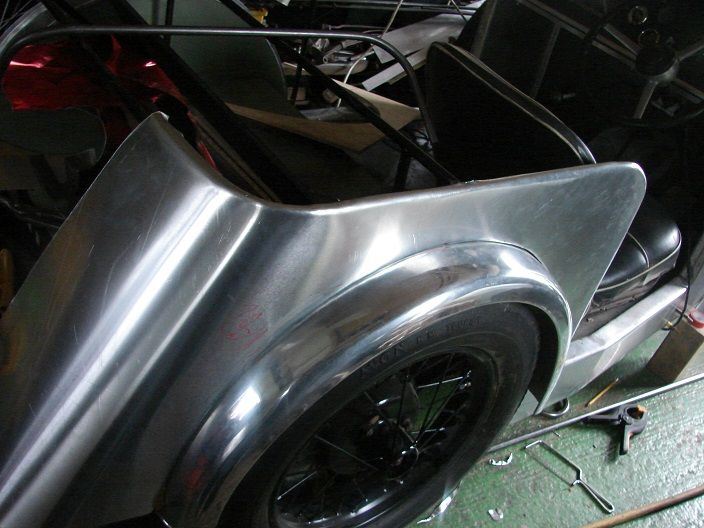
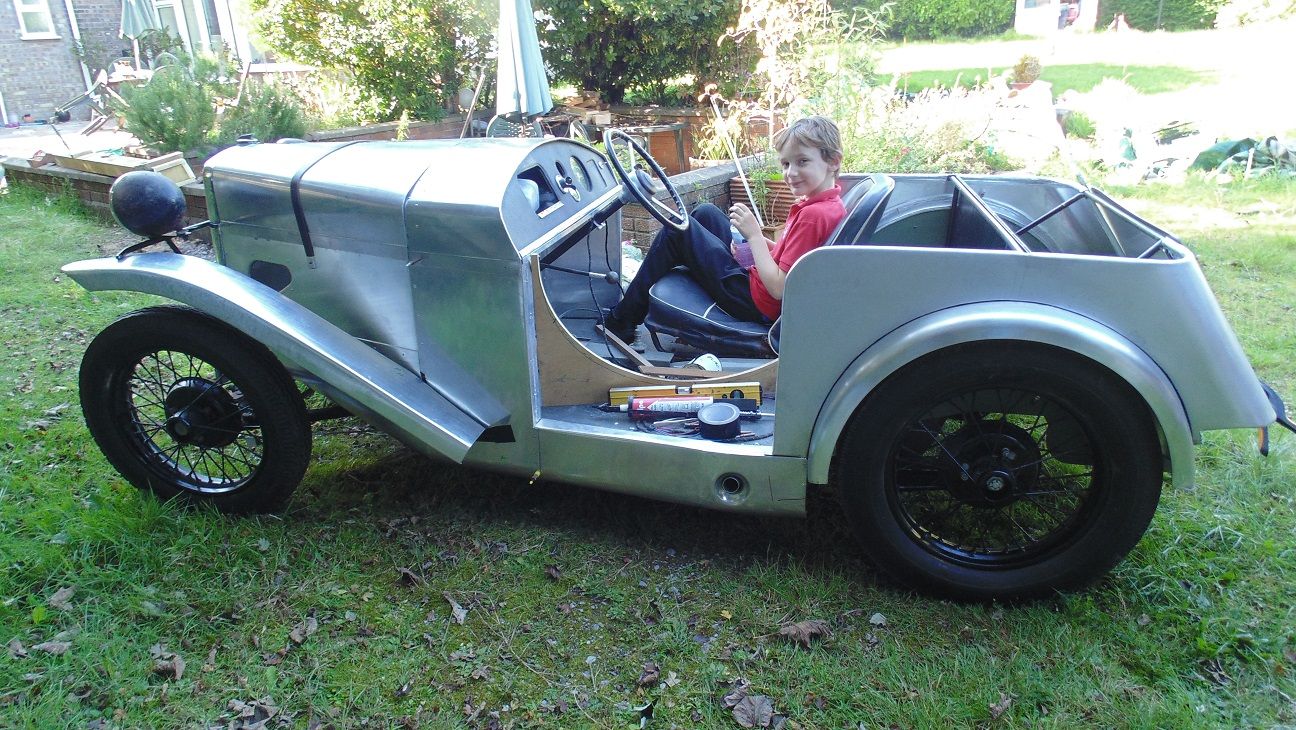
Hi always look forward to your updates, have you tested the rear wheel movement over uneven ground to check it does not catch the wing looks a bit snug. Very impressed by the car.
Location: Dorset
The plan will be to either turn the bottom lip inwards and 'Sikaflex' the joint or to use countersunk rivets and blend them in. There will have to be some sort of rubber 'P' strip there to keep the pieces from rubbing, anyway.
As for ride height, it seems very light so I'm hoping it will not sink too much. If it does, I have some more springs to try although the flat ones seem to offer the best performance, right? I've never driven one on the road so I don't know. The wings are quite deep inside so they might be OK. The axle will hit the bumpstop a few millimetres before the tyre hits the mudguard if I have done the measurements and calcs correctly (Ruby Mk1 chassis). Time will tell.
Thanks for the last comment, Douglas. It is always comforting to know that someone thinks you are going in the right direction! 
Location: Cardiff
Will there be a hole for the top of the diff housing in the back? I think I allowed about 4 inches above mine (have to go measure to be sure).
Also it's not just both wheel bump you have to consider, it's also what happens when one wheel deflects. You get a lot of axle twist. Imagine one wheel going over a bump such as a kerb for example. Tricky to explain but hopefully you see what I mean.
Simon
Location: Auckland
Rob
Take a look at
http://www.theaustinsevenmotoringpages.info/Original%20Drawing%20of%20Sports%20Chassis%20A.htm
I don't know if a similar drawing exists for the later chassis - but, from experience, Dad's '29 Ulster will bottom out on the inside of the wings going over a bump or pot hole etc... - and that looks like it has loads of clearance between the wings and tyres.
Similarly, you have to be careful of the back axle tubes hitting the sides of the body under extremes of travel.
Peter
Good point, Simon and Peter. I THINK that the Ruby chassis has a bit more room for the diff to miss the woodwork but I'll check in the morning. The 'early' pic suggests 3.5 inches bump which I think is the figure I worked from.
the boot floor sits on top of the rear chassis extensions. Obviously the springs have since been changed!

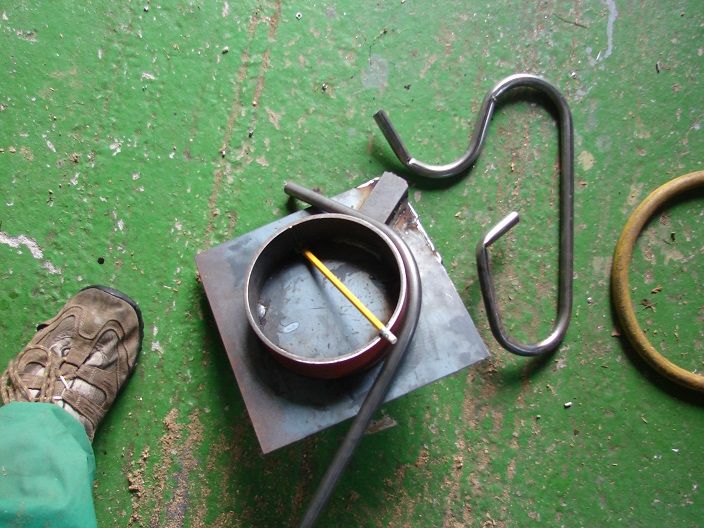
Mk2 pipe bender works quite well.
Location: Cardiff
Plenty of space betwixt diff and floor so I cut and folded the first rear side panel this morning. If there is ever any problem I'd be better off raising the rear springs a bit since they are actually slightly (1/2 inch?) below 'flat'.
Location: Cardiff
I was in the same quandary regarding clearance so I made the transverse tunnel almost as high as the bump-stops on the Ruby chassis and filled the outer gap with a removable panel. My reasoning was that the clearance was designed for a payload of four bodies, two of which were well aft of the hinge point and beyond the centre-line of the axle.

Location: Ripon
Good idea, Duncan. These springs I've got are very low and the clearance everywhere is only 3 and a bit inches but there is no great weight to the body and no room for anyone at the back. If it doesn't bottom out in the first few runs then I might be alright. If not, I'll put some packing wedges under the spring seats. Mr Thicky here forgot to make holes in the floor to get the spring clamps out. Doh!
One side complete and the other side half done. I also knocked up the frame for the headlamps and front wings although I haven't decided yet how to finish off the rear edges of them. Running boards would need too much structure to hold them up.
By the way, I've got 41.5 inches gap between sides for the shoulders. How does that compare with other versions?
Location: Cardiff
Is that a strategically placed tea mug I see on the seat?
If you're planning trials work a mudflap with a tidy detail fitting might give you a neat terminal for the guards?
I also omitted a hole for the spring hangers. Doh!
That is 7" wider than my Special and 3" wider than my Nippy, I would also suggest that a 3" guard clearance will bottom out over bigger bumps.
Location: NZ
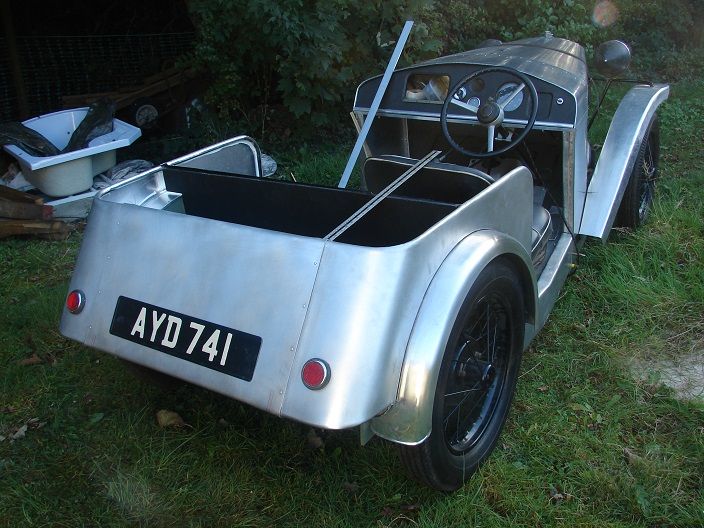
Tail end all in place except for the bumper or cowl that needs to go underneath. Not sure whether to make an alloy bumper to go below the back end. Next job will be the doors.
Location: Cardiff
The rear springs on my saloon have settled to the extent that there is now only 4" between the tyre and the wheel arch. With two up, the wheels are beginning to catch the body on unexpected bumps. You need 6" clearance with new springs, unladen. The springs will settle by 1" after a while and the drivers weight will add another 1" deflection, leaving 4" to handle the bumps.
If the clearance is insufficient with the body only part built, the situation will only get worse as the build progresses. Bite the bullet and fit a pair of springs with more camber.
I have from experience to agree with the comments over clearance needs. For instance you have not yet added the fuel tank contents 5 1/2 galls + tank say 70 Lbs, spare wheel say 50 Lbs, a few tools, jack, spare water and oil, two bodies, hood perhaps, tonneau cover, both seats, luggage space lining, lights, etc etc.
There is also a significant sideways component to the axle and tyre/wheel. Hard cornering will move the tyre possibly a couple of inches sideways if you take into account body lean.
I hate to be a doom-monger but the rear body looks a bit tight in all dimensions to me. I built a Cambridge bodied special and started with 120mm clearance blocks above the tyres when I set up the cycle type Cambridge wings. On big spring deflections even with one up the tyres now graze the wing supports. The springs settled and the poor road surfaces encountered these days make the springs work hard. I have had to move the wing stays once already and a second move is on the cards
I also had to move my wing supports up.
On yours is there scope to raise the whole body?
David
Ooooooh...now they tell me!
I can pack the springs up with angled wedges (I think that will work, won't it?) and maybe a Panhard rod will locate it sideways. I had assumed that the flat springs would have keep sideways movement right down.
What about "Nobby" type spring assistance between axle and chassis extensions/Bumpstops?
Location: Cardiff

I suspect there is very little true sideways movement of the axle because it's constrained by the pin joint with the springs. However as the car rolls there is a considerable angle between the wheel and the body so the top of the wheel rubs on the inside of the wing.
My car, a 1929 saloon, is at the other end of the spectrum and the wheels rub, but of course it rolls a lot more than a special would.
Occasionally the wheels occasionally hit the top of the wings in the bottom of deep dips, not bumps though. That's about 6" of spring travel
However RK saloons have no bump stops. I don't think the body would be strong enough to withstand the shocks!
Location: Melrose, Roxburghshire
It may be easier to have the rear springs reset to provide more camber. I think if you fit rubber bump stops they will be acting as your suspension and the ride will not be pleasant!
With more camber on the rear springs the rear end may look a little high, I would give the front spring more camber to level things up. Altering the front spring is a doddle!
My experience is that with our roads Austin 7's that sit a bit higher are much nicer to drive and ironically, on a cross country journey on back roads, the car with the better ride height will be quicker than the low 'sports' model.
It is also embarrassing if you take a lady for a ride and the wheels scrape on the wheel arches!
Quote..."it is also embarrassing if you take a lady for a ride and the wheels scrape on the wheel arches!"
I like it!
Progress today. I measured another flat spring and there is 3x as much spring outside the cahssis rail as there is inside (53cm Vs 18cm) so I carved 2 oak wedges to be 18cm long and 2cm tapering to zero to try and give an extra 2 inches at the wheel. It seems to have worked although the hardest parts were to firstly drill a hole to get at the top of the big spring bolt and then to align the hole after the work was done (Simon. I wish I had found your photo website sooner!).
Mk2 will have a slot cut down the wedge so it can slip in without having to fully withdraw the big bolt. One side done and it sits about 1 3/4 inches higher.
One more question, if I may. What is the 'packing' mentioned in the various books? I never found any in the boxes of bits that this car was assembled from. Is it a flat piece between the spring and the flat plate at the bottom of the chassis rail?
Location: Cardiff