Welcome to the Austin Seven Friends web site and forum
As announced earlier, this forum with it's respective web address will go offline within the next days!
Please follow the link to our new forum
http://www.austinsevenfriends.co.uk/forum
and make sure, you readjust your link button to the new address!
Ruairidh,
Was it you that mentioned that some time ago?
Rings a bell.
Geoff - Video editing progressing
Location: South Norfolk - Next to Suffolk
AustinSeven
Have been busy getting all the loose small body parts cleaned ready for epoxy undercoat, then September hit and floored me.
September was without doubt the most humid month I can remember, and what with the heat, it made the Carport 'Out of bounds', so have been busy in the Workshop, as seen below.
I had chucks lying around since 2006 ready for mounting onto base plates, for use on the lathe and dividing head, so thought it high time I made them.
Austin:
Machining the manifold and water inlet surfaces on the block:
https://youtu.be/zLBFv60GRNQ
Valve grinding:
https://youtu.be/29NdwYBHzbo
Chuck backplates:
https://youtu.be/eXFRk-fUI_8
For the dividing head, having forgotten to take photos of the ones for the lathe.
Back onto the body and this pair:
I've forgotten where they go.
Any hope of a replacement?
Geoff - Still recovering from September heat & humidity
Location: South Norfolk - Next to Suffolk
Been a while, but here's what I've been up to, so feast yer eyes.
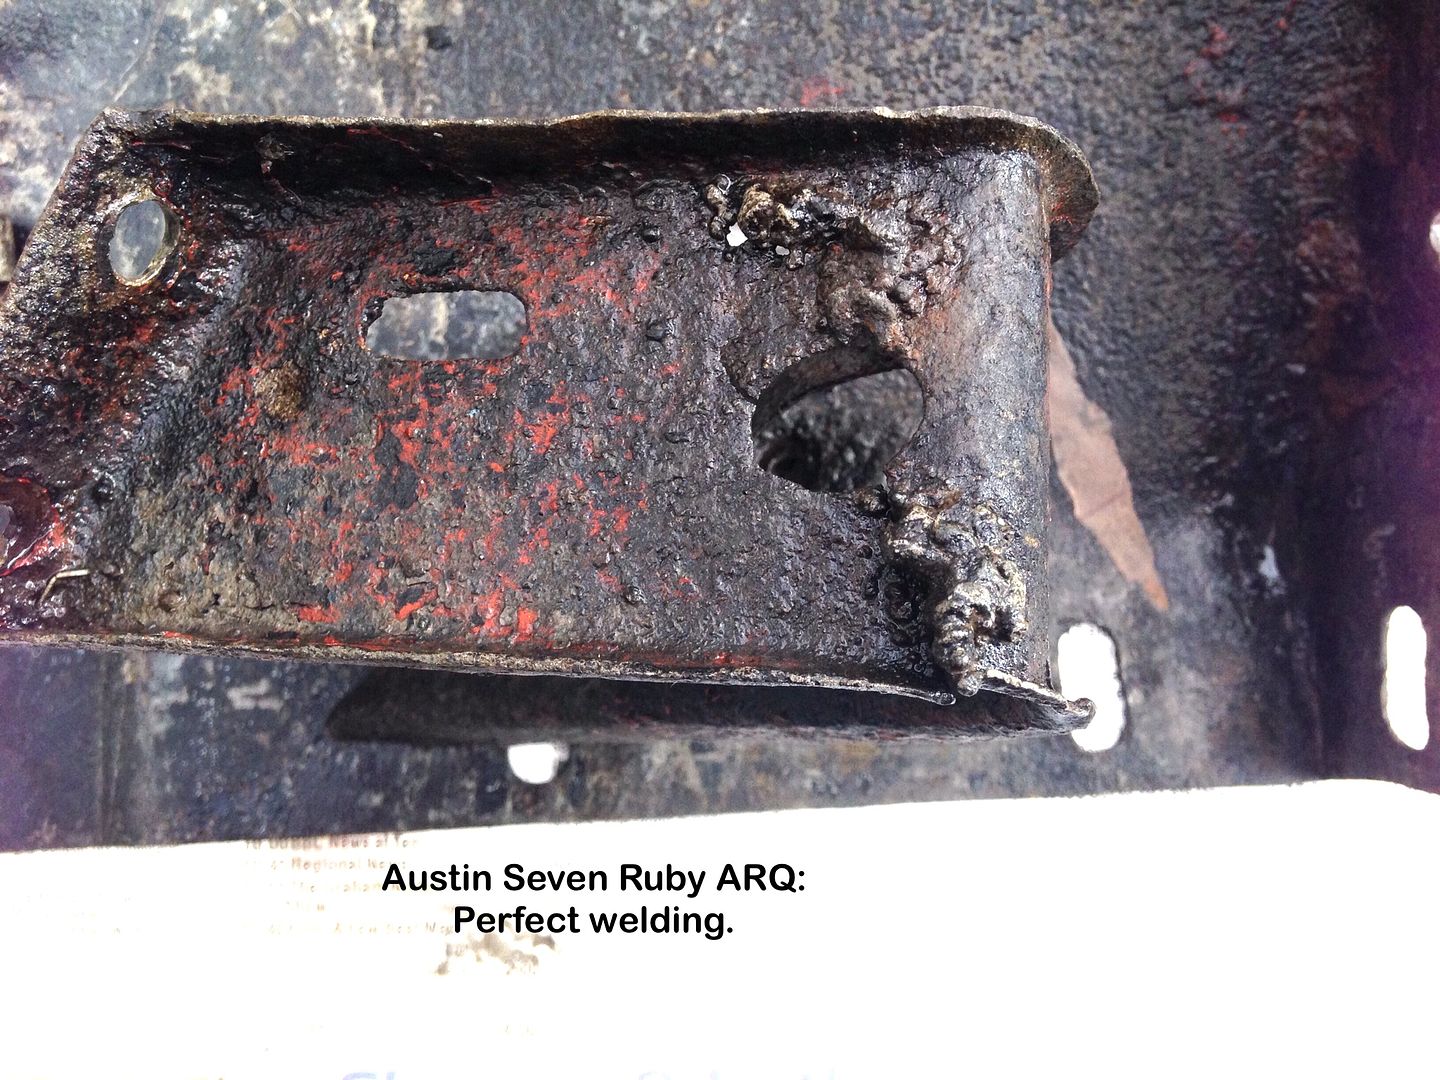
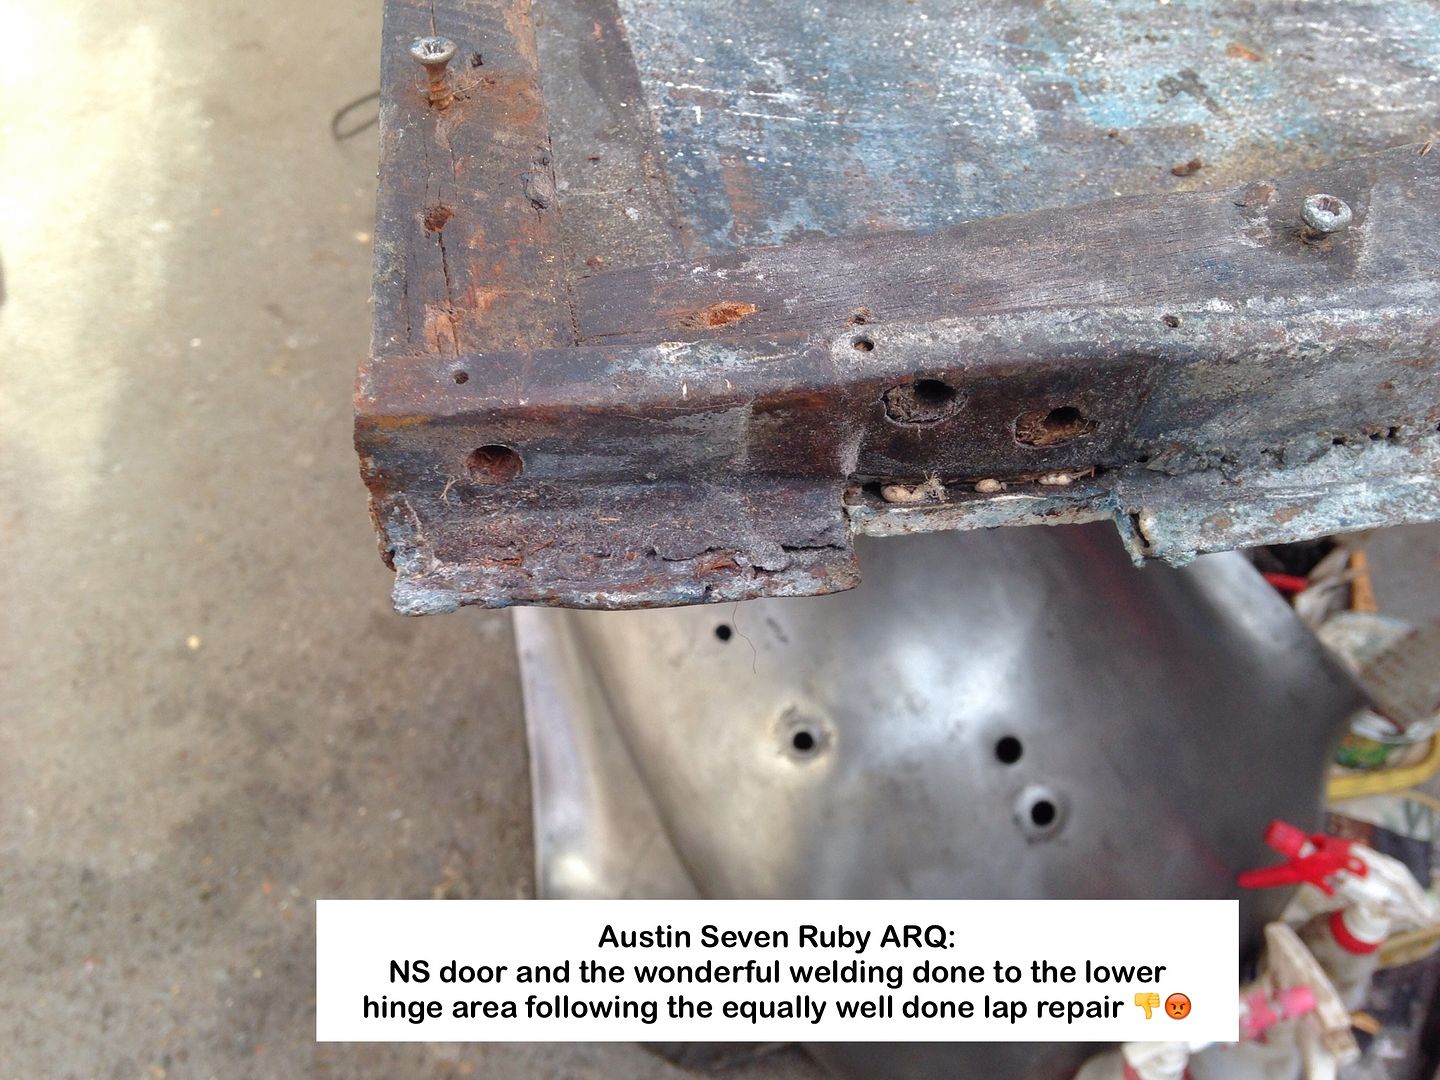
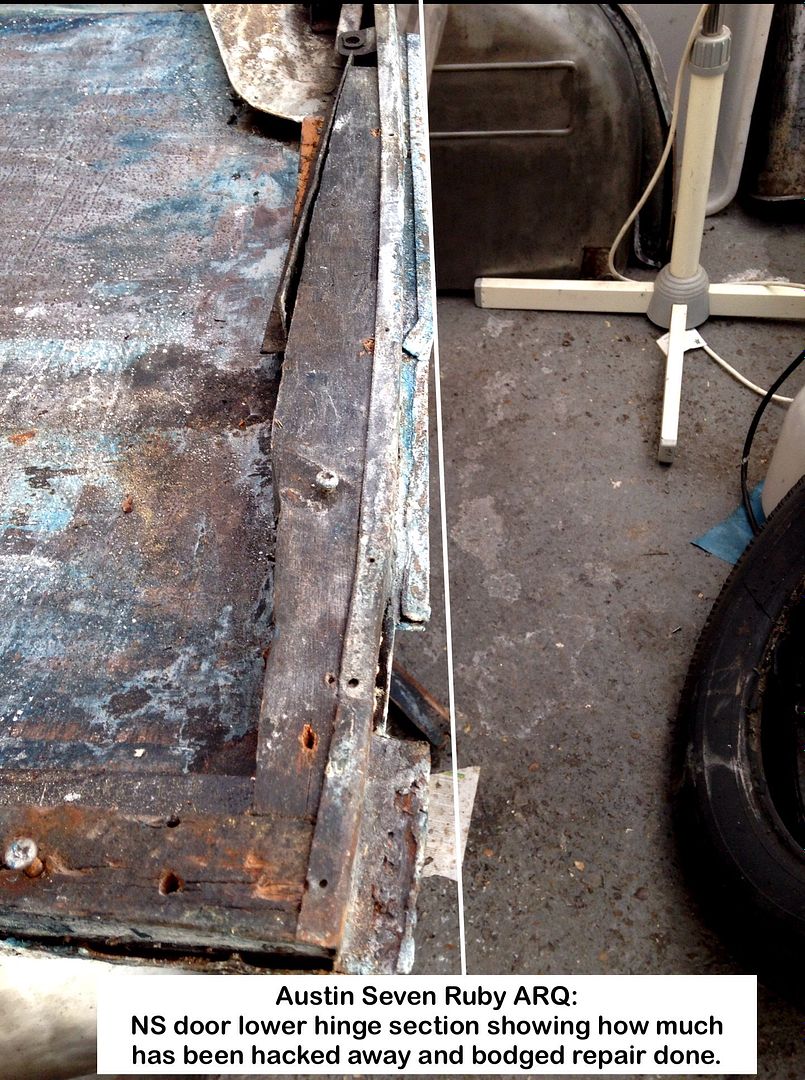
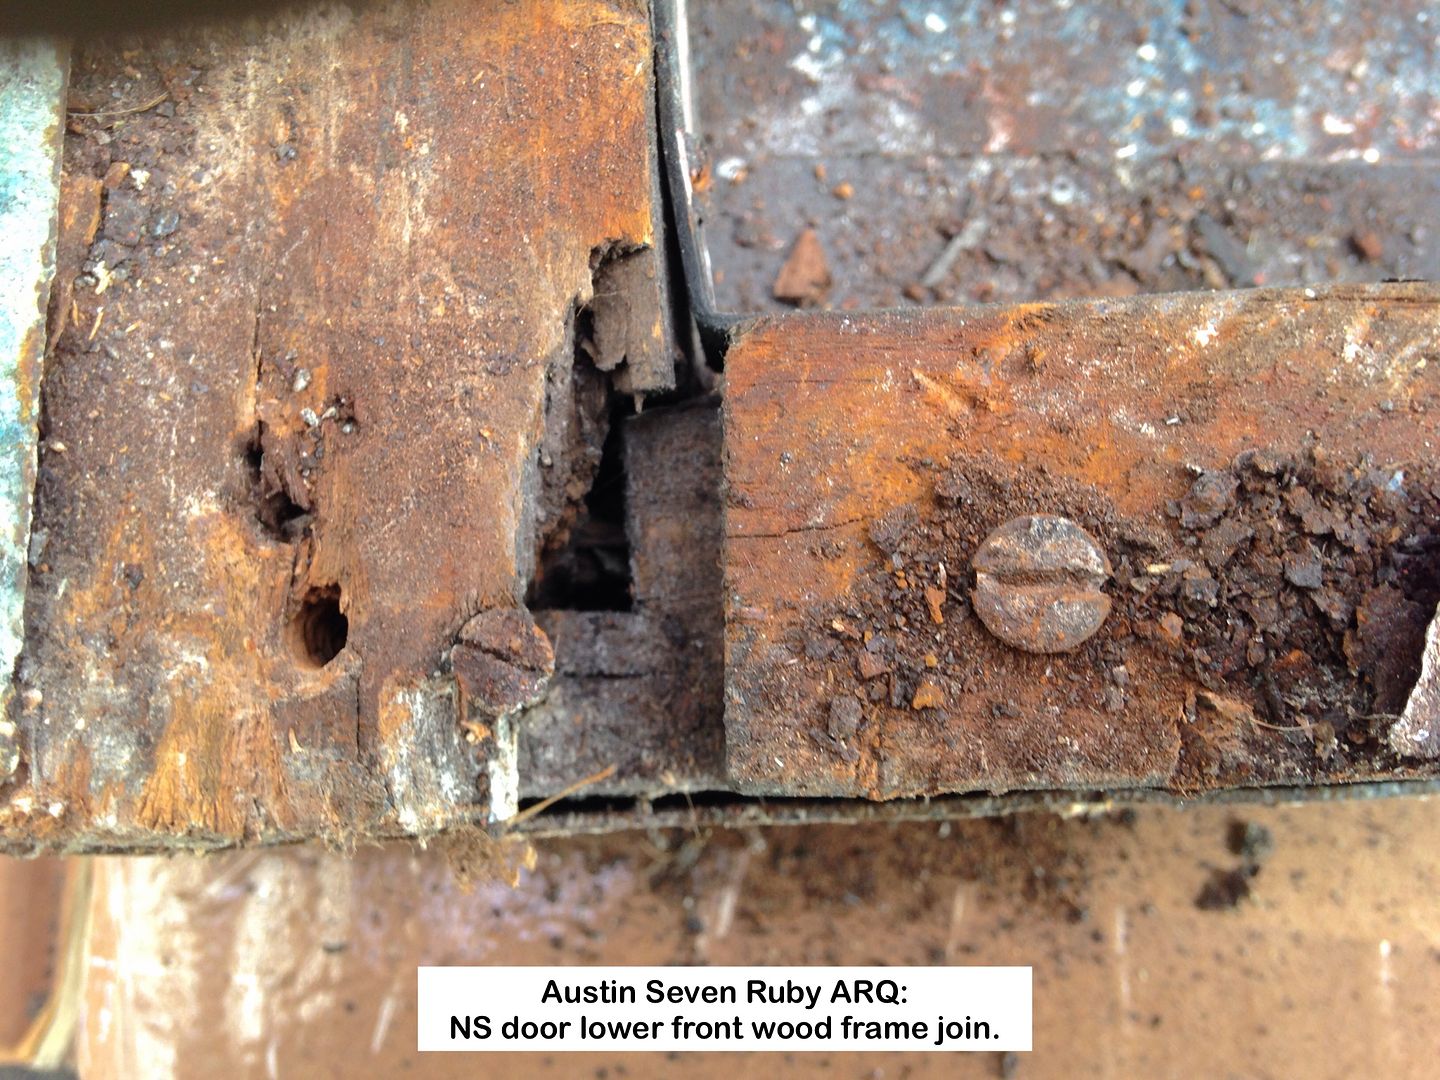
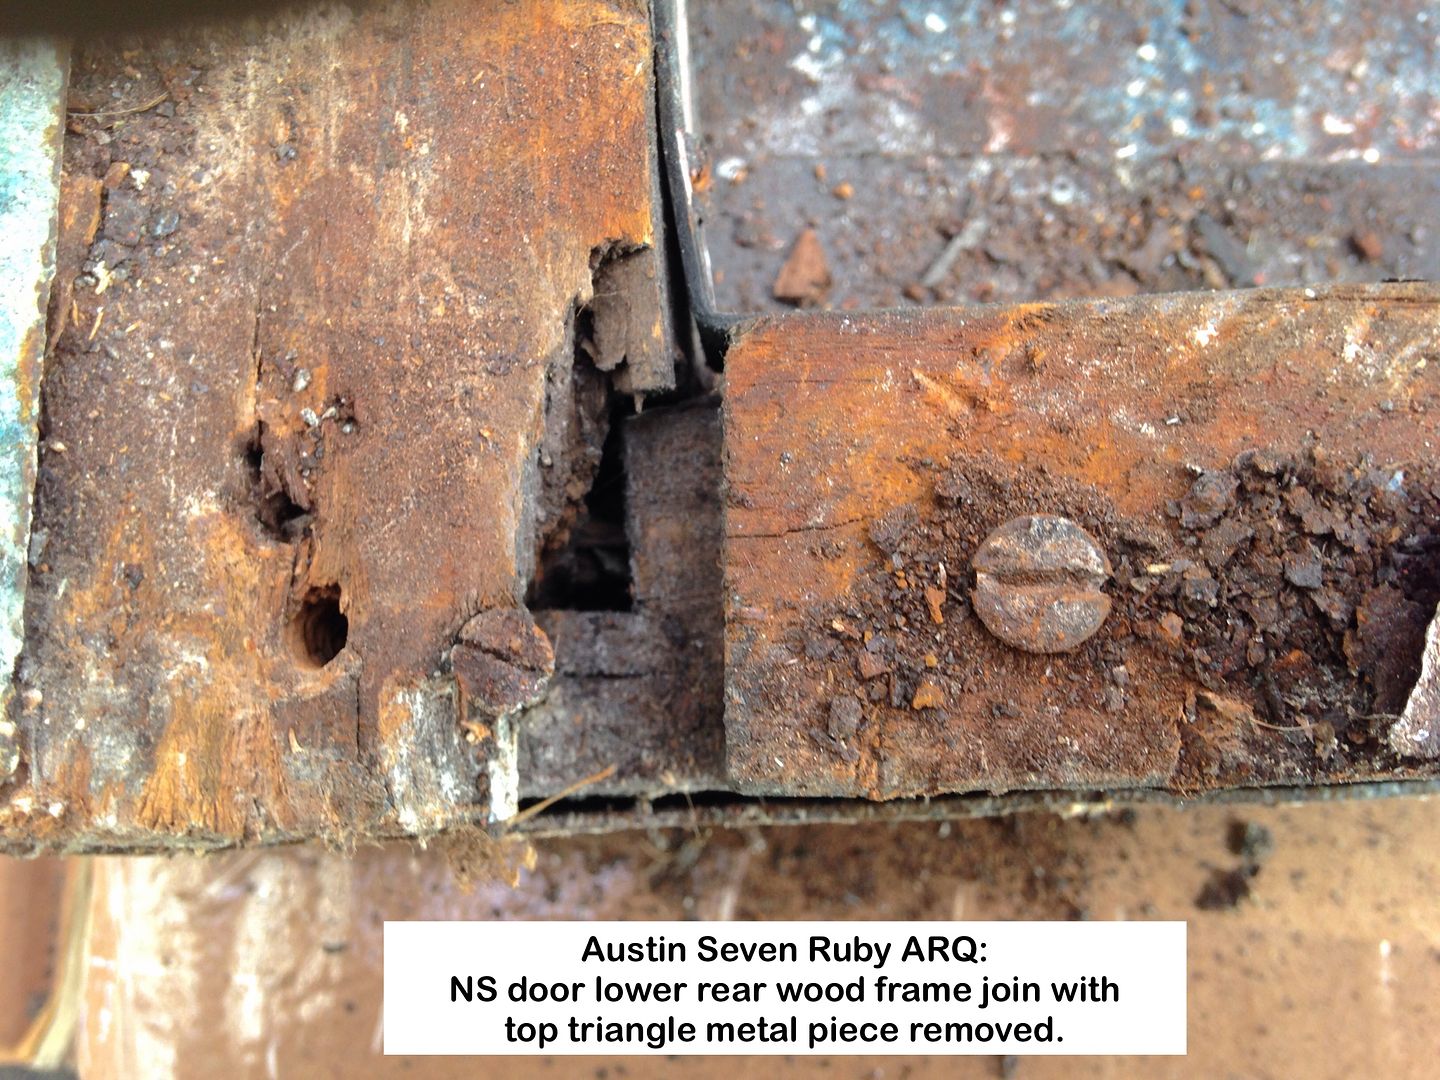
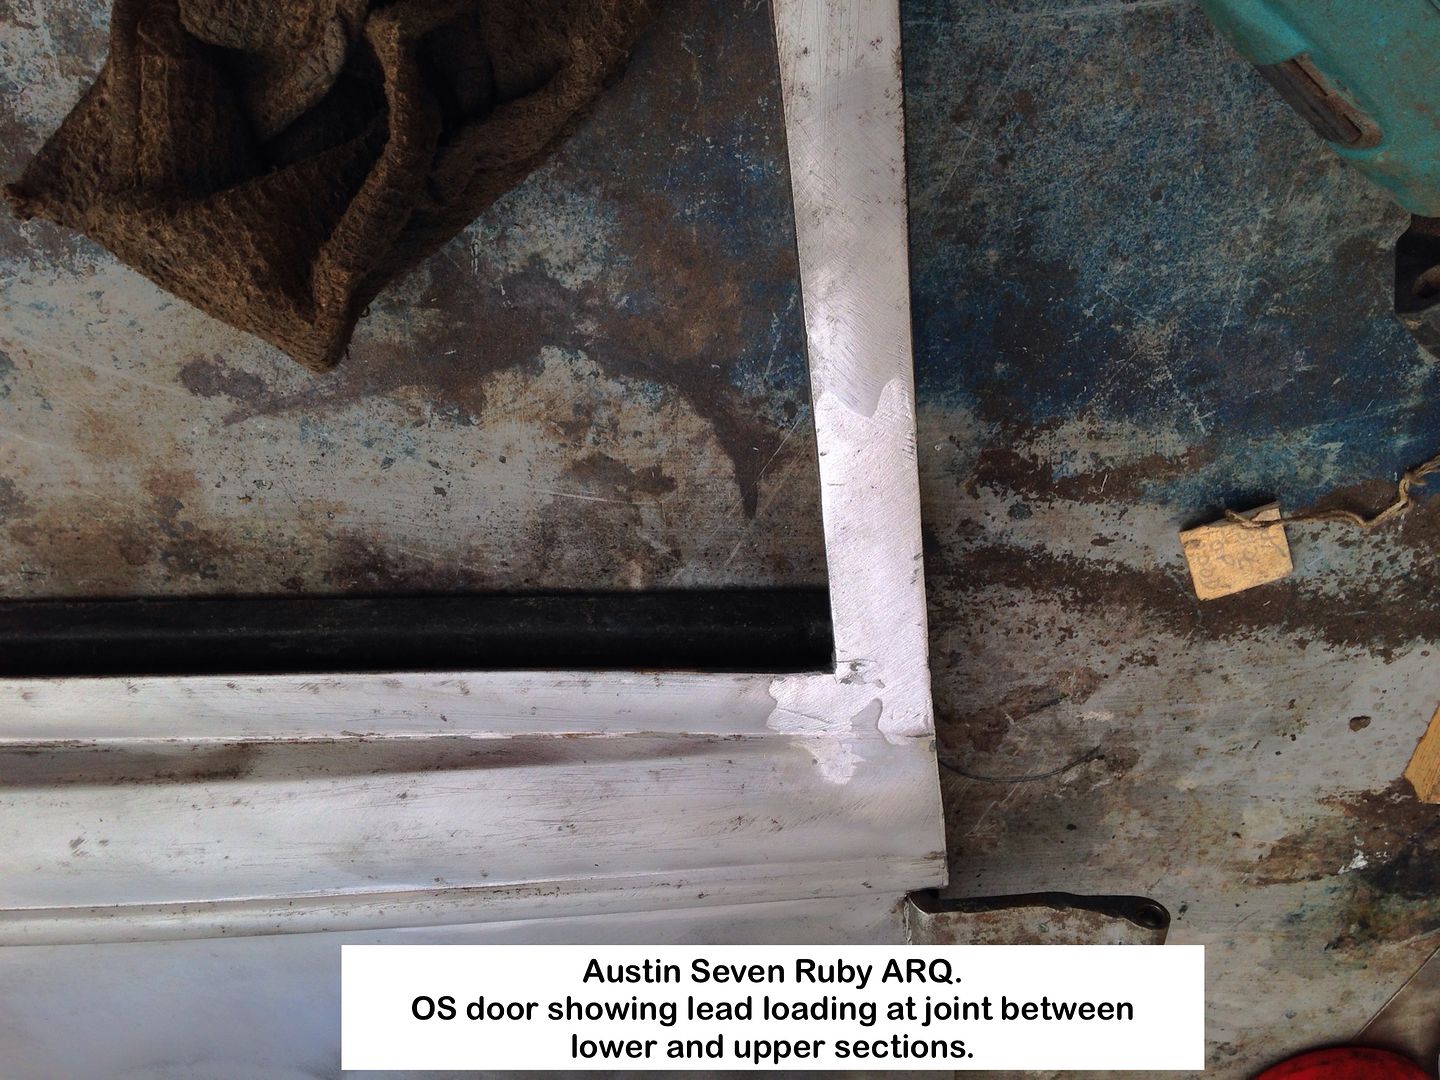
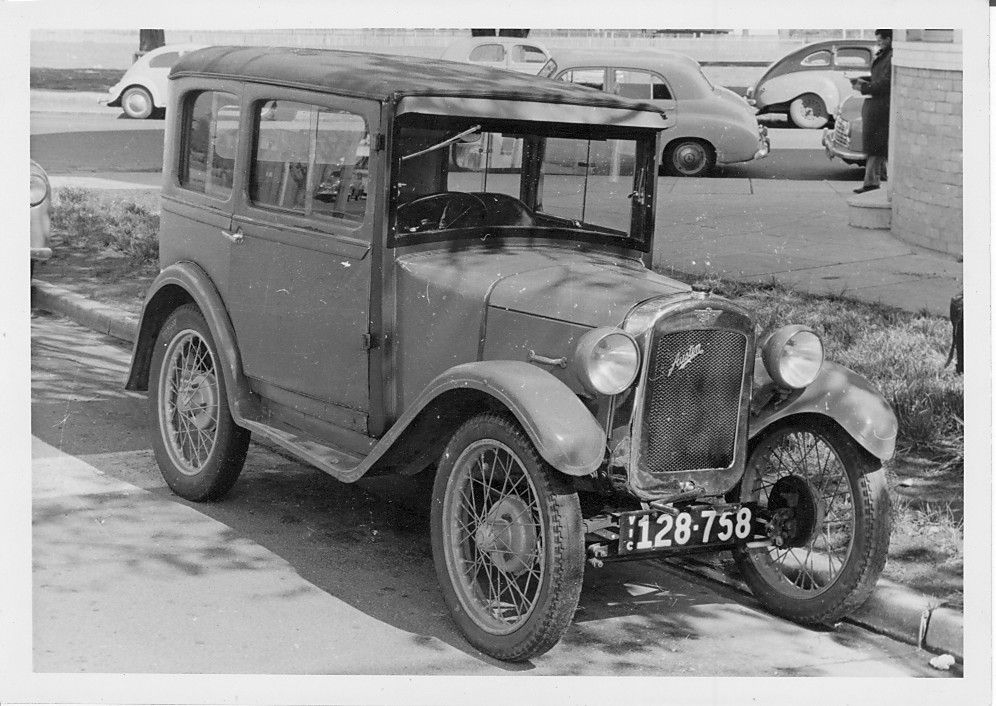
Notations say it all I hope, BUT I have failed to point out that my Ruby is a MK.1 after Margaret Park asked me what model it was, so will add that to future photos.
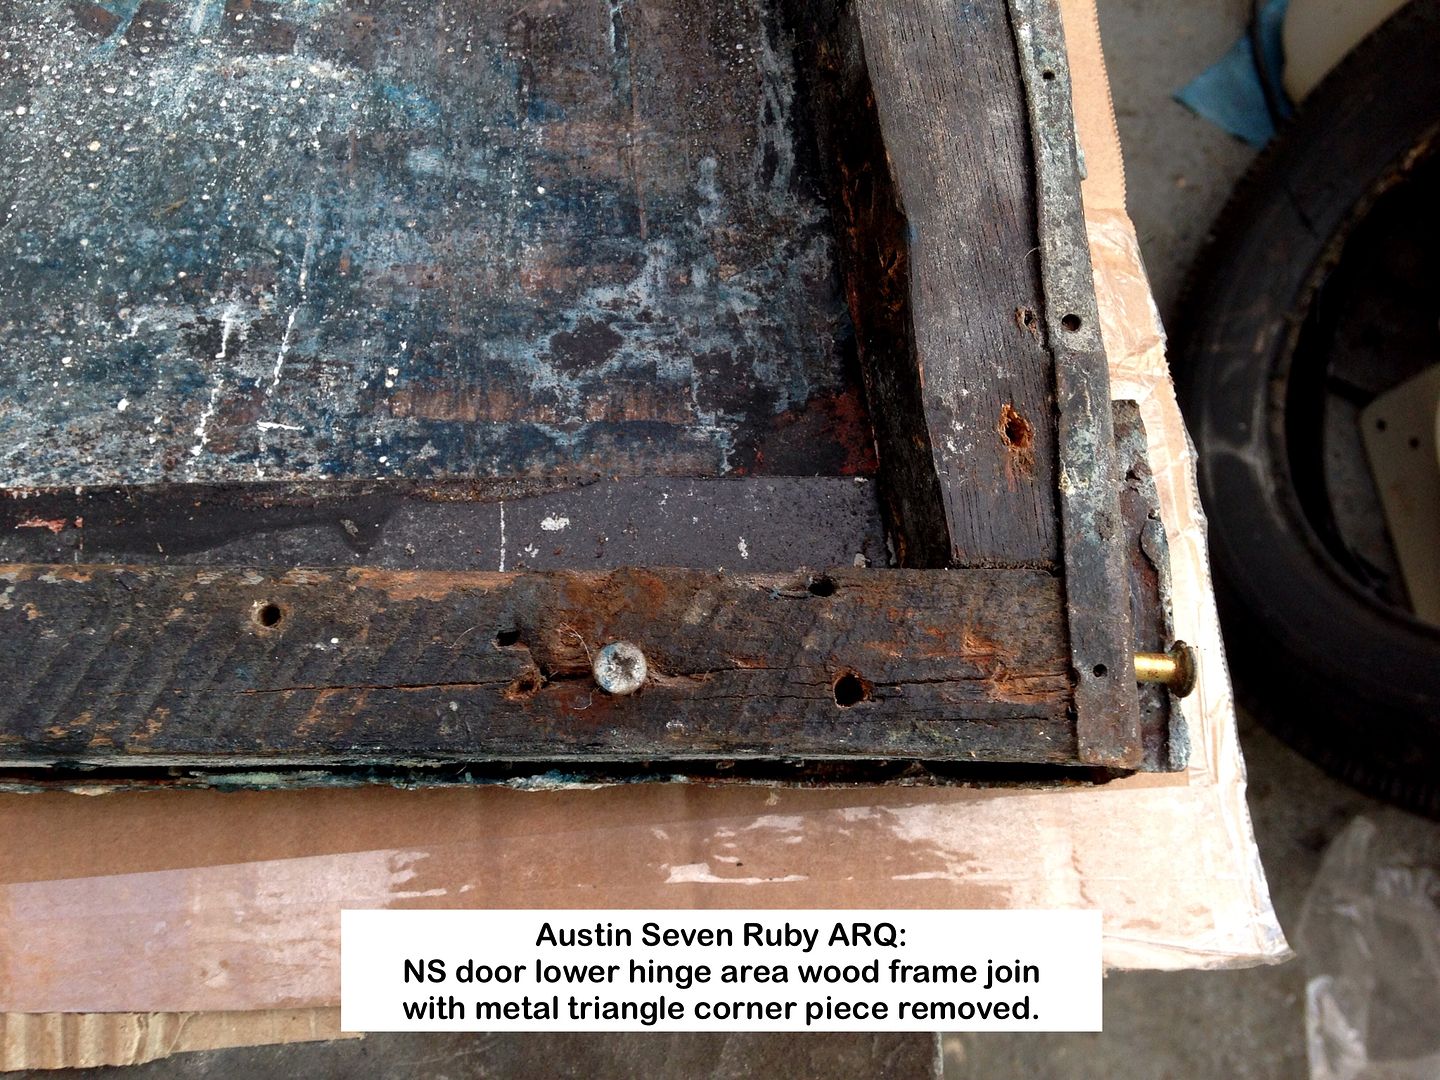
Thanks to Ruairidh for mentioning that the door window frame on his Pearl broke away where it joins the lower section, so I will be adding reinforcing strips just to be safe, plus photos once I have cleaned that area up, as with the other side.
These photos will, unfortunately, not be in the order as uploaded, as they are linked to Photobucket and all that entails, and that site NEVER saves them as uploaded. GRRRRR!!
I now prepare posts in the iOS Notes App, then copy and paste, having lost some in the past when 'writing' directly into the Forum Thread page.
My Facebook page has the photos in order.
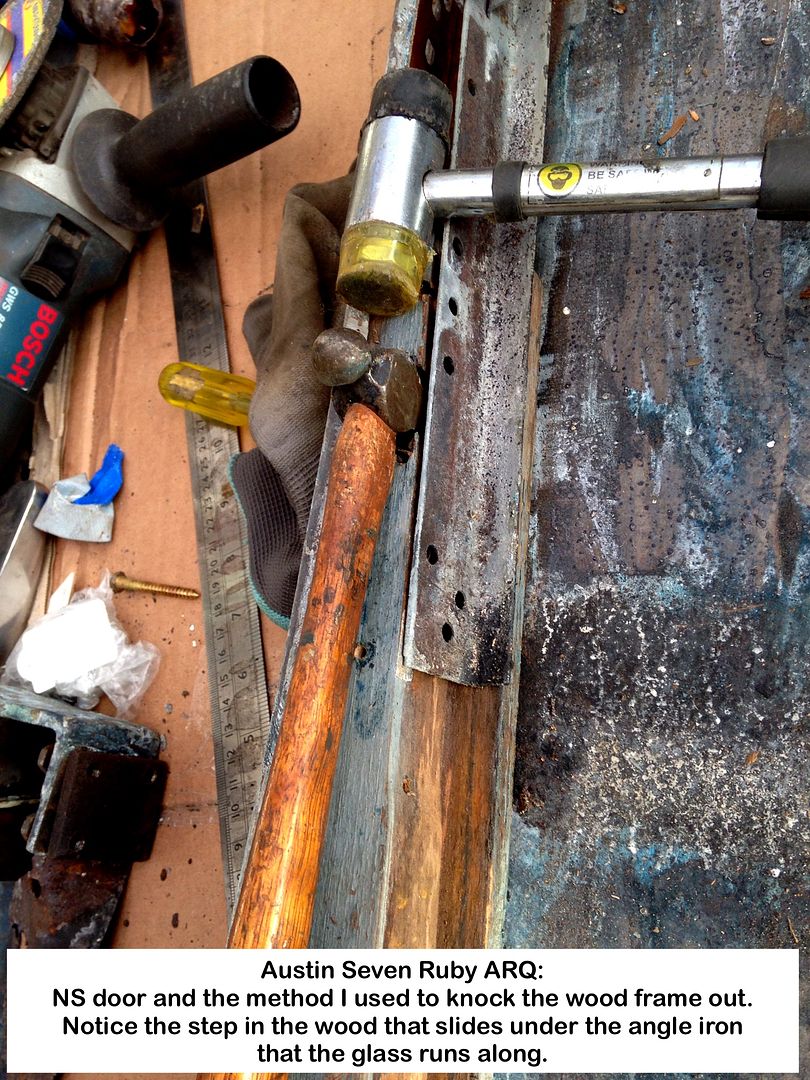
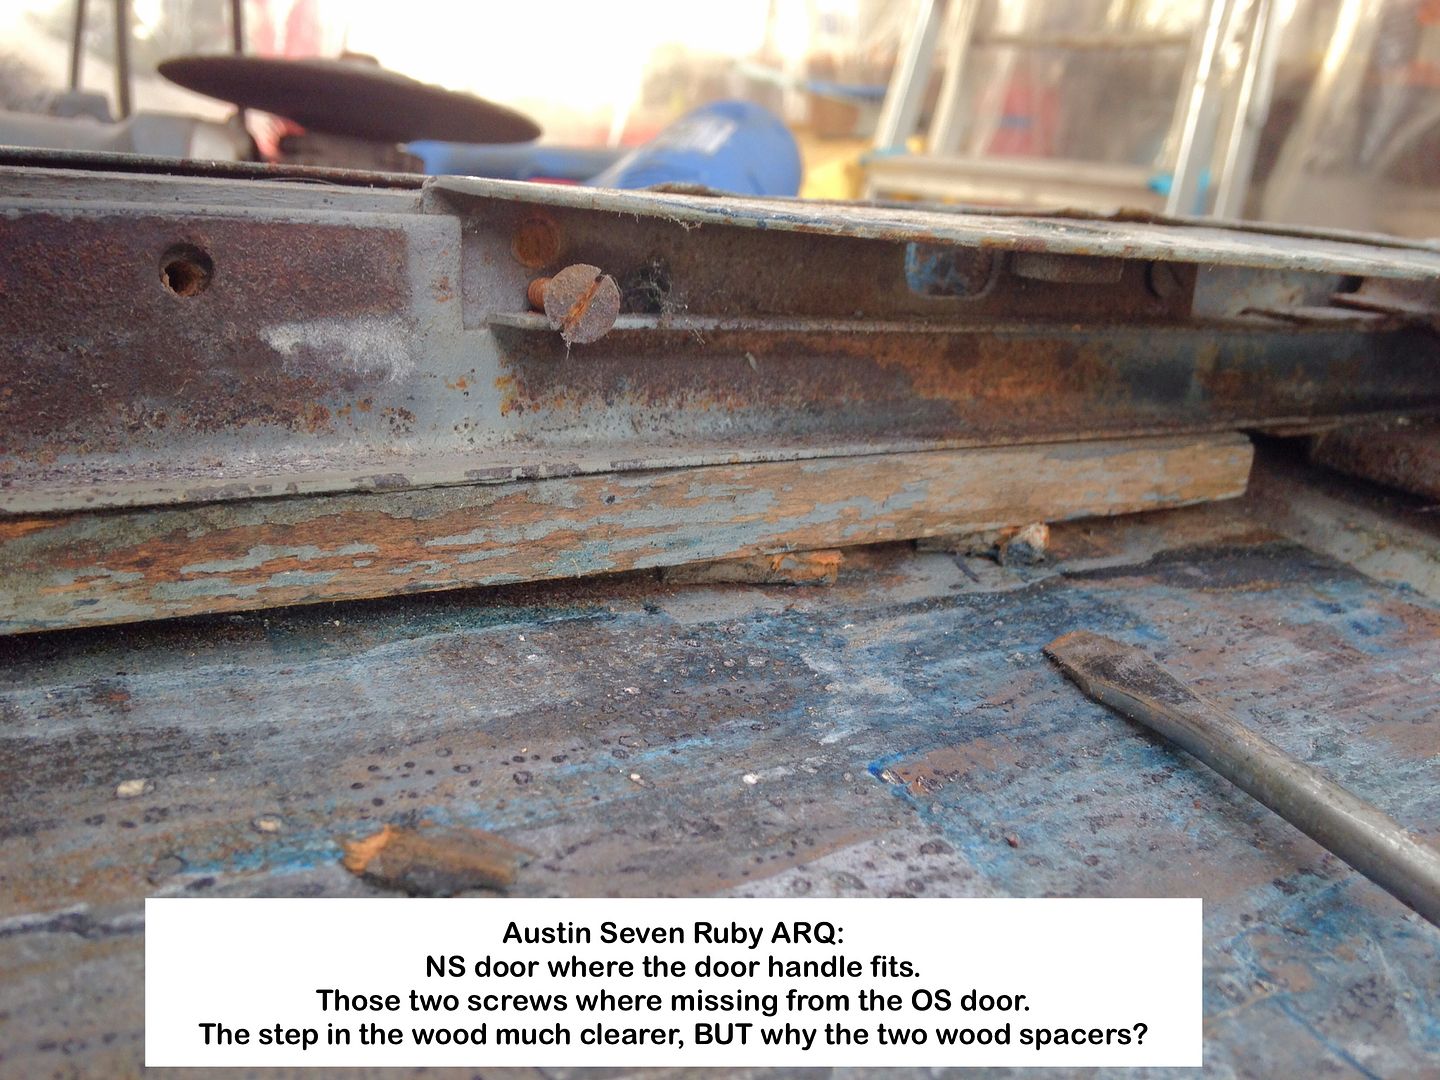
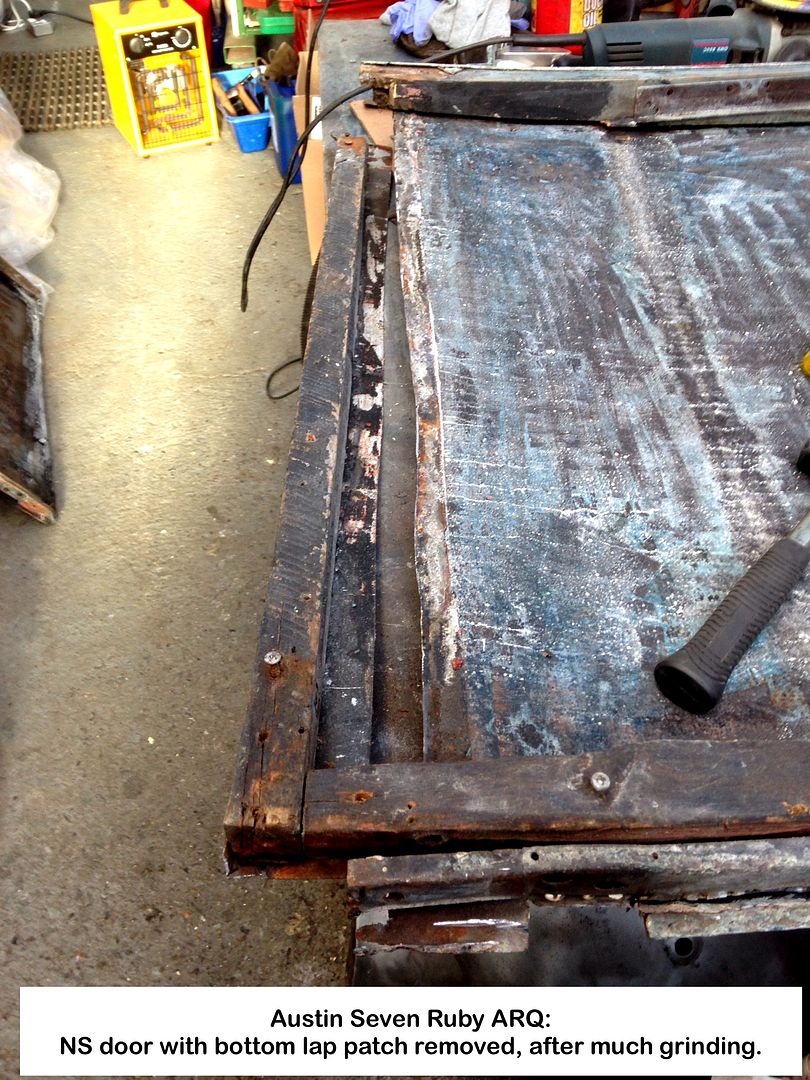
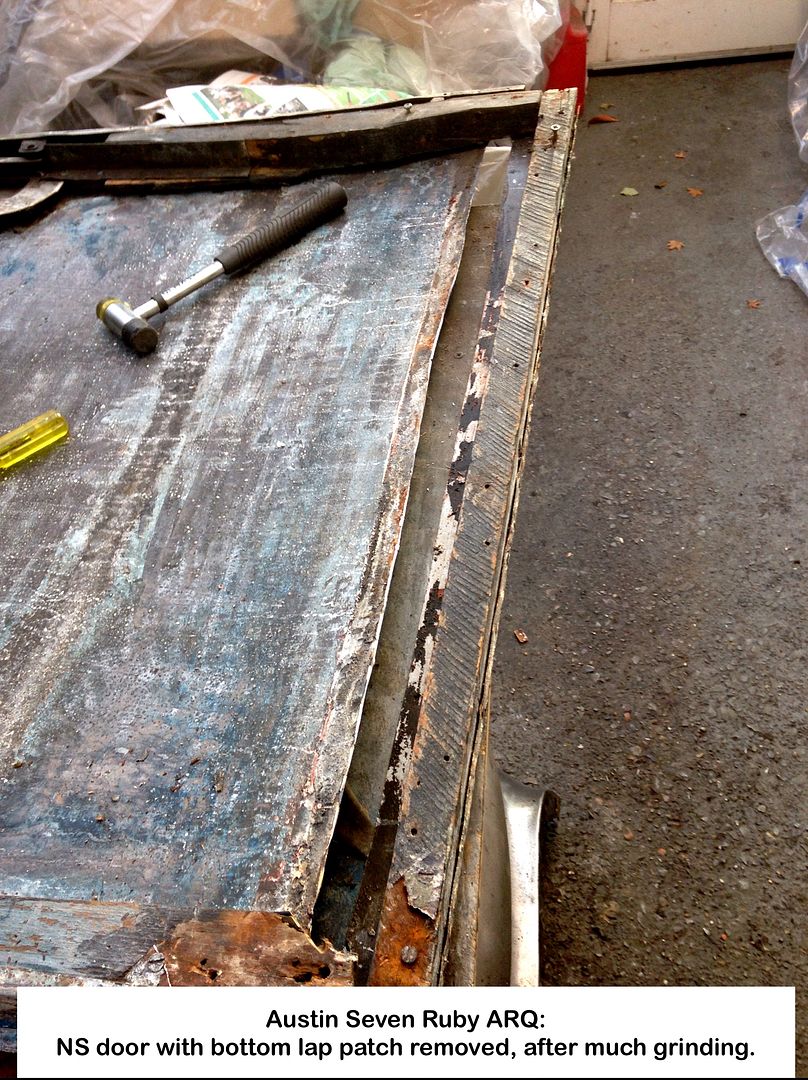
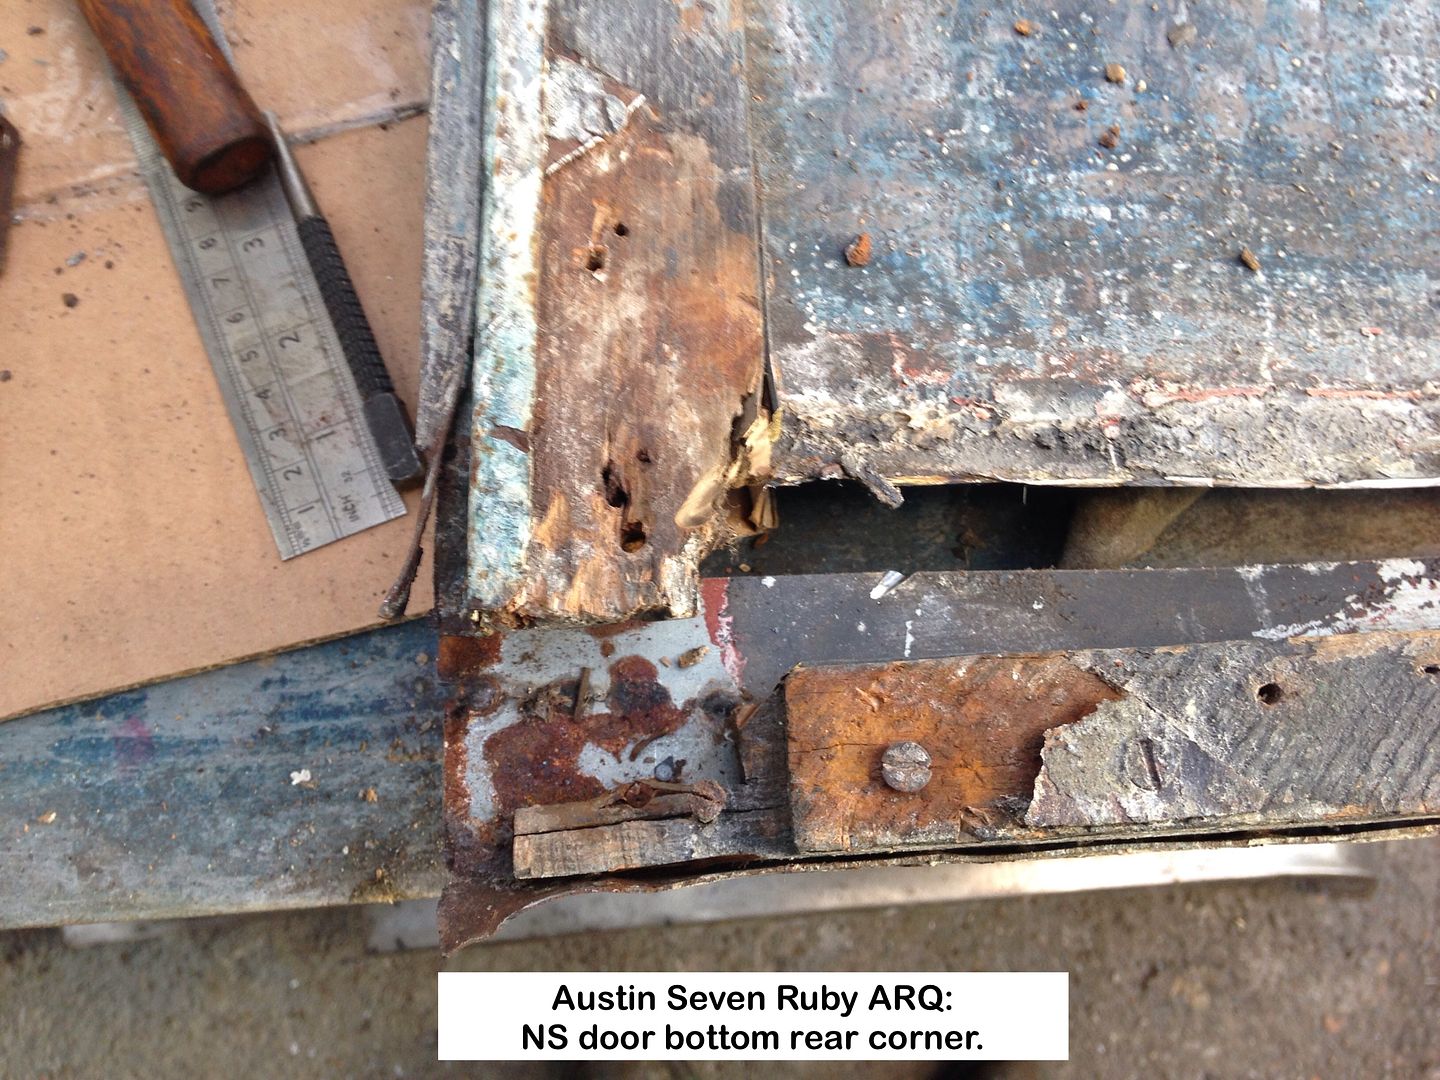
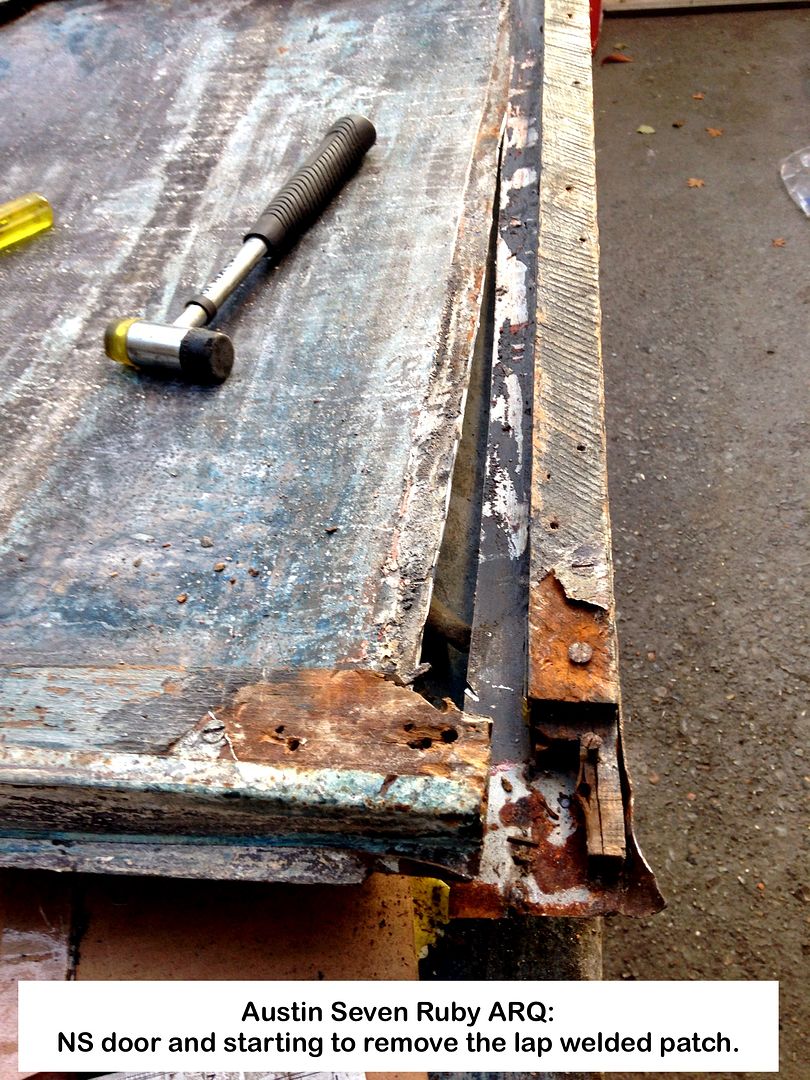
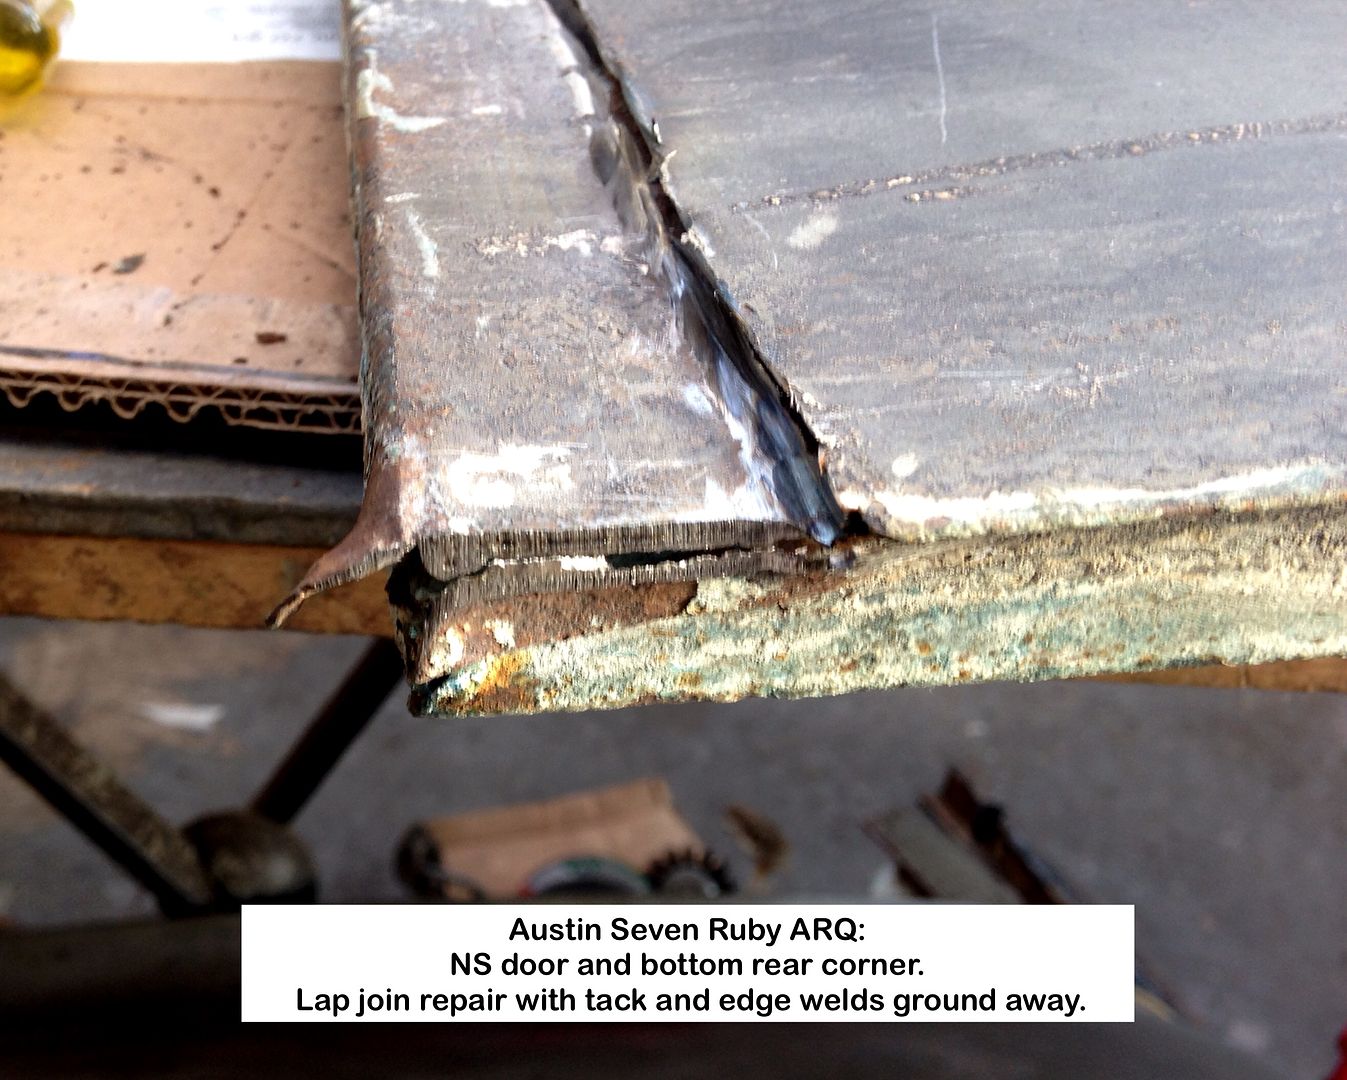
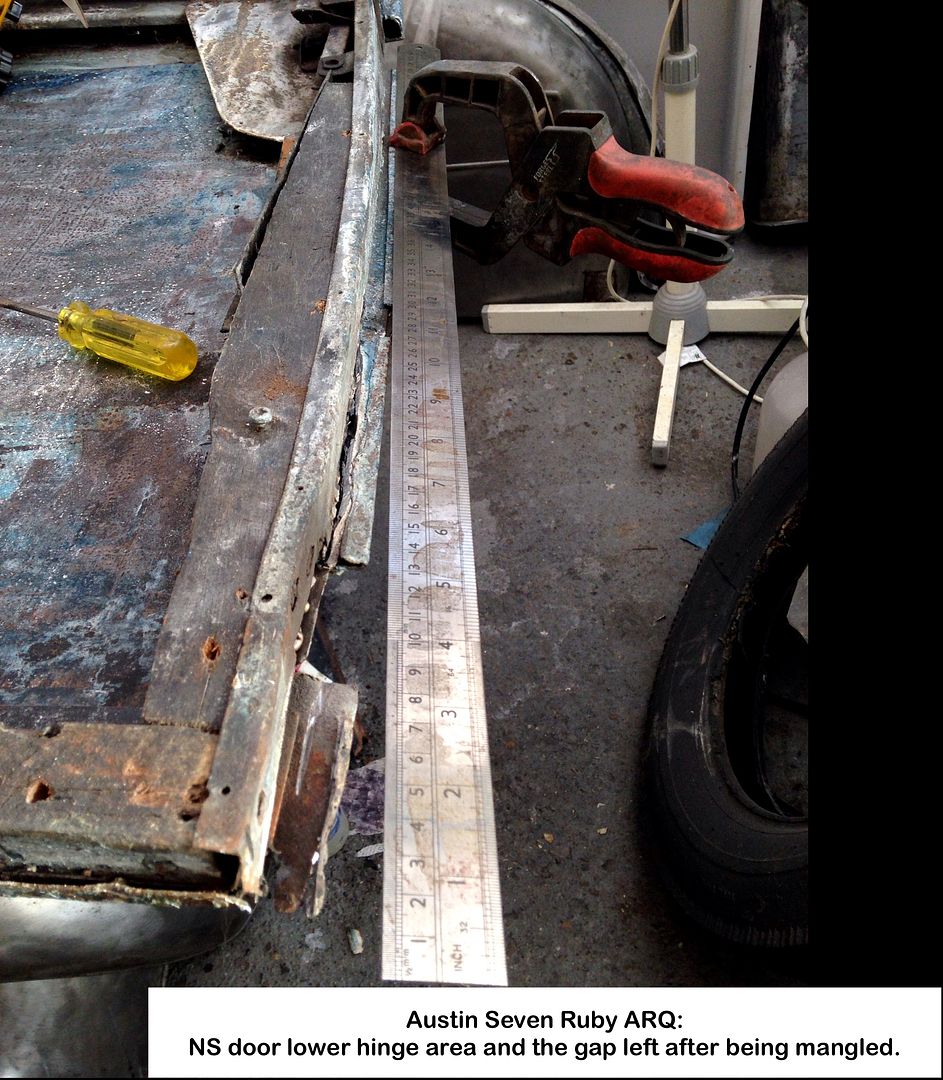
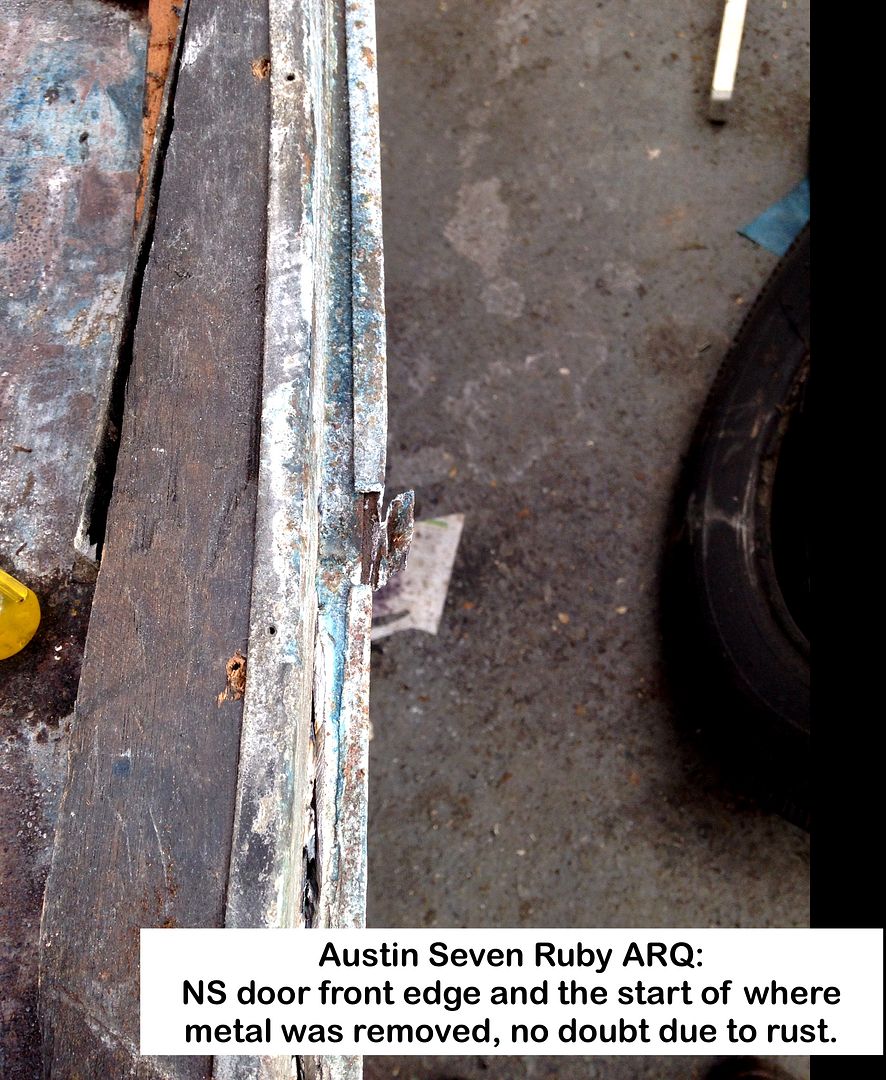
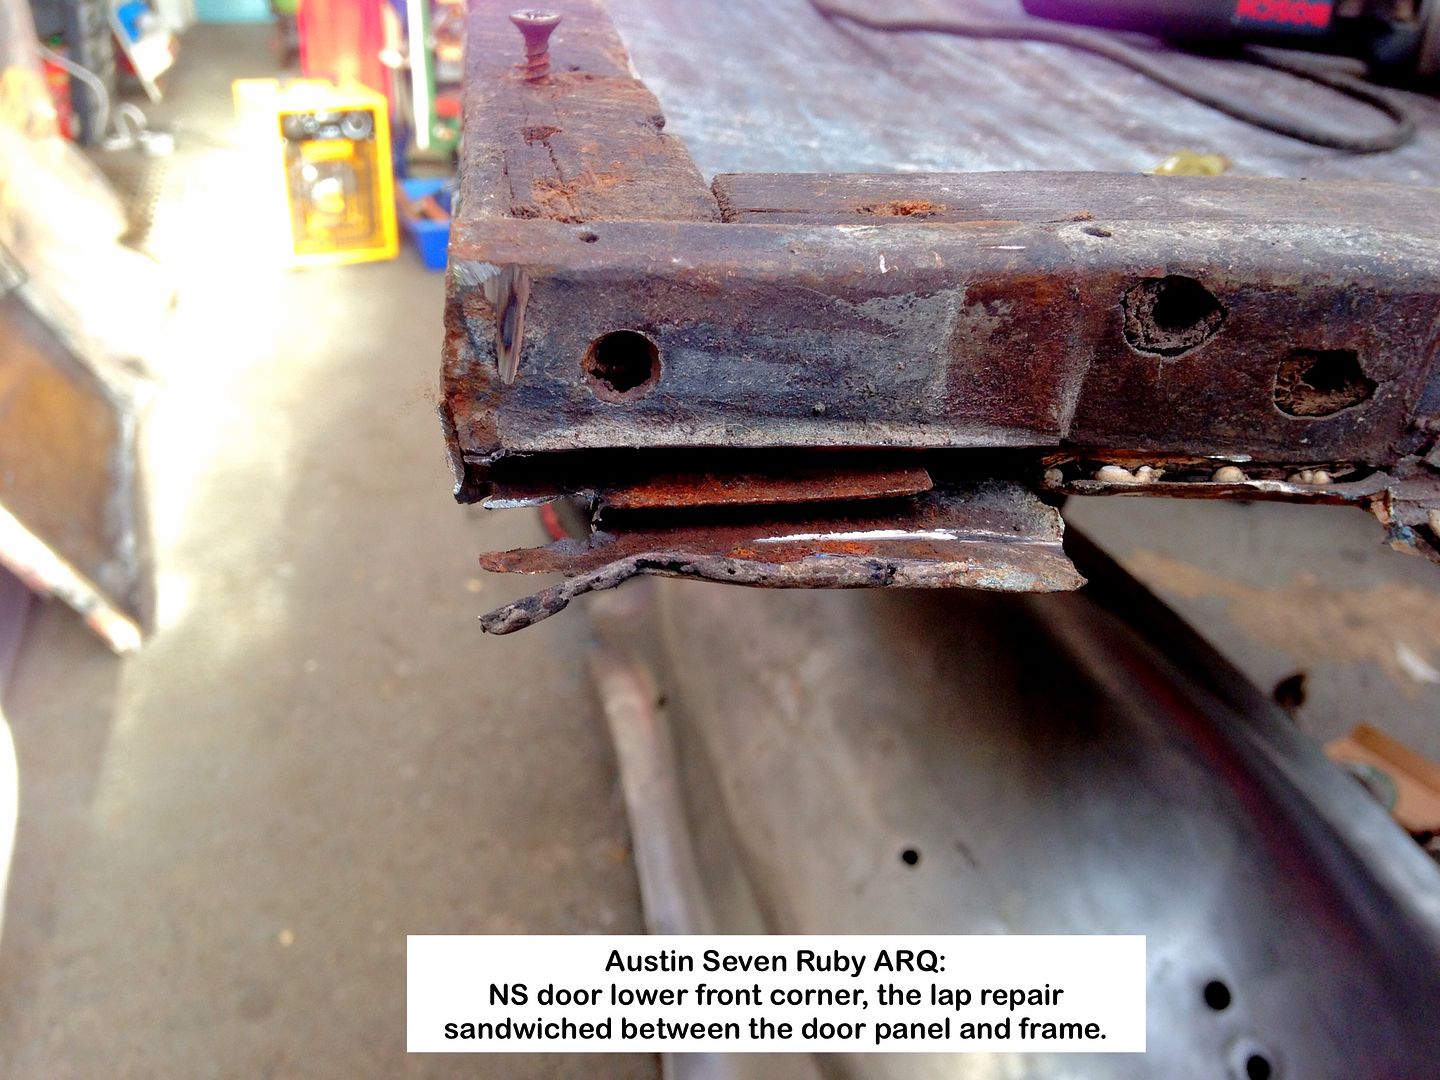
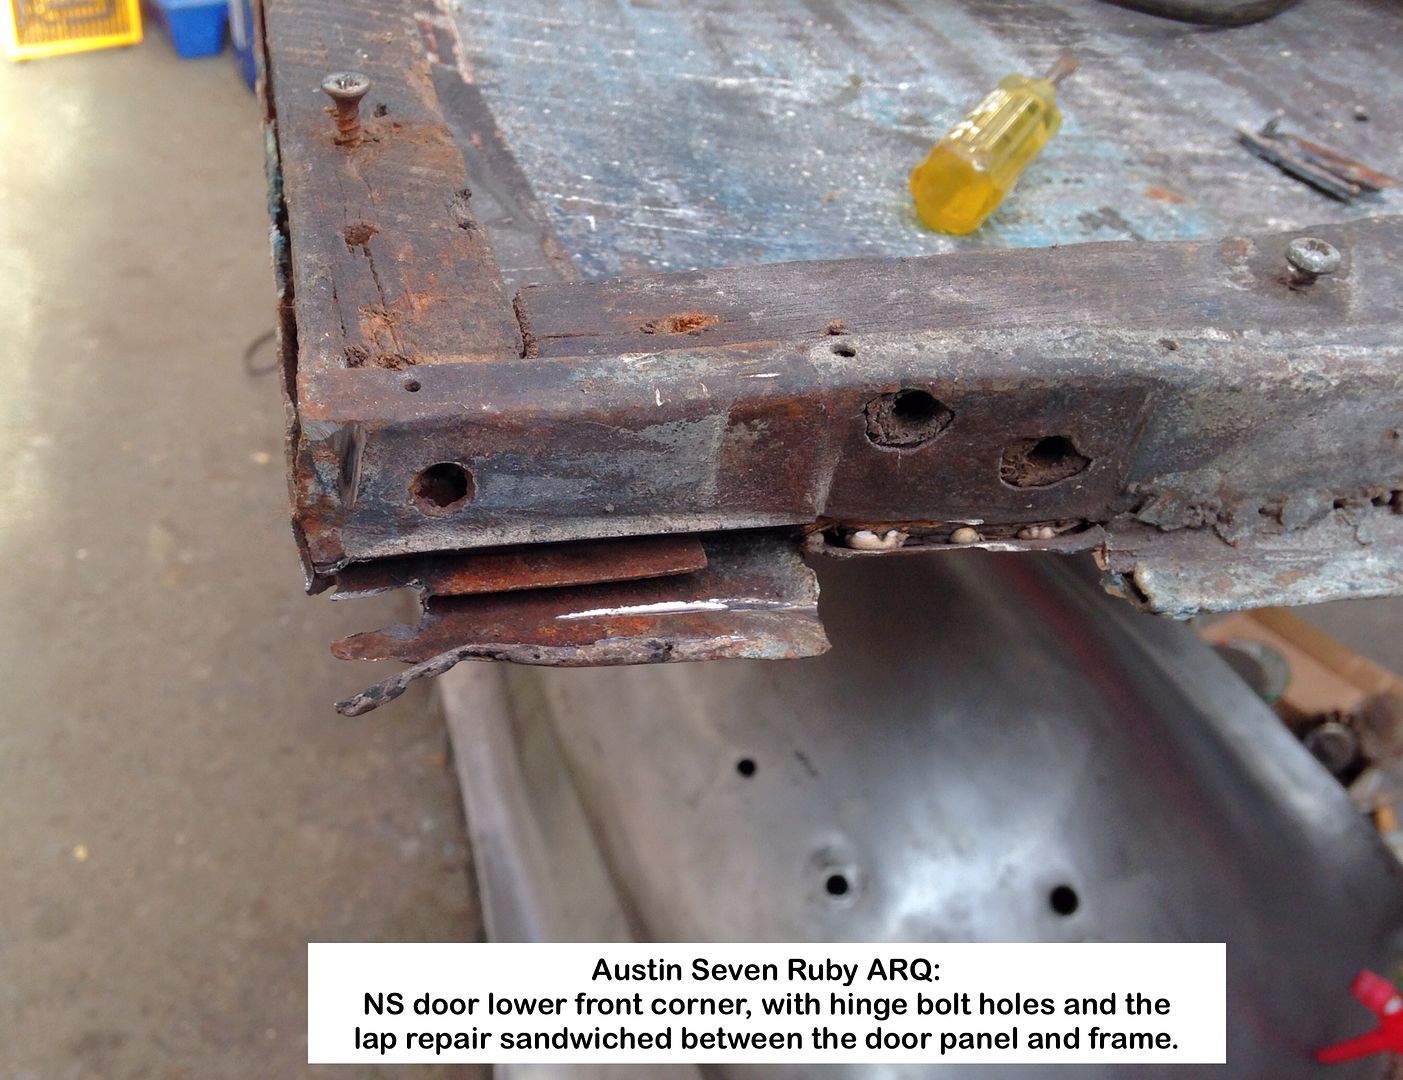
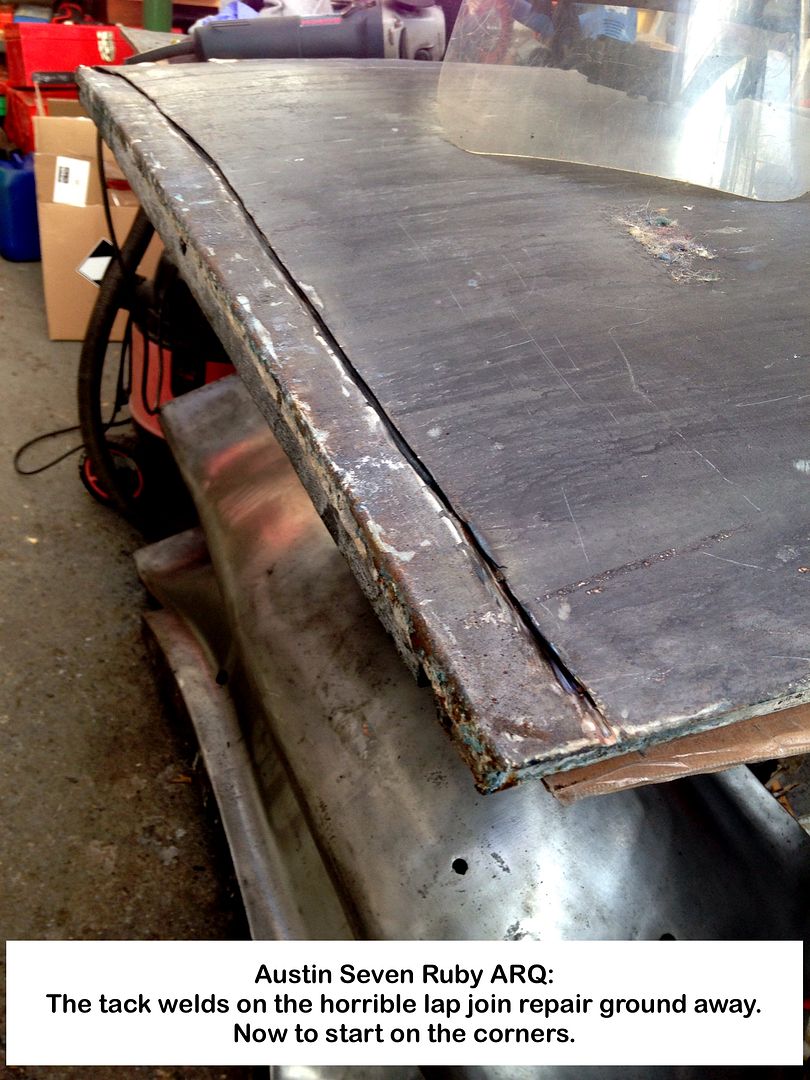
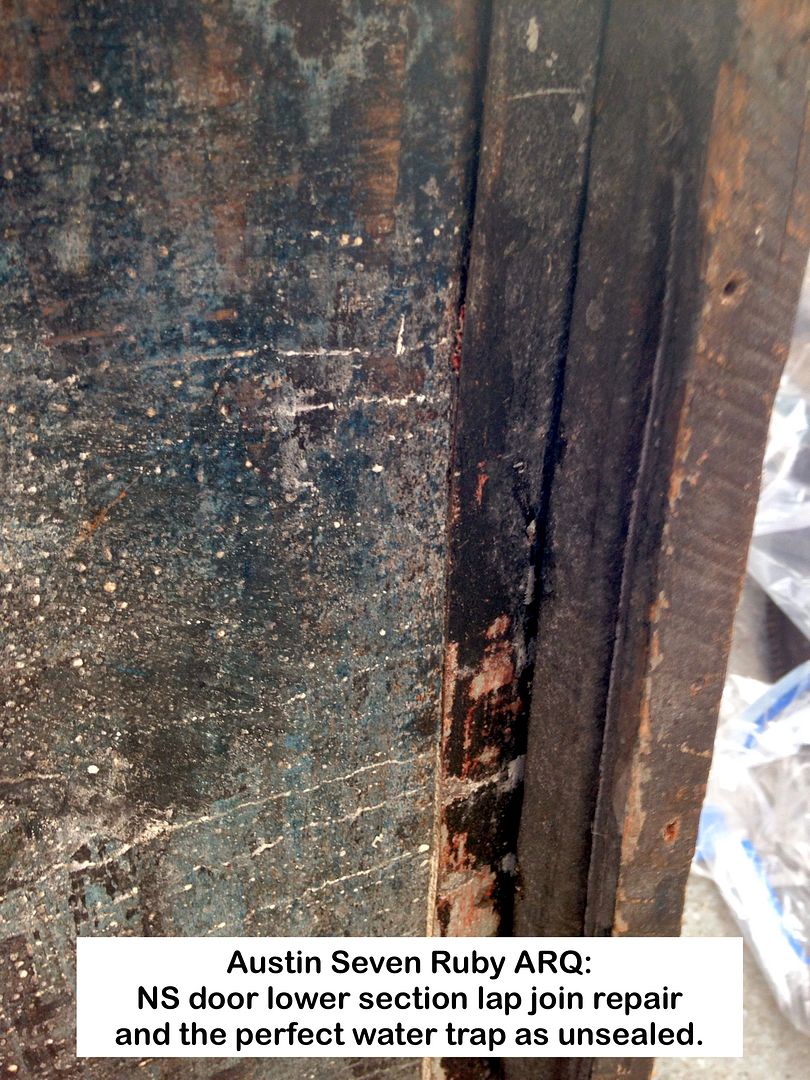
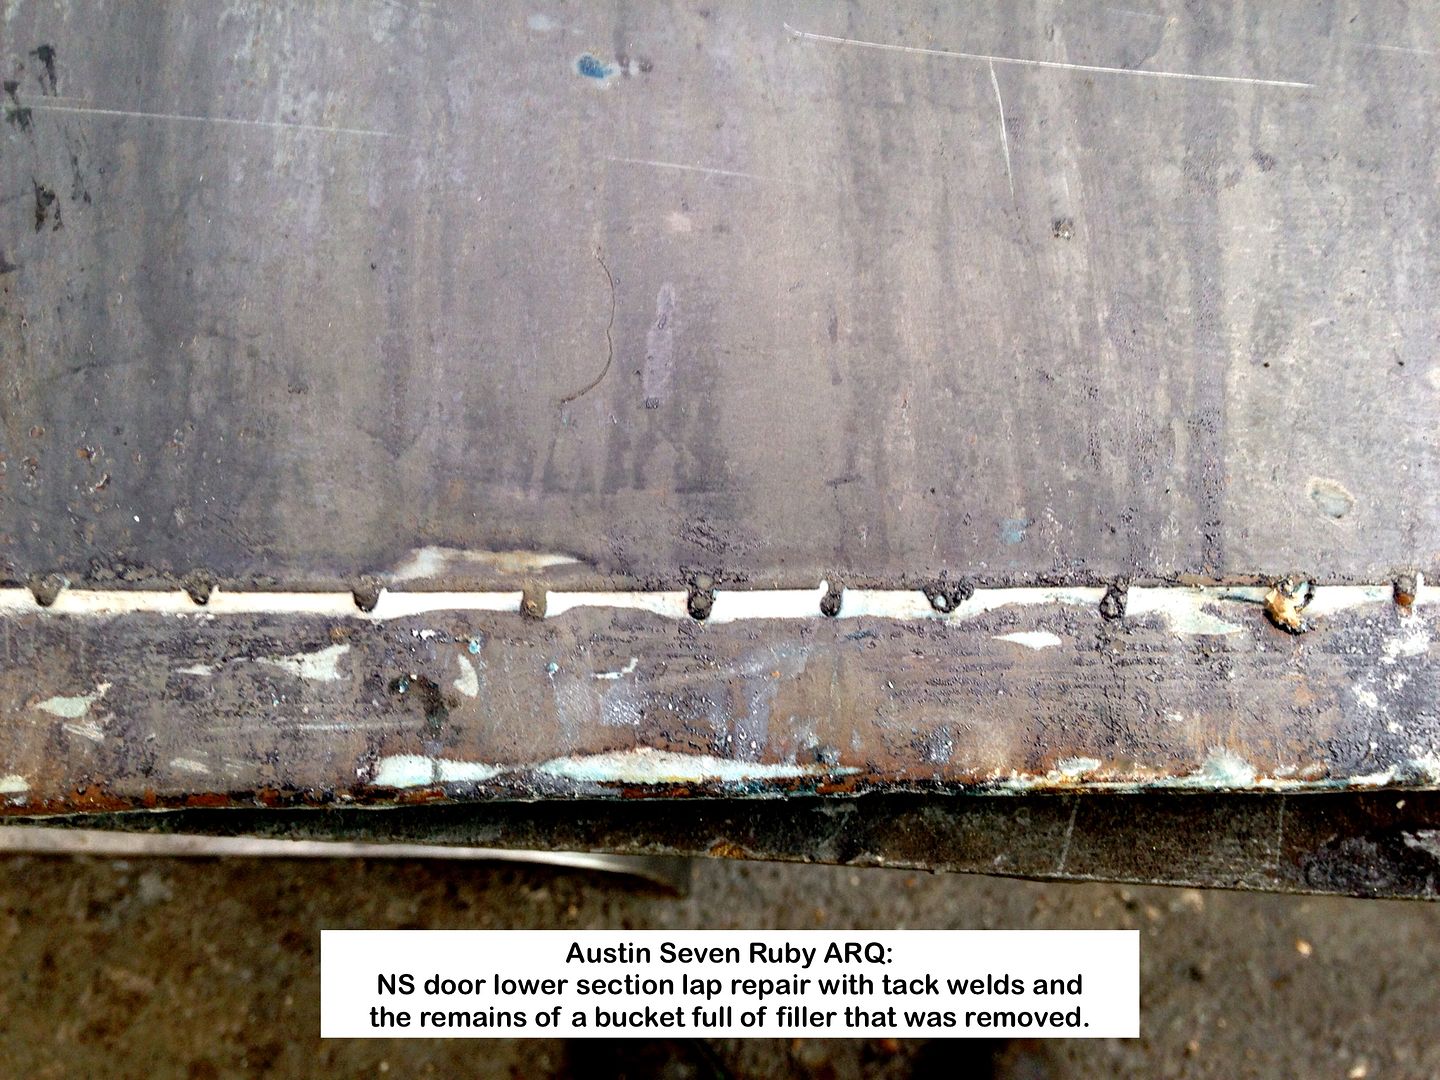
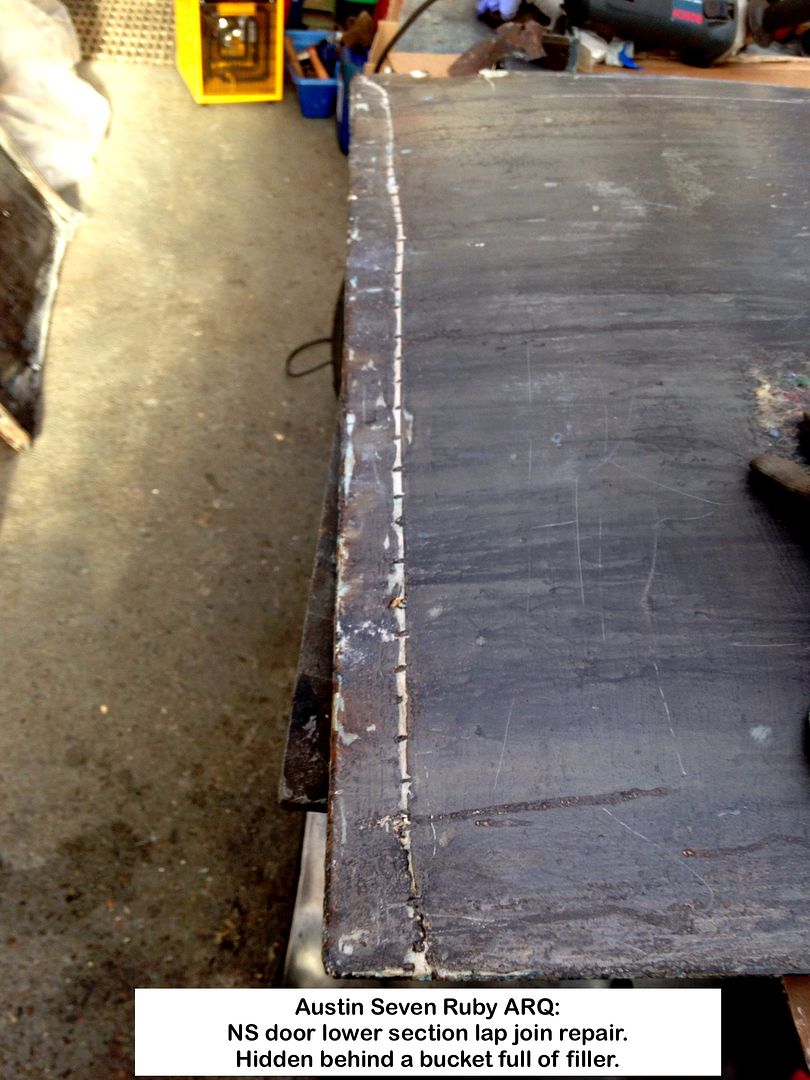
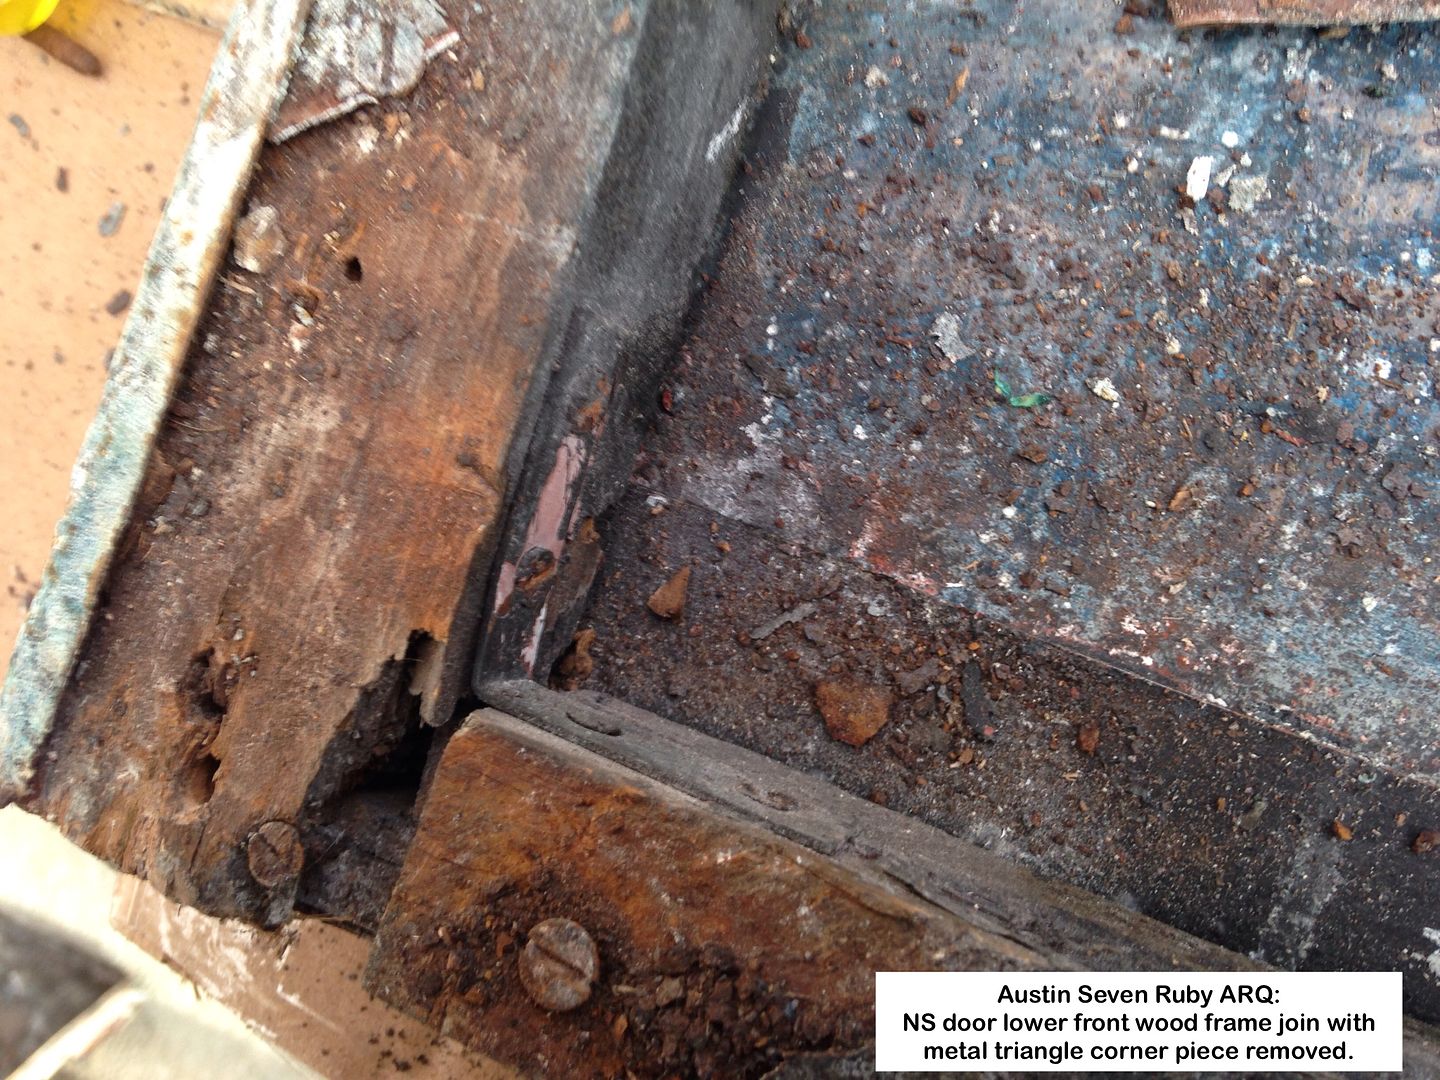
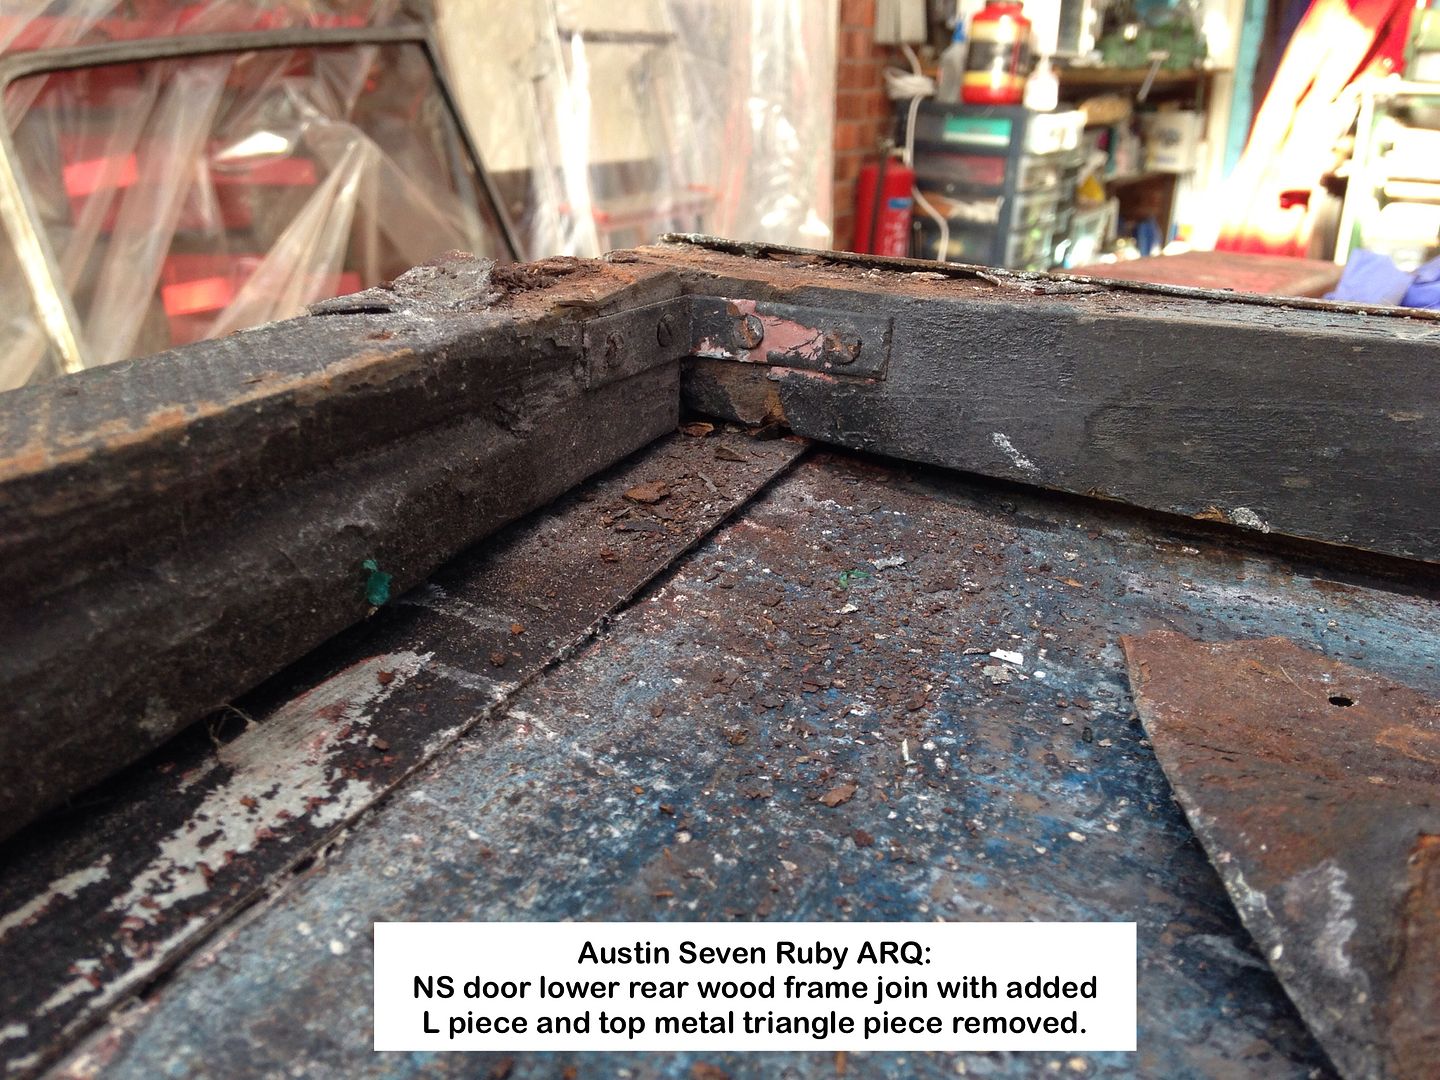
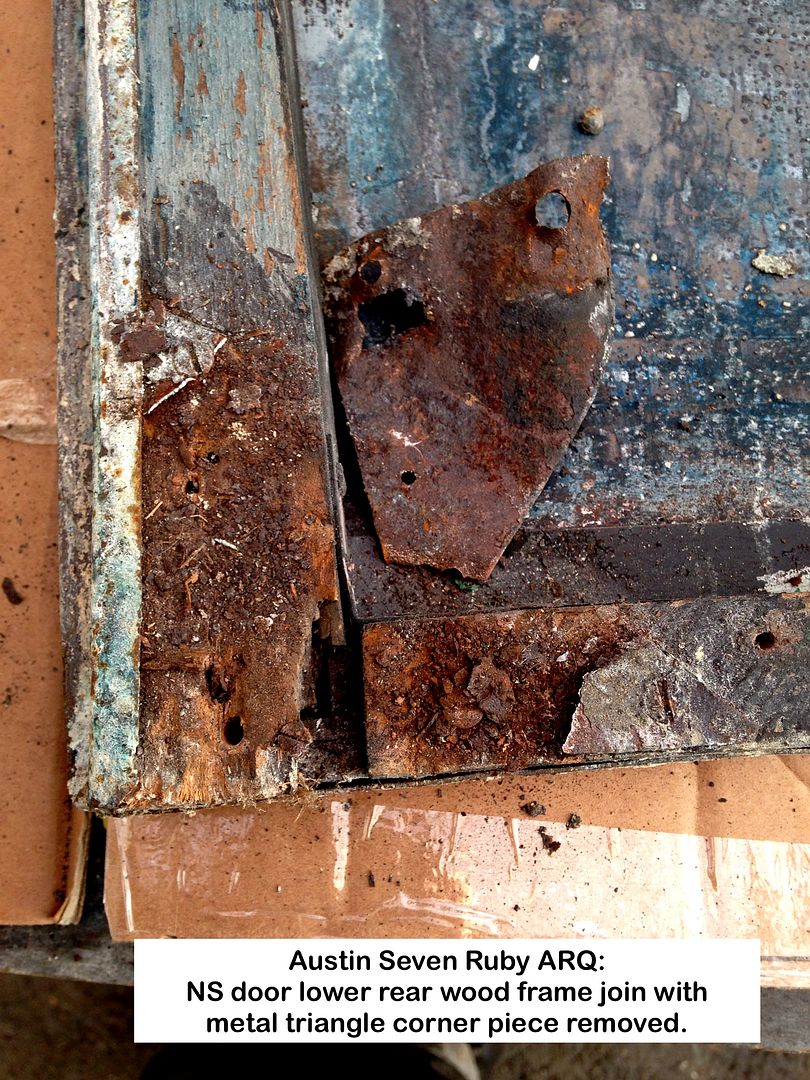
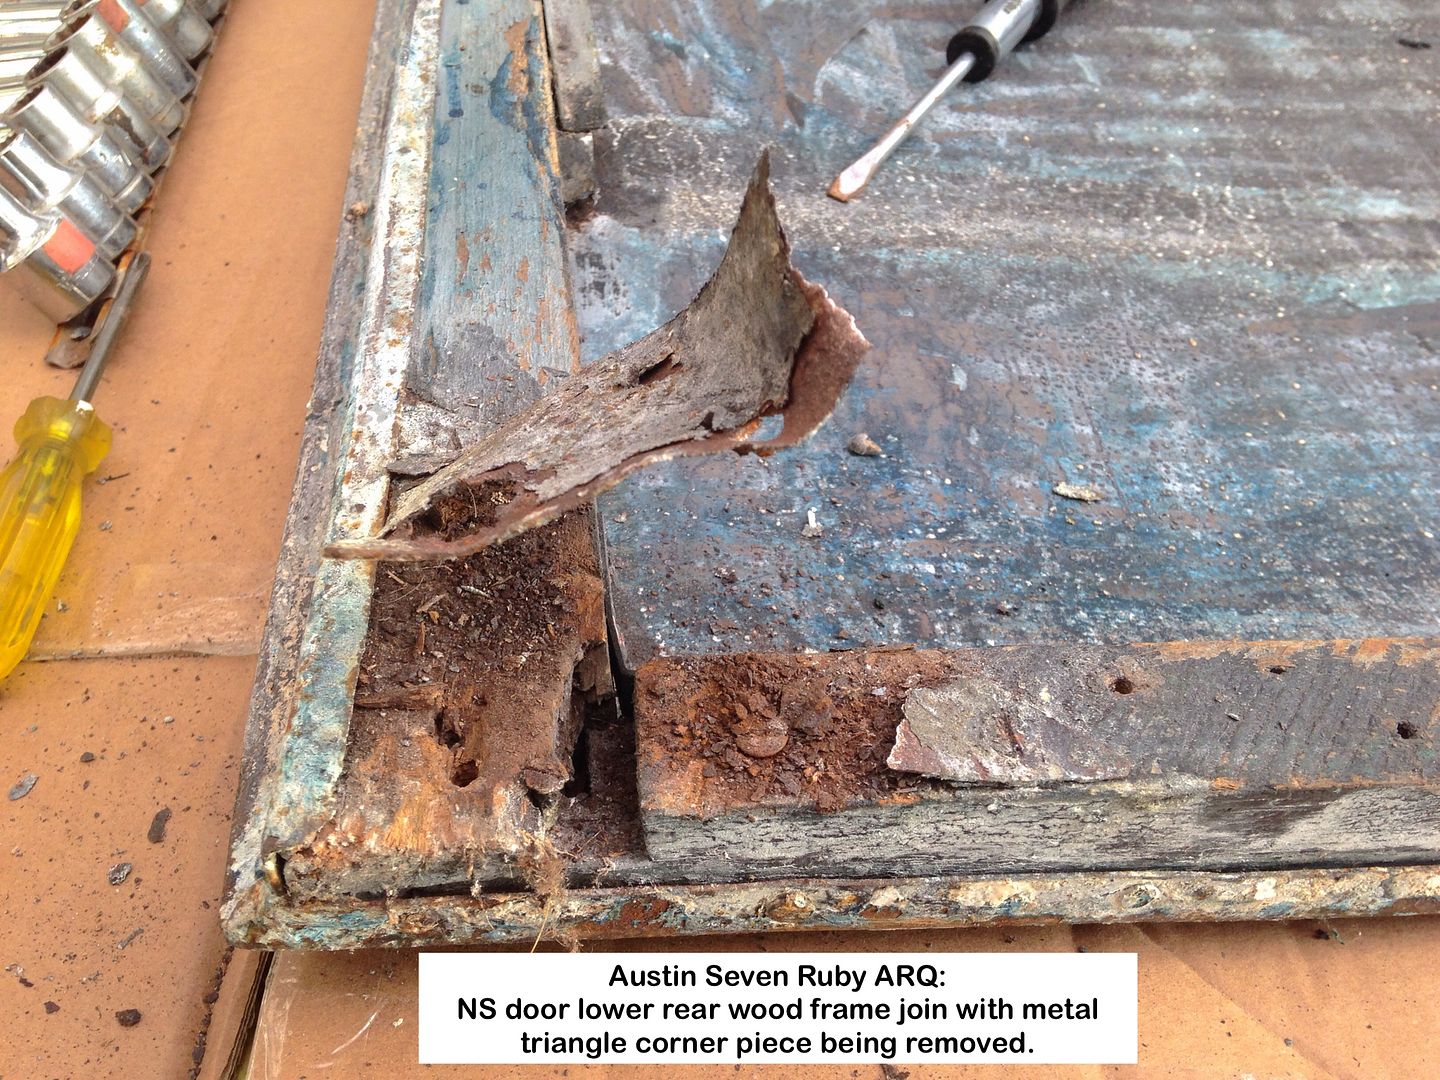
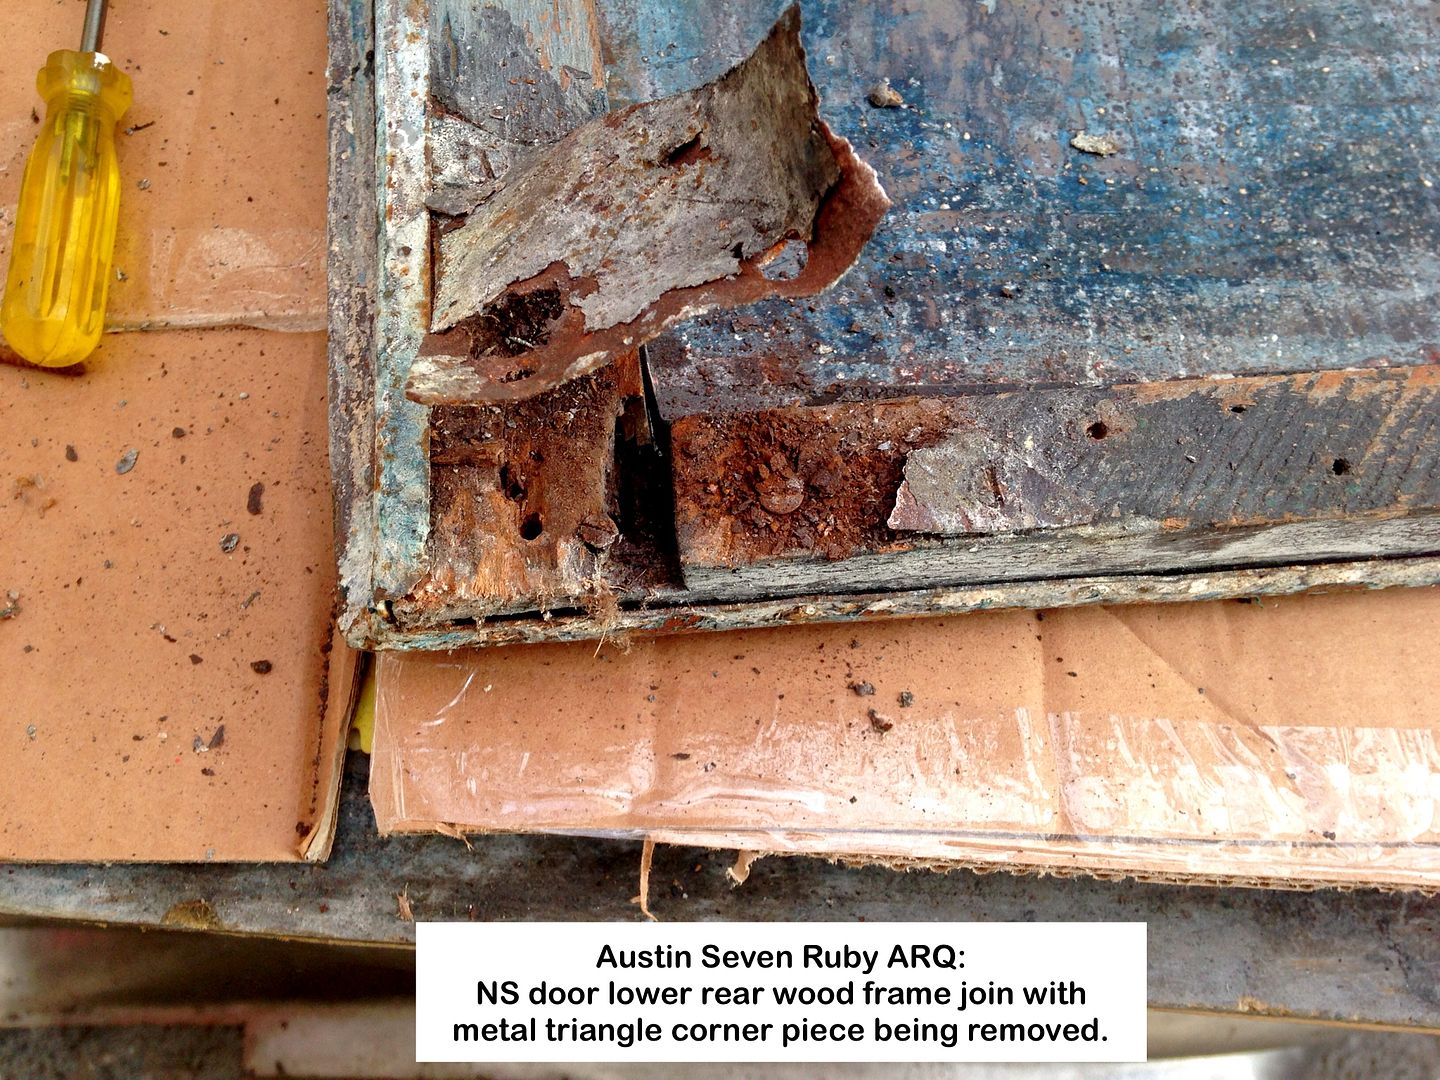
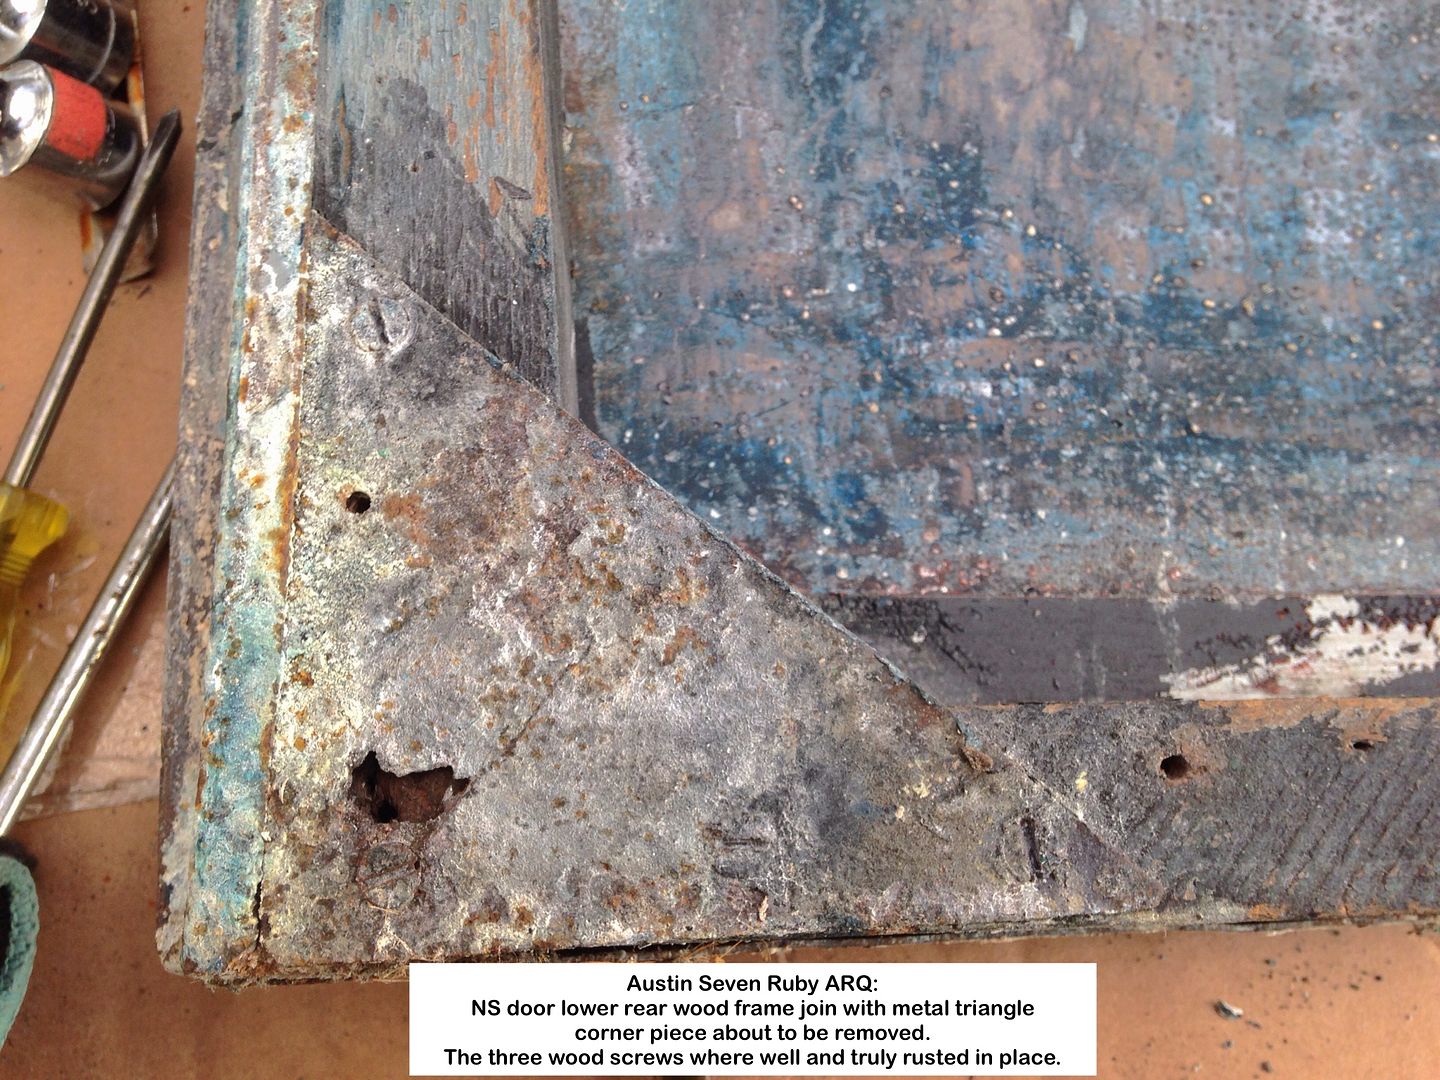
Nearside Door:


Geoff - I am now well and truly cross-eyed, so OS door tomorrow or next week.
Location: South Norfolk - Next to Suffolk
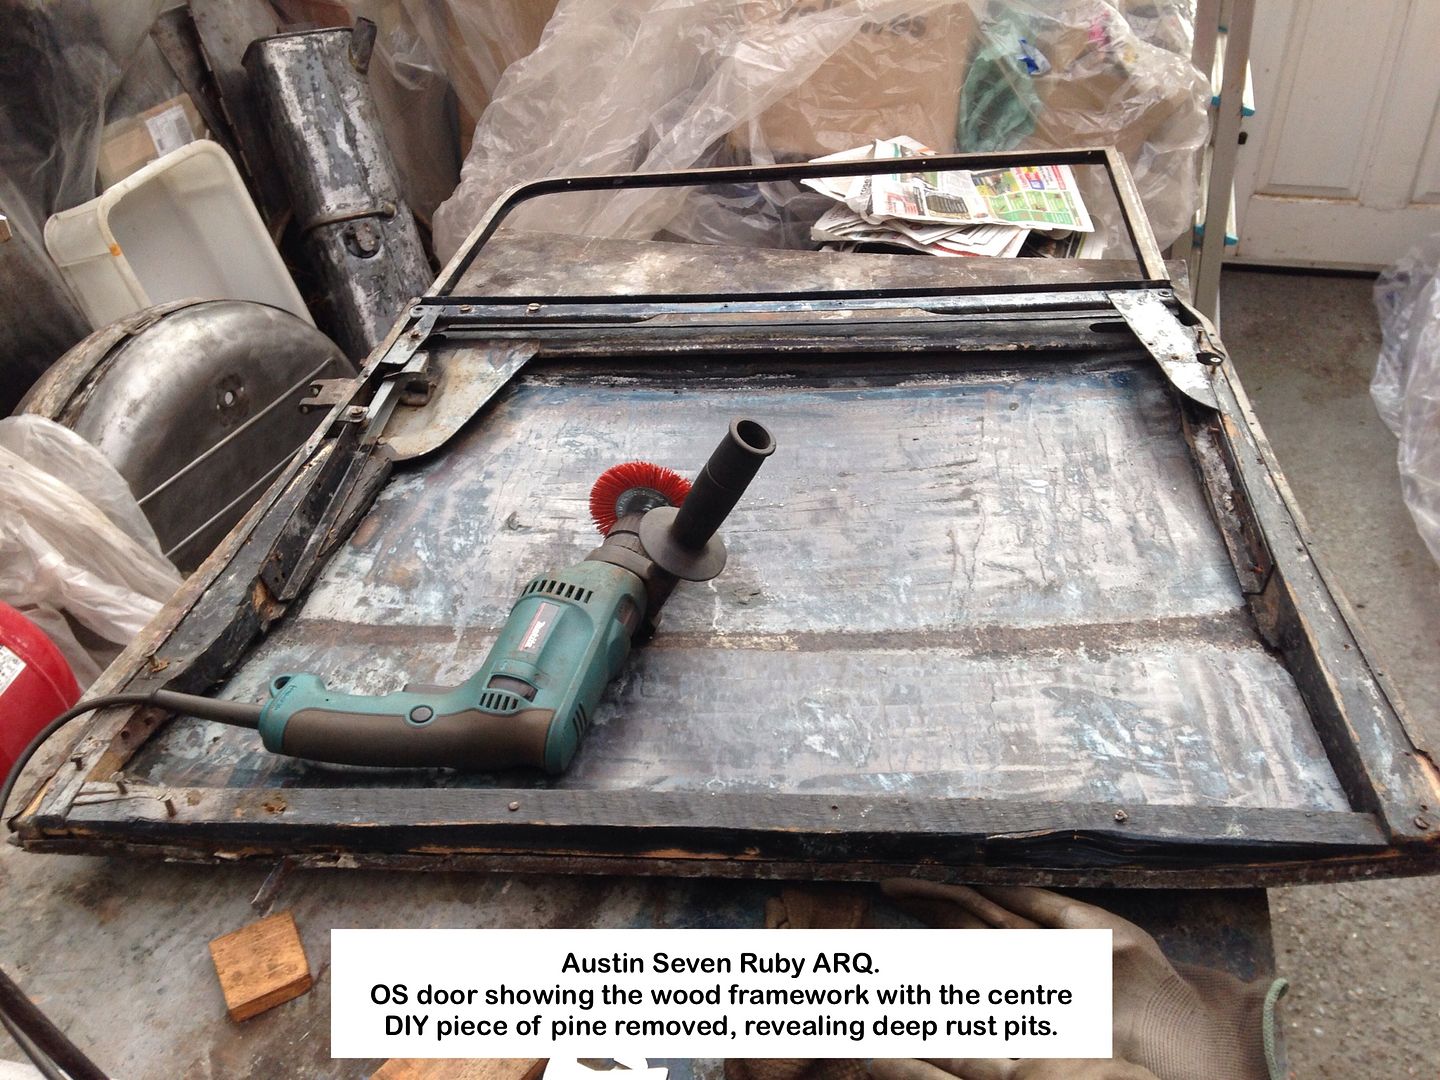
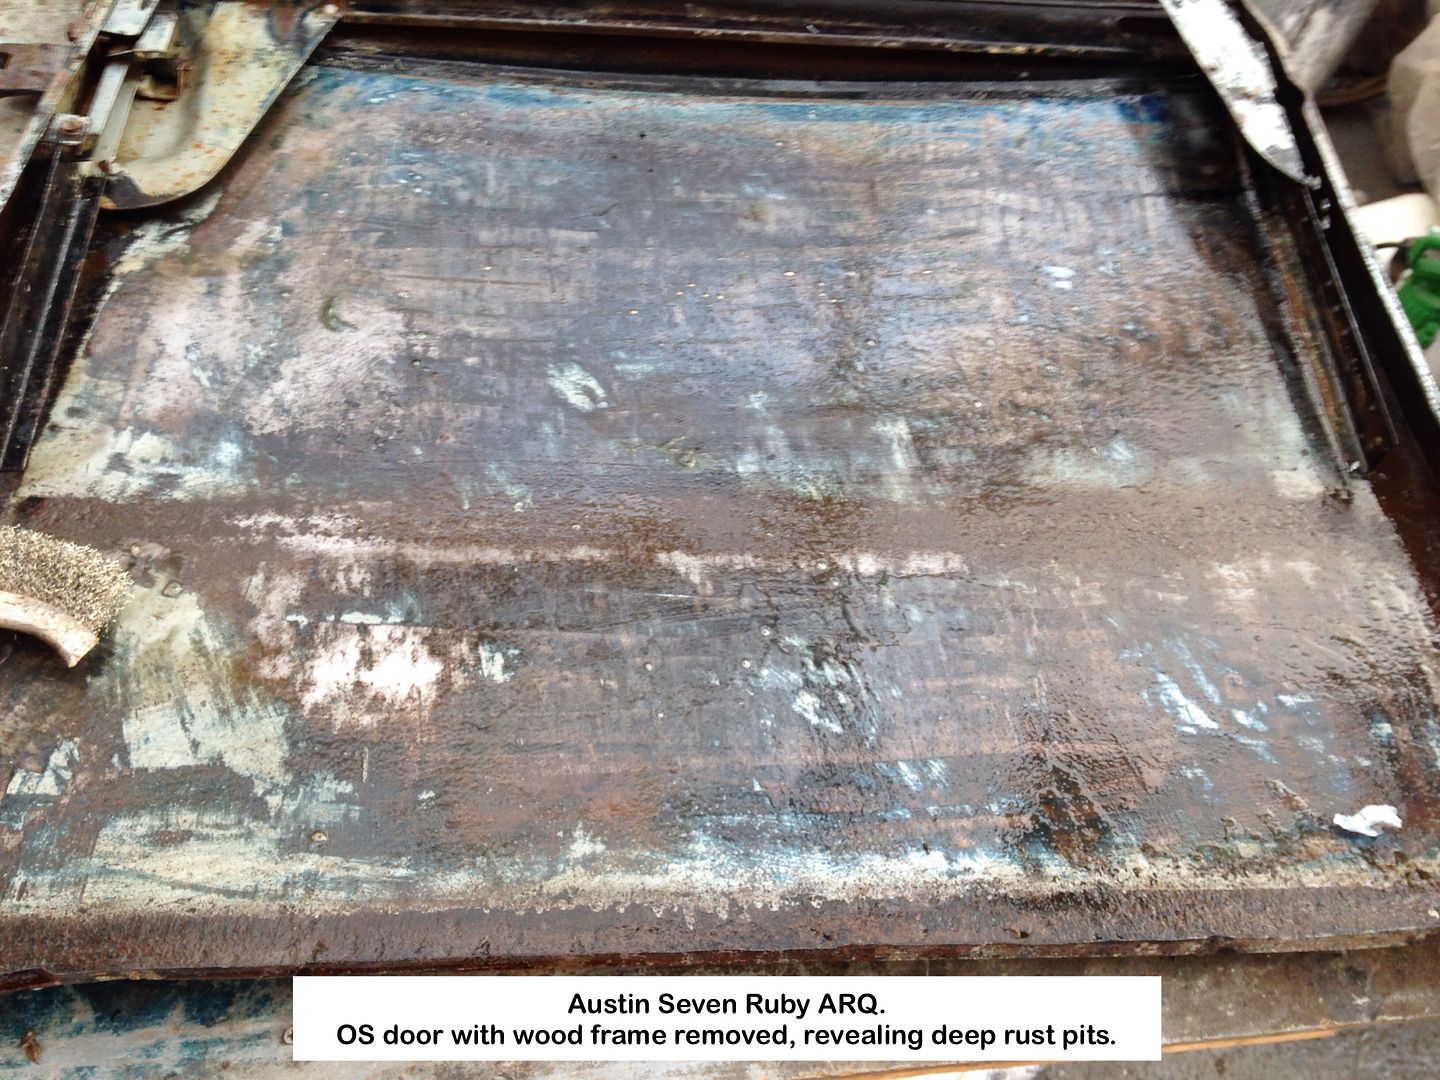
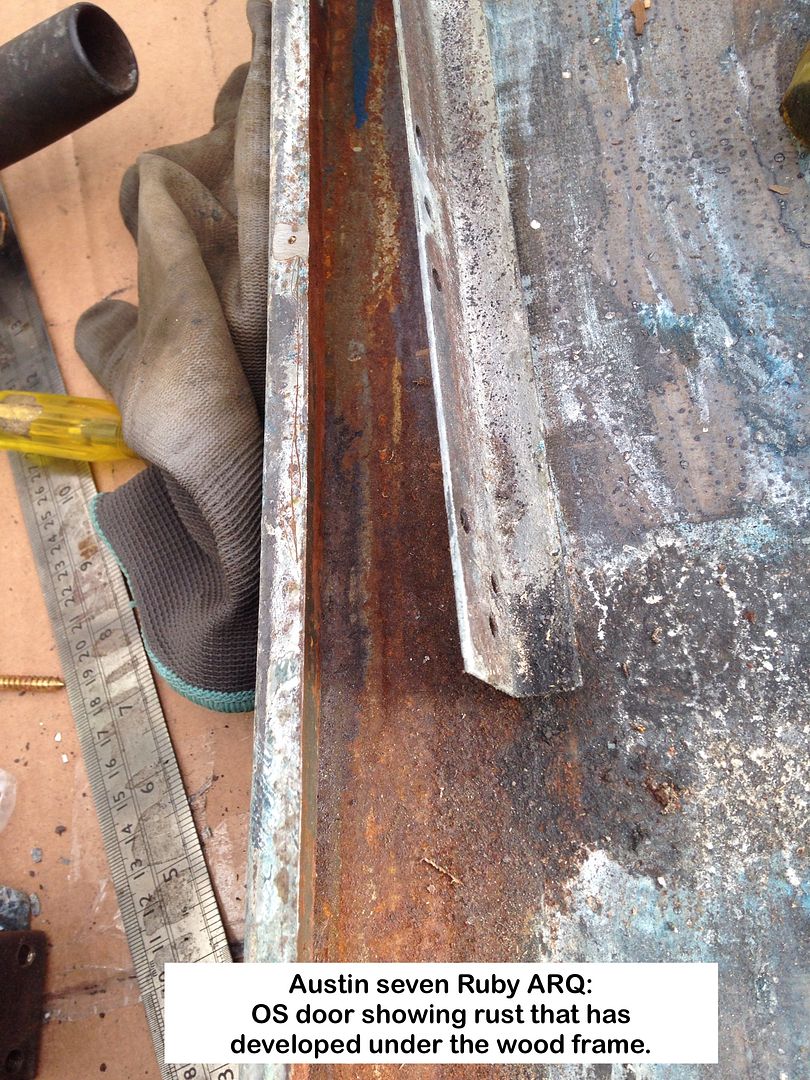
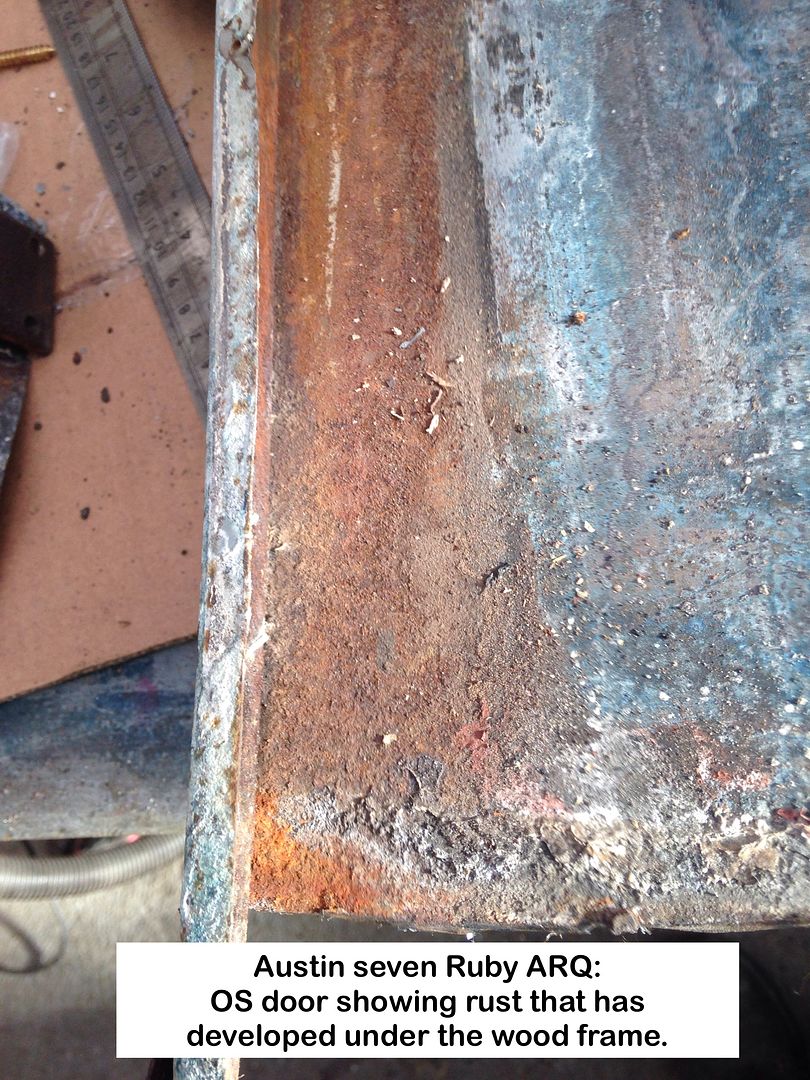
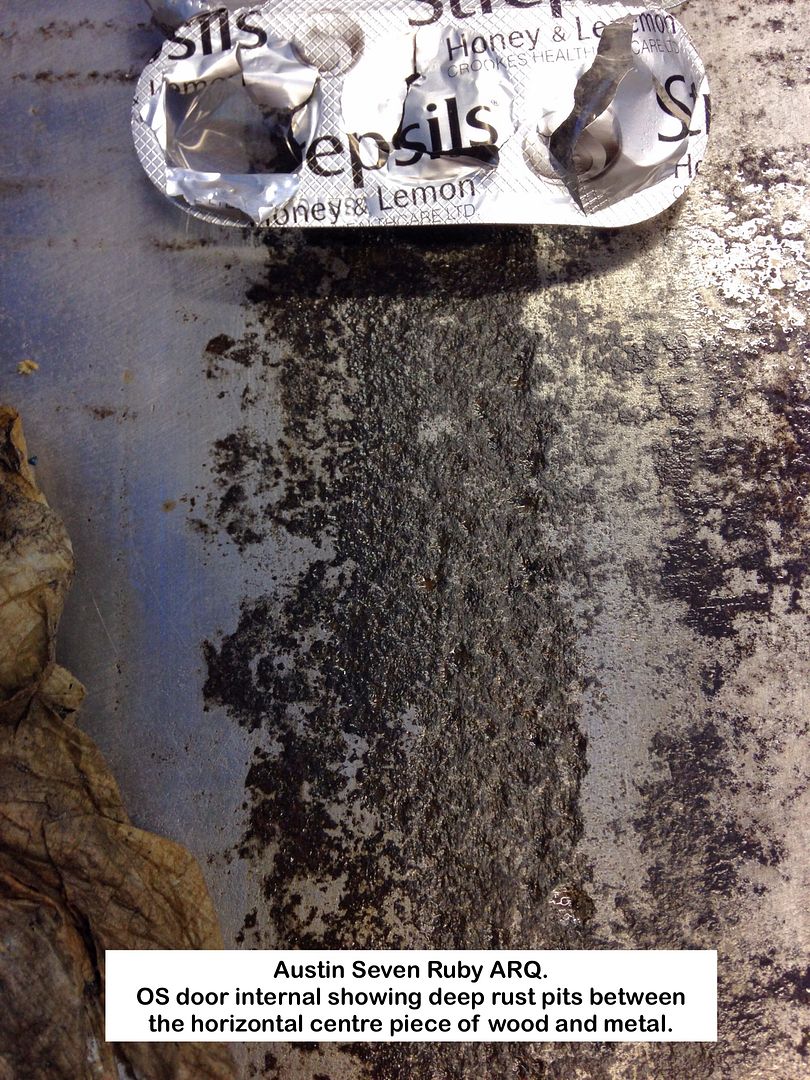
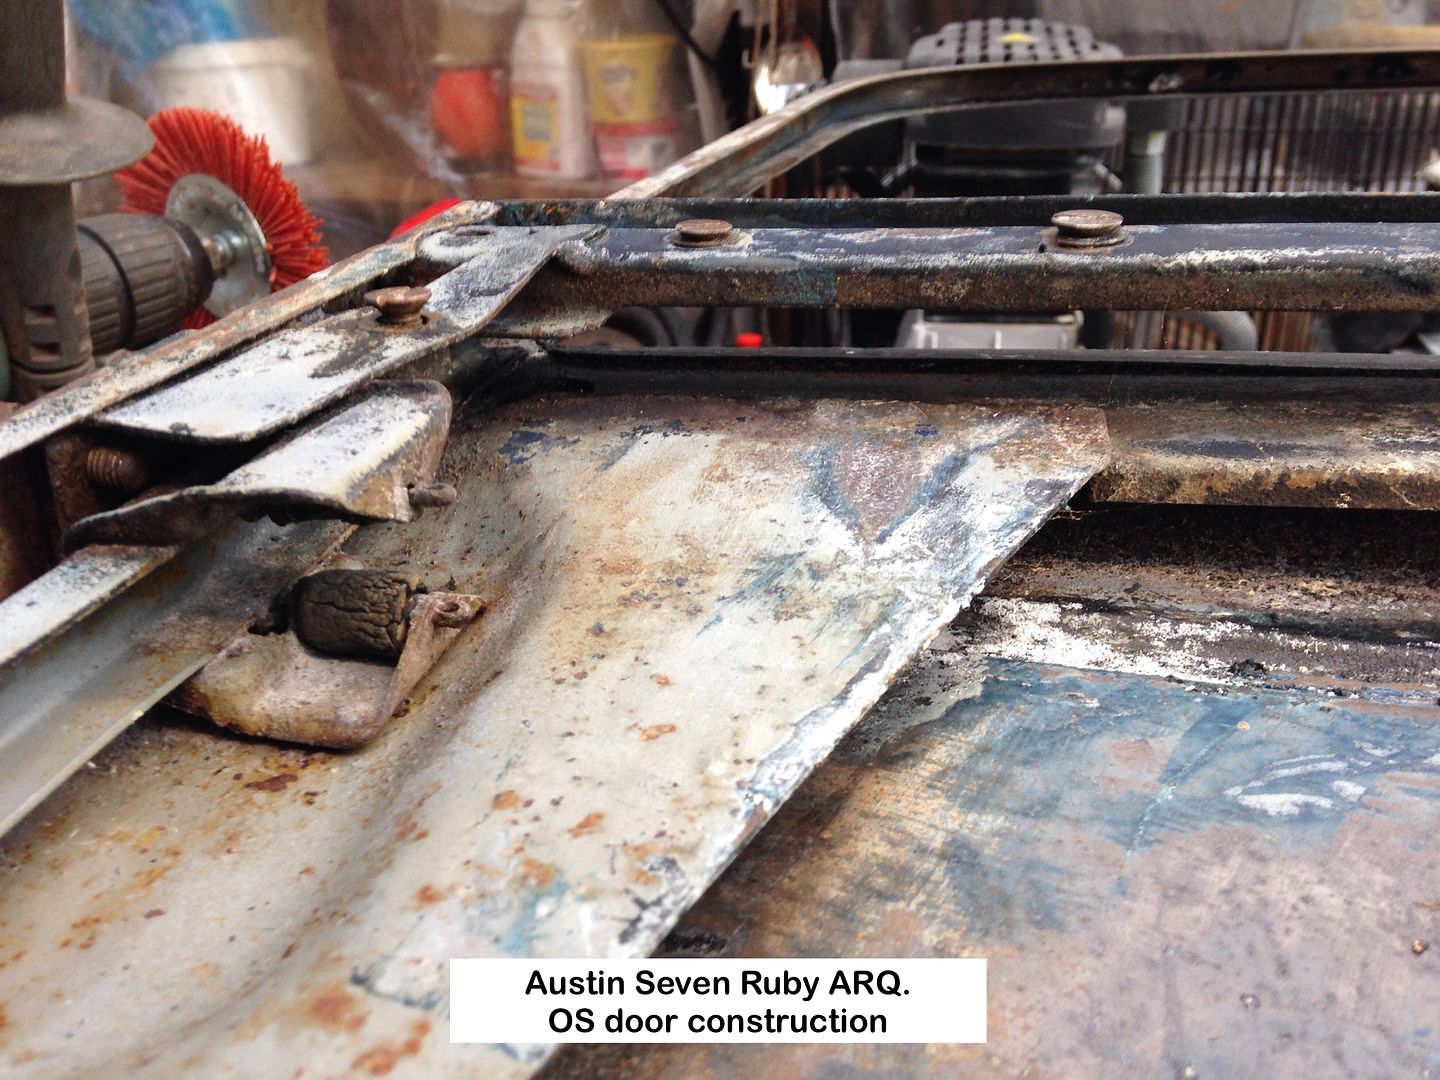
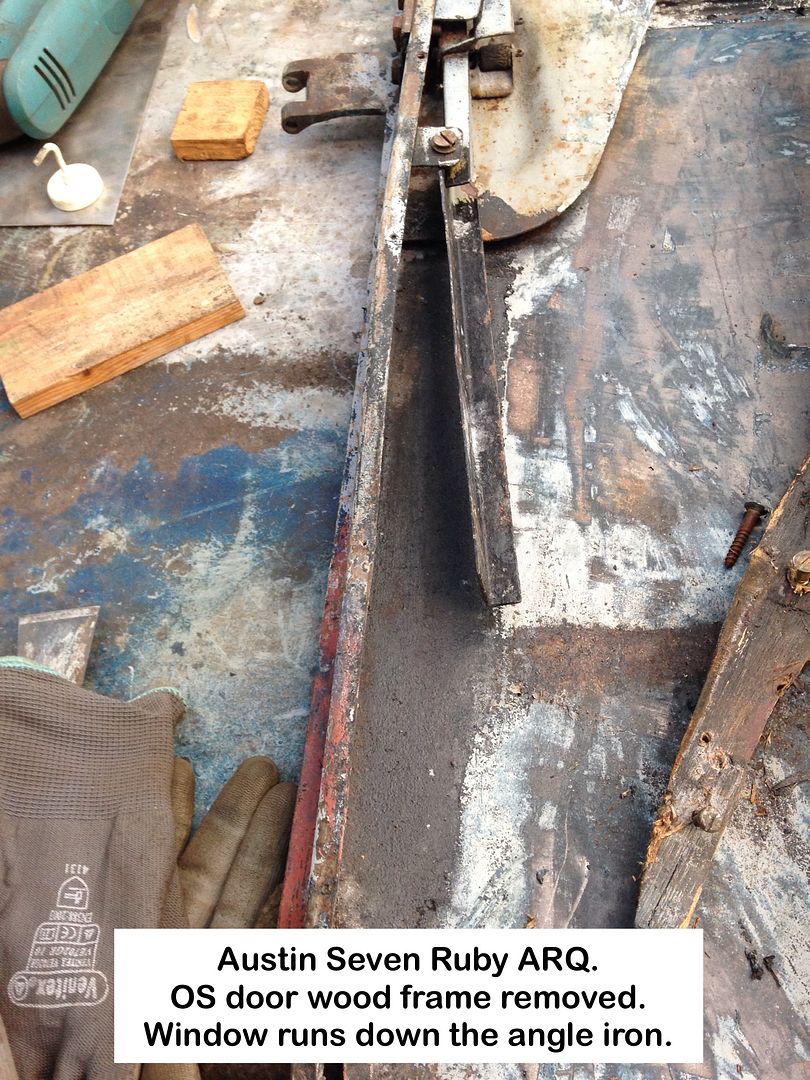
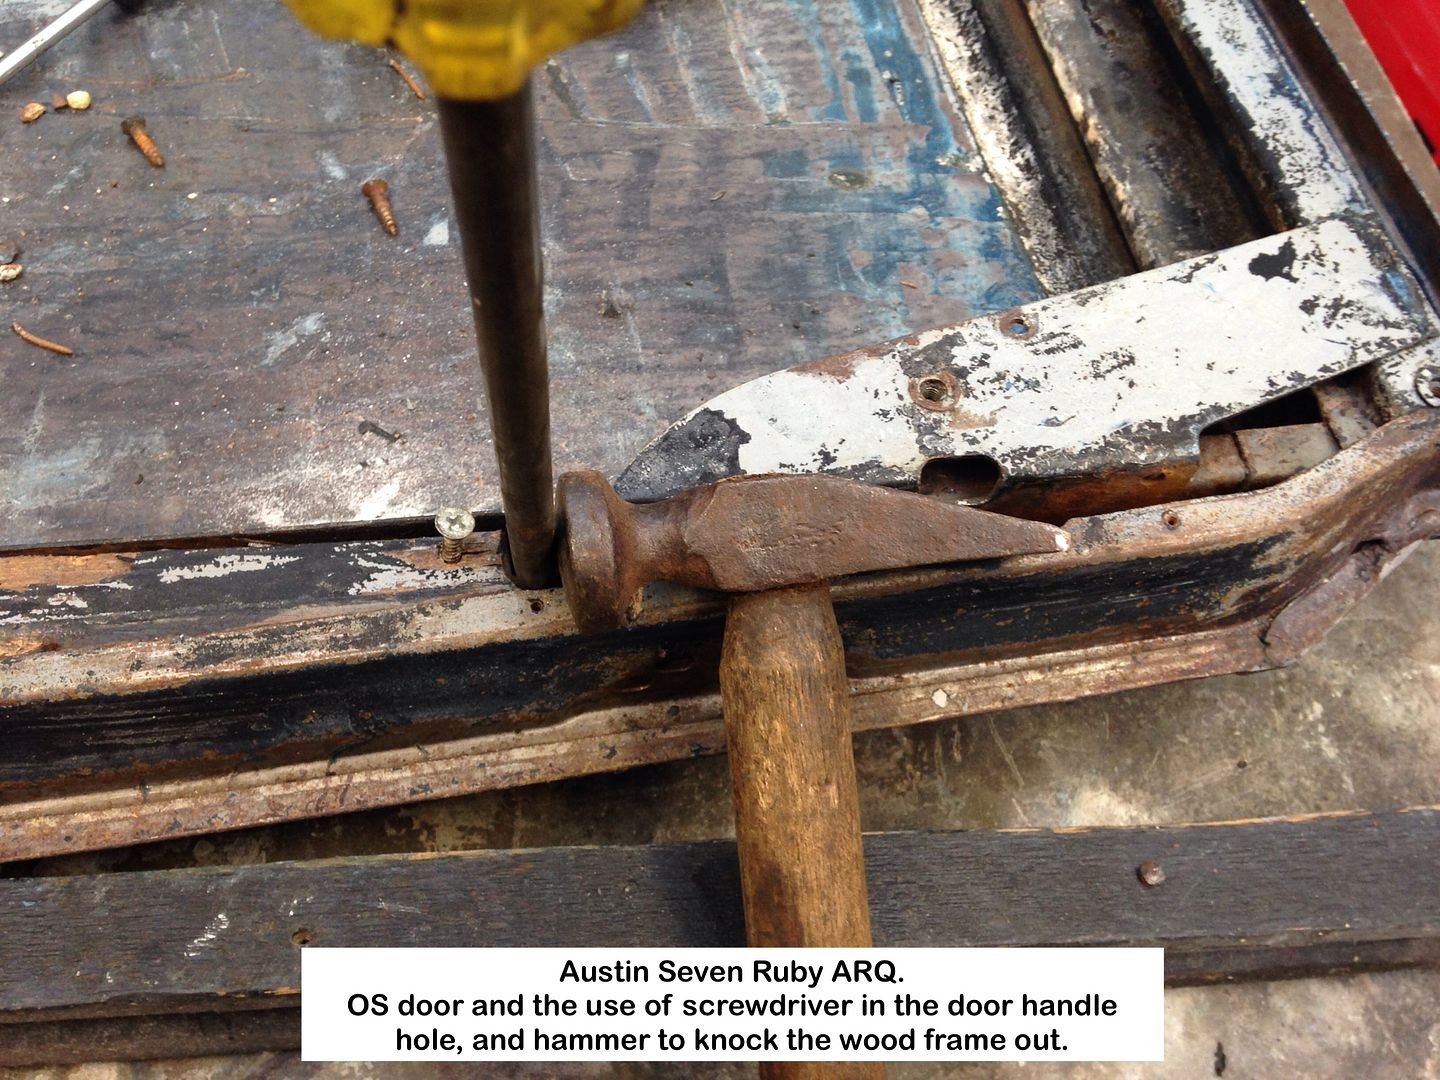
Offside door:
I've recovered from the marathon of getting all the links for the NS door into the last post.
The OS door isn't in as bad a state meaning nowhere near as much work needed on it.
There where varying degrees of rust between the wood frame and steel panel ranging from minor to quite severe rust pitting under the horizontal centre piece.
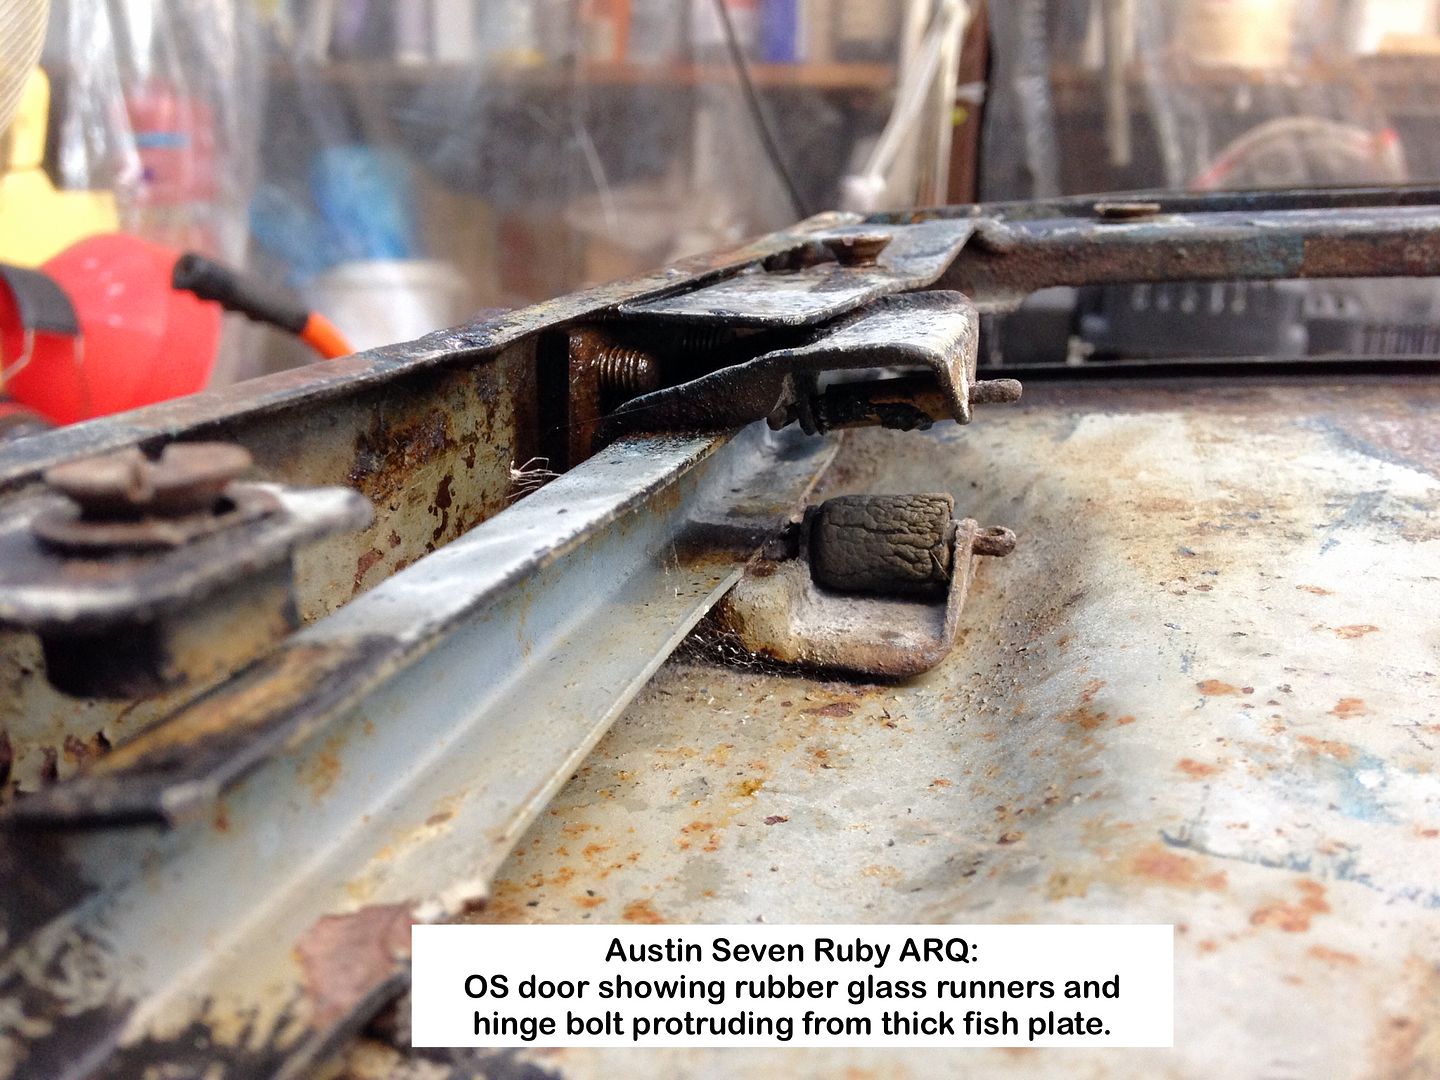
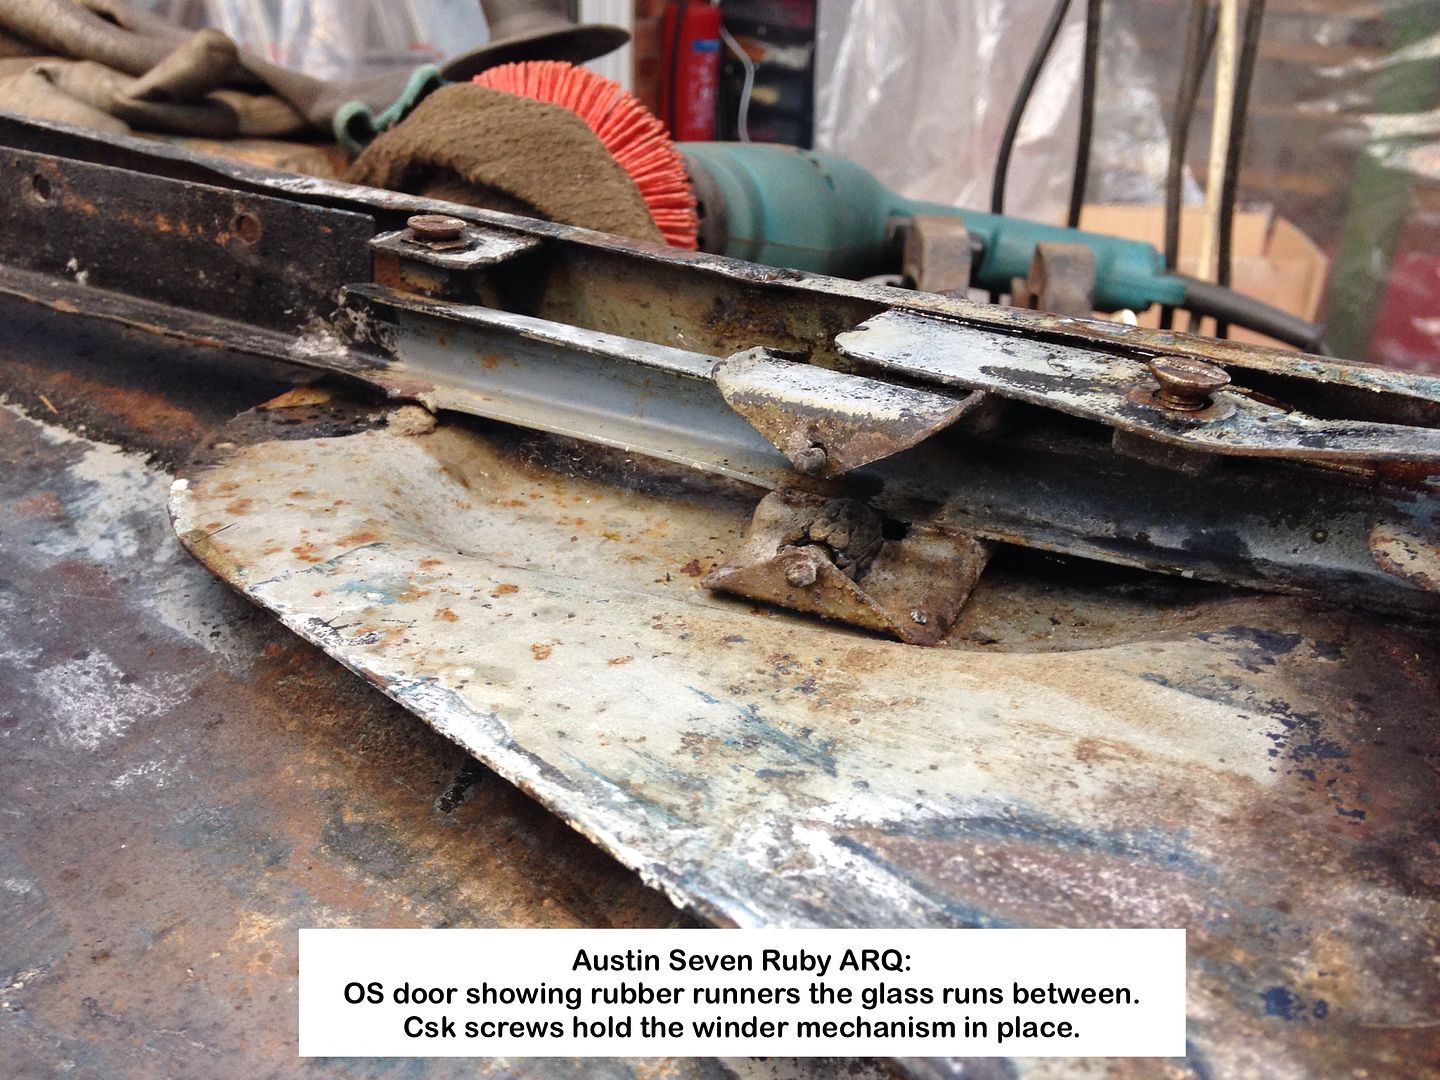
The bottom lip is very much 50/50 whether it's worth keeping or replace either some or all of it.
Will need to come up with a solution to replace the perished rubber rollers that the glass runs between, but will add a photo once I have removed the 4 tubes that the rubber is mounted on.
Will get a cost for blasting before trying myself.
Cannot be more messy compared with soda blasting can it!?
1)
2)
3)

4)
5)
6)
7)

8)
9)
10)
11)

12)
13)
14)
Geoff - Next lot will be of the finish painted small parts.
Location: South Norfolk - Next to Suffolk
Hi Geoff,
There is a very good blaster just down the road who does wet blasting and dipping, would you like his number?
Keep up the good work,
Tom
Location: Eye on the Norfolk / Suffolk border
Yes please Tom
Fersfield by any chance?
Do you per chance have access to sheet metal rollers?
Geoff - 5year old's school Christmas Party at 1330h, so girding my loins.
Location: South Norfolk - Next to Suffolk

Much appreciated Duncan.
I used to do Bradford - Diss - Bradford regularly when I was Enginering Manager at Klockner Moeller, so yes a tad too far 
Geoff - School party went well, if somewhat noisy.
Location: South Norfolk - Next to Suffolk
Hi Geoff, the Fersfield company only do coarse grit dry blasting, I was thinking about a company near Stanton on the Bury road. I can’t find there contact details at the moment but I will email you.
Yes I’ve got some sheet metal rollers and you’re more than welcome to use them or give me a ********** sketch and I’ll roll them for you. If you haven’t got the material yet let me know and I can get it pre-cut for you.
Tom
Location: Eye on the Norfolk / Suffolk border
Thanks Tom, much appreciated.
I will need to pop round with the rear Mud Shields as they both need the area that fits flush up against the inner arches replaced, as do the corresponding sections of the inner arches, that said Mud Shields bolt up against.
They have what I can only describe as being well and truly done over, as with the NS door.
Do you have suitable sheet I could purchase?
If not will get some cut at Roy Allen.
Hope the above is as clear as mud
Some time next month with any luck, as I'll have the body back in the Carport then.
Geoff - Inside today catching up on other things as Carport too 'bleep' cold 
PS:
The school party went well 
Location: South Norfolk - Next to Suffolk
Time waits for nobody, expect his old f@rt.
It's been a while, but 2-6°C is not all that conducive to working in the Carport, BUT I have been busy.
I moved one of those ubiquitous bench mounted sandblasting cabinets from a corner in the Workshop, into the Carport to try out now having a man enough compressor to handle the air requirements.
Before even connecting up I read/viewed everything I could find on this type, and realised that surgery was needed to get it to work at all , so made a start 24/12/2016 and that is still ongoing.
The cabinet is now doing the job it was 'designed' to do, albeit not all that well thought through, and is now residing on a stand with the compressor lurking underneath.
A video with details later.
I at last made a rack for the 5C collets that have been lying in a box, and now readily at hand at the lathe.
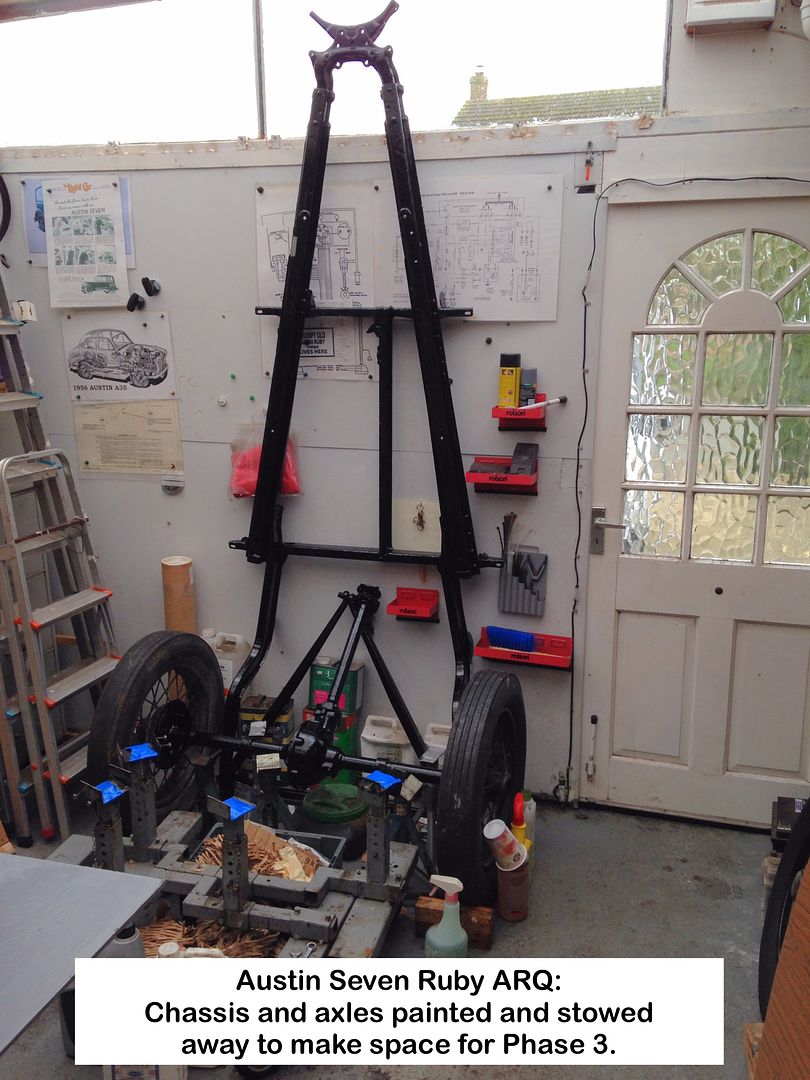
Ruby news:
Just had to rescue it from obscurity and decay.
On the 'Operating Table' ready for some dramatic 'surgery'.
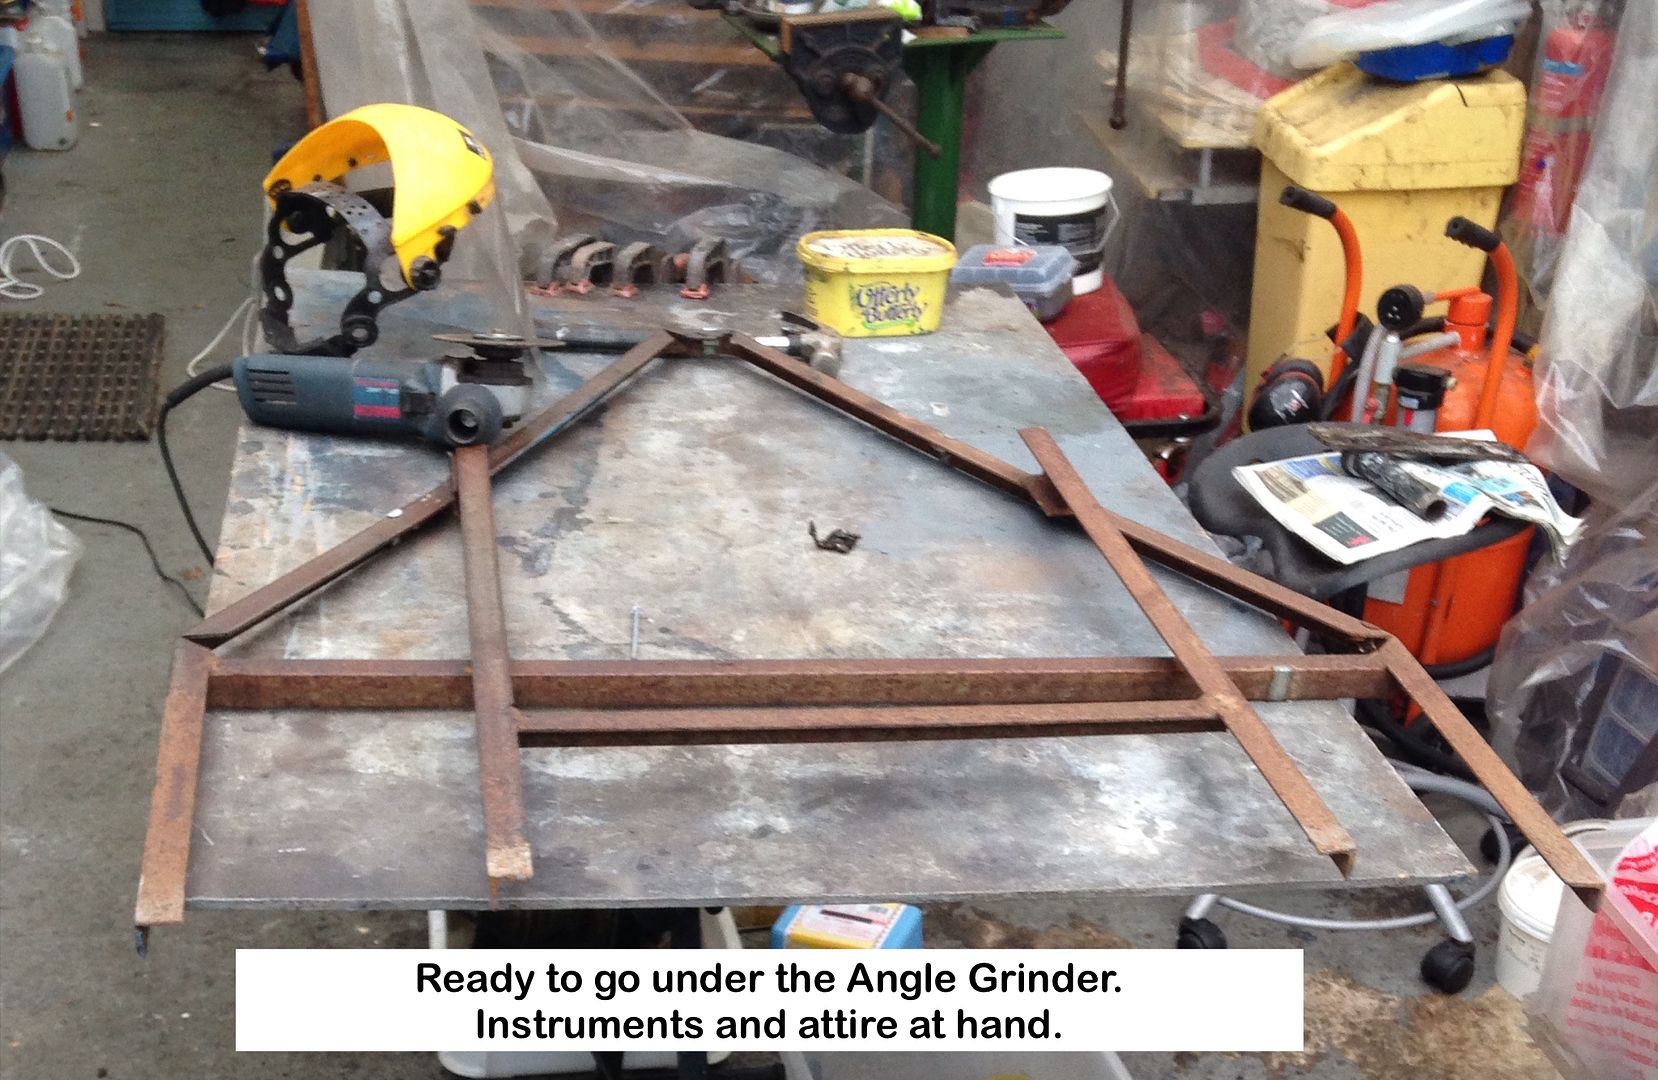
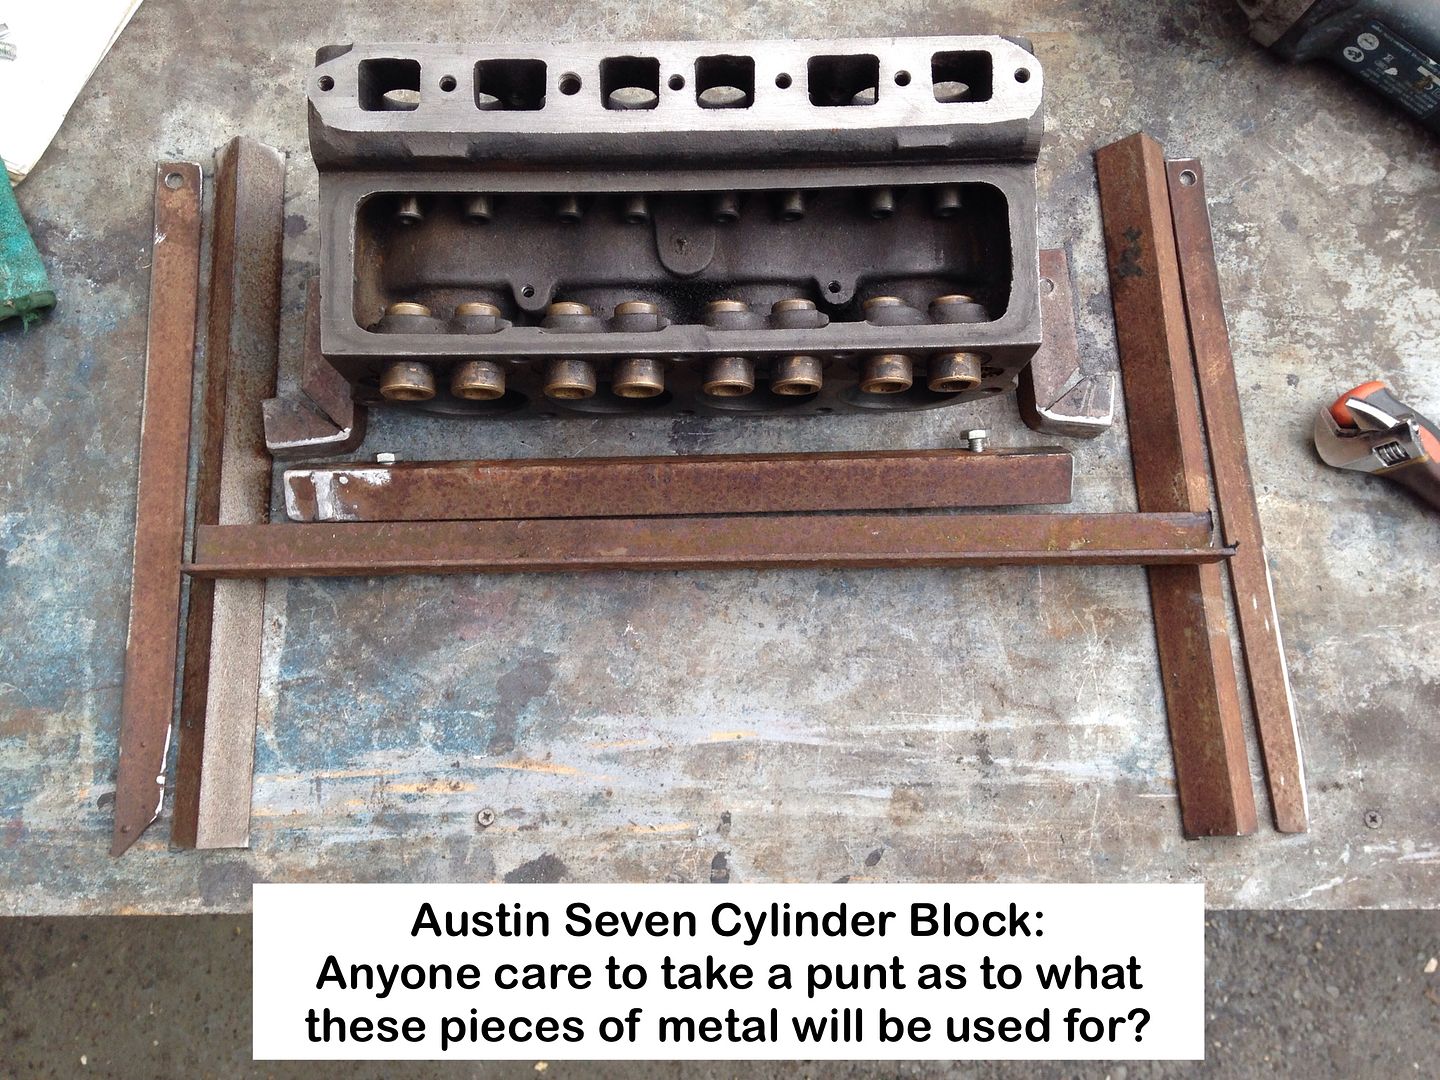
Time to tax the 'collective' brain and imagination, to be used in conjunction with the Engine Cradle I made to fit onto the Engine Stand.
Another post tomorrow.
Geoff - The body will be back in the Carport very soon with luck.
Location: South Norfolk - Next to Suffolk
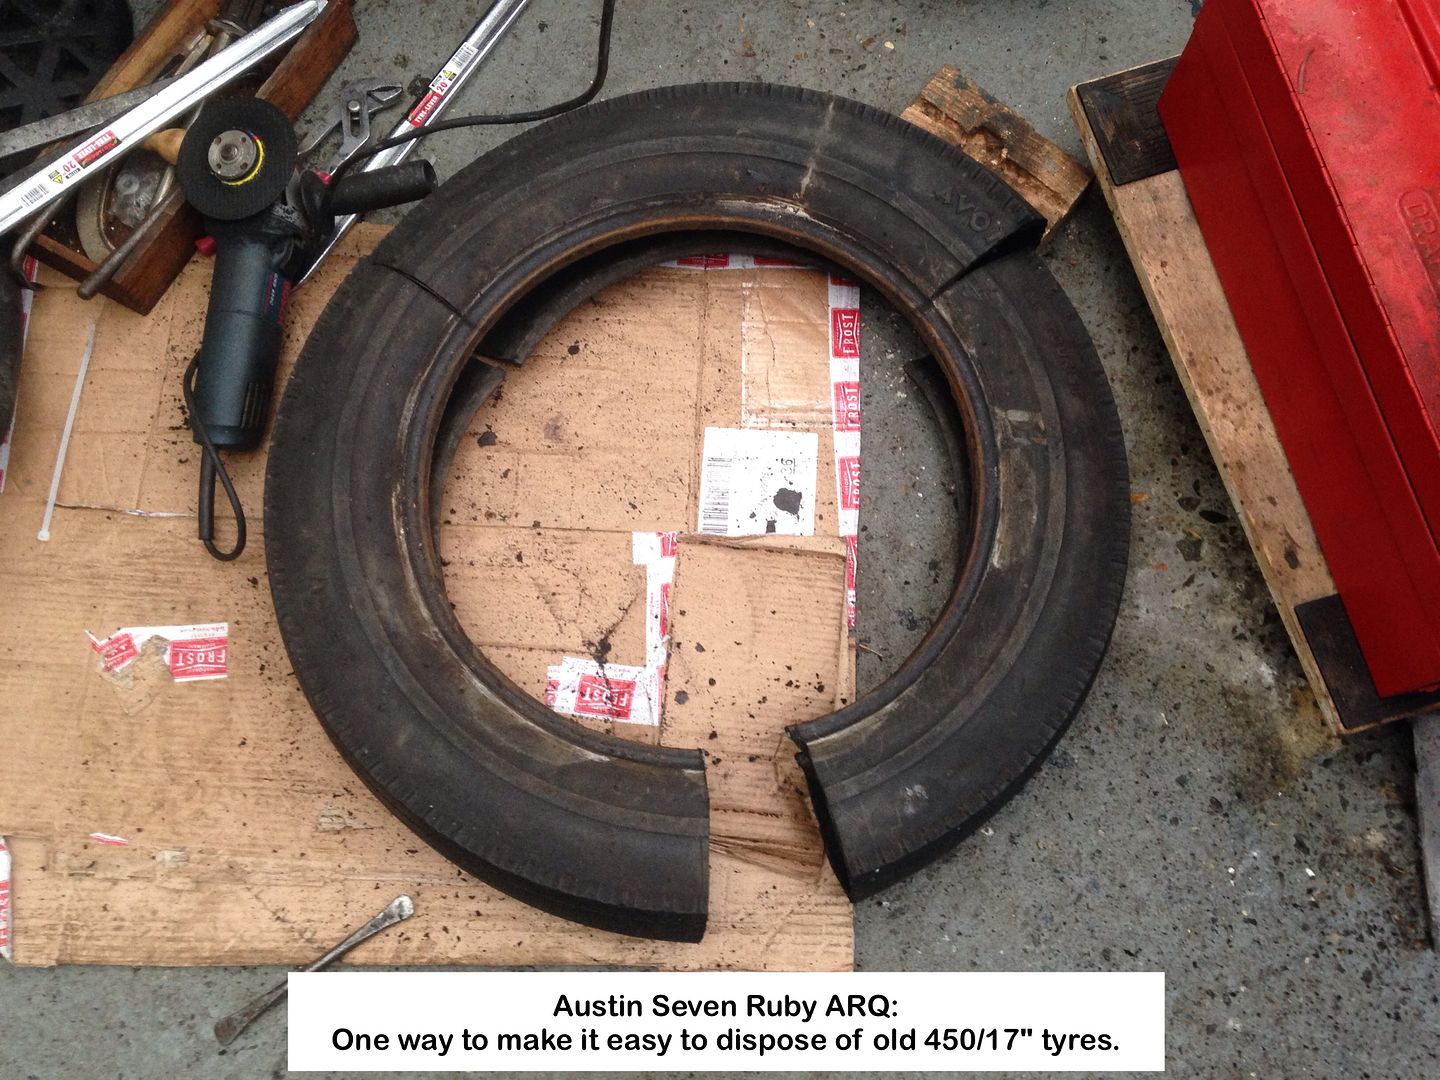
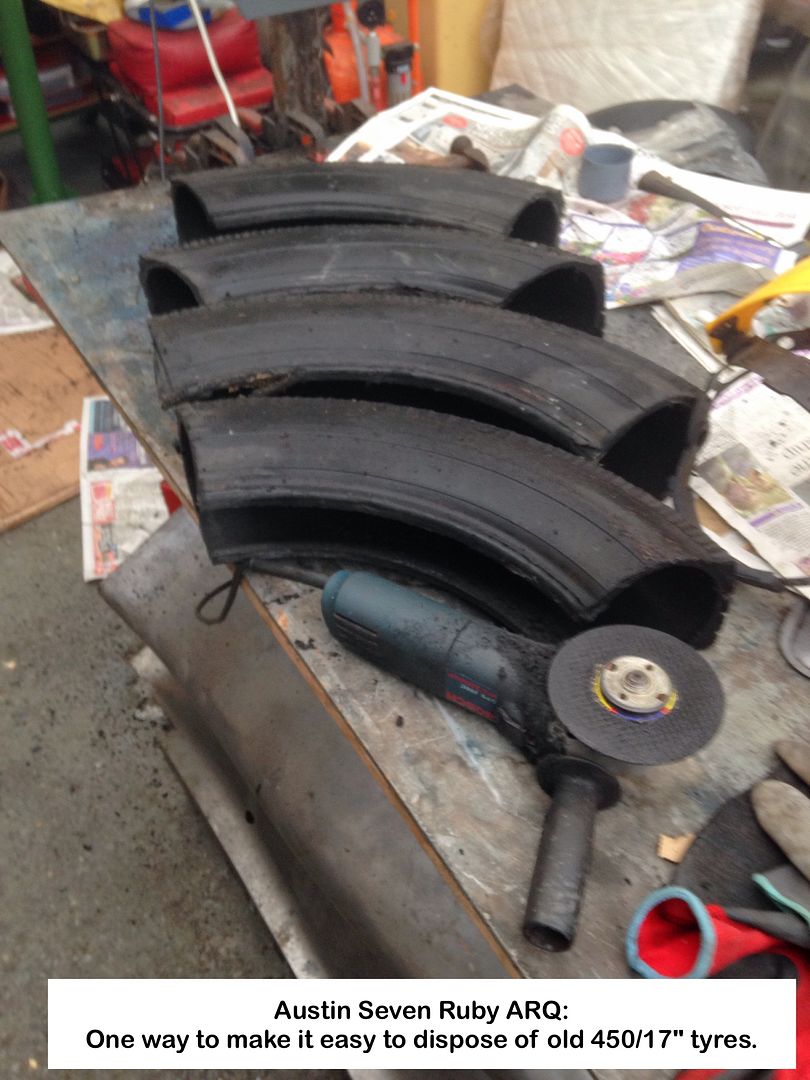
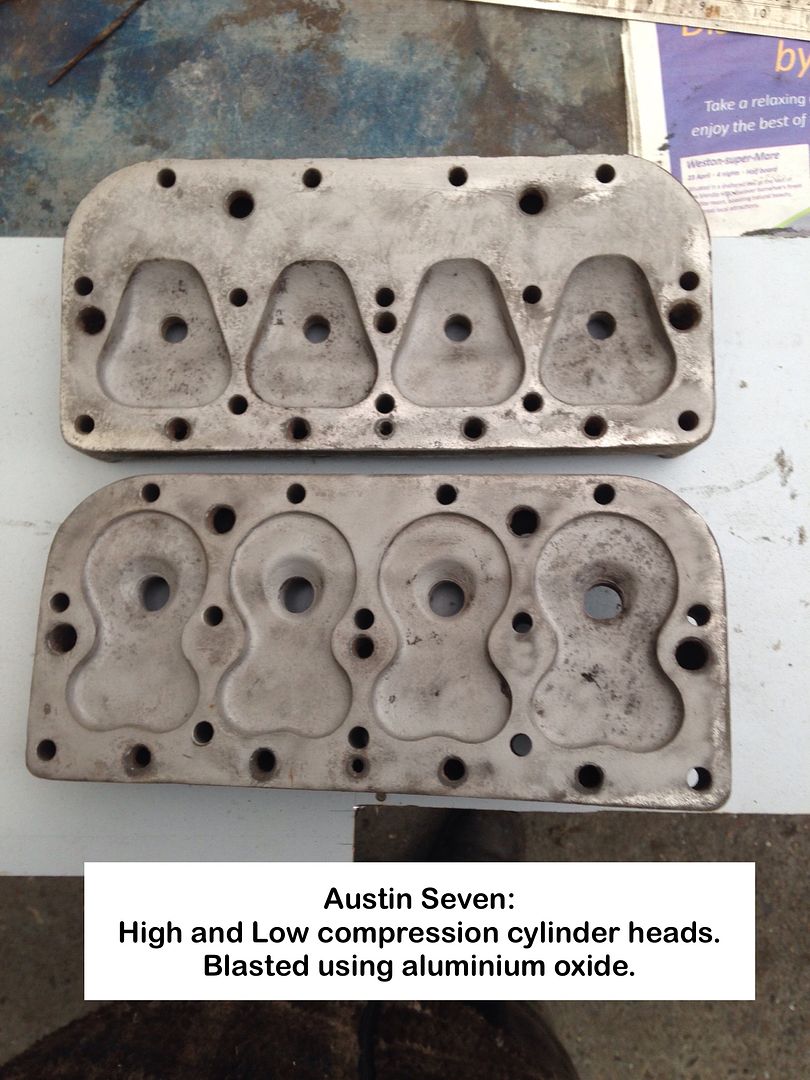
Wheels and cylinder heads.
No need to add anything.
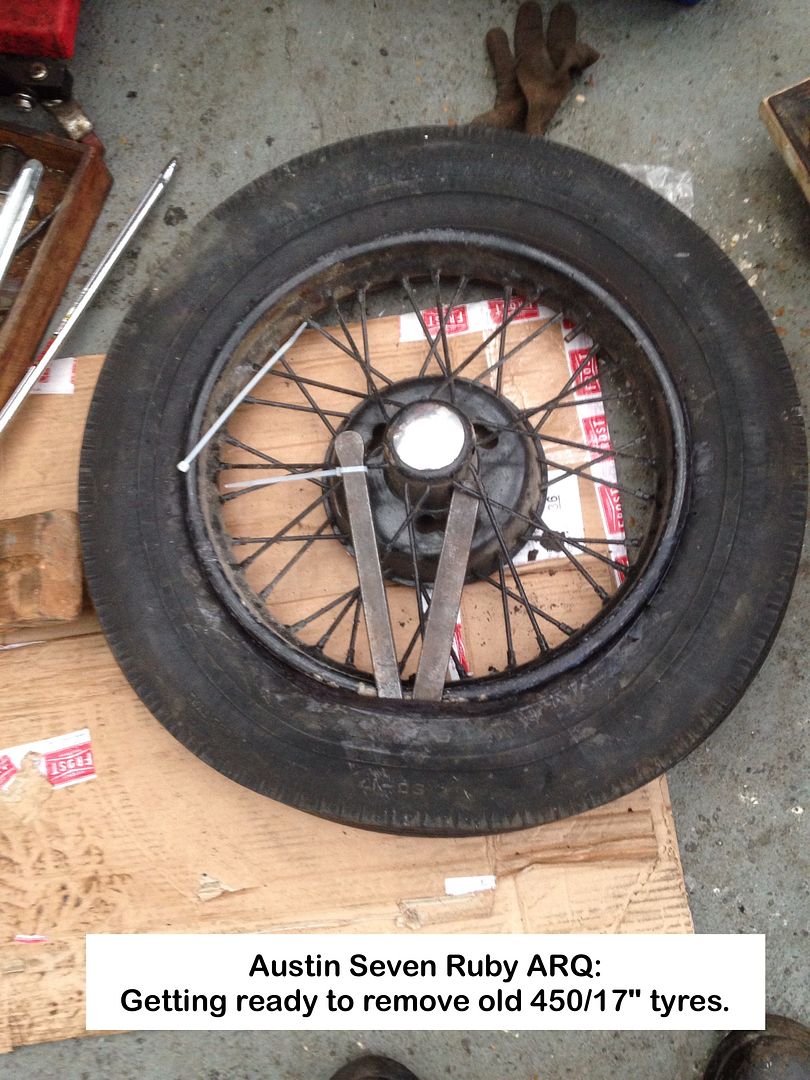
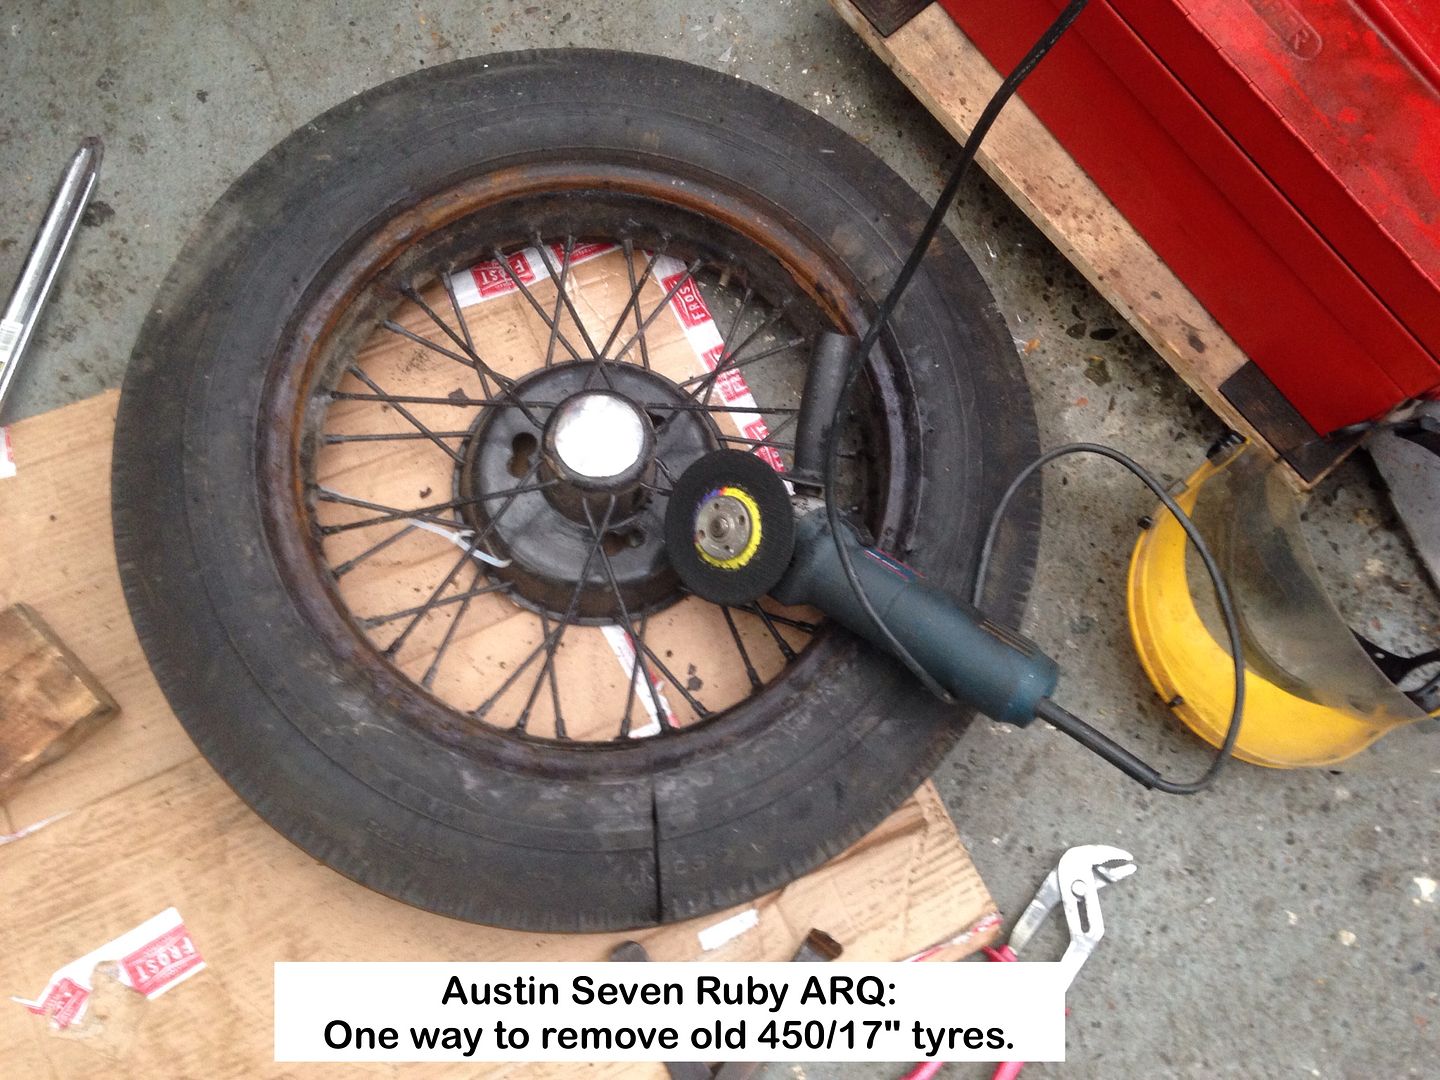
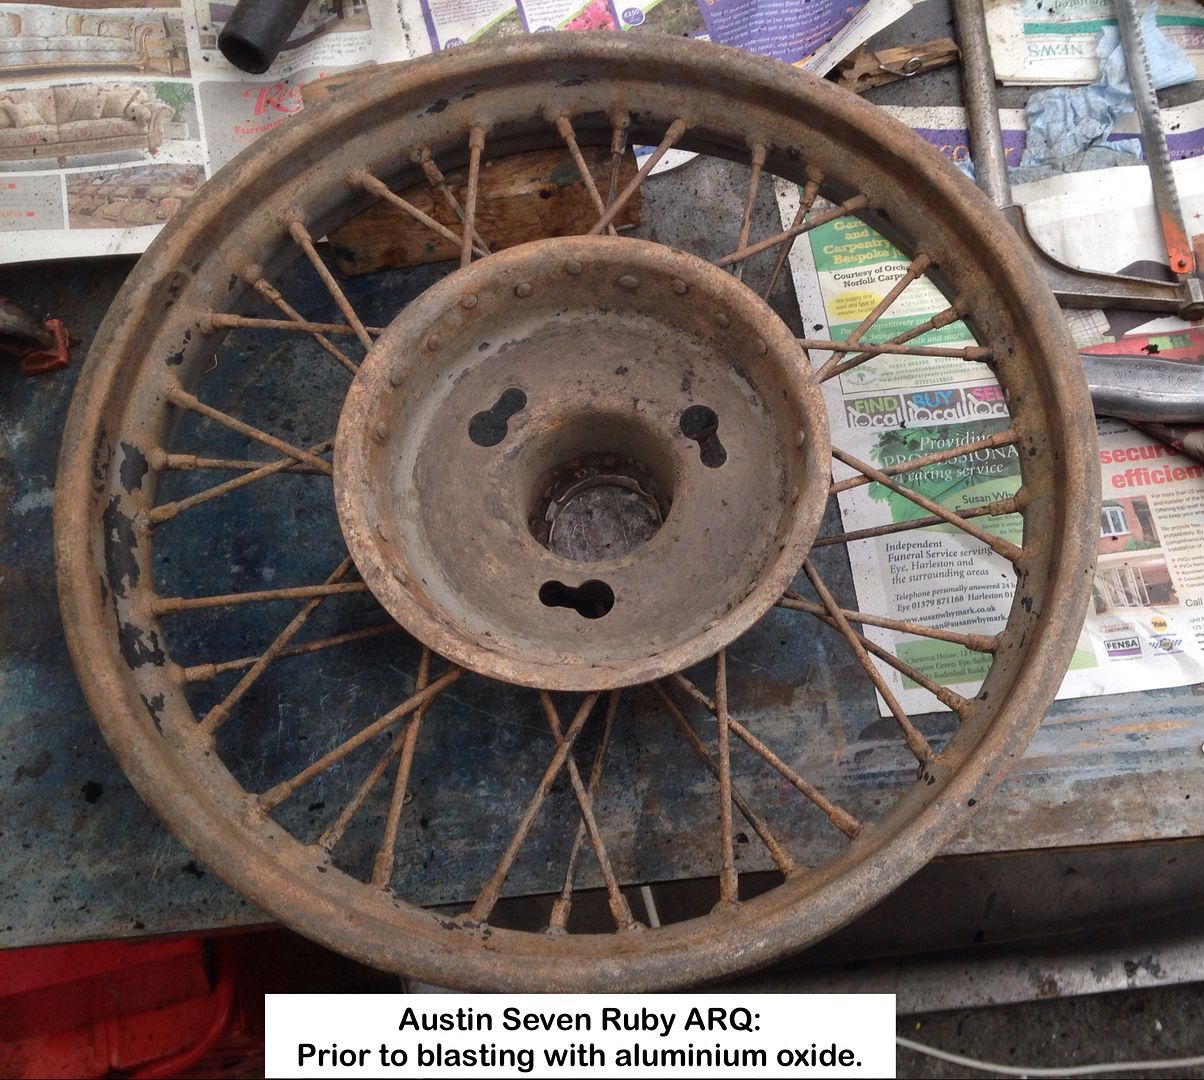
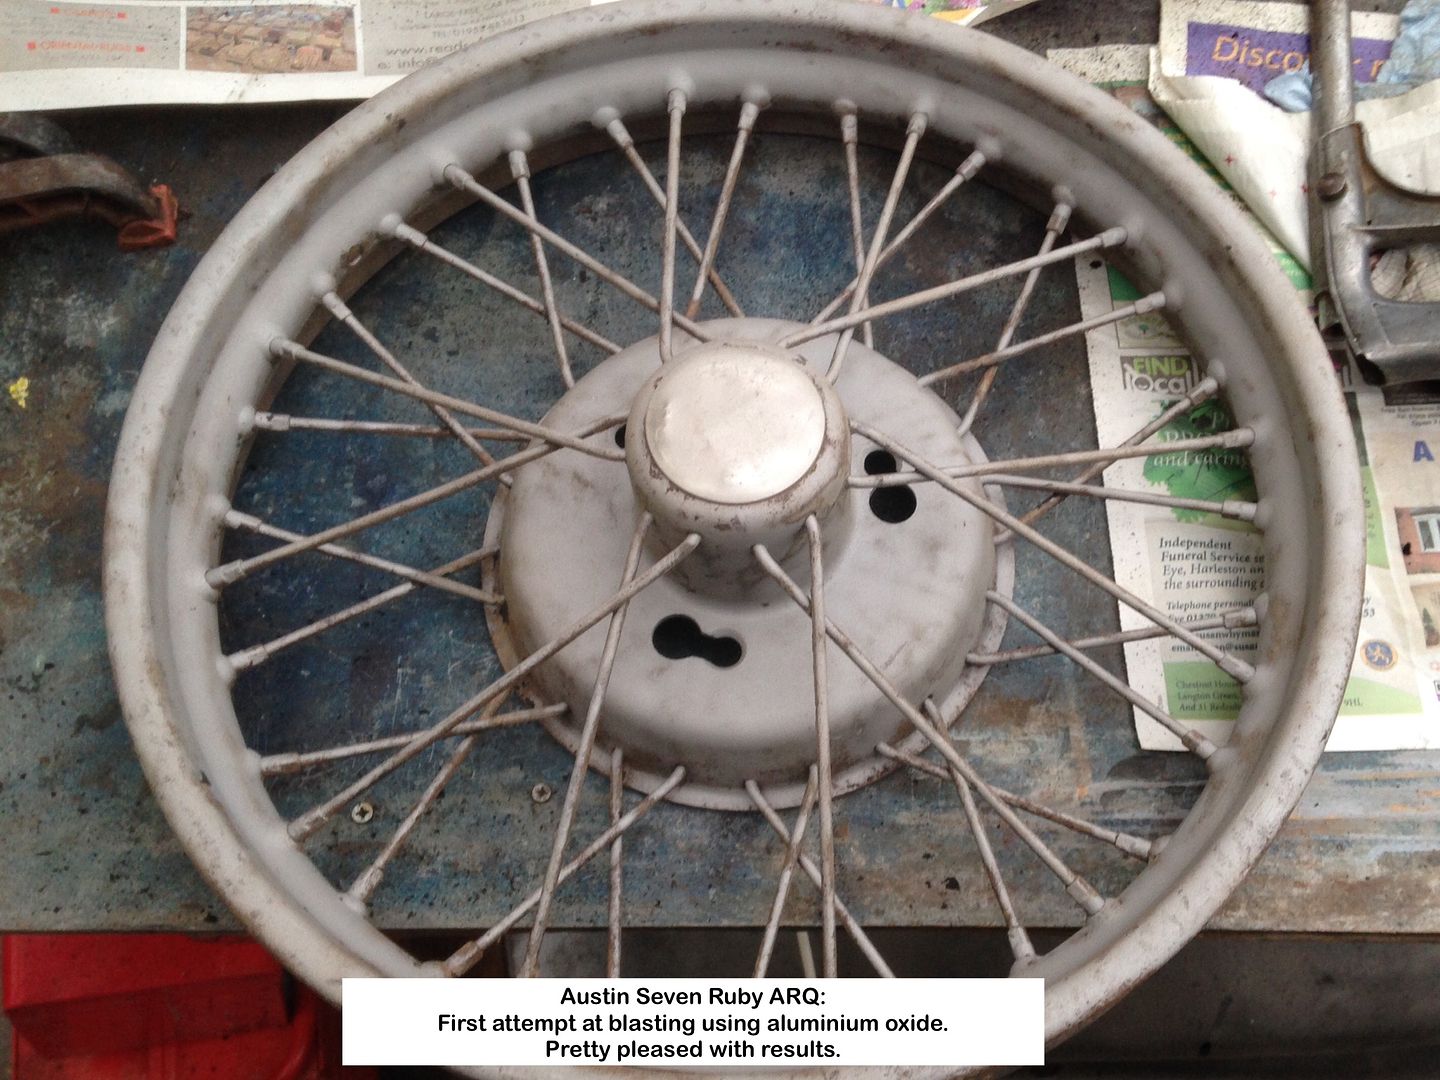
Wheels:
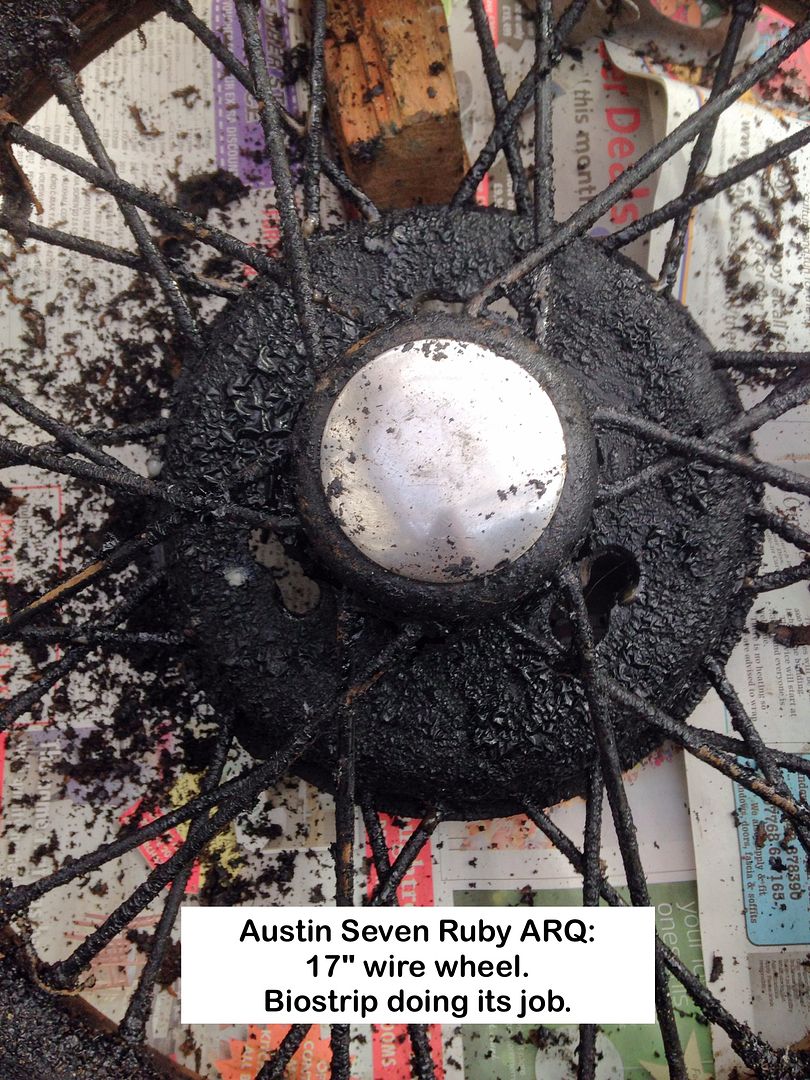
Sandblasting:
Before and after.
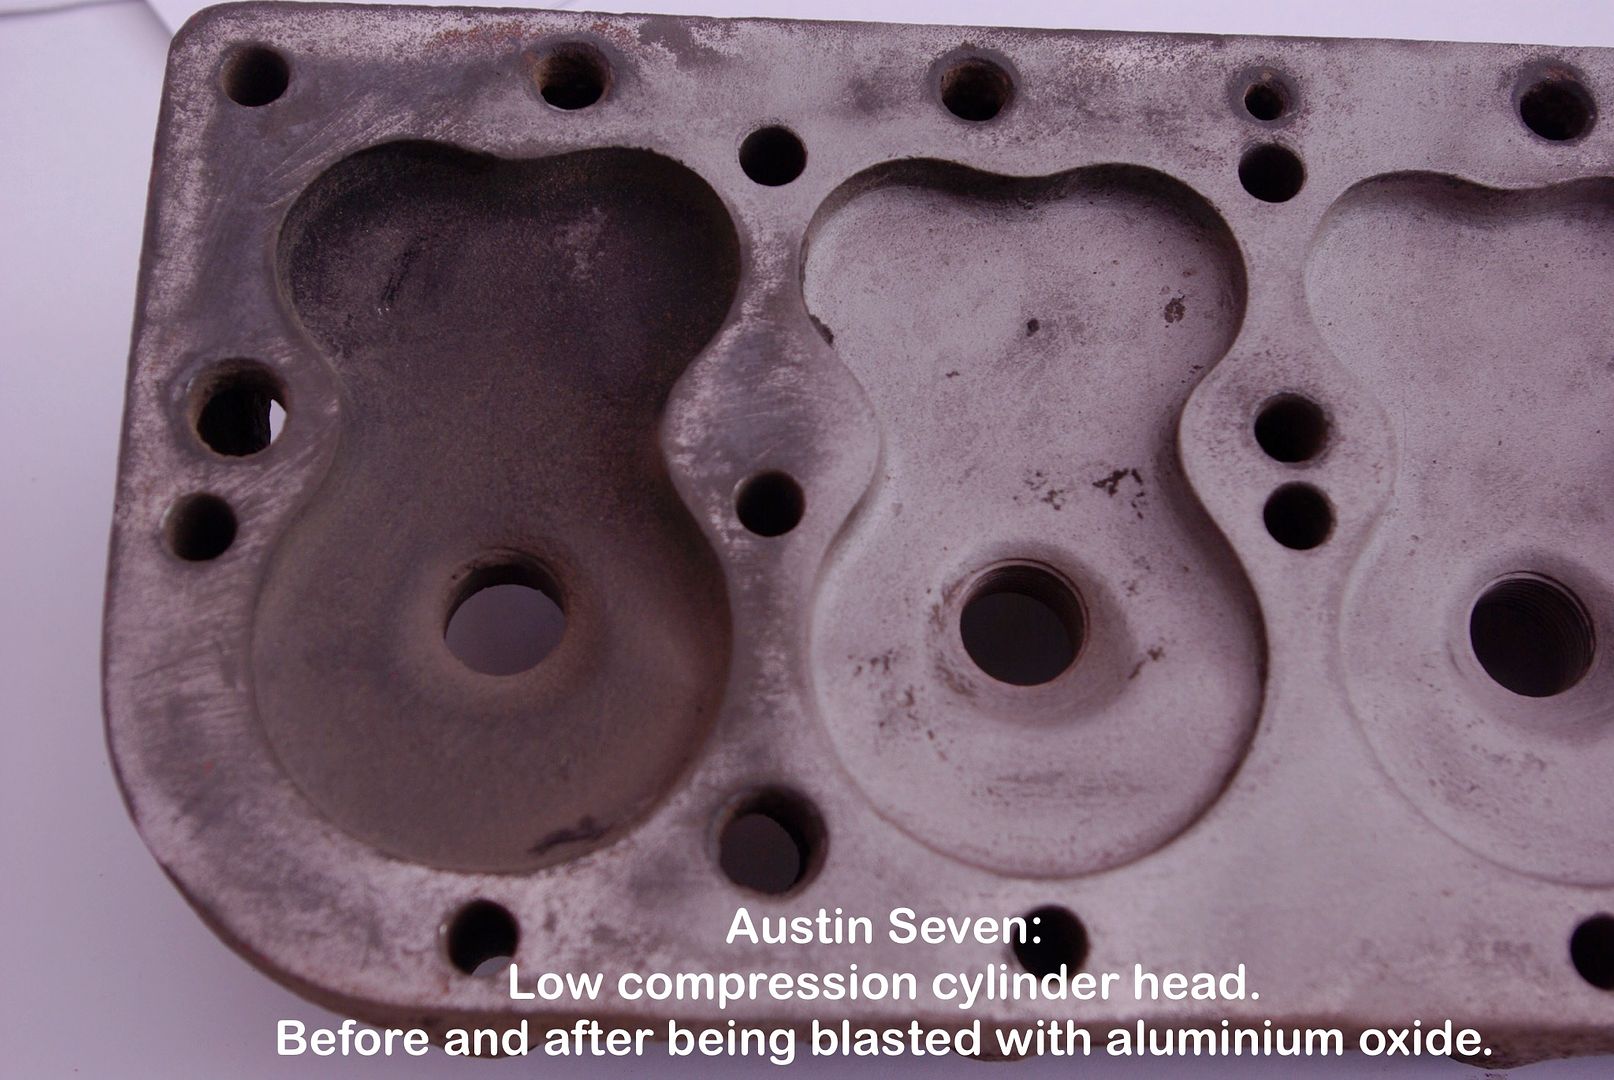
High & Low compress cylinder heads difference.
Geoff - Next will be the completed mystery item being used.
Location: South Norfolk - Next to Suffolk

Geoff, a simple rule regarding changing tyres - "Start and finish at the valve"
That means, once you have broken the bead into the well of the wheel, lever the tyre off adjacent to the inner tube valve. Unless the opposite part of the tyre (at 180° to the valve) isn't right onto the well then you'll have the devil's own job of levering the bead.
Same applies for fitting - make the last bit next to the valve, and if you can, walk the tyre into place (easier with 19" tyres)
Helps if the tyres are warm.
Location: Gard, France 30960. Used to be Languedoc-Roussillon but now it's Occitanie
Hi Geoff, Email sent regarding shot blasters, sorry for the delay.
Tom
Location: Eye on the Norfolk / Suffolk border
Thanks Reckless 👍
The tyres where we'll past their usage, hence my method.
Thanks Tom.
Geoff - Video of that block thingy soon.
Location: South Norfolk - Next to Suffolk
Tom,
Would you post address here please?
Google is now behaving like YahooMail and won't accept my password even after resetting 
Geoff - Video done, just needs editing tonight.
Location: South Norfolk - Next to Suffolk
Hi Geoff,
I'll drop them over to you.
Tom
Location: Eye on the Norfolk / Suffolk border
Preamble:
Whilst suffering a head cold, passed on to my by family members, and not feeling in the least capable of doing any work on the car without making a 'codswallop' of it, decided to post an update.
For some unknown reason I'm unable to upload to YouTube, Facebook or Google Photos from iMovie on the MacPro, but can on the MacBook.
Have asked for advise on Apple Support Communities - iLife, but no luck so far.
Update.
Sandblasting Cabinet:
I have one of those ubiquitous bench mounted cabinets that are, as supplied, next to useless, BUT can be made to work, thanks to all those before me figuring out what to do.
It took days of searching the 'net to find out what mods/additions/changes where needed to convert it from an ornament into something actually worth having.
I also added some of my own ideas, particularly in lighting the inside and clearing the dust from the window, both of which I'm pretty proud of.
A video will, with any luck, follow in the not too distant future.
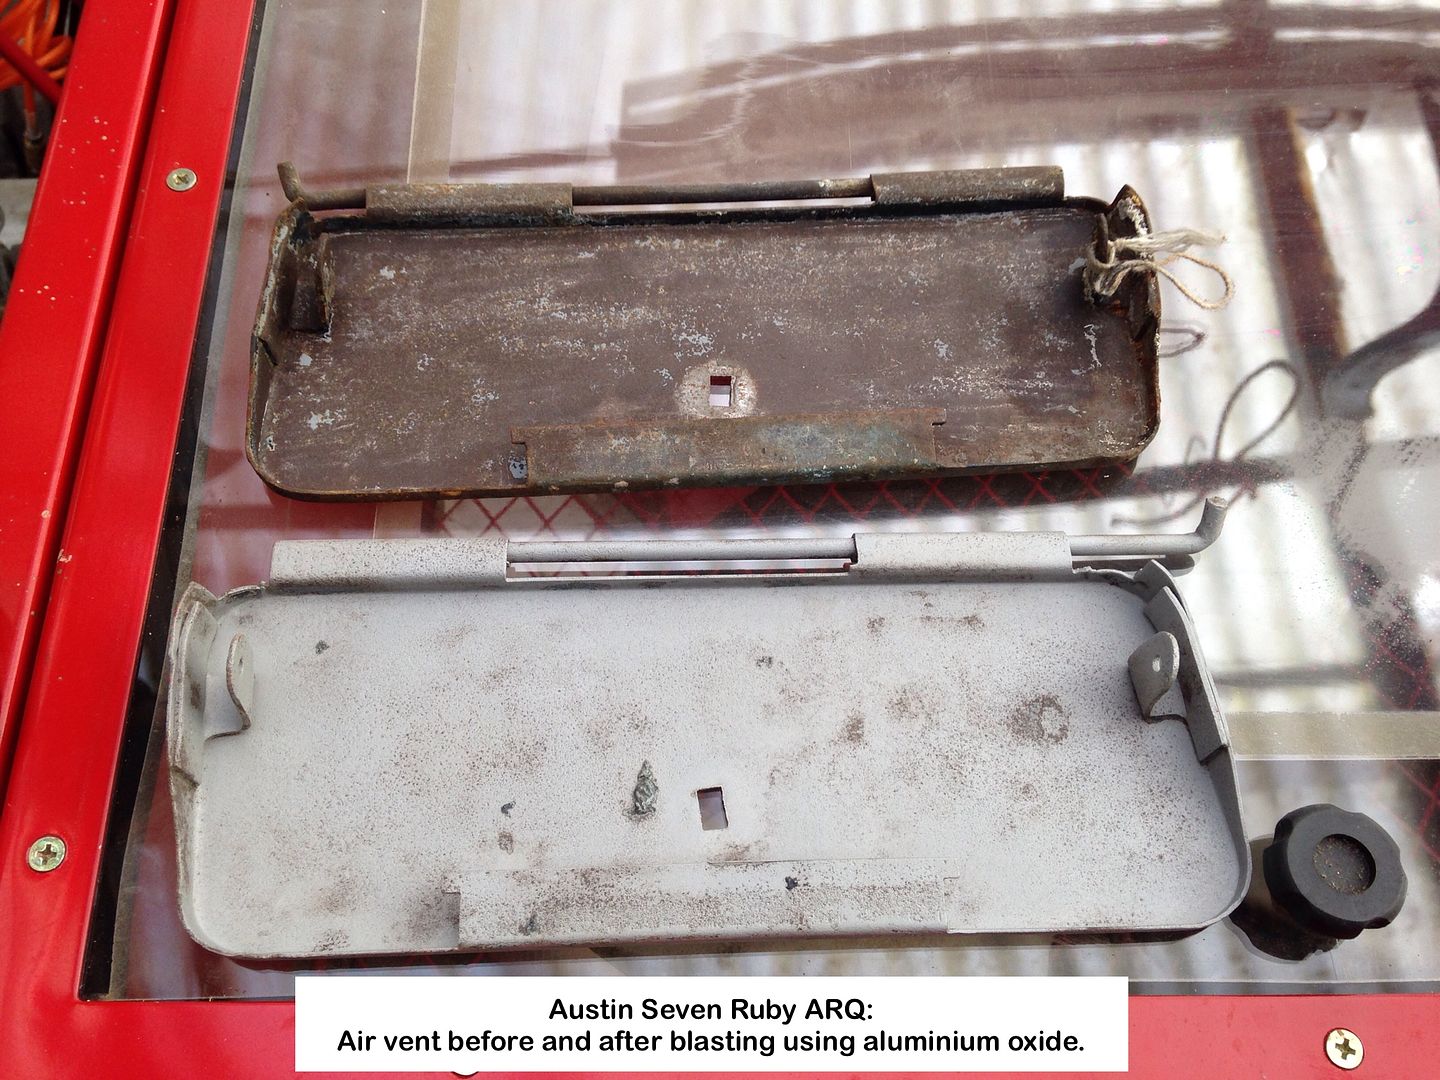
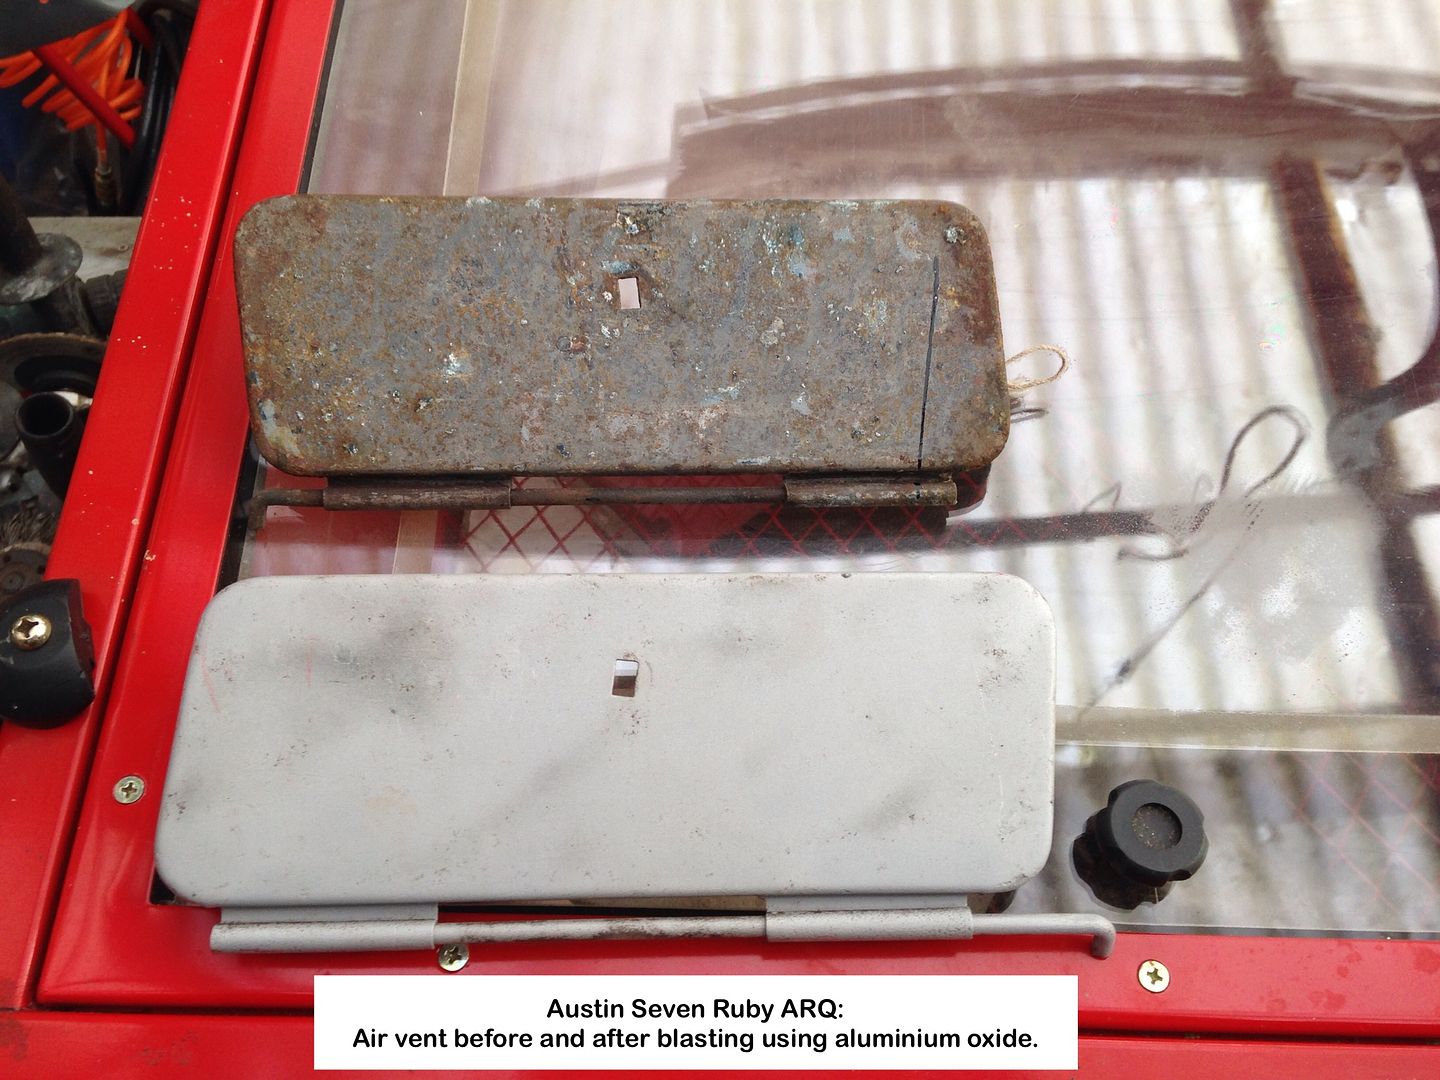
Austin Seven.
Air vents:
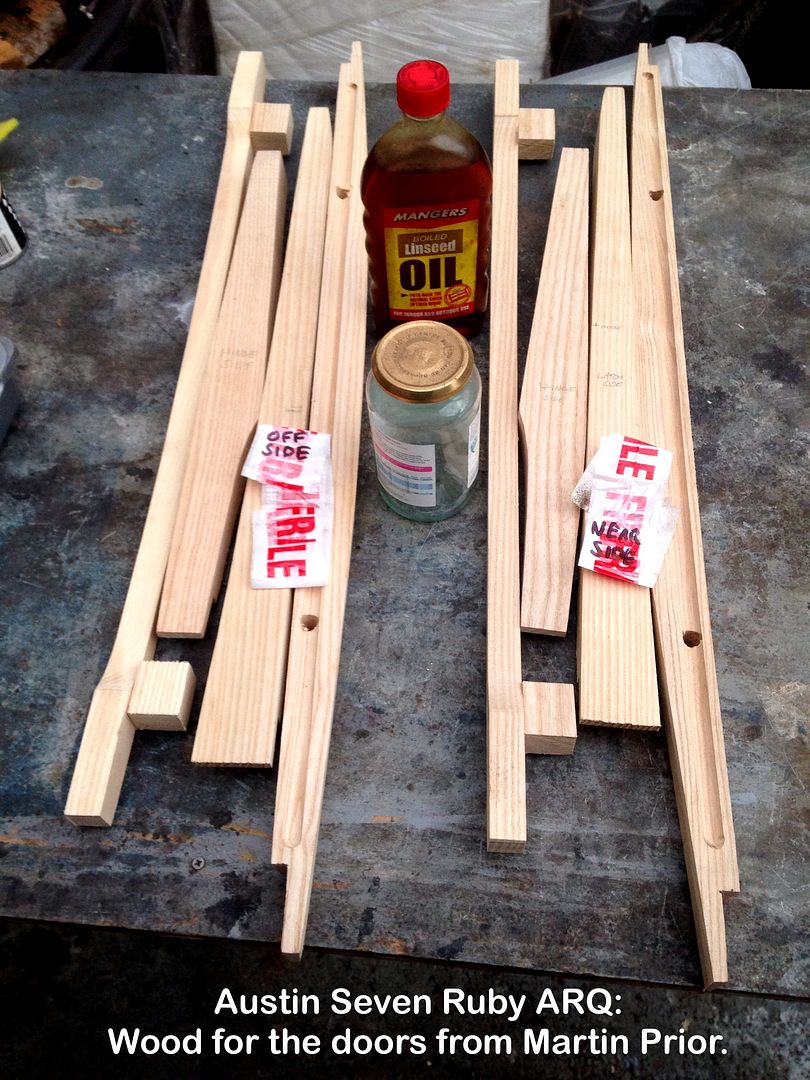
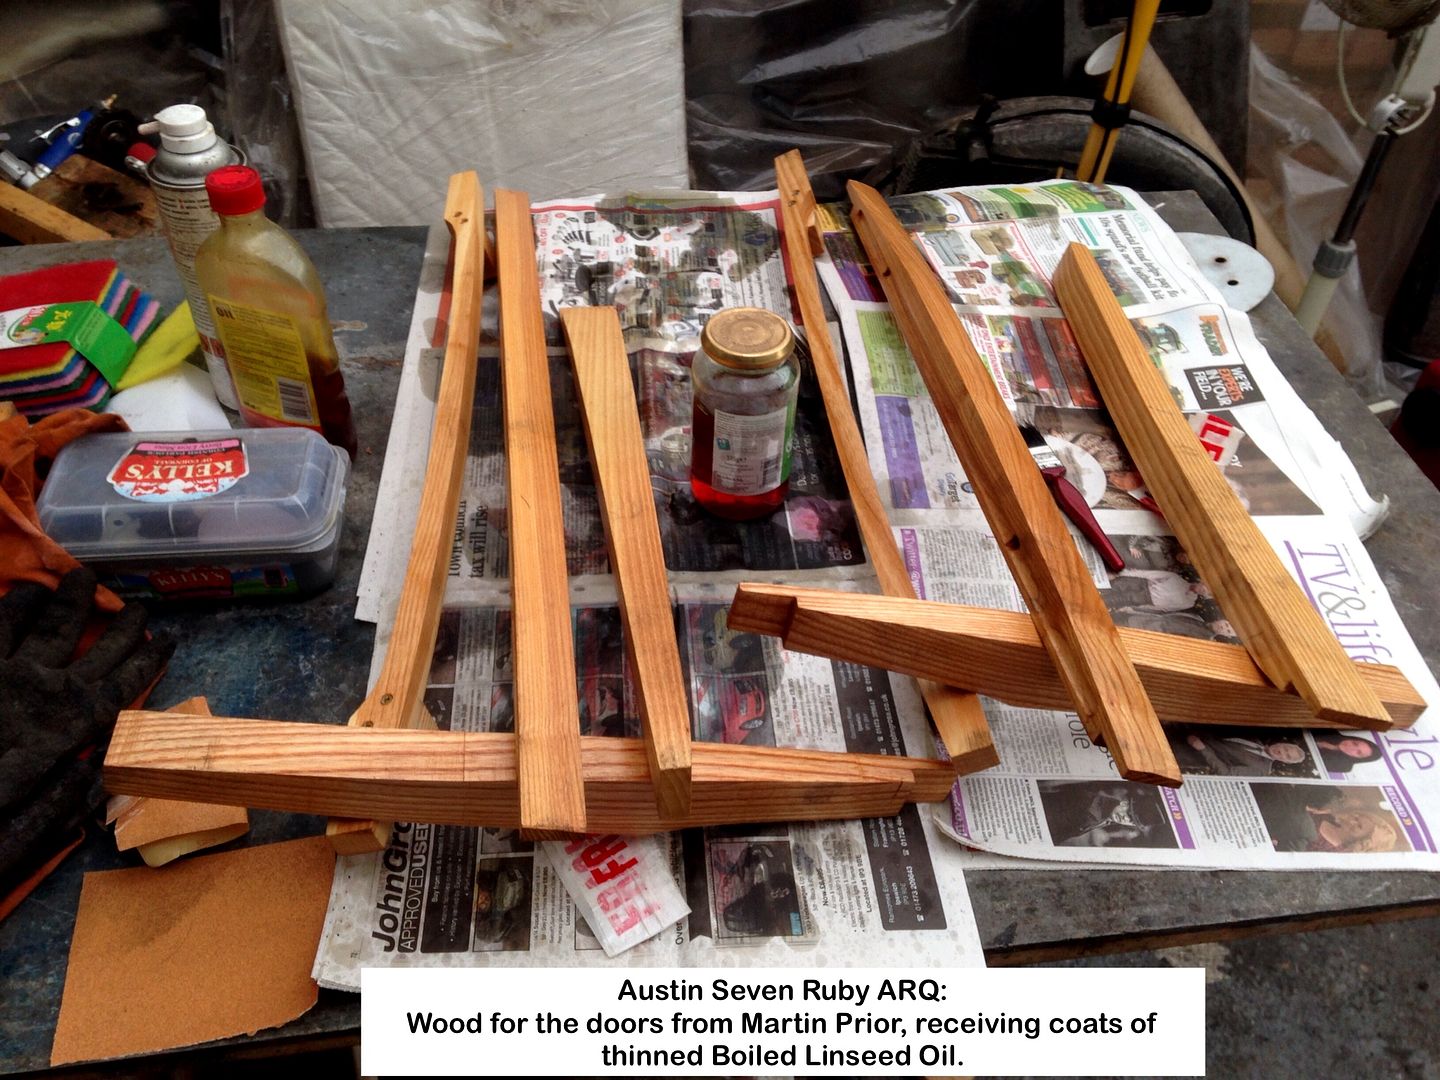
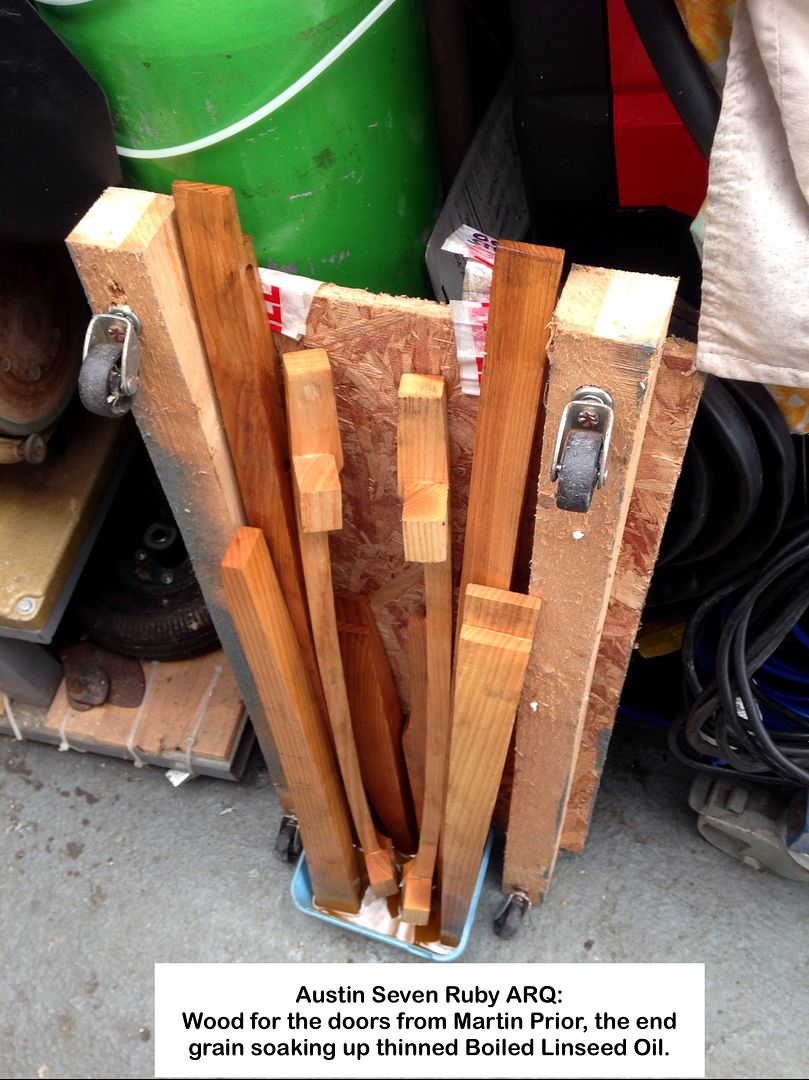
Door wood from Martin Prior, of excellent quality:
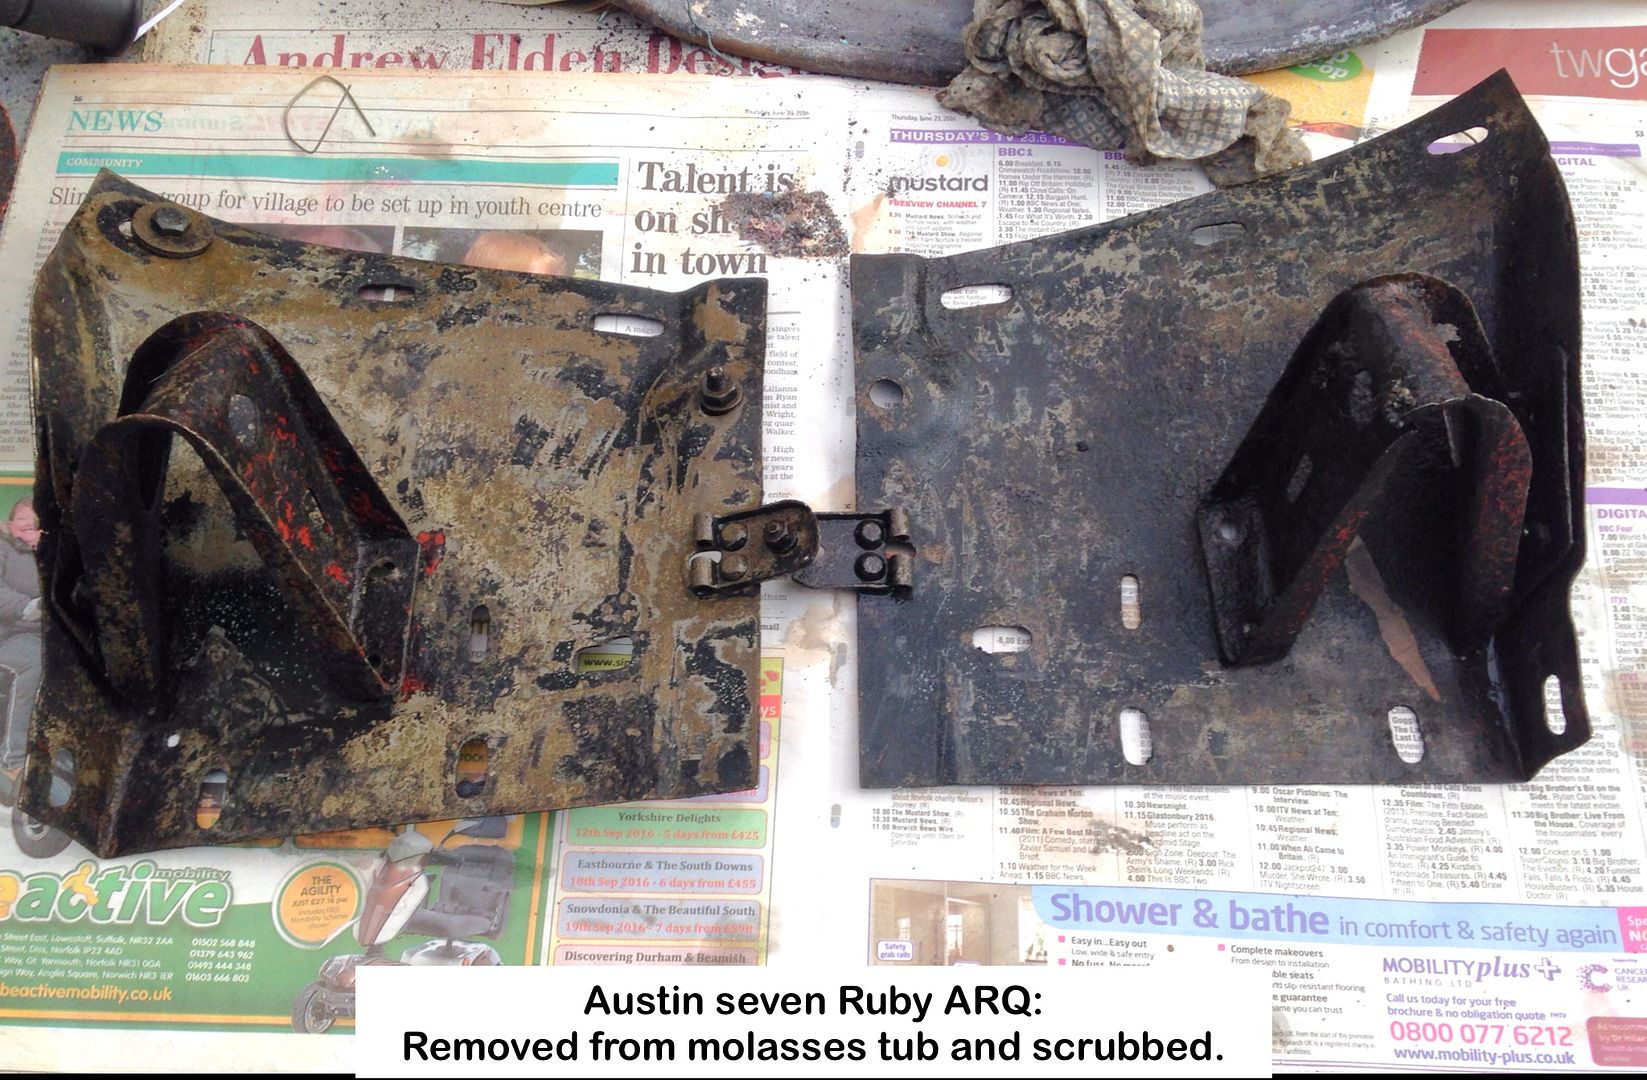
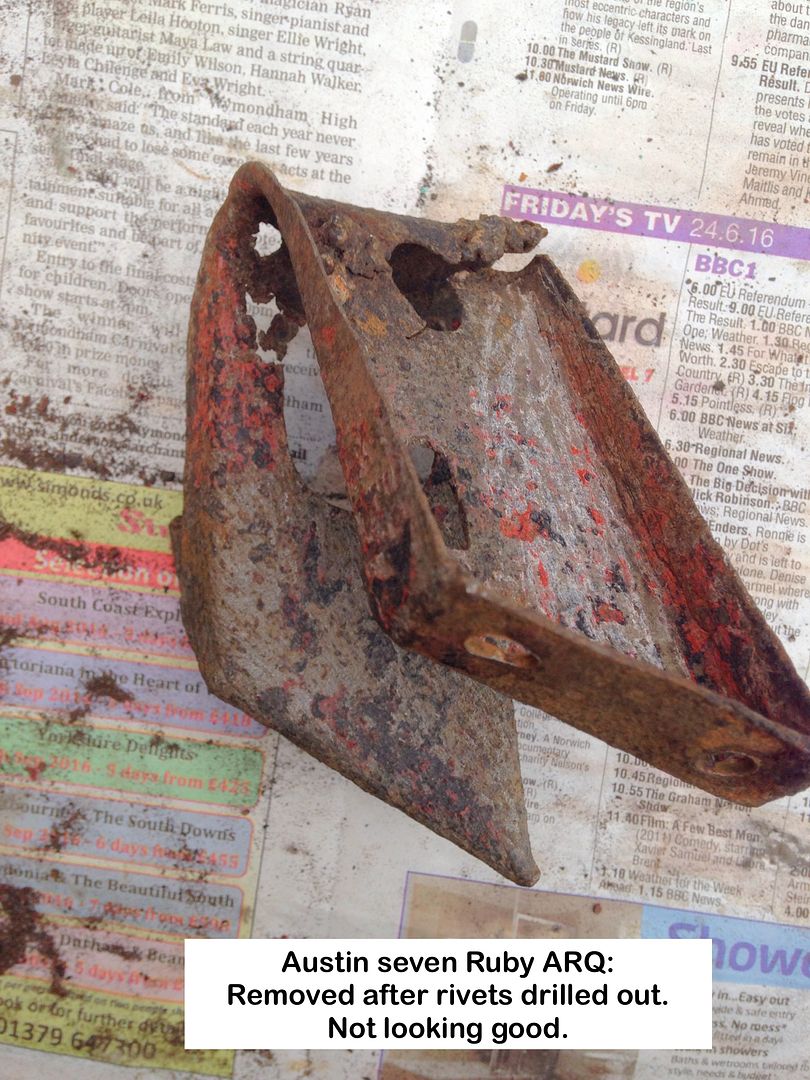
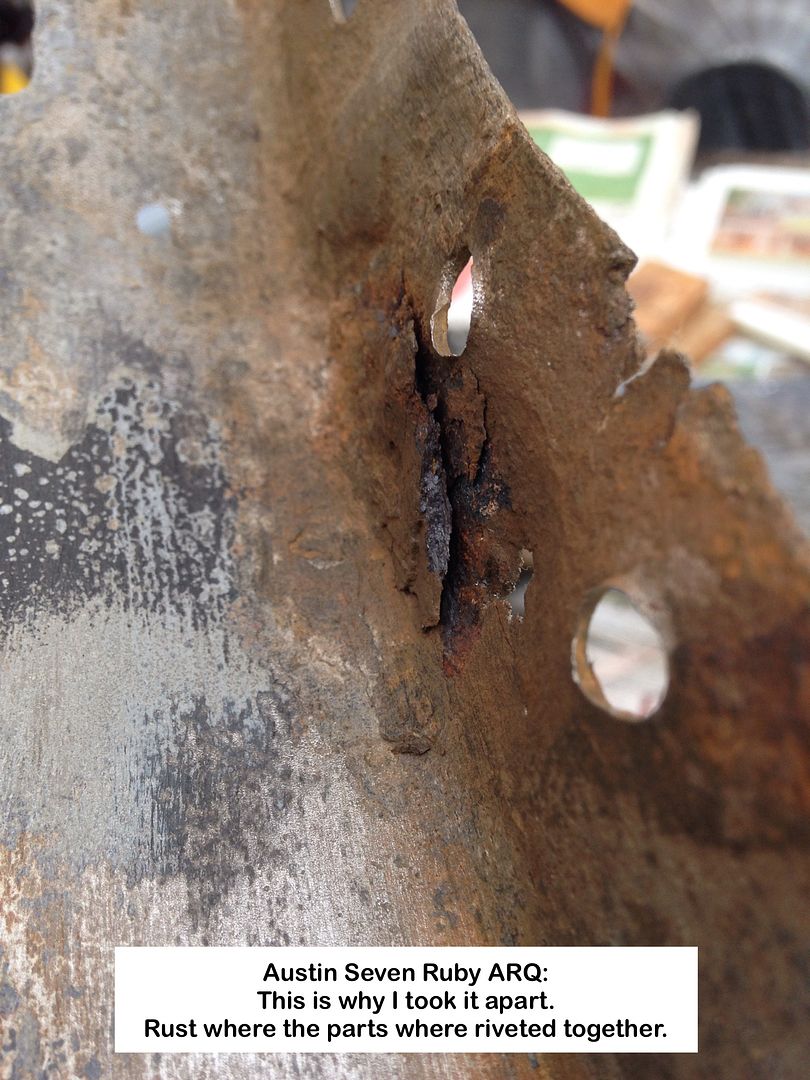
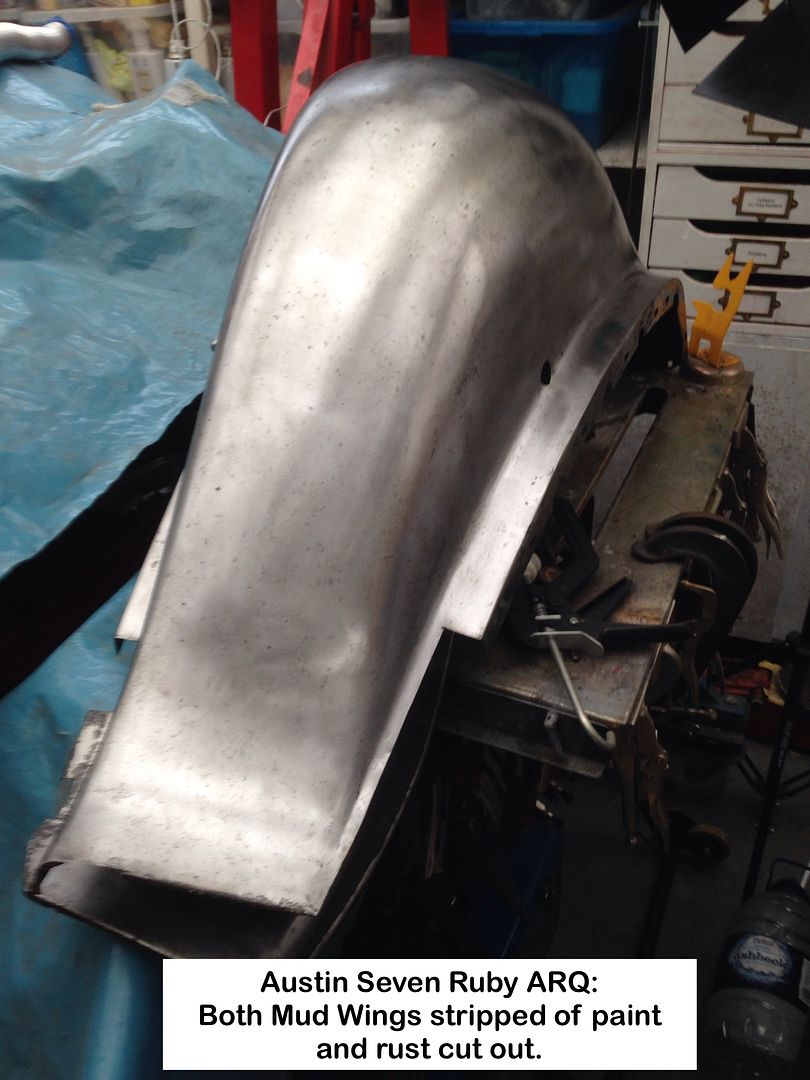
Mud Wings - Front:
Vacuum sucked up a lot of the dust.

Rust soon revealed and dealt with.

Ready for repairs plus blasting small areas using aluminium oxide.

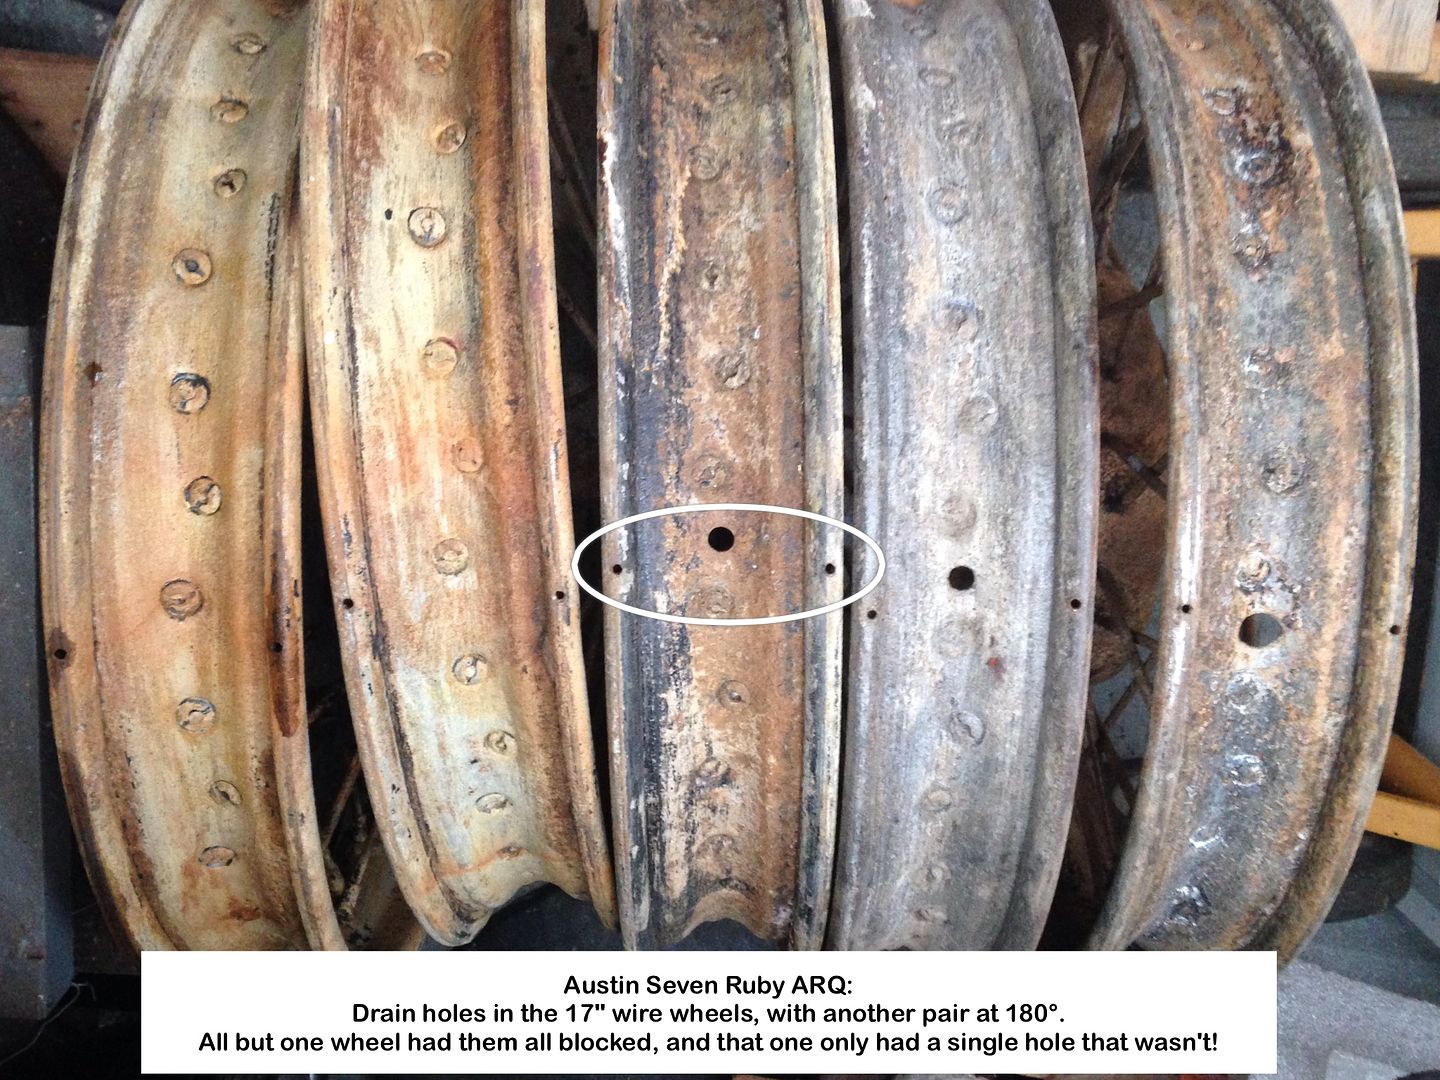
Wheels:

Discovered blocked drain holes.
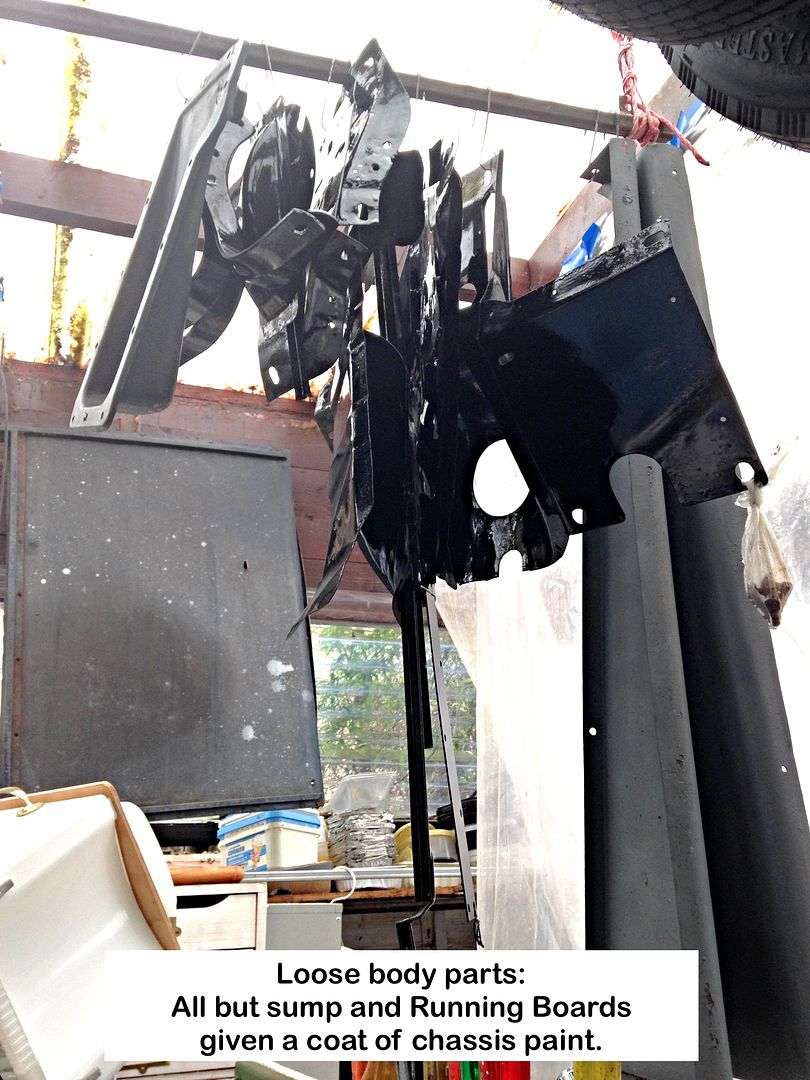
Loose body parts:

Let's hope I don't take so long to post next time.
Geoff - Taste buds AWOL so everything I eat now could be old leather.
Location: South Norfolk - Next to Suffolk
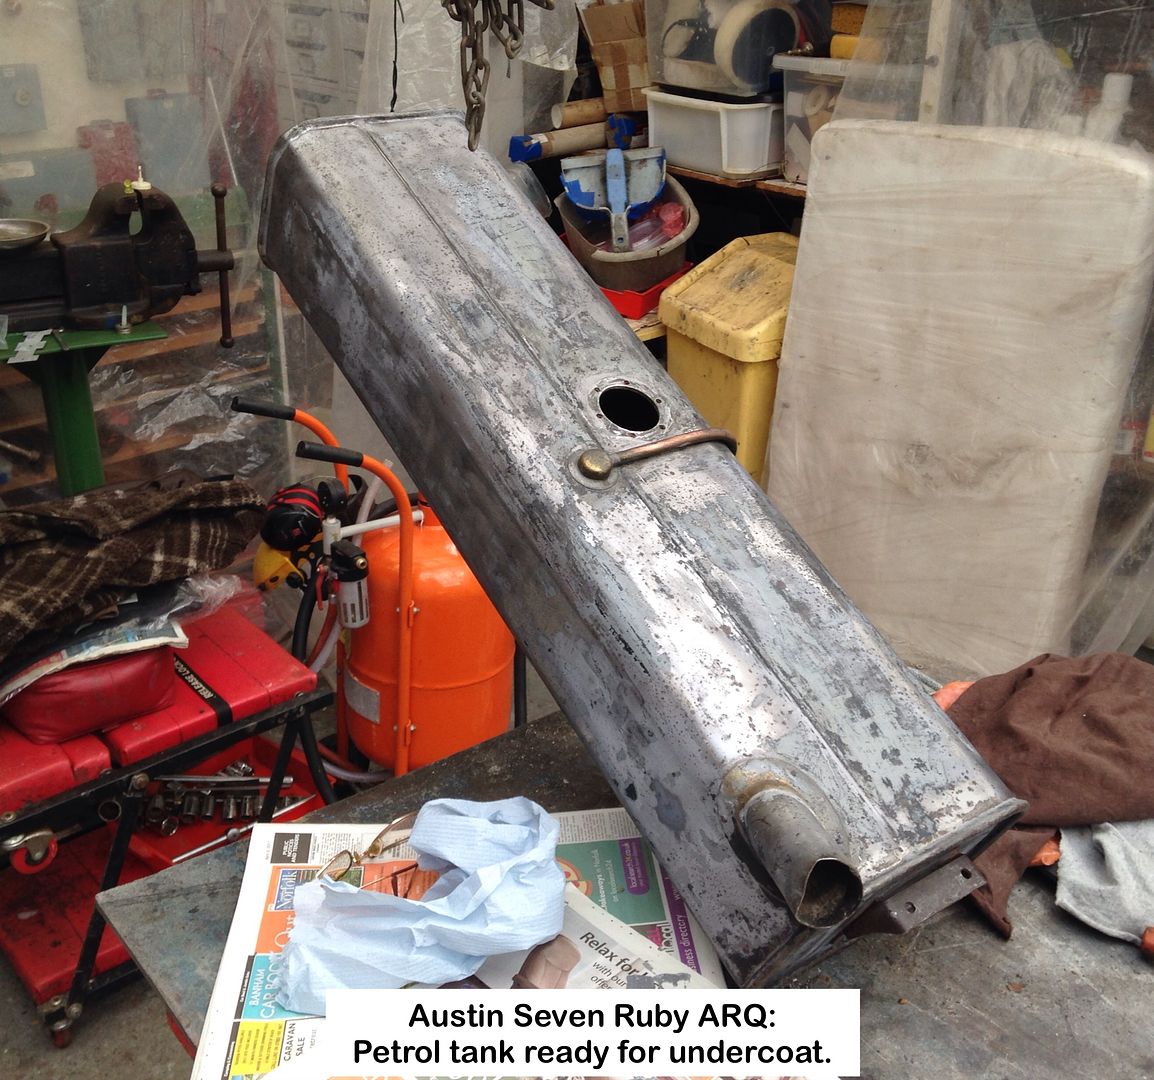
I removed the petrol tank sender unit on the 6th April but only now able to post details, having since then suffered from that horrid head cold and red eyes that's been doing the rounds, and the worst I've experienced to date.
Photos show the angst experienced in removing the screws, the slots having been well and truly mangled.
Was thinking of using one of the tank sealers, but will the two baffle plates prevent full coating?
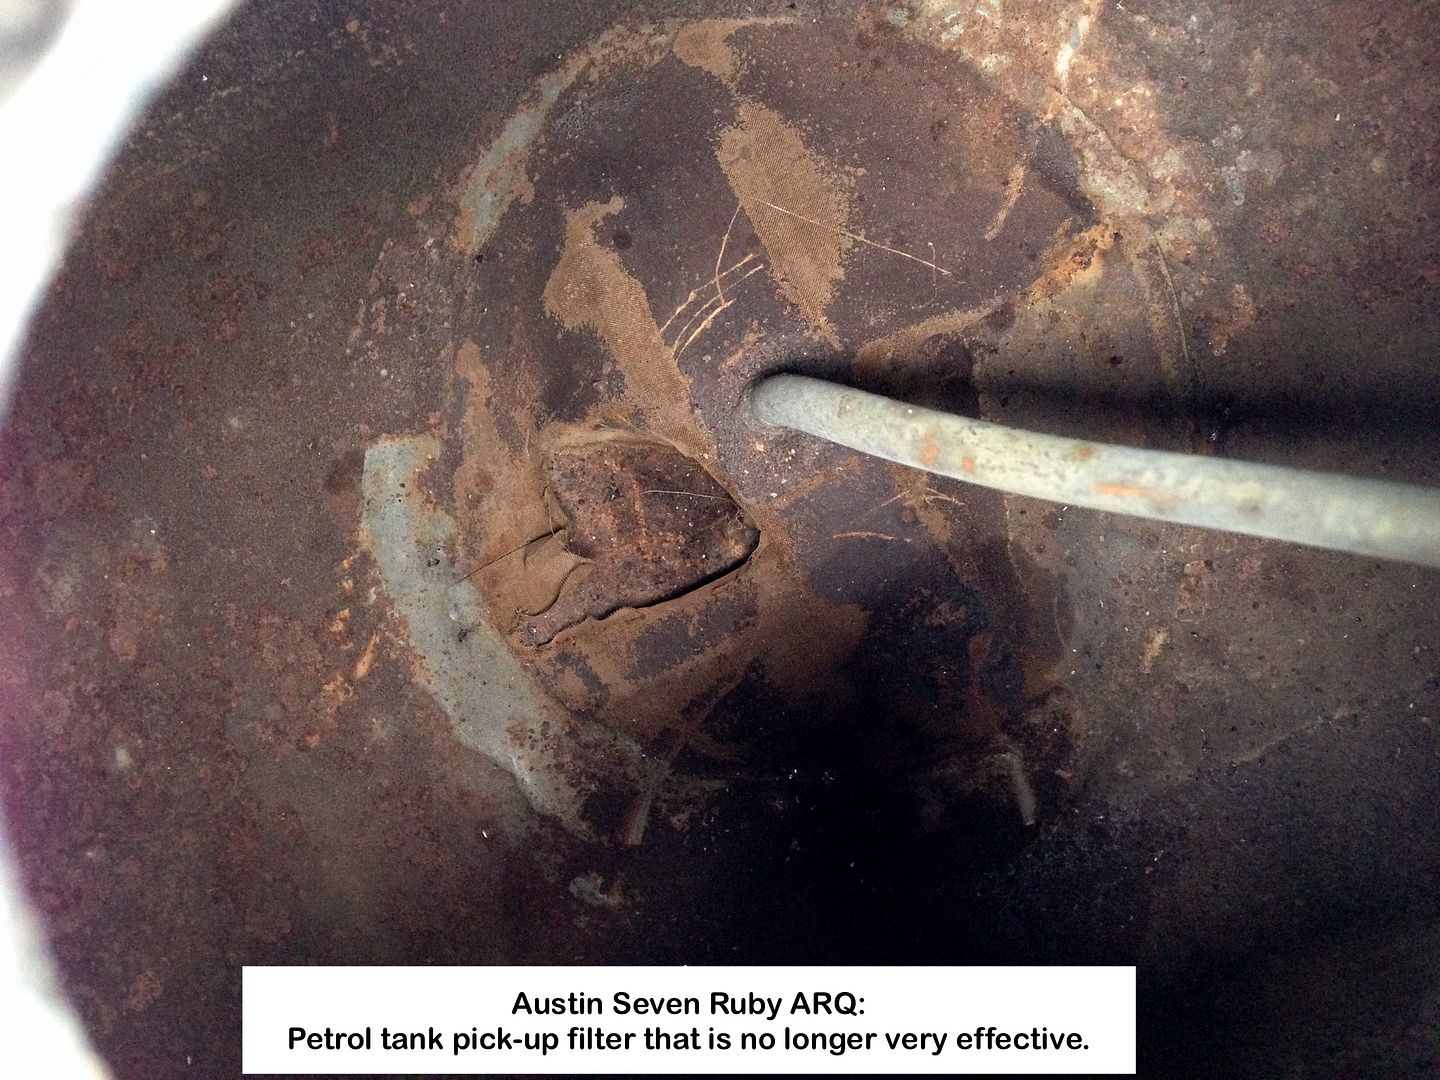
The gauze filter has a chunk missing so ineffective, see last photo, but I was going to fit a remote filter onto the bulkhead in any case.
The screw slots had been so well and truly mangled that even a hollow ground screwdriver was ineffective, this after a week of squirting every release agent I had at them.
I even went so far as to use a knife to scrape away the cork gasket, opposite the screws, in an effort to get the stuff to wick onto the threads, all to no avail.
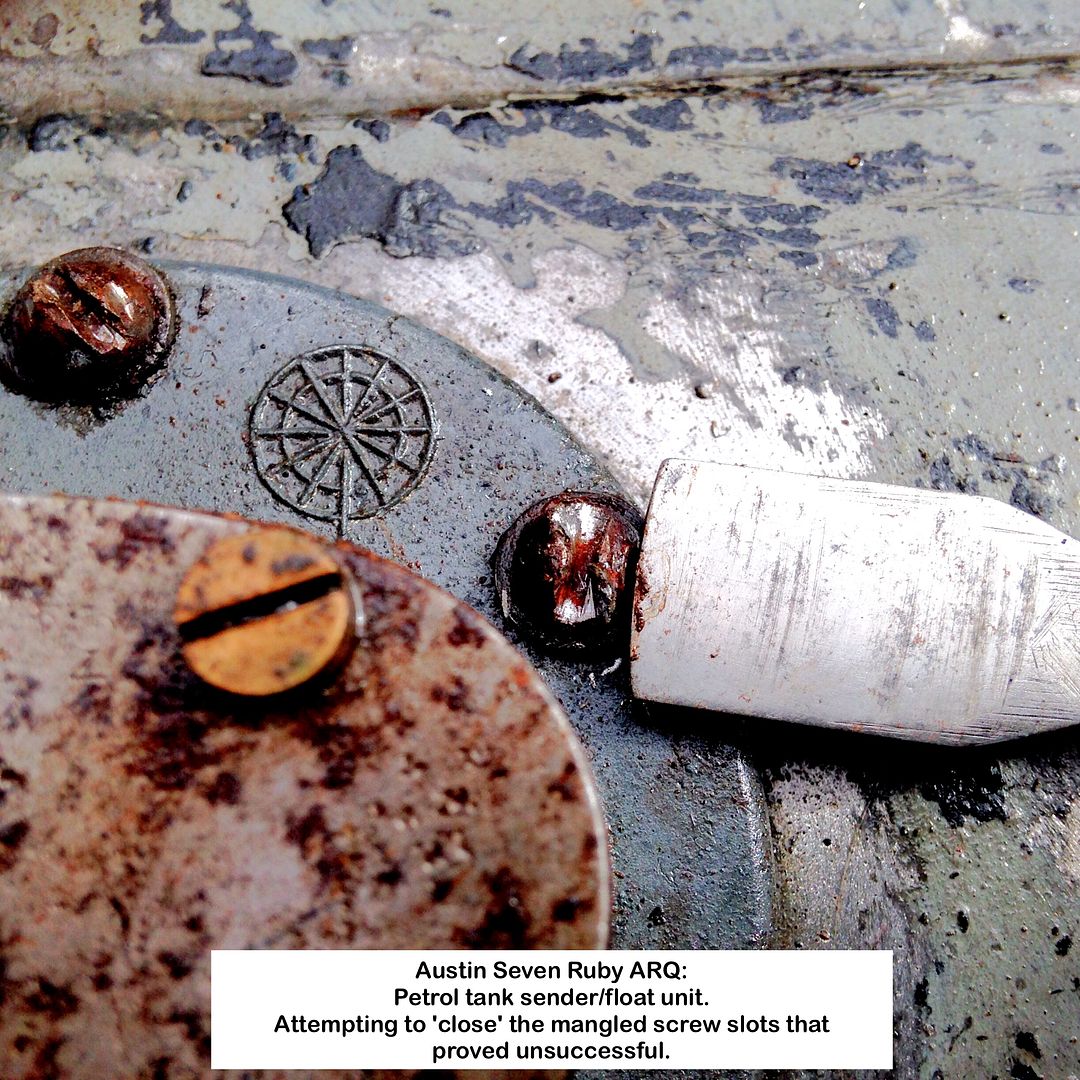
'Brain out of gear' brute force the only solution now.
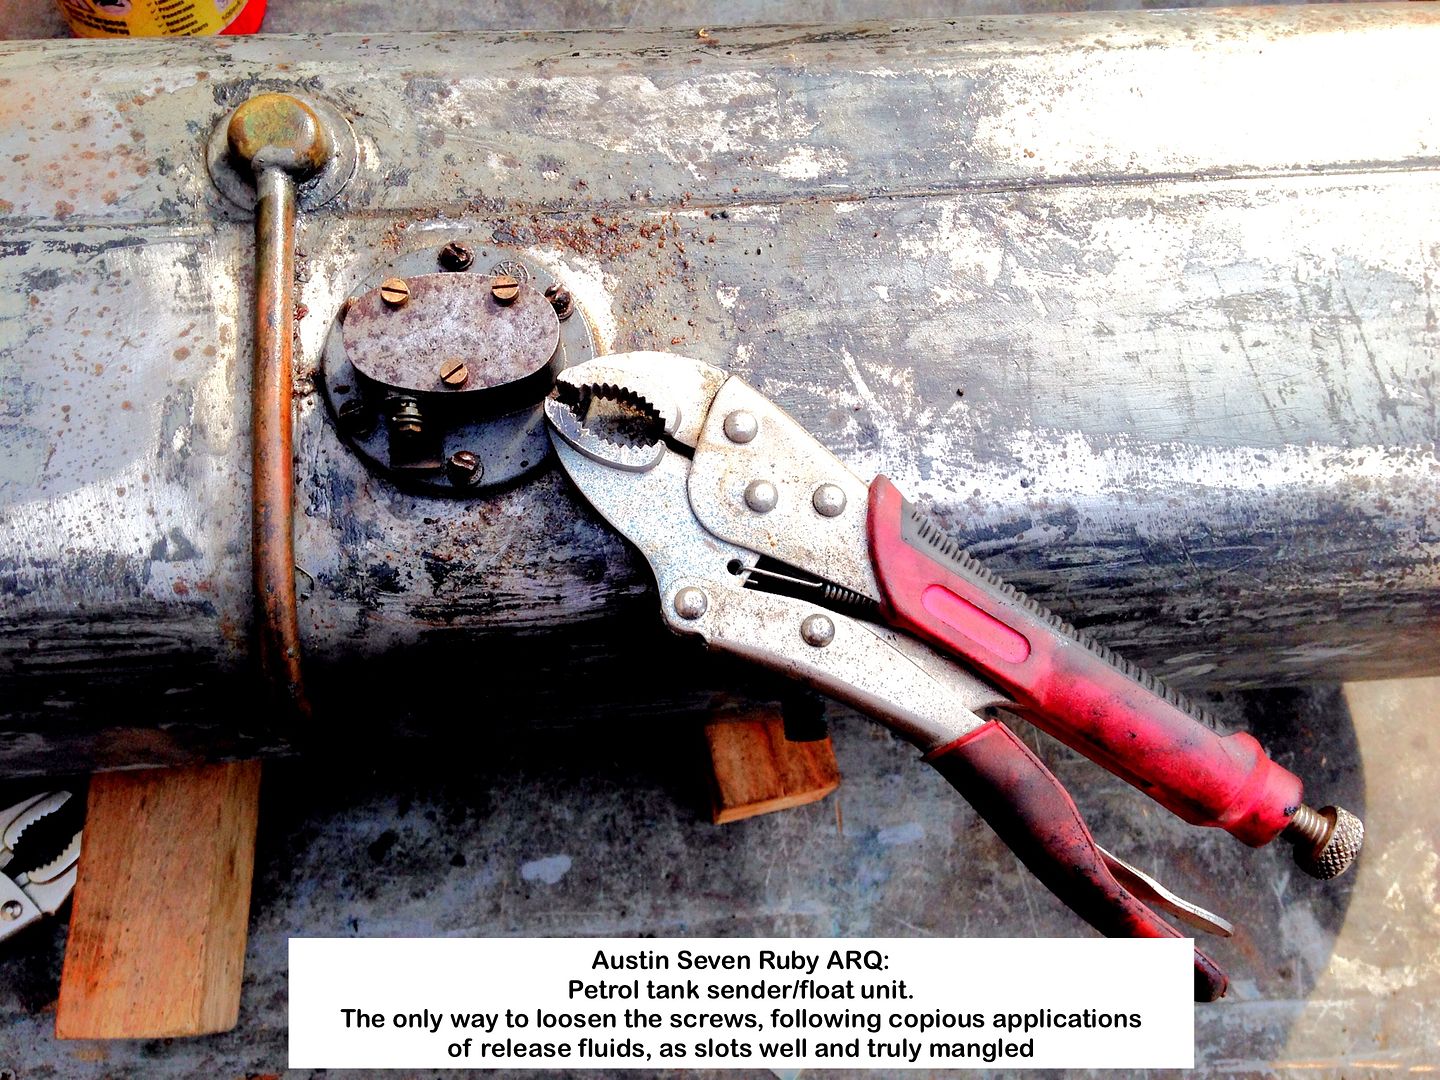
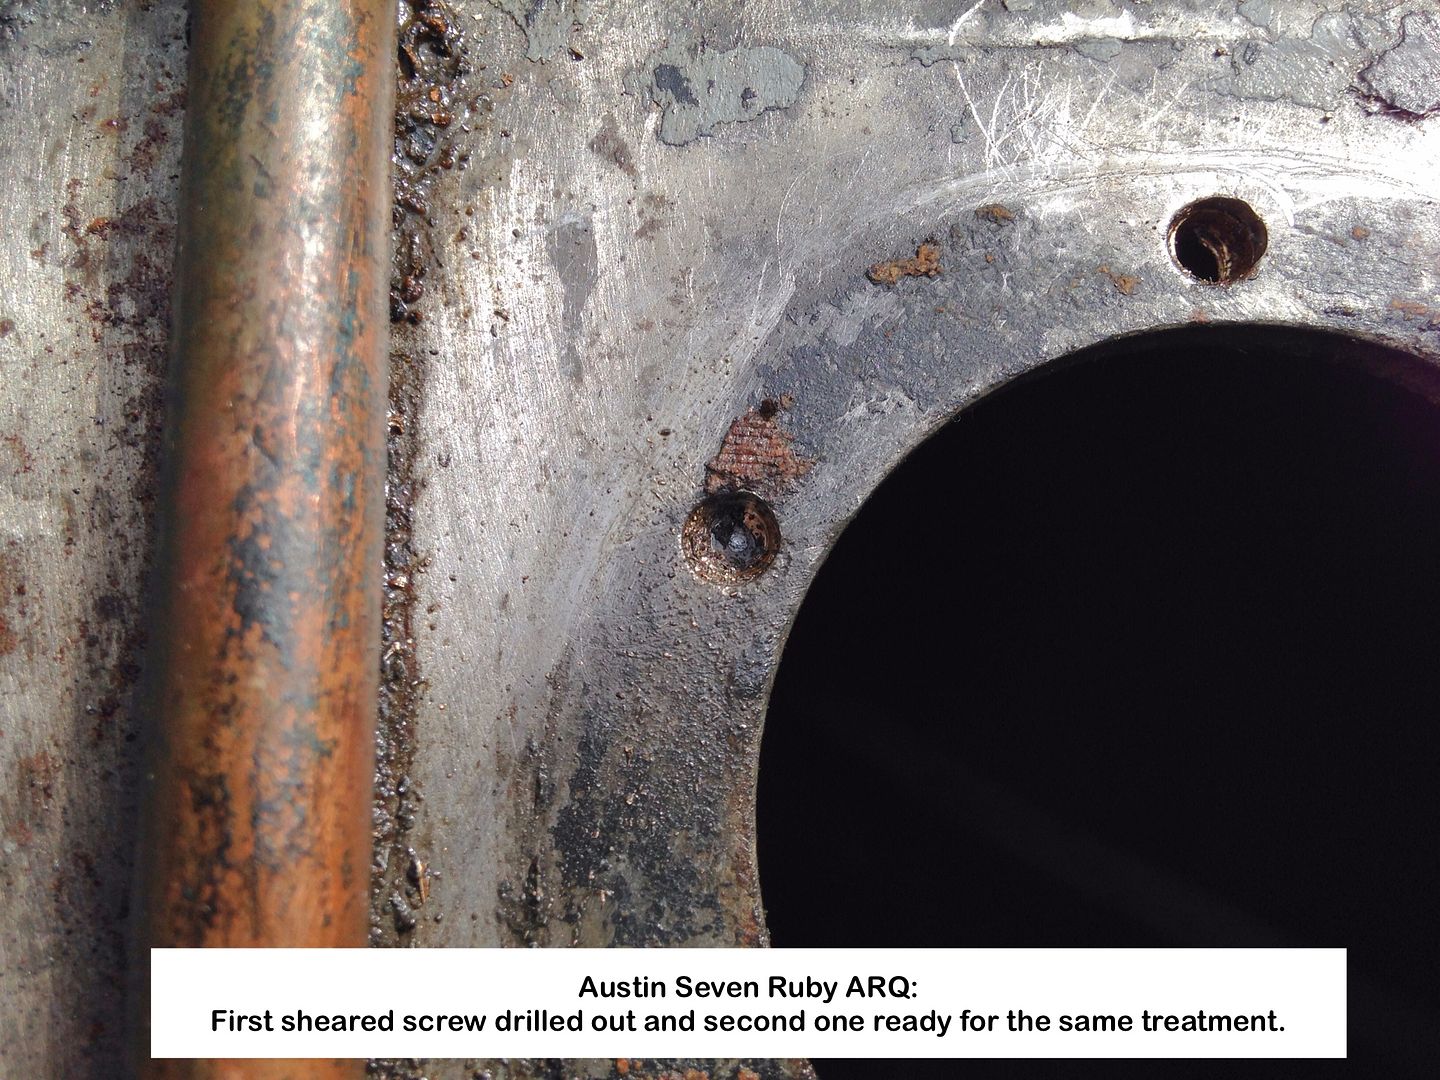
Four screws eventually succumbed, but the last two sheared, turning the air blue.
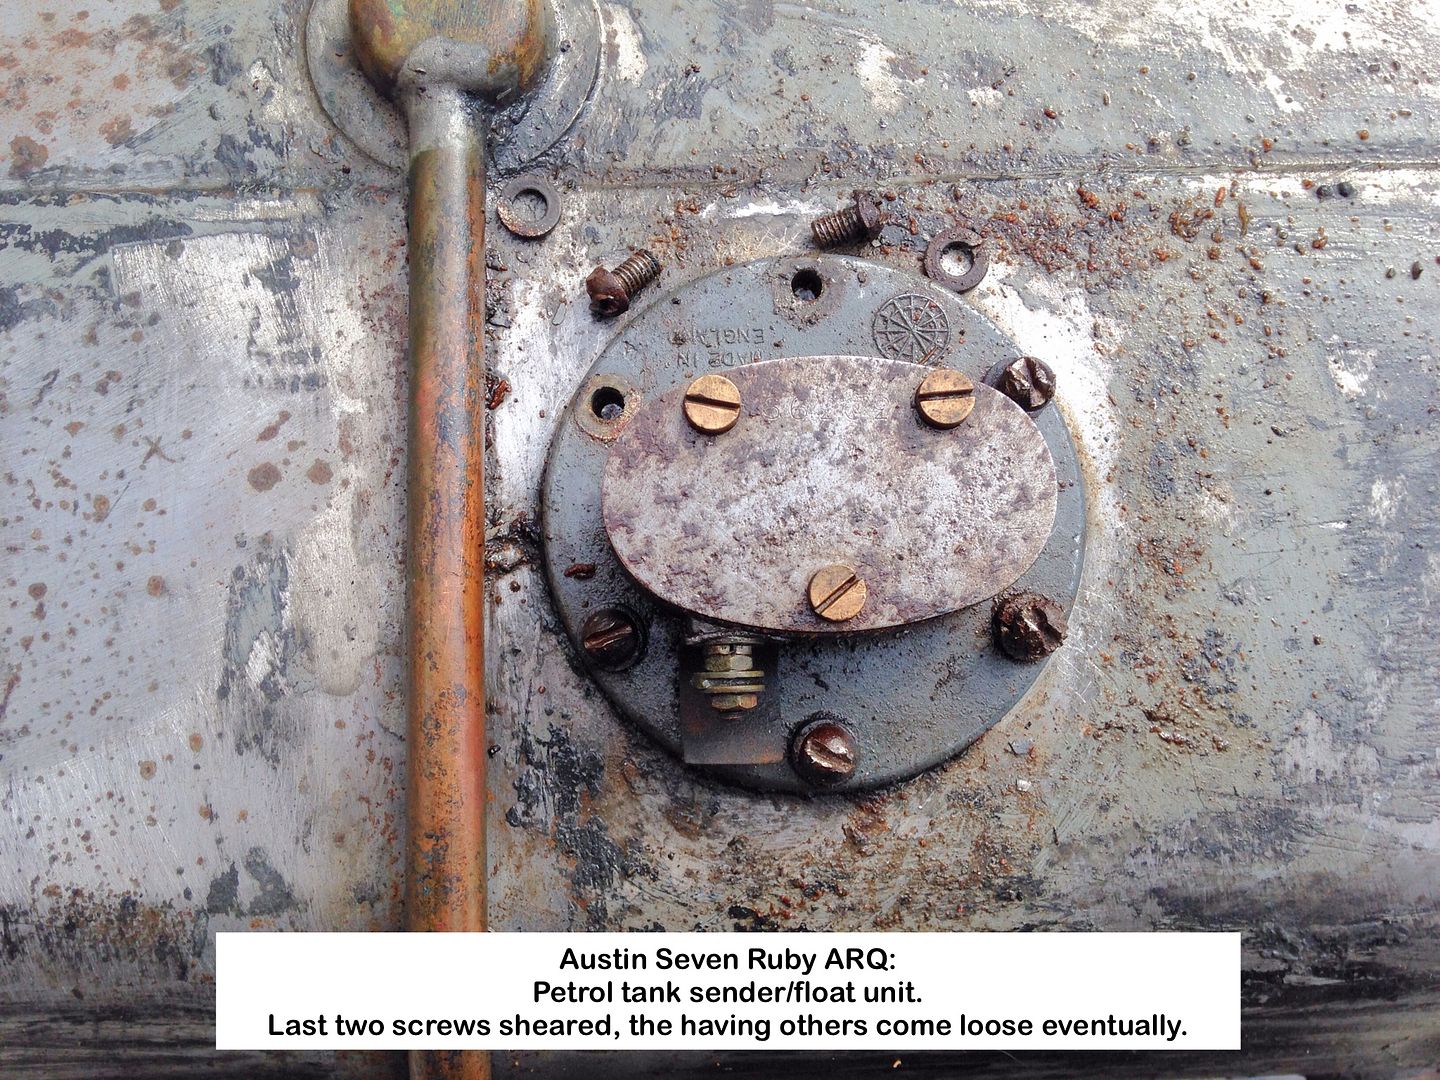
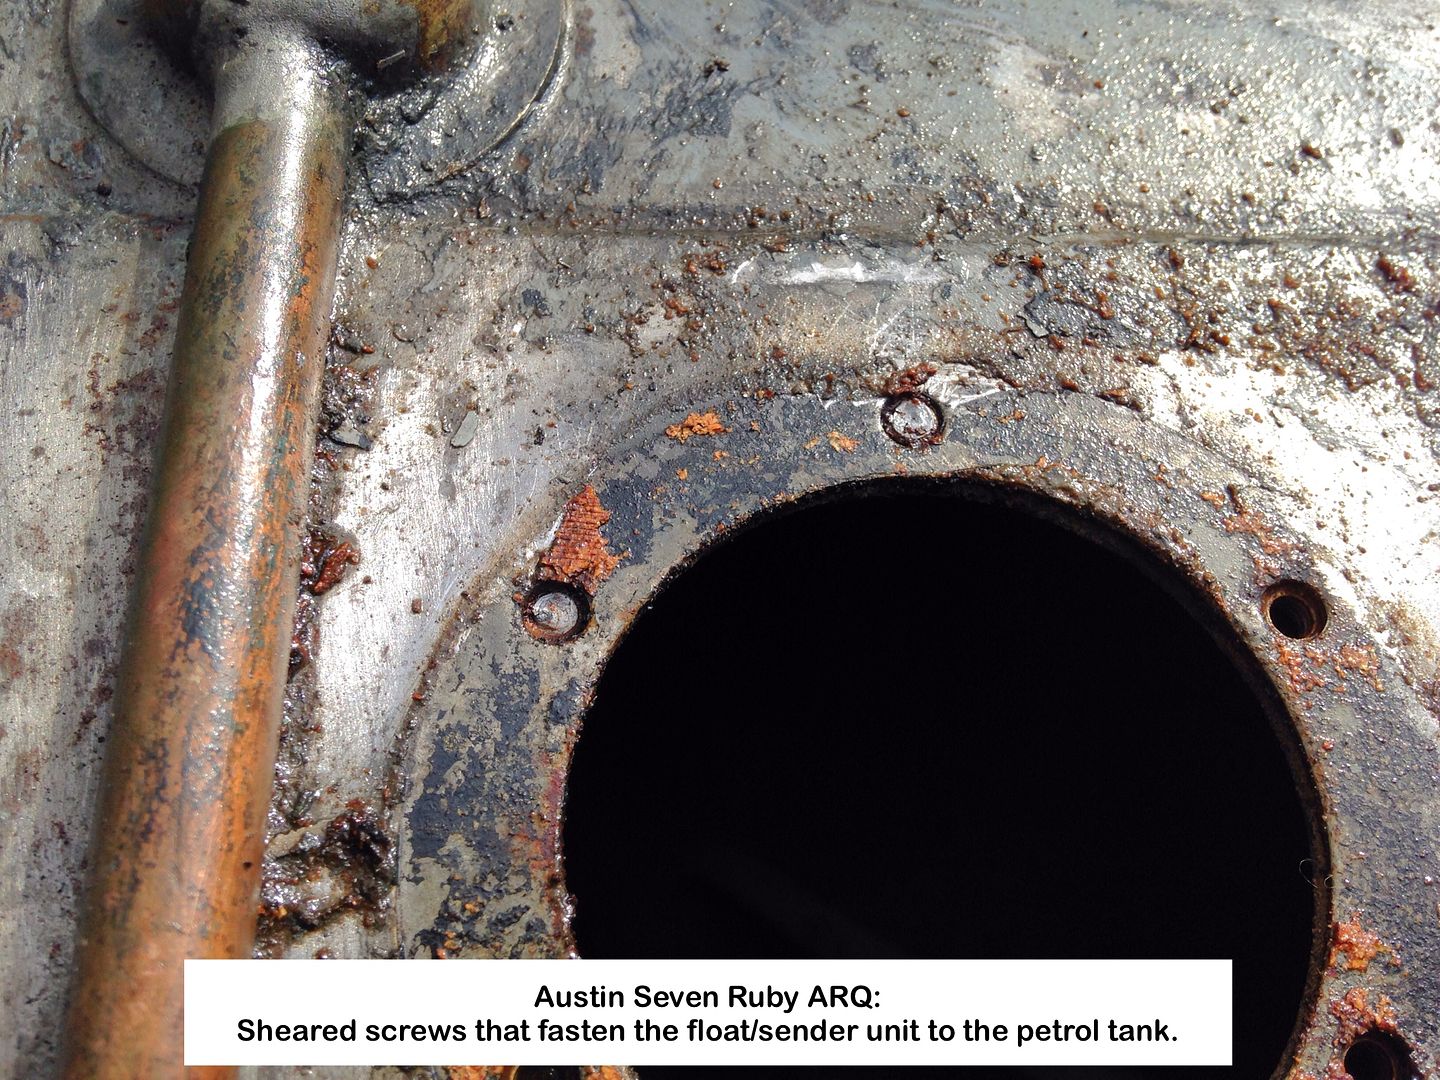
Sender unit removed to reveal the sheared screw stubs.
One of the sheared bits ready to be drilled out.
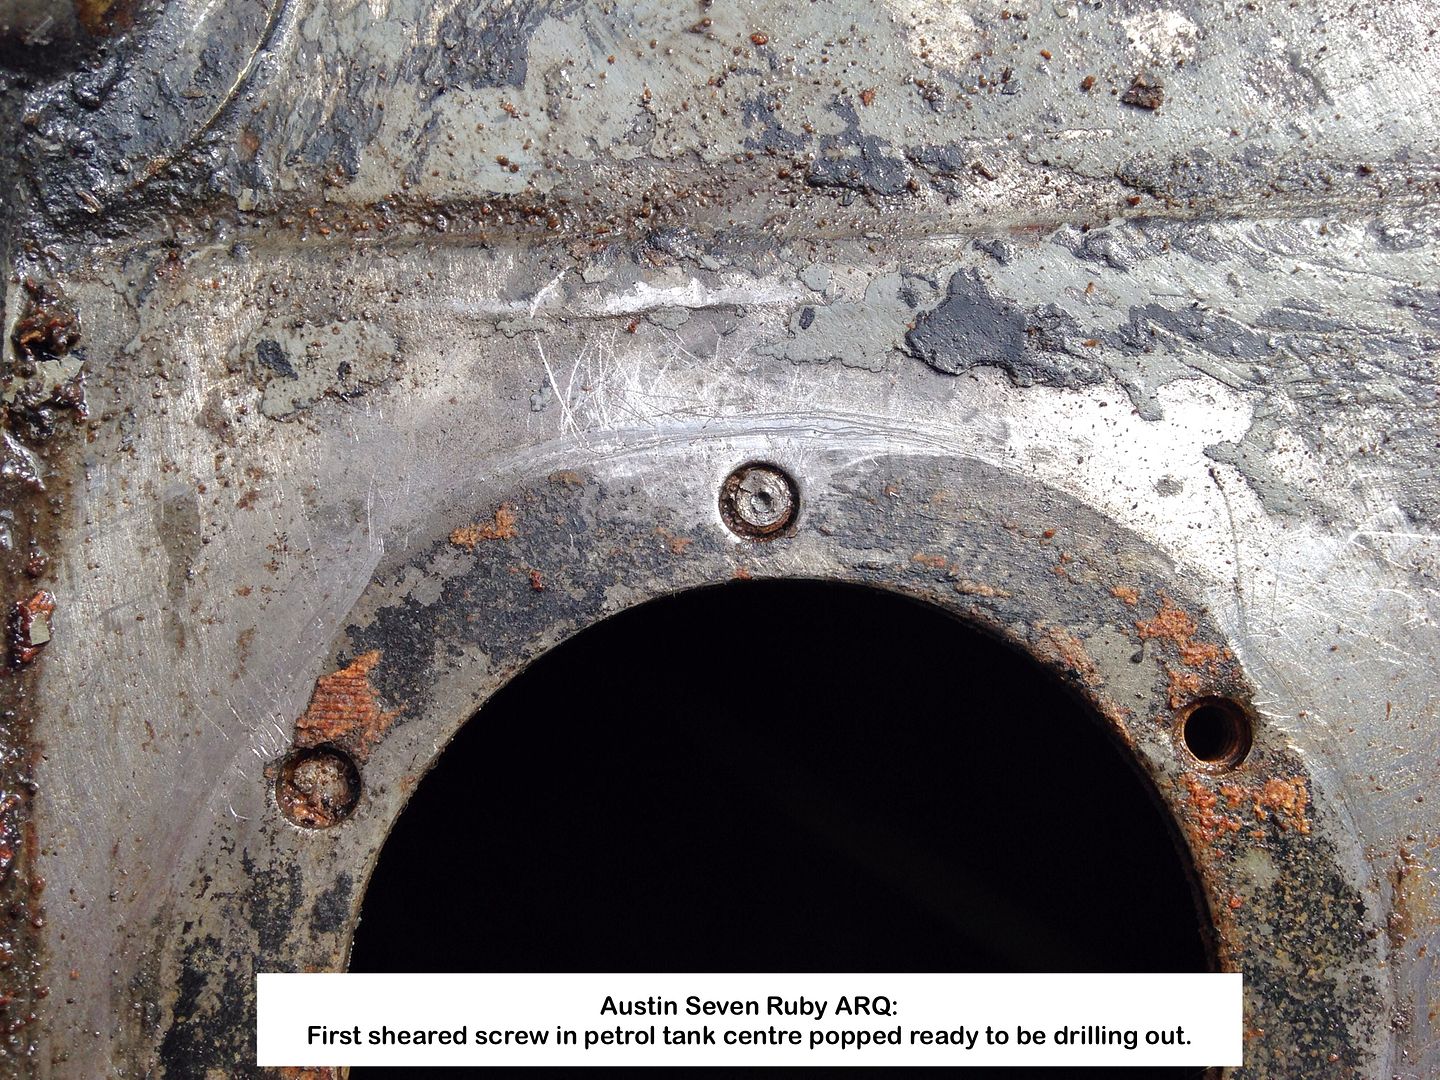
One sheared screw drilled out, one to go.
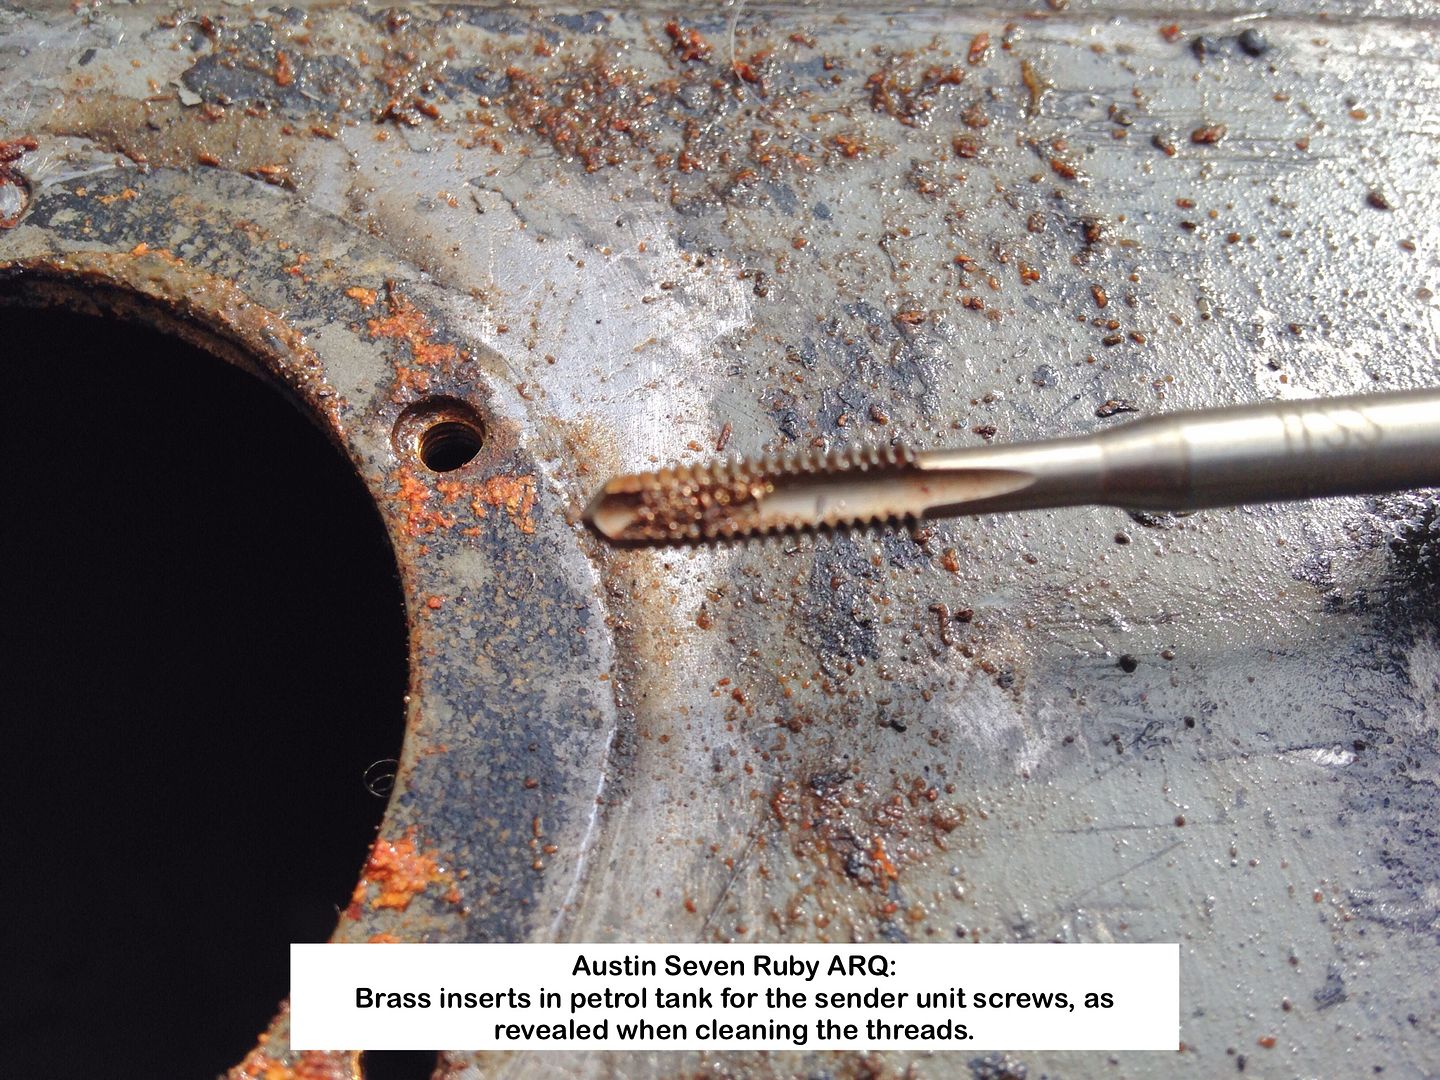
Threads cleaned up revealing brass inserts.
Need to find BA brass screws to replace the rusted in steel ones now.
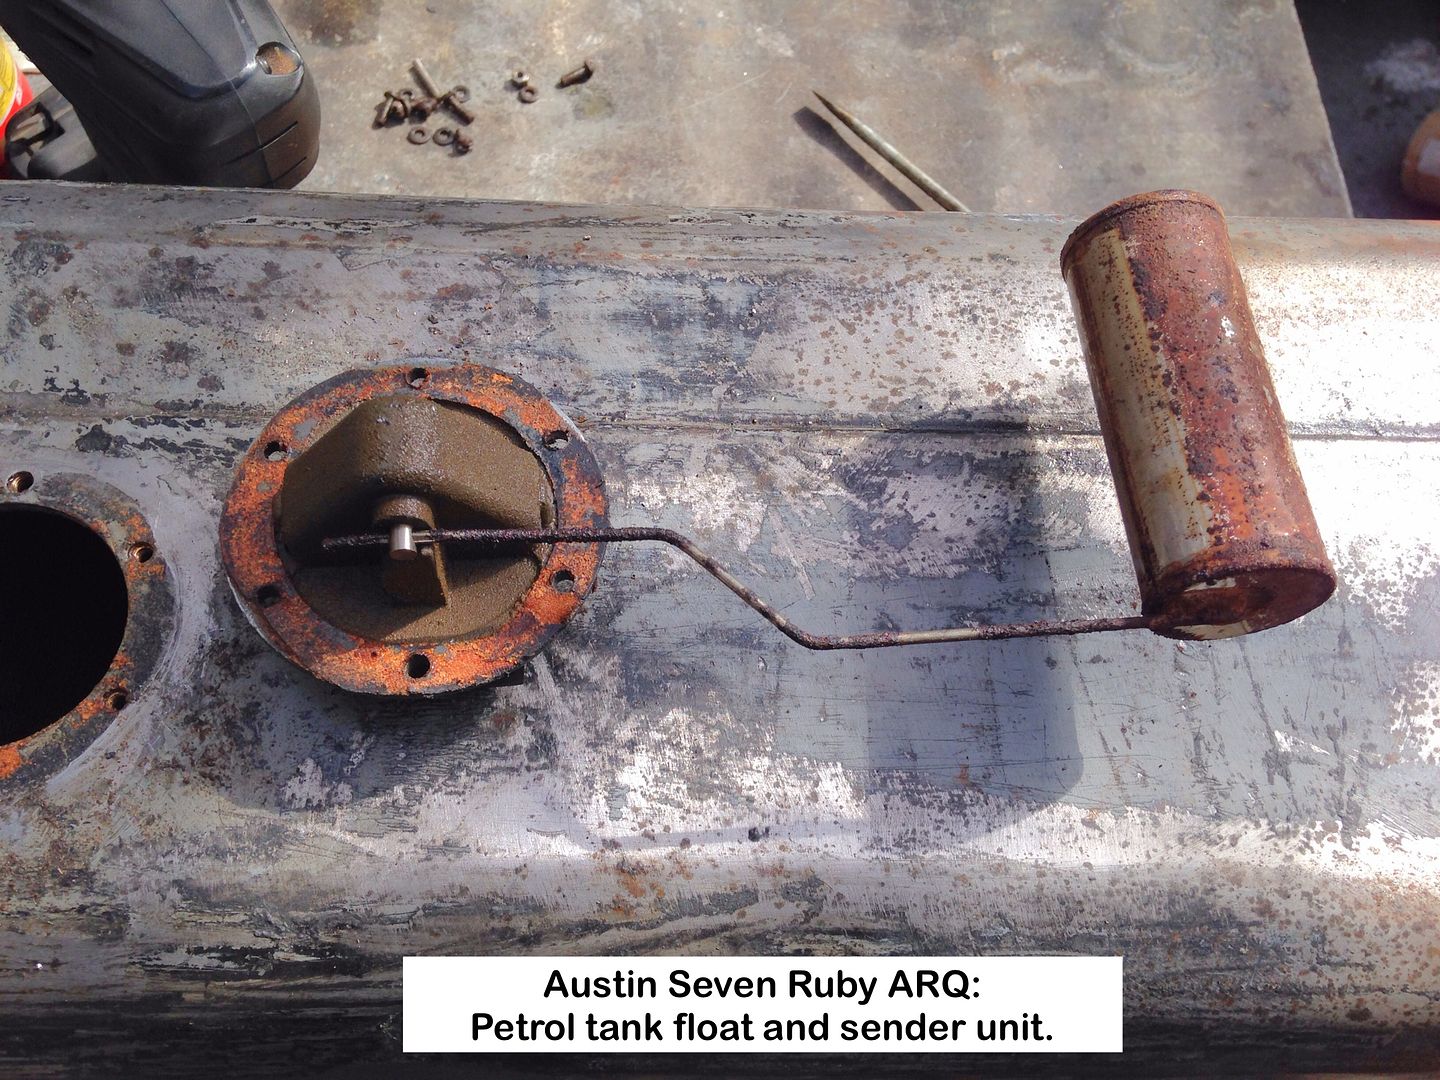
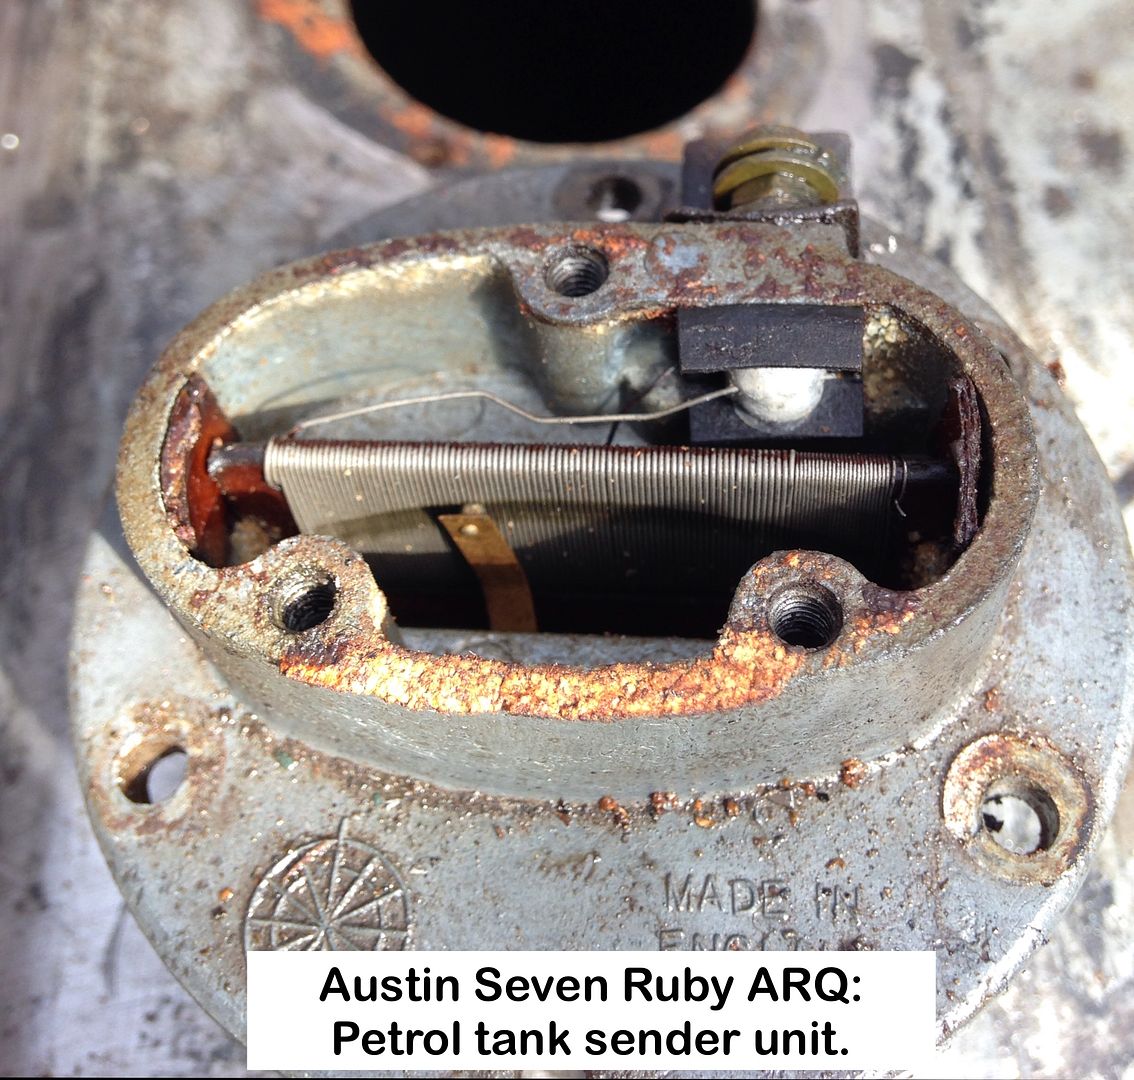
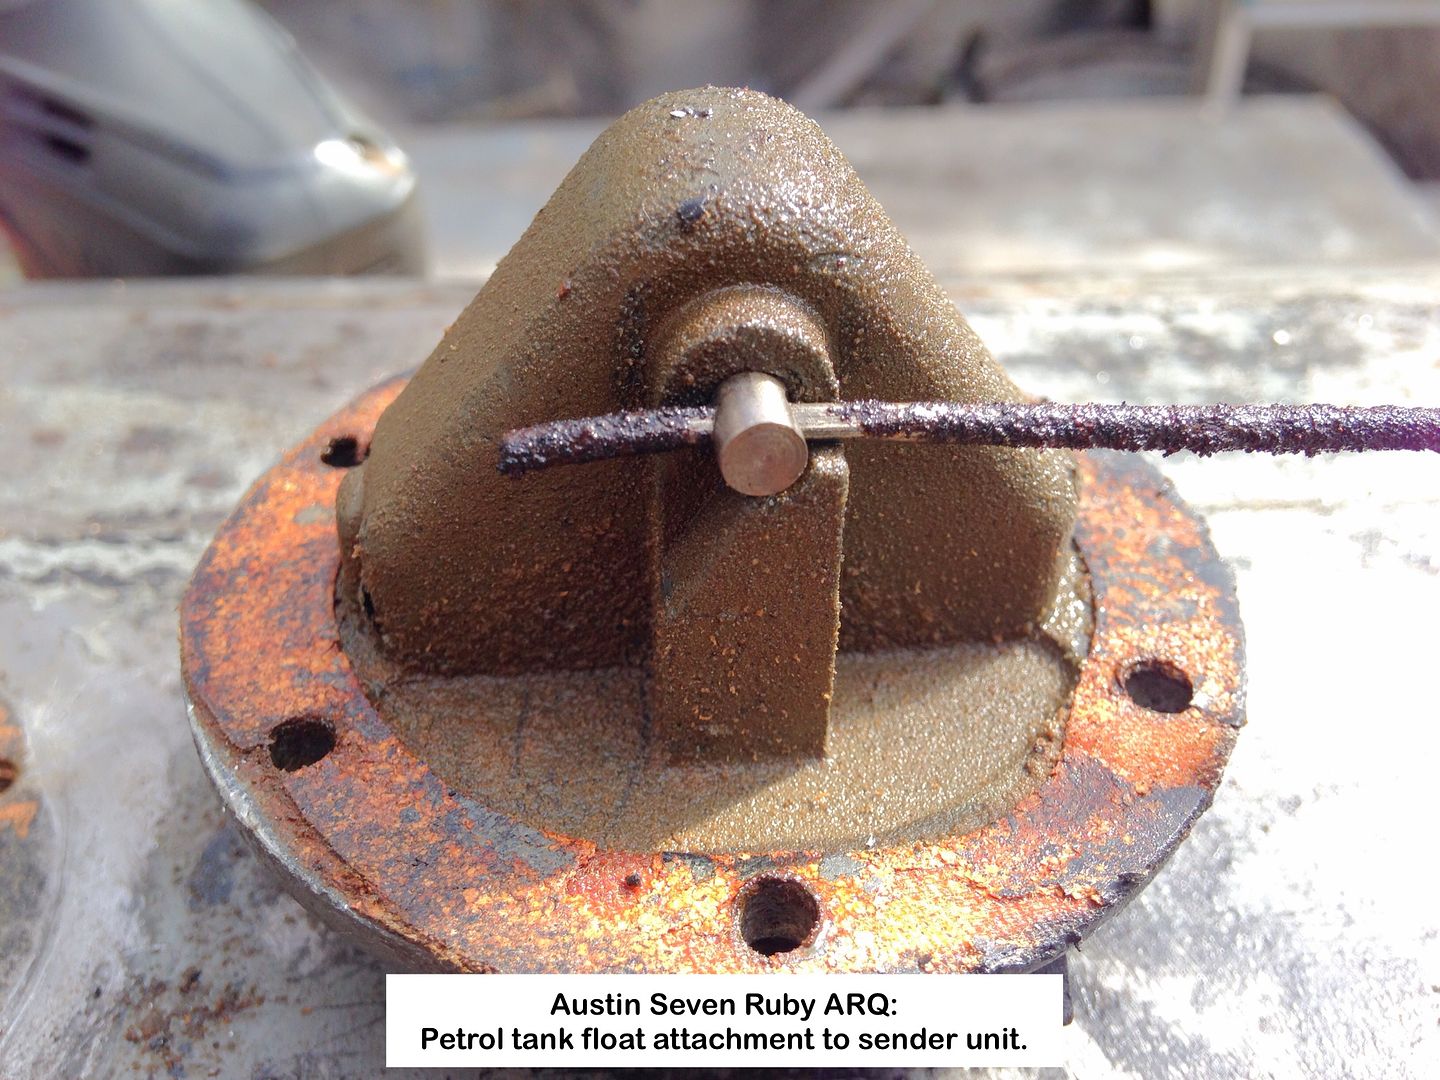
Sender/float unit in all its glory.
The heart of the sender section.
Attachment of the float to sender.
The gauze filter inside the tank has a piece missing, so no longer of any use.
Suggestions please on what to do with/best way to remove, the gauze plus how to deal with the two end baffles if using a tank sealer?
For the two baffled areas, I don't fancy cutting a hole in the top of each end, ala the sender unit.
Inside of the tank looks reasonable, but there is 'scale' in the filler pipe baffled end, but cannot see into the opposite end.
Geoff - Time to practice welding prior to Mud Wing repairs.
Location: South Norfolk - Next to Suffolk
Geoff
To replace the screws holding down the sender unit Meccano screws are the same thread / length.Regarding the gauze I used fuel tank sealant and Sloshed it around the tank ,turning upside down , on end so the solution went everywhere then when cured I stuck a screwdriver through the gauze and pulled it out and put a sediment glass filter bowl in the line between tank and pump
If they suit Meccano 'bolts' they are 5/32" Whitworth- should be available in brass - I think I have some brass round heads.
Cheers, Tony.
Location: Melbourne. Victoria, Australia.
Am I being dim or have I missed something? Soaking timber in linseed oil prior to gluing seems counter-intuitive to me. Usually glue instructions recommend keeping surfaces clean & dry.
My preference would be to oil after assembly but I'm happy to be corrected if I'm mistaken.
Location: Ripon
Replacement smiths sender mounting bolts are readilly availible for more modern motors if you search the internet. They are quoted as 8-32 Unified. This is 5/32 UNC. This rather suggests to me that 1930's onew will have been 'whit'.
If they were BA in the 1930's essentially a metric system they would have stayed BA.
I suspect those reported as 3BA have been tapped out. Both tanks Ive messed with i never took a tap anywhere near them and a Meccano bolt went in using finger and thumb and tightened up nicely. The originals were definatley 32TPI.
Location: not north wales any more
Mine where 3BA Hedd.
Have the necessarily to make my own replacement screws.
Update:
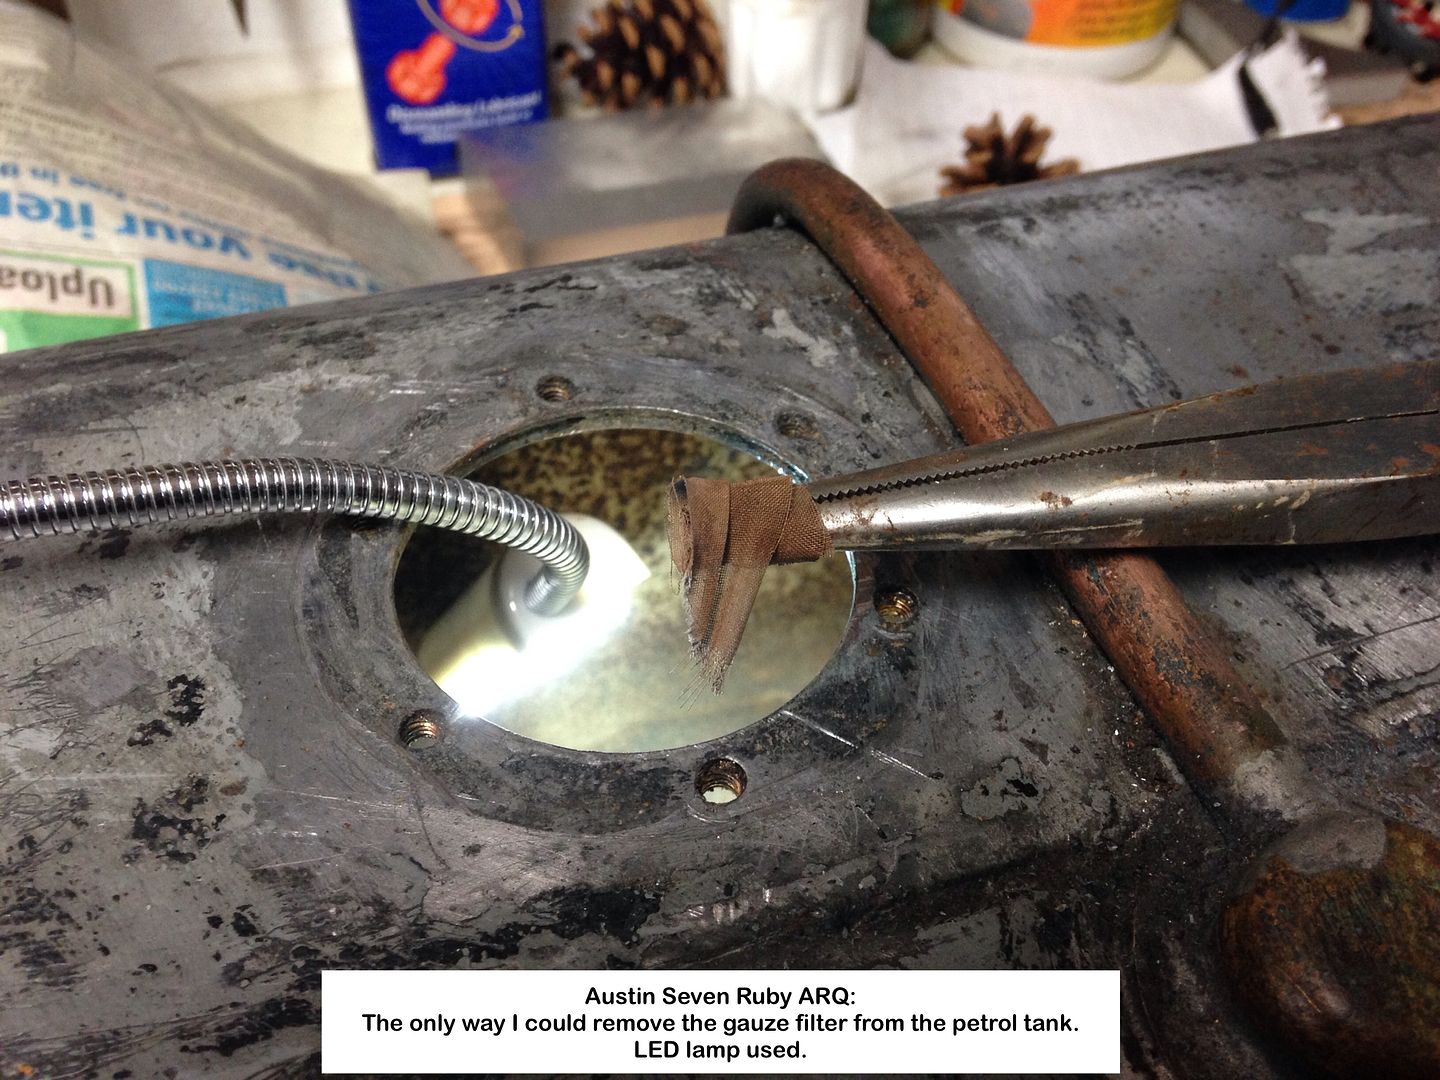
The petrol tank gauze filter was easy to remove, then painted.
A long nosed pair of pliers came to the rescue.

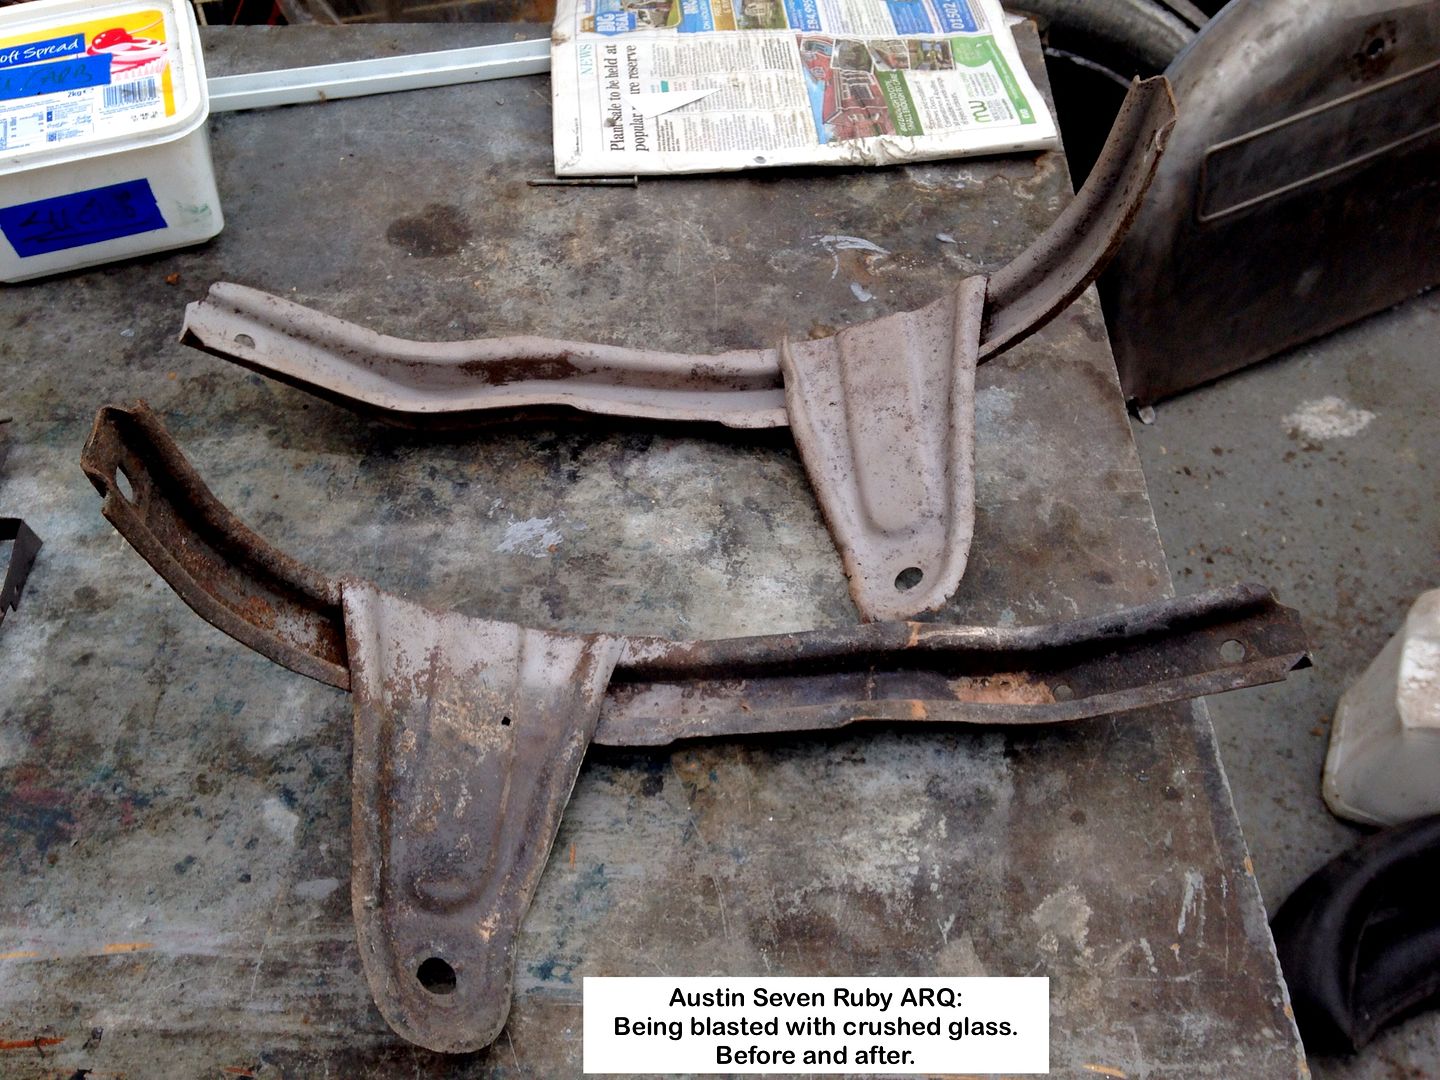
Crushed glass in the sandblaster.
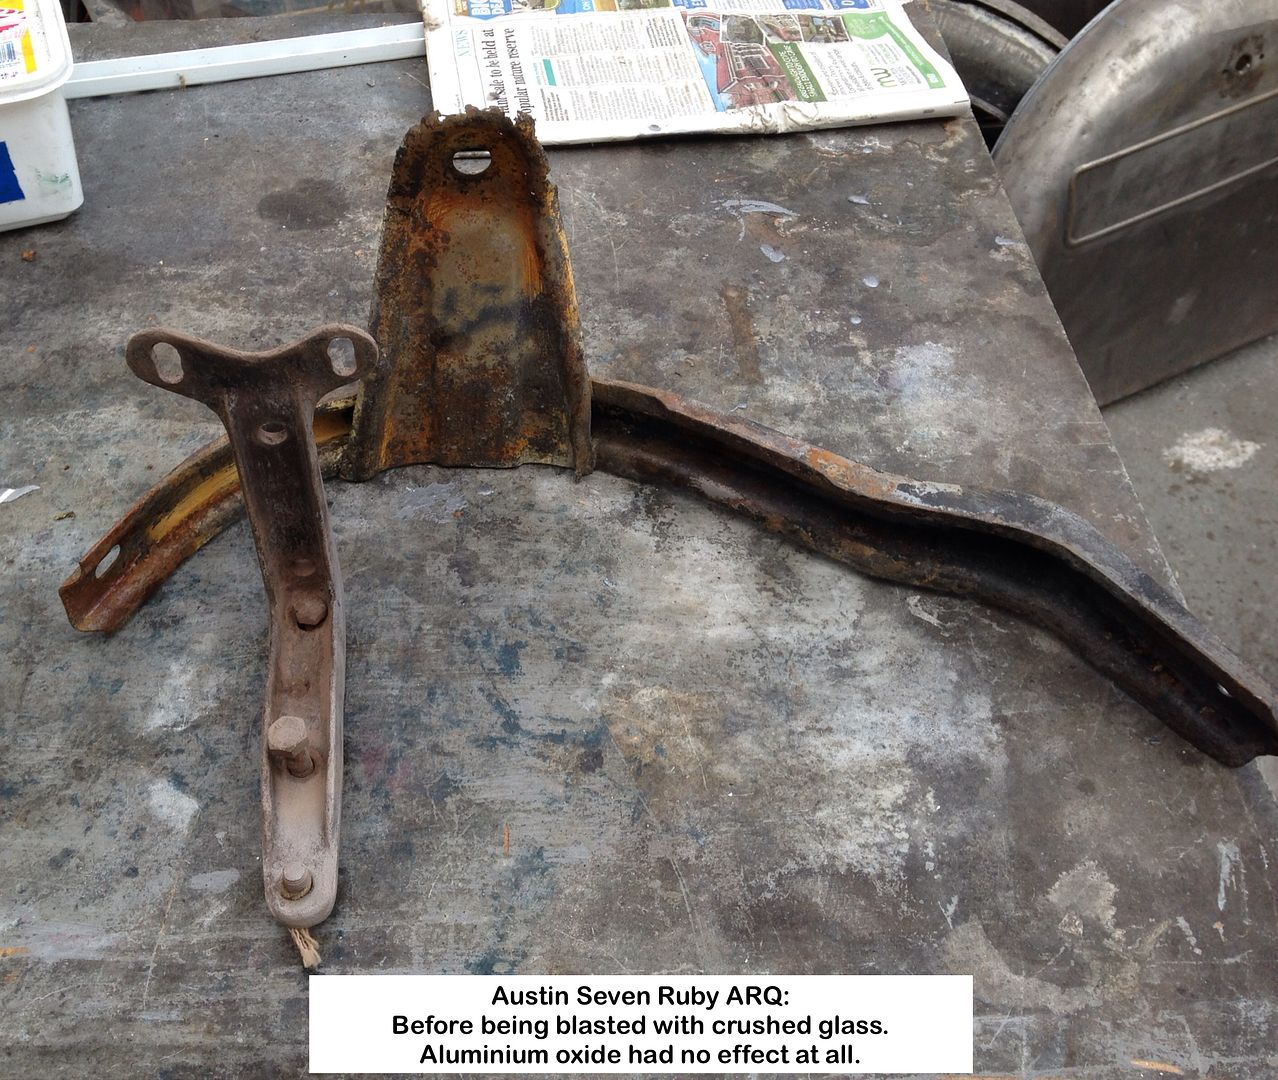
Neither aluminium oxide nor twisted wire wheel, in L-grinder, had any effect on removing all the hard detritus on these front Mud Wing supports.
Someone on Facebook said he has had success using crushed glass, so I ordered a 25kg bag as nothing to loose.
Started with a 5mm nose piece on the gun, but soon changed to a 4mm, the smallest I had, and that was soon doing its job.
Needed a few passes on some areas, as that cr@p was well and truly stuck on.
Used the glass to do all the other parts, and there is far less 'dust' produced compared with the aluminium that needing the inside of the window cleared frequently, even with the SideBlastAir in operation.
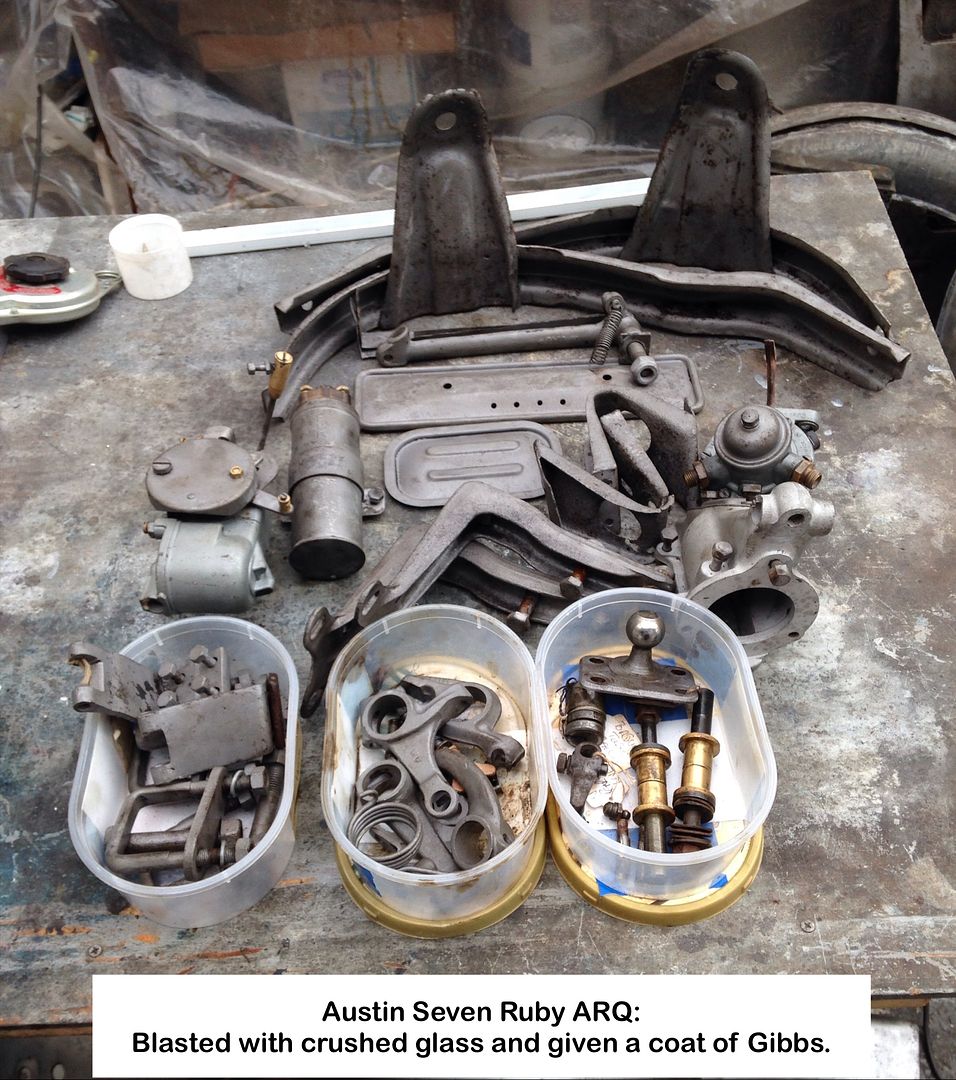
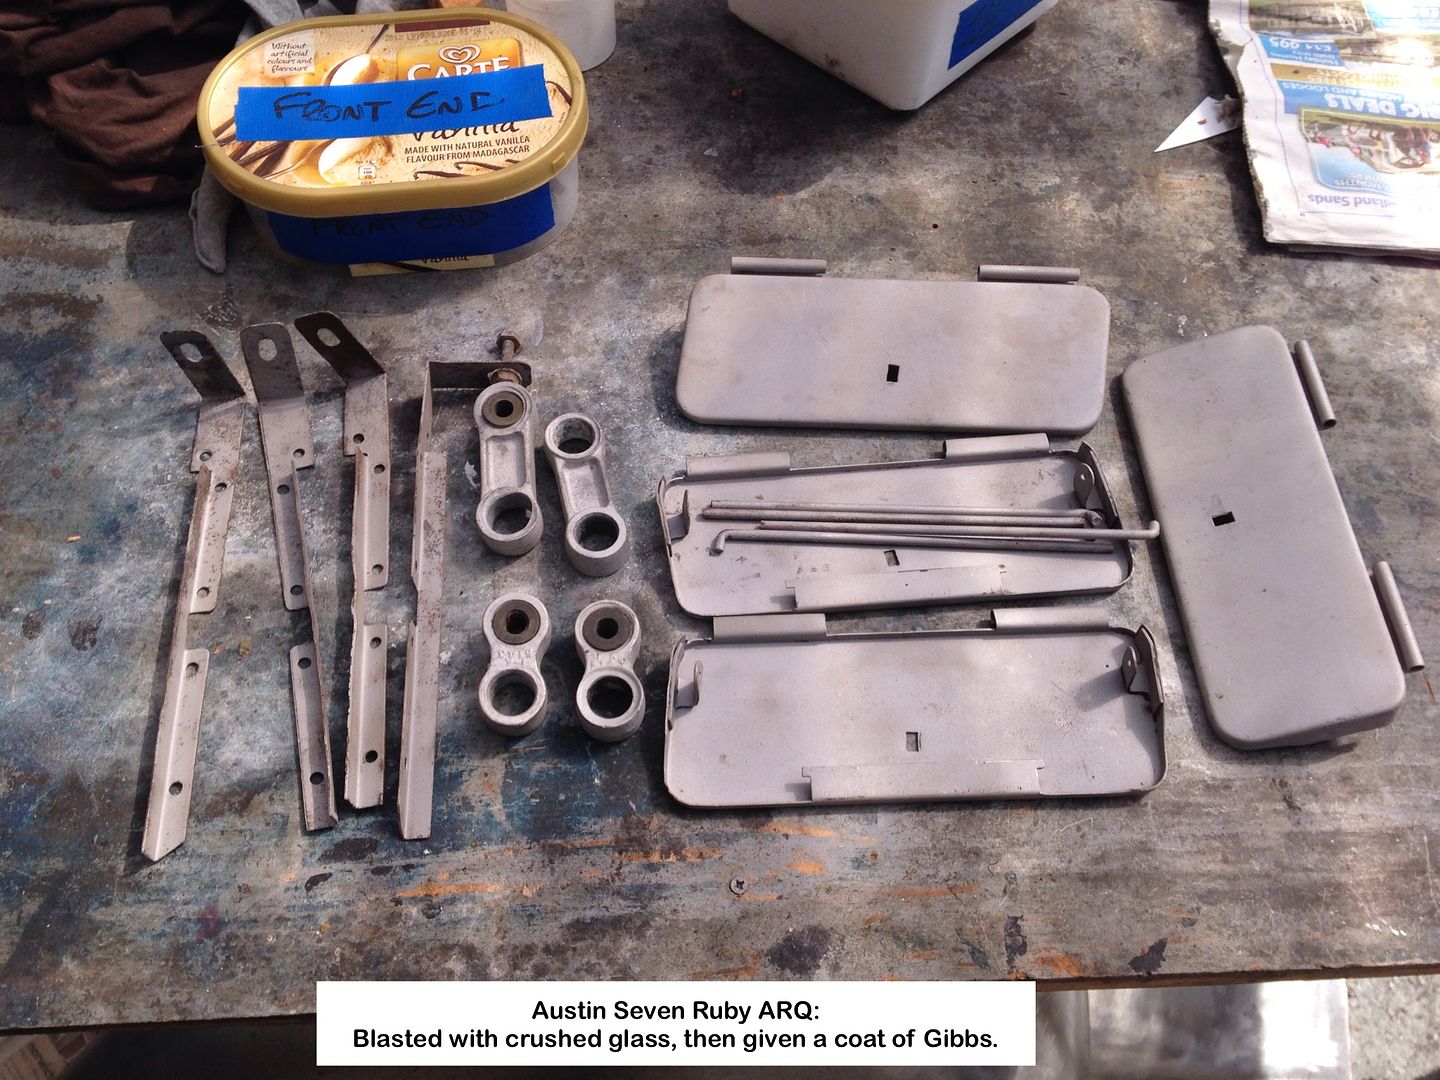
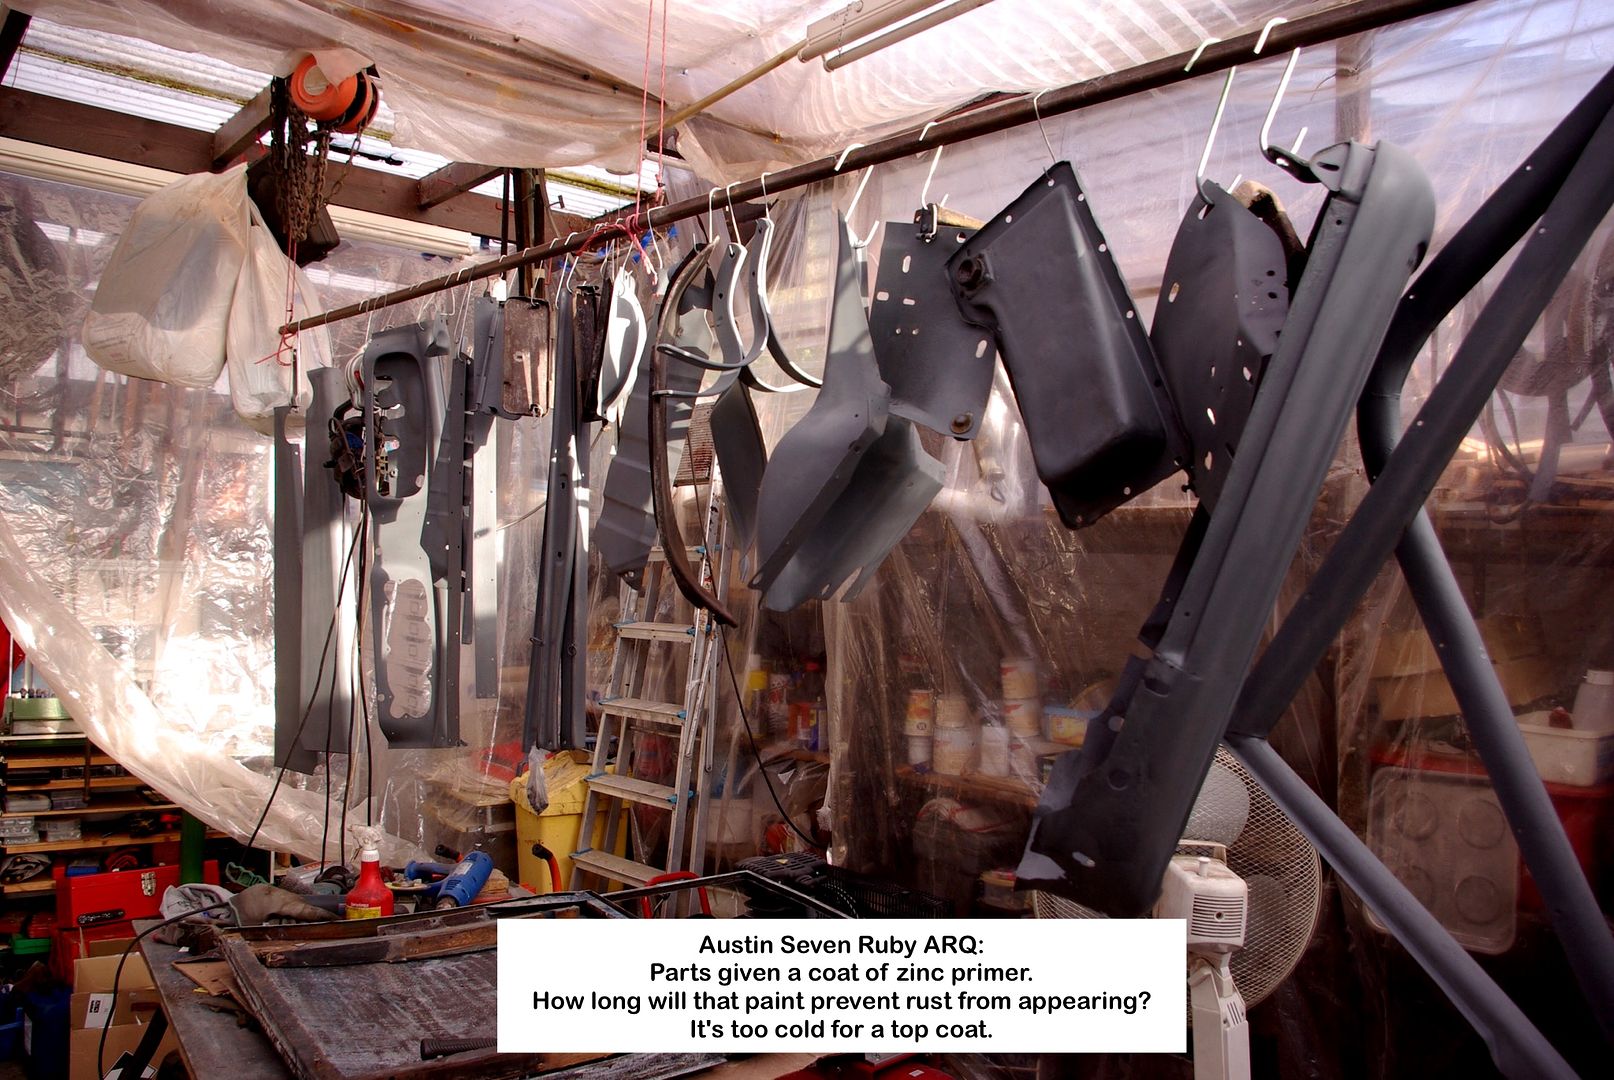
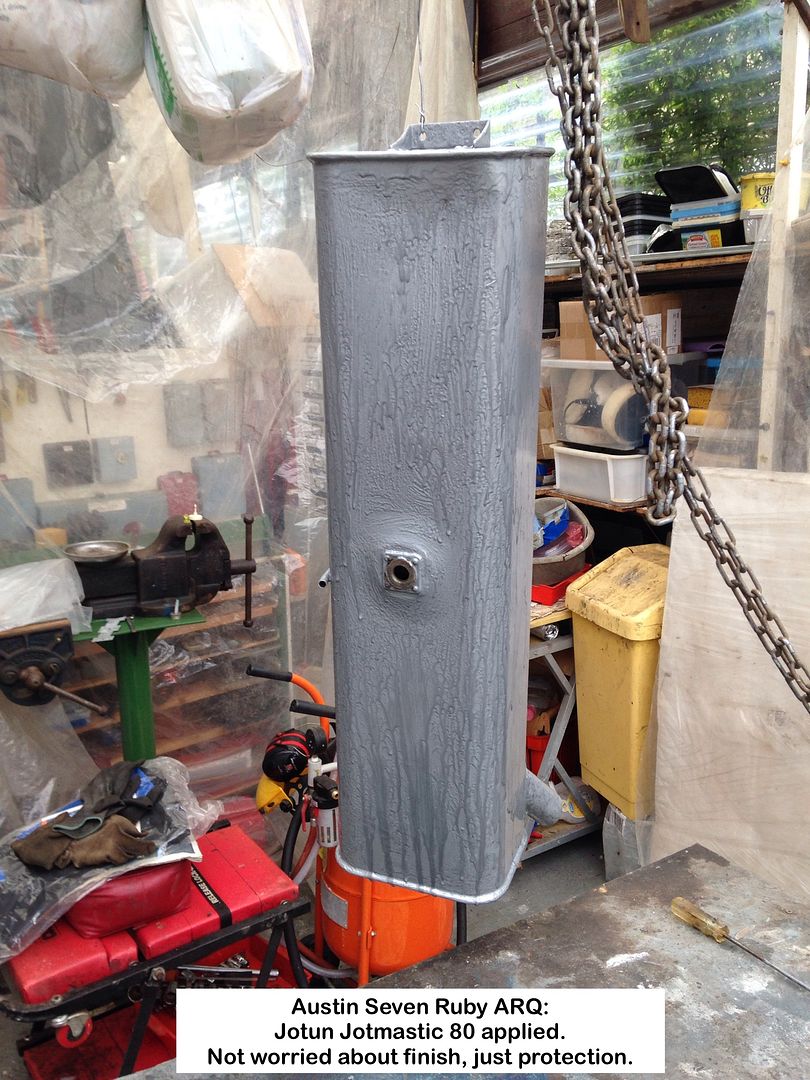
Everything I can think of has been sand/glassblasted and coated with Gibbs so now ready to repair the front Mud Wings and give them and small parts a trial coat of Zinga or zinc epoxy, then possibly Jotun Jotmastic 80 on the underside of the Mud Wings, but not sure.
Geoff - Small parts stored to make space for the Mud Wings?
Location: South Norfolk - Next to Suffolk
......my Austin 10('36) and 12('35) were original and unmolested and were 4BA....
Steve V.
Location: Polegate, East Sussex, United Kingdom
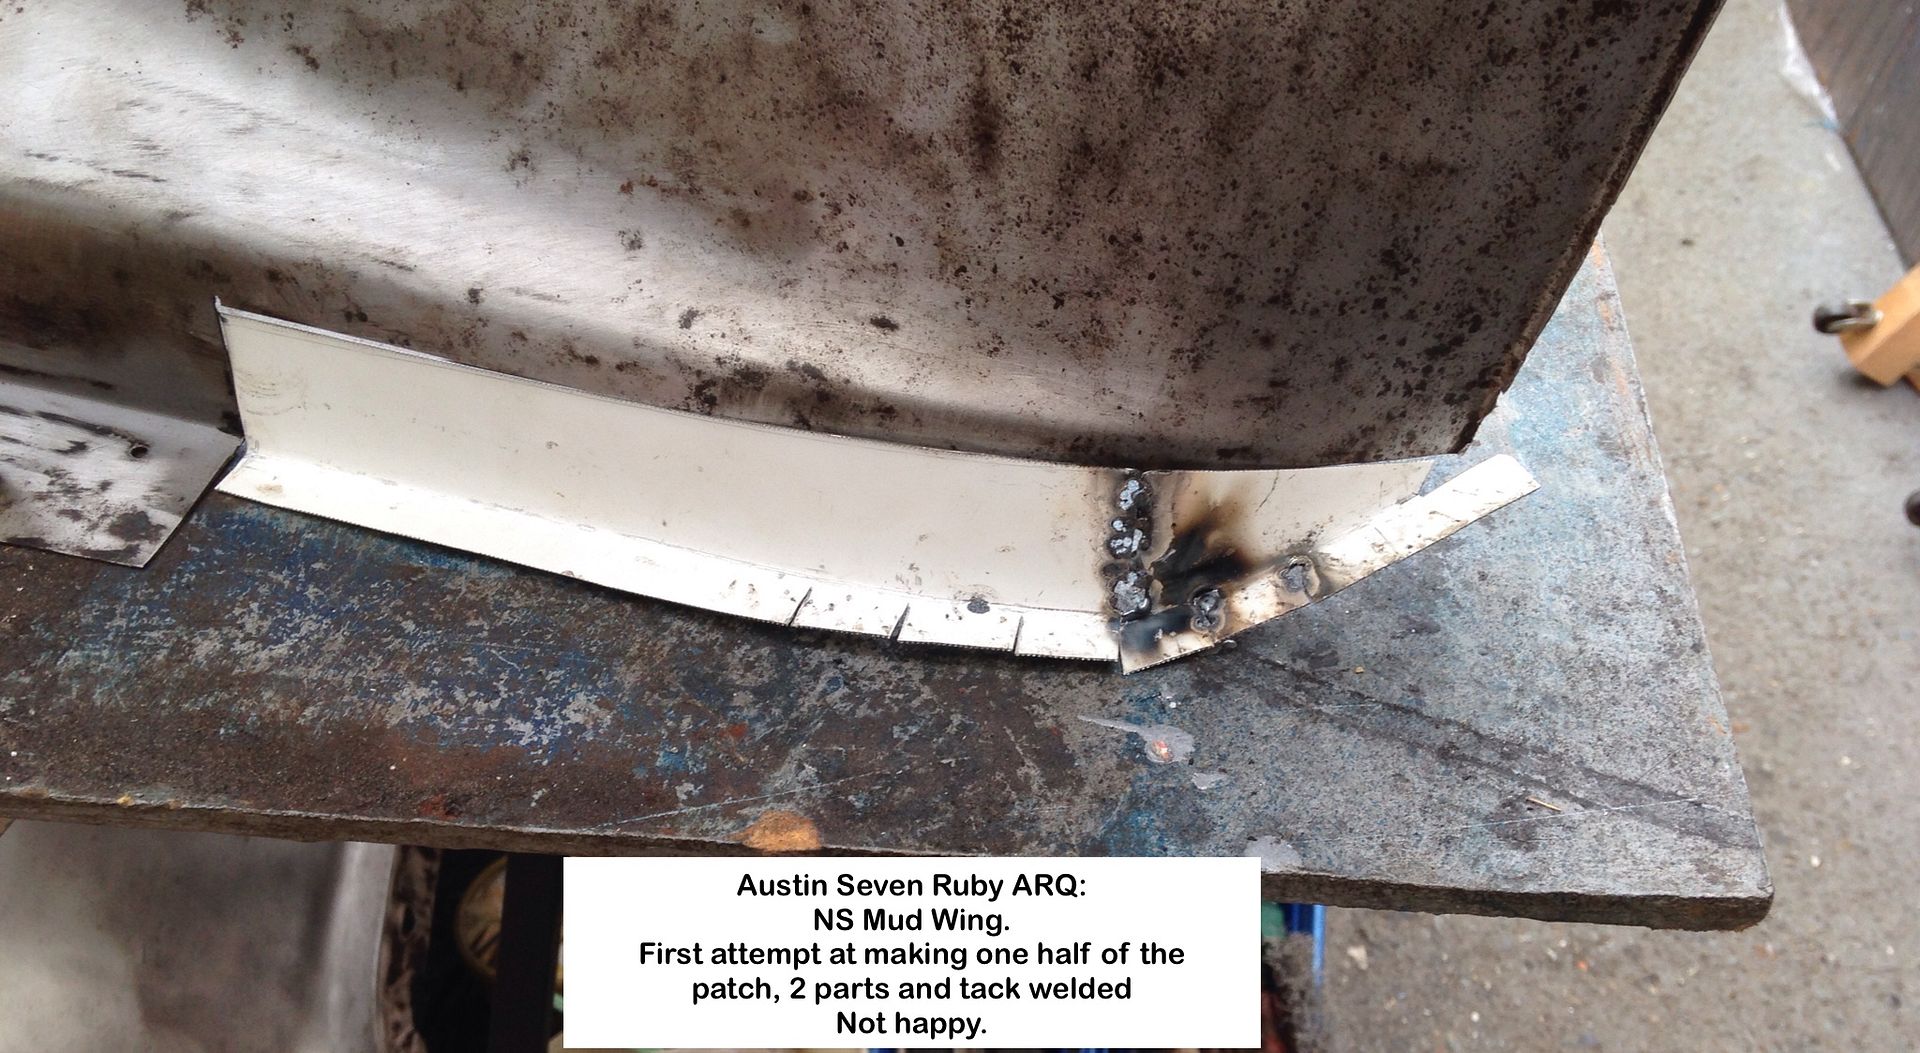
NS Mud Wing patch
Advise please on the best way to make this patch.
This is my first attempt at bodywork, and I experimented using 0.6mm sheet
Pretty pleased with it, BUT can/must do better.
A former and tin bashing?
Open to any suggestions.
Not sure where to split the part for easy welding.
My bender produces a bent very close to that from the Austin factory so don't need to make a new blade, with a different radius.
I am thinking of making short bends on the top curved section/s, split as per my experiment after a failed attempt to stretch the metal, and then welding the flat flange/s to them, but just had a thought, would 0.6mm sheet (not 1mm as stated) stretch enough?
I did mange to get a gentle curve only, after a few minutes with sharp end of hammer.
David Gardiner in his video Bodywork Restoration Tutorial makes stretching the metal look so frigging easy - Grrrr
Need to have another look at what he does, before I dive in again.
Trust me to start on this as a first attempt at tin bashing.
My late Dad is shaking his head right now, shouting "Get in with it, it's easy!"


Geoff - Spring!?
Location: South Norfolk - Next to Suffolk
Geoff, the David Gardiner video that I have seen is excellent and would be recommended viewing for anyone attempting this sort of repair. My advice for what it is worth; First measure the panel thickness and make your repair sections from exactly the same gauge material, welding them in will be far easier later. Second set yourself up with some practice sections, fold a few angled strips and practice shrinking one edge to make the strip curve, then do the same but stretch an edge to make the strip curve the opposite way. Once you have mastered these two techniques try Scribing an S curve onto a piece of flat plate mark a a second line 3/4" away and trim to that line. Now get a piece of steel bar and cut a slot in the end face 3/4" deep, you can use the bar over your panel to break the edge and bit by bit lift the flange, you will now need to use hammer and dolly to bring the edge up to 90 degrees, shrinking or stretching the edge depending on the radius you are working is internal or external. Far easier to demonstrate than it is to try and explain in words, but once you have mastered these methods making your patch panels will be easy. Watch David Gardner, again and again, then practice, practice, practice and It should fall into place.
Location: NZ
Steve V.
If you do a bit of searching it seems by the 1950's the standard size was 5/32 UNC. You can still buy them off the shelf from landrover and MG specialists. Sadly with a phillips head.
Location: not north wales any more
I'm just a beginner here, I've been repairing the body on my Arrow for the last 6 months and I'm just now getting some of these techniques to work. My tips would be to stretch that flange
Make sure you hammer is shaped to stretch in one dimension only (curved not domed)
Help the stretch along by putting the metal in tension while you hit it
Make sure the hammer is stretching at least half the width of the material in one blow or you will just be denting local areas
work from the outside edge in
Also 0.6 seems very thin to me, Ive been using 1.2 cold rolled. Is your material suitable (Malleable enough) for hand forming?
Good luck 
Location: Fremantle, Australia
Ian, Mark,
Thanks for the suggestions.
Watched the video on shrinking/expanding again last night.
Mud Shields are around 1mm thick as best I can measure, but no idea of original panel thickness before forming.
I only used the 0.6 to experiment with and realised later that it was far too thin to stretch.
I will get some 1mm and slightly thicker to practice on.
Someome has suggested using an air hammer, with blunted chisel, to stretch.
Air hammer I have so worth a try.
Mark,
Could you be more specific re 'curved not domed' please?
I don't have a proper stretching hammer but have these, having ground the centre one:
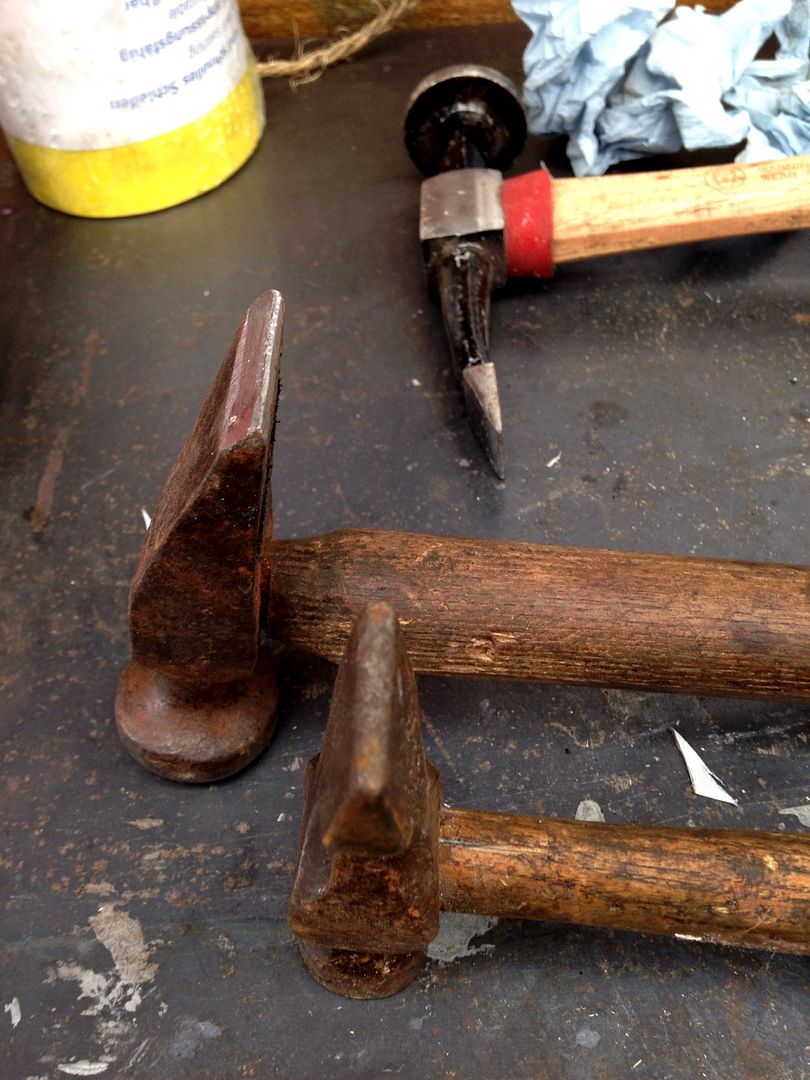
Making one of these patch panels is going to teach me a lot for future metal bashing.
Geoff - Talk about jumping in at the deep end!
Location: South Norfolk - Next to Suffolk
Hi Geoff
I did quite a bit of metal bashing, mainly 1.5 mm Aluminium when making my GE Cup Model look-alike. I don't know how many repair sections you need to make, but I would certainly invest in a small shrinker/stretcher machine. They are available on Amazon for about £ 160.00 and certainly make life a lot easier, particularly the shrinker. Stretching metal is fairly easy with a flat hammer, but I couldn't master shrinking with a hammer. Best of luck with the restoration.
Location: At the moment in France but soon to be near Grantham
When hammer shrinking steel a bit of heat can help. First put a series of puckers into the edge you wish to shrink, much like the wavy flange on a metal pie or flan dish, this will cause the panel to curve into the desired shape. Then heat one of the puckers with an oxy torch to dull red and close just the extreme the open end down onto a flat surface. The idea is to trap the excess metal in the pucker, this excess can then be hammered down flat, being now trapped by the closed edge the additional metal has nowhere to go other than flow into the surrounding metal. Heating the bit of metal you wish to move to dull red softens the steel making it flow more easily, you can also shrink steel simply by heating and quenching, although this method is generally more useful when removing stretch and flop in a reasonably flat panel.
Edit: Think of it like this, to stretch an area you will need to make the metal thiner, this can be achieved by striking (squashing) and area between two hard surfaces i.e hammer and dolly, or anvil and roller of an english wheel etc. To shrink and area you need to make the material thicker, so you need gather up the excess material, trap it and then push it back into its self, this is known as hammer off dolly, in other words you support the metal next to the area that you strike with the hammer pushing the metal down to the same level as the dolly. With the material trapped at the edge the metal has to flow into its self and shrink.
Location: NZ
Geoff
You will find it much easier with the some thicker sheet so good luck. The hammers both look quite aggressive for stretching, the one I use that works best has a bigger, round, head (Say 15 - 20mm dia) with a slightly radiused crown. My comment about shape is the the crown should be flat in one dimension and radiused in the other. (like yours, just with a much larger radius).
Buts that's what I found worked, you can probably can get the same result with what you have in the photos, you will just need a lot more hammer blows to end up with a flatish finish. It helps if the wind is blowing from the west as well

Location: Fremantle, Australia
More good advise - cheers.
Been watching the David Gardiner video again on the way he does his work.
Looked at stretcher/shrinker u it's yesterday but had to buy a new welding helmet.
The solar one I have refused to work yesterday afternoon as the ambient light was miserable even in the clear roofed carport.
I do have portable flood lights, but they just get in the way so the new battery one will solve that problem with luck and it has a big 'window'
I will be trying the hammer approach, then air hammer once I get thicker material to practice on.
As far as I can tell, these are the only two bits on the car I need to stretch, but time will tell.
Geoff - Off to steel merchant.
Location: South Norfolk - Next to Suffolk
Been using the MIG to weld patches in the front Mud Shields.
Whenever I read about how hard MIG welds where in comparison with OA/TIG, I always thought 'How much harder can they be?'
'Add your favourite AngloSaxon here' HARD that's what!
Couldn't believe it when I tried a file and it just skated over the weld blobs.
Used TIG to fill holes then ground the welds down and the difference in the quantity and type of sparks produced was eye opening, with MIG winning hands down.
Photos to follow when done
Geoff - TIG from now on especially for panel work.
Location: South Nordolk - Next to Suffolk
Out of sequence, as I've repaired the front Mud Shields, modified the Running Boards and given them and other smaller parts a coat of 2k zinc primer.
This is 4 months later than I had hoped for, so nothing unusual then.
My DIY Car Trolleys made the move out and now back in a doddle.
Ruby body into Carport
Tried to embed this video using the BB Code, but no luck, so what am I doing wrong?
Geoff - Bodywork at last.
Location: South Nordolk - Next to Suffolk
Update on my post 3rd March at last!
For some unknown reason I just could not get the video below to upload to either YouTube or Facebook and gave up after 5 attempts even using a different computer.
After the success with the body rolling into the Carport one, had another go last night and this morning found it was sipuccessful.
AustinSevenCylinderBlockWhatsit in all its glory.
Geoff - Work started on the B-post.
PS
Just noticed that some of the photos in a couple of posts are either incorrect or missing for some reason.
Haven't changed anything in Photobucket either.
Location: South Nordolk - Next to Suffolk

Where the heck is South Nordolk I wonder.
Geoff - Body ready for tilting.
Location: South Norfolk - Next to Suffolk
Geoff have you paid the extortioners in order to keep the historical part of this thread alive or have you discovered another solution.
Location: NZ

Thought the same but hesitated to comment lest it alerted the robber band
Location: Melbourne, Victoria, Australia.
Ian, Tony,
There is no way I will pay their greed induced ransom.
I do, however, pay for extra storage and read somewhere that doing so will keep links working till next year sometime, when they will kill 3rd party links as well, so they are now only used as a photo backup, amongst others.
Have now switched to using Postimage for now, till I sort out something I control.
Geoff - Norhing done the last two days 
Location: South Norfolk - Next to Suffolk