Welcome to the Austin Seven Friends web site and forum
As announced earlier, this forum with it's respective web address will go offline within the next days!
Please follow the link to our new forum
http://www.austinsevenfriends.co.uk/forum
and make sure, you readjust your link button to the new address!
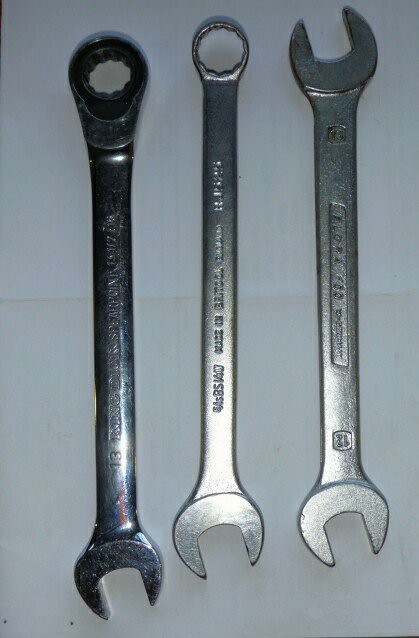
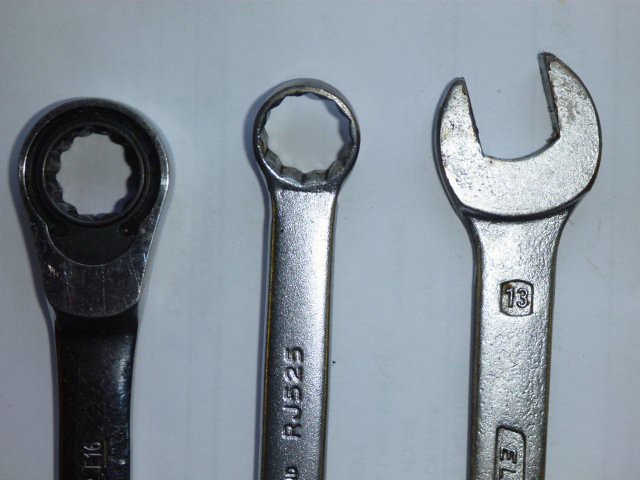
I thought I'd start a new thread about tools that make working on our cars easier.
Below are three spanners, from left to right the first is a 13mm ratchet combination spanner. I dismantled the ratchet end and carefully filed it out to fit a 5/16" nut. Being a 5° ratchet it is extremely useful for undoing the bell housing nuts.
Next up is a standard 5/16" combination spanner with the ring spanner end thinned down for doing up cylinder block nuts.
Finally a 13mm open ended spanner that will fit the tappet adjusting nuts. These can become rounded over the years where worn spanners slip. Being 13mm and a tight fit there is less risk of this happening. Note that the sides have been ground to give more clearance in the valve chest.
Location: Deepest darkest Kent
I was lucky enough to find a full set of Snap-on sockets, wrenches including tappet wrenches all UK sizes.
All at a motorcycle market rather than automobile.
Even came with a Snap-on tool tray.
Prepare to be overwhelmed:
https://primetools.co.uk/product/king-dick-kgw2228-7-pce-whitworth-ratcheting-combination-spanner-set/
Expensive for a set of spanners but a very cost effective way to bring joy to mankind
Charles
Ian
Have a look on the net for prime tools they do them and a good make
Bob
Location: Surrey
After seeing Ed China on 'Wheeler Dealers' using ratchet spanners I searched the web for an imperial set and found that King Dick do them. I then went via one of their outlets, Yarmo Tools, and was absolutely gobsmacked to find them available at ridiculously low prices -1/4 BSF was 97p and the 5/16 was £2.20. Clearly a mistake but who am I to point it out. I staight away ordered a full set and waited for them to realise their mistake, but a set of beautifully shiny spanners arrived just in time for Christmas. I tried to share my good luck with other Sheffield Seveners and Dave W sent off for an similar batch. Sadly for him Yarmo had realised that a gooley had been dropped and sent his money back. Imperial ratchets are not now on Yarmo's list!
They are super spanners though!
Location: Sheffield

I recently bought one of these:
https://www.stanleytools.co.uk/product/147567
It works very well and can be clamped firmly in place. Good when the bolt/nut is damaged.
Well I never. I couldn't find one so modified the metric one, well done Charles.
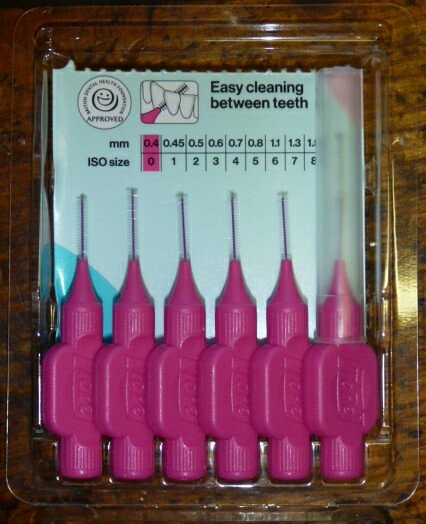
Here's another item that I started to use only recently, interdental brushes for cleaning jets before putting them into service.
Location: Deepest darkest Kent
https://primetools.co.uk/product/king-dick-kgw2228-7-pce-whitworth-ratcheting-combination-spanner-set/
Brilliant - I have just ordered them !
Location: The Centre of the Universe
Some cheaper pricing here:
http://www.lawson-his.co.uk/king-dick-kgw-2228-ratchet-combination-w-p154945
http://www.shacktools.com/product_info.php?products_id=39806
Individual spanners here:
http://www.kingdicktools.co.uk/wrenches/product.asp?item=ratchet-combination-wrenches-24-10

A couple of odd items.
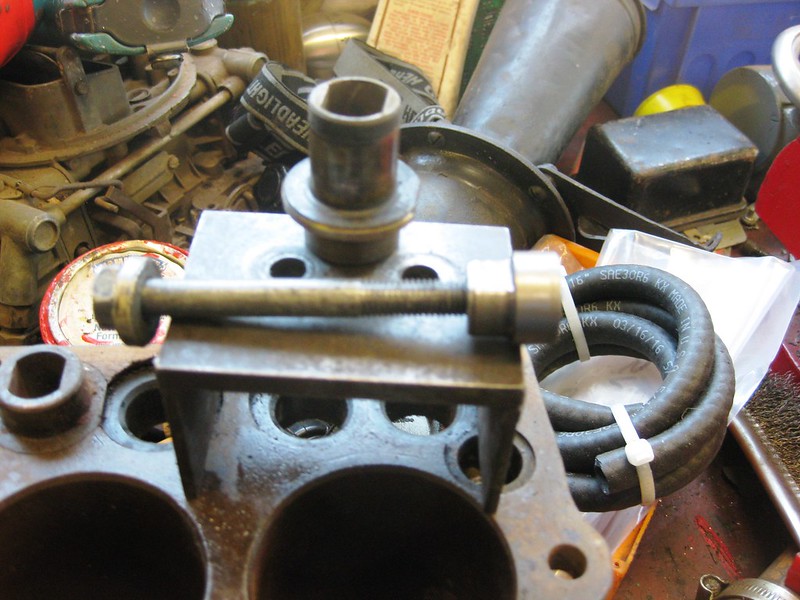
A home made tool to reduce the amount of brute force and ignorance required to install the front main bearings. I made it from a piece of 20mm studding with Austin's weird 5/8" x 16 TPI thread screwcut onto the end that goes into the crank nose.

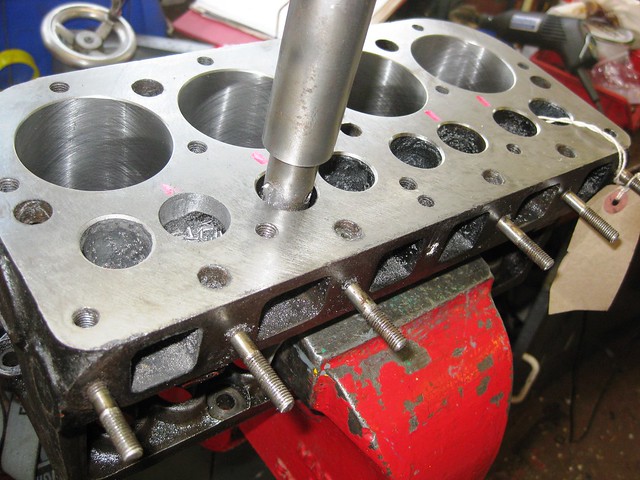
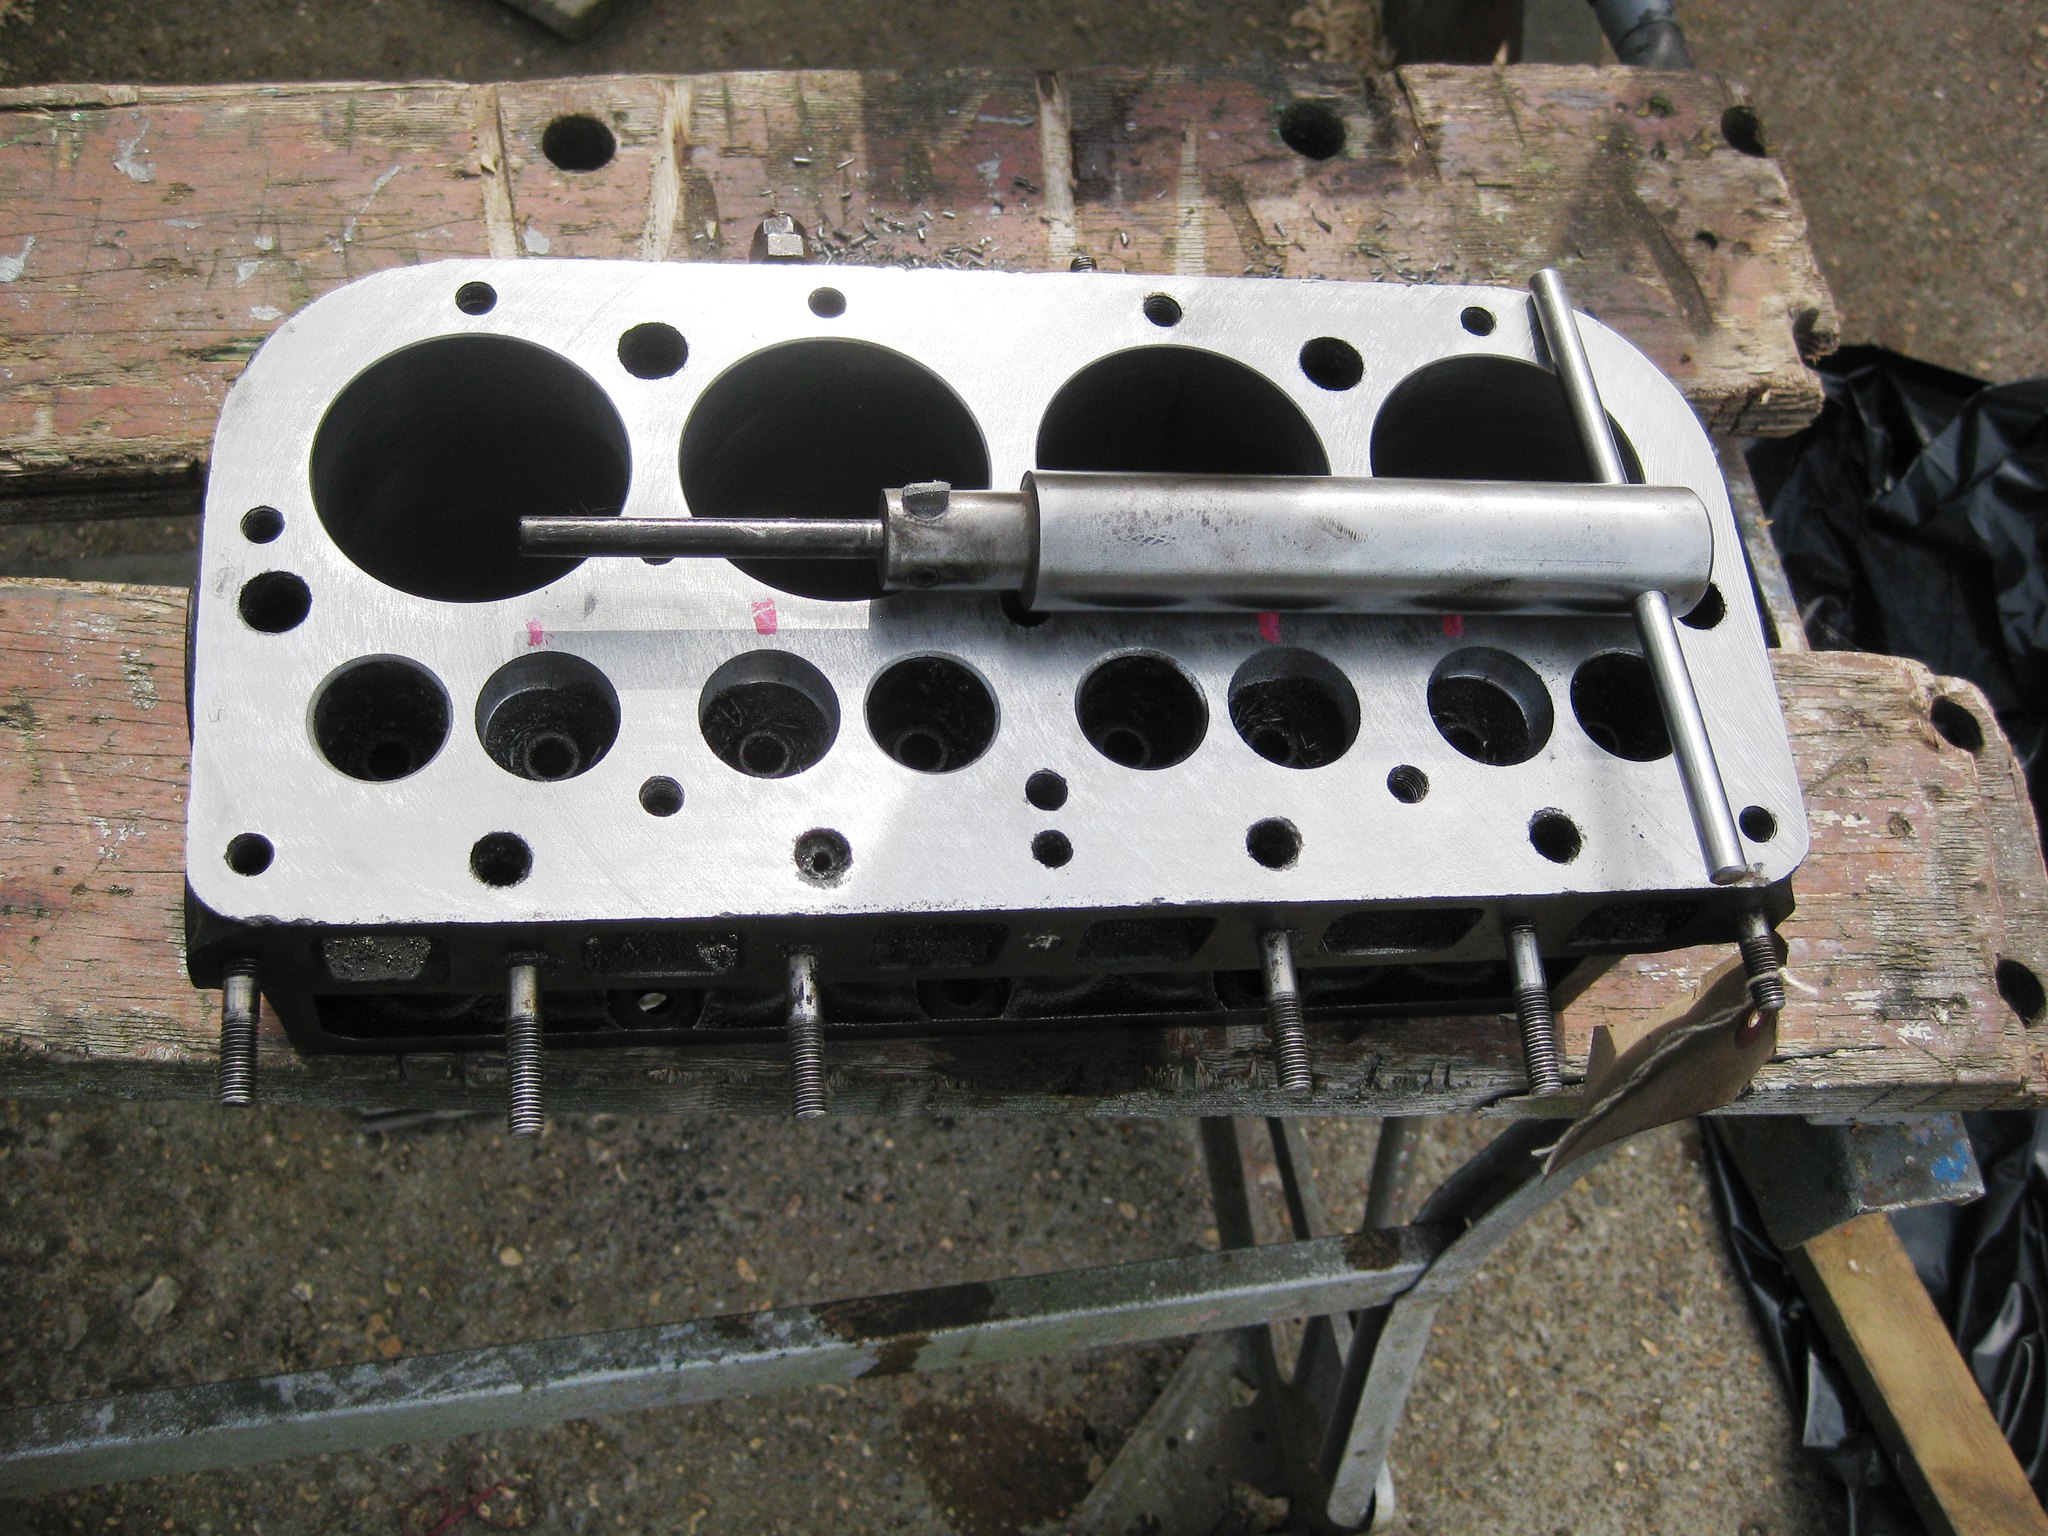
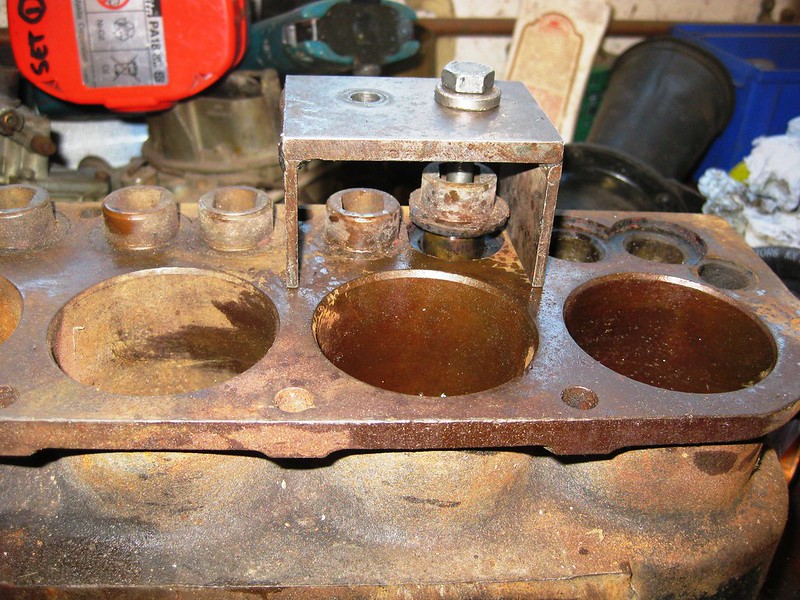
A counterboring tool for cutting "big" inlet valve throats concentric to the valve guide axis -this block is getting Mini/Morris Minor inlet valves.
Location: N W Kent
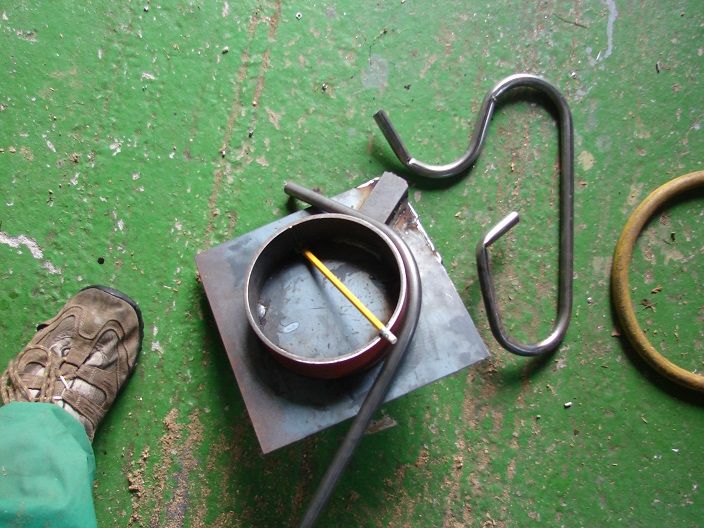
Pipe bender for making bodywork. If you do it slowly it doesn't crimp the tube. Good for making headlamp bracketry on specials, too.
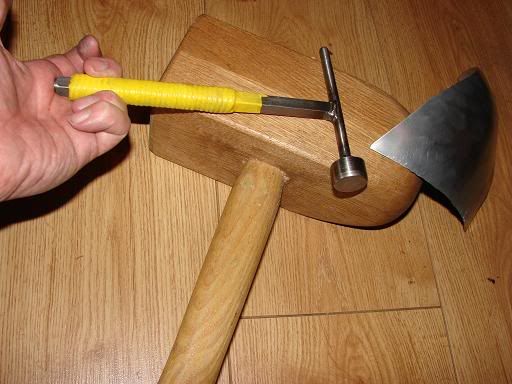
Small metal hammer has a hardened 'pick' on one end to let you bash tiny components and gets into places normal hammers can't reach. The big wooden hammer is made from a section of staircase and has a great mass behind it but a fairy soft surface so is ideal for bashing sheet metal. Neither cost me any money to make.
Having managed to destroy two hub pullers (sheared bolt, stripped thread) I welded a puller to the hub, broke the welds, welded again and finally removed the hub, I refashioned one of the pullers into this ugly but functional tool... With a cheap 3 legged puller it never fails me!


My daughter bought me a 1/4" drive metric socket set to make life easier when fixing her Beetle. The thing is I use it more on the Seven, the sockets are a single hexagon not bi hexagon and the 11 mm socket is a ideal for the dynamo bolts.
I have exactly the same Dave - one of my favourites!
Geoff Greineg writes:
Thought you would be interested in the attached photos. I’ve been venturing in to panel beating as you can see!
The ¼ rear panel is my biggest attempt so far (on old piece of used aluminium from a broken-up caravan). I’m quite pleased with the result.
It’s been a steep learning curve, looking at quite a few utube videos,buying a cheap set of panel beating tools together with a bossing mallet,
setting up a suitable tree trunk with a shallow hollow on top, and making myself an 18” dia. Sandbag (see pic.) from scrap leather off-cuts obtained from ebay.
I feel quite confident now that I could shape the full size cover at some time, so have bought a new sheet of aluminium for just this. I’ve learnt one
very important thing – many light taps with the hammers rather than few heavy bangs, and definitely wear ear defenders! I find it quite therapeutic, but of course it takes time to get the desired shape required. As the finished article is going to have wadding and then rexine, or whatever, over the surface, a super professional finish to the aluminium is not really needed. It will no doubt get dented as per my old YW 214 did! Makes me wonder, while I’m at it, if I should make a second complete spare boot lid for ‘Sundays’ !!
Maybe you could post the sandbag photo on ‘Useful Tools’ for me at some time.

This shows just how easy it is to OX/A weld aluminum. I have used one of these for 30+ years.
https://www.youtube.com/watch?v=upE-sOIHjGo
Prepare to be overwhelmed:
https://primetools.co.uk/product/king-dick-kgw2228-7-pce-whitworth-ratcheting-combination-spanner-set/
Expensive for a set of spanners but a very cost effective way to bring joy to mankind
Charles
After 45 years of conventional spanners I've bought a set of these whit ratchet combo's,WOW. I took the rear springs out of my sports shooting brake special to add a couple of leaves at the weekend,they made the job much easier,could even get on the 1/4" cotter nuts easily.Converted.
I fit the block to the crankcase with pistons and rods dangling through the bottom.To stop the pistons popping out of the top I drilled and old piece of aluminium channel (Out of a double glazed window frame)for three of the centre head studs with a couple of bits of tube as thick as the head to tighten the nuts to.Alternatively you could use a piece of 1 1/2 x 1 1/2 timber.
Prepare to be overwhelmed:
https://primetools.co.uk/product/king-dick-kgw2228-7-pce-whitworth-ratcheting-combination-spanner-set/
Expensive for a set of spanners but a very cost effective way to bring joy to mankind
Charles
ok, so I started trying to sort my spanners. And now I'm looking at this thread...
The question is, if one, in a theoretical world, bought the supadupa spanner set, would one generally still need standard ring spanners because the ends of the ratchets will be too bulky in certain circumstances? Or will my standard Austin spanners suffice in those cases...
Or should I just buy a set of Whitworth ring spanners for 15 quid and wait ten years until I can possibly justify to myself buying the others...
As I get older I find I like to take my time and savour the things I enjoy. I'm not sure what the benefit of these is other than finishing the job quicker?
Rather than buying a set, why not drop some serious hints to the family about getting one each for you (or clubbing together) to get something you actually want this Christmas?
Strangely enough my step son kindly bought me a metric set last year. They are one or two that occasionally seem to fit, but they are basically useless to me. Now I begin to wonder if it was due to me complaining about spending so much time fixing his Discovery.
Location: Essex
I bought the full set a few weeks ago - sweaty brow moment placing the order and all that!
Jobs done to date that have been made much (much) easier:
1. Magneto engine front camshaft bush nut - the tricky one between the block and the dynamo housing (had to grind the outside edge a bit (more sweaty brow moments) works a treat!
2. Ruby rad cowl bolts - total dream installation using the ratchet spanners.
3. rear O/S engine mount nut on all 4-speed crankcases - oh joy!!
4. Bell housing nuts - 3 and 4 speed gearboxes - oh joy!
There will be more....
Get one of these, ideal when stripping down where nuts are often of different sizes and always seem just too tight for your fingers to hold and only about £3.00
 .
.
Location: Piddle Valley

One big advantage to having a couple of Rosengarts, THEY ARE ALL METRIC 😄😄😄😅
Location: Oakley hants
I have an old offset ring spanner which gets in to a lot of otherwise difficult places such as the long bolt holding the dynamo housing to the crankcase and updraught manifold nuts.
Like this one:
http://www.ebay.co.uk/itm/Vintage-Williams-Superrench-Forged-USA-Chrome-Alloy-3-8W-5-16W-No-W8729-/351897666585?hash=item51eebc4419:g:ESIAAOSwzaJX2VS3
The nut on a 1938 / 9 Ruby and Big 7 rear axle bearing is 1 7/8" , I did not want to Drift the nut off but found the spanner size was the same as an early Harley Davison flywheel nut , I found a box spanner of that size from www.fecked.com
A few years ago I used to visit the car boot sale at the new Manchester market off Ashton Old Road, there was a guy there selling second hand tools, probably from clear outs of closed down engineering works. He had everything you'd need for any job from a Seven to a locomotive, mainly imperial, you just had to be prepared with gloves or get you hands dirty. I found spanners for the rear hub bearing nuts by the dozen and loads of 1/4" x 5/16" open end, ring, offset ring, combination and all good gear King Dick, Stawille etc no Chinese and all at yesterdays prices.
There was everything imaginable for sale at the market, all cash and don't ask where it came from.
Like this one:
http://www.ebay.co.uk/itm/Vintage-Williams-Superrench-Forged-USA-Chrome-Alloy-3-8W-5-16W-No-W8729-/351897666585?hash=item51eebc4419:g:ESIAAOSwzaJX2VS3
many thanks Jim - I just found another identical ebay one for 2.98 posted from "grandadsclearout'...

Fished out this home made tool last week as needed a set of tappet guides to shorten to work with a high lift cam.
Location: N W Kent

Jig for bowing front beams.
Interesting looking device. what powers the actual "bowing" piece? even when the beam is red hot it must need a fair bit of force to re-shape it.
Location: N W Kent
It does require alot of pressure. I used a hydraulic ram which pushes the piece of box iron. The back of the ram sat against the upright support I have at the end of the 4" channel. The ram is pressurised by a hand pump.
This jig was welded to a big old flat bench when I used it which prevented distortion.
Location: Ireland

This is a basic tool that I made up to hold rear hubs while tightening and opening half shaft nuts. It holds all three studs.
Location: Ireland
John,
Thanks for posting the photo of your bending jig, I have a much clearer idea about it now.
Below is a photo of the Hub Holder I have produced locally for members of the NZ VAR.

Marcus
You are very welcome. that is a much more professional looking hub spanner
Location: Ireland

I am a sucker for nice measuring kit. I bought this proper machine engraved 2foot rule on ebay and use it regularly.

And on the back....
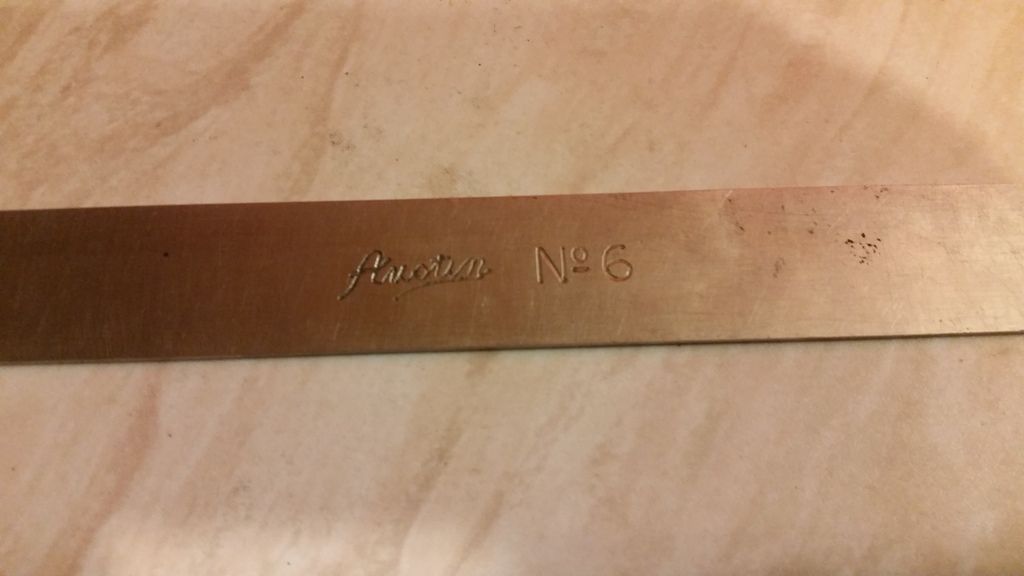
Anyone else got any ex longbridge tools?
R
The other tools we have been producing locally are these:

A is designed to keep in the car, it fits the rear halfshaft nut so that if you have a mishap on the road you have something on board to deal with a broken key or halfshaft, you can of course also use it in the workshop, it also fits the starting dog on the front of the crankshaft.
B is to fit the thin nut that holds the rear hub bearing on, this has usually been removed and fitted in the past with a cold chisel because no-one seems to have had a spanner to fit.
C is designed to fit the large brass nut that is on the end of the steering column and screws into the steering box, the other end is the octagonal shape to fit the alloy dust caps on the front hubs to protect the wheel bearings.
Excellent!
Hello Marcus
Those are very nice tools indeed, might I enquire as the price and availability ??
Kind regards
Greig
Location: Sunny South Africa